
Now it is, anyway.
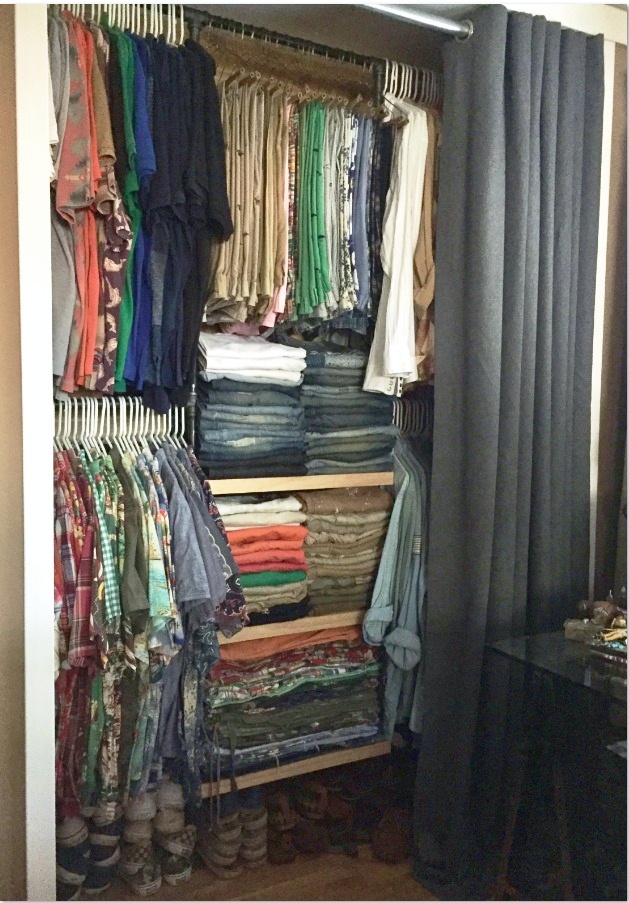
Ya know that single bar with a single shelf above it? I guess it was enough for a complete wardrobe during the depression. But now…Well, let’s just say that I’ve been buying/feverishly collecting clothes for about 35 years. (And I still have almost every piece. Let that sink in a bit) So naturally, I need to use every available inch of my closet.
Here’s where we started…
I call this shot…..”4 different flooring options”
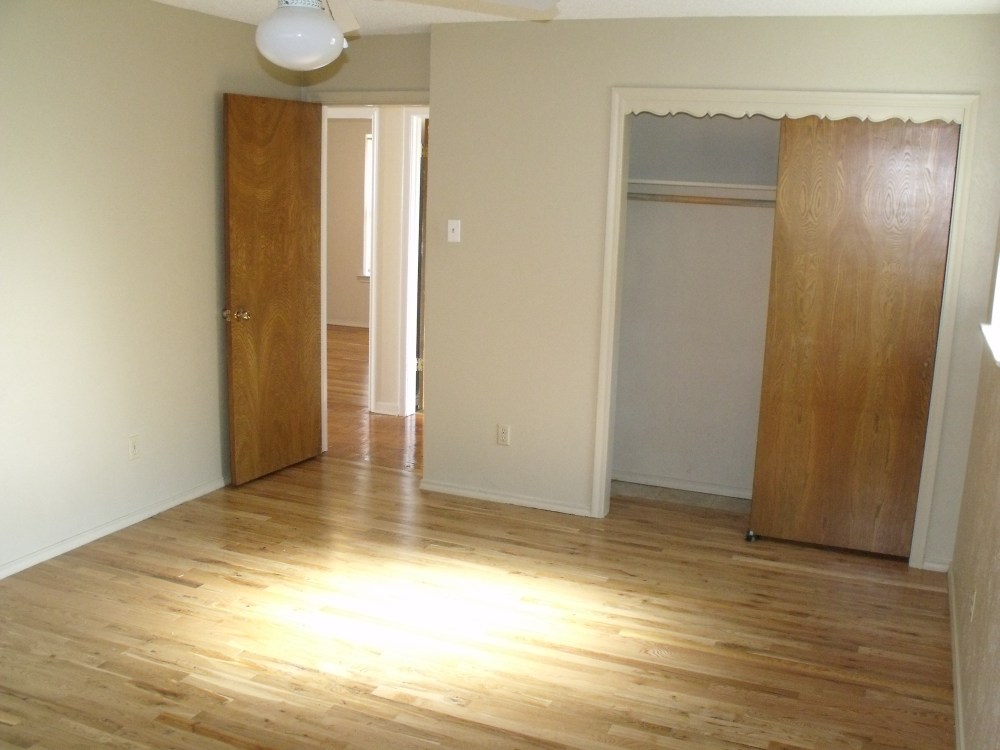
This is what the master bedroom looked like before we moved in. That’s my current closet on the right. And there’s that single bar with the above shelf. Also, notice the scalloping detail above the sliding doors? That was the first to go. Also, also, notice the wood floor in the closet stops about 11 1/2 inches from the back wall? W. T. Heck is that about? (Shakes fist in the air at previous Cavender home owner)
Here’s what I was working with last week…
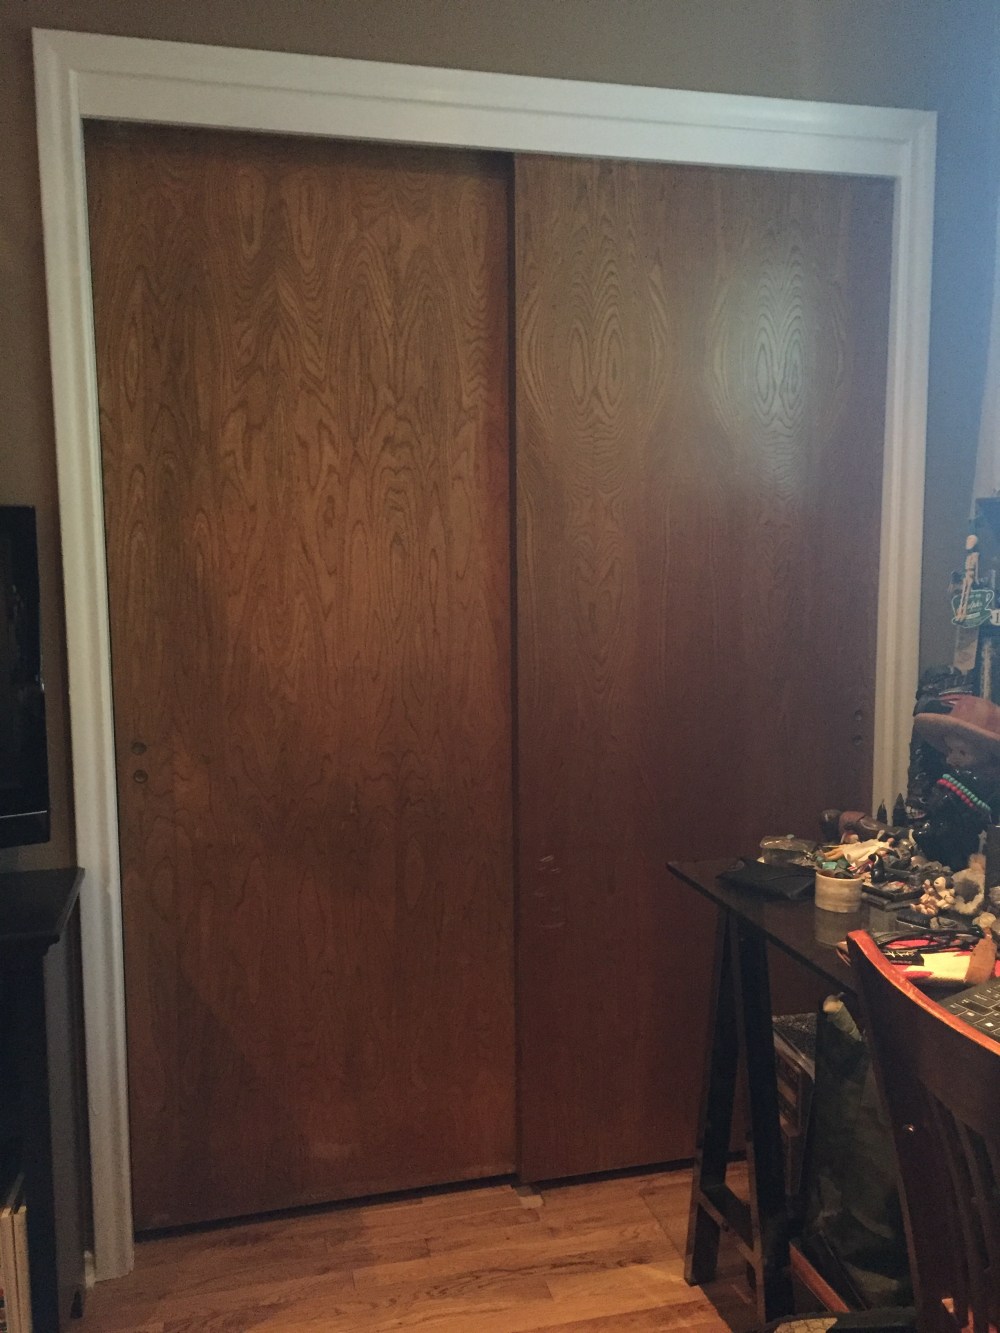
The scallop trim is long gone, yes. But I still need to maximize space and the access to that maximized new space.
I ripped off the doors, track, that sad little bar, the moldings, the newish UN-scalloped trim AND about 20 inches of drywall and 2X4 closet header…..taking the opening almost all the way to the ceiling.
Now to fix the half-assed floors. (Pardon my sailor talk, but, Come On, Seriously?)
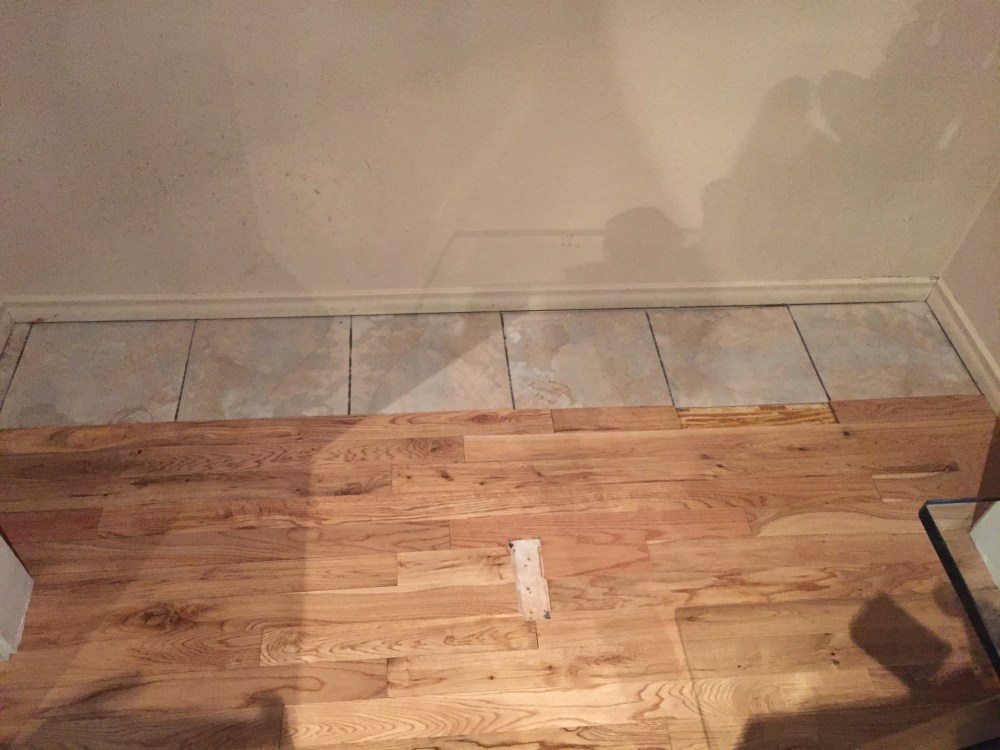
I’ve always intended to peel up those 6 vinyl squares and finish installing the wood floor in the back of my closet…..and the other 2 closets in the other 2 bedrooms….That’s a no brainer. Of course, every product the previous owner used to “upgrade” this house is no longer in production (shakes fist at the previous owner’s bad decisions,…. yet again. Did he run out of money? Lose interest? Move? It boggles the mind)
I did find a similar flooring. That’s not really the issue….
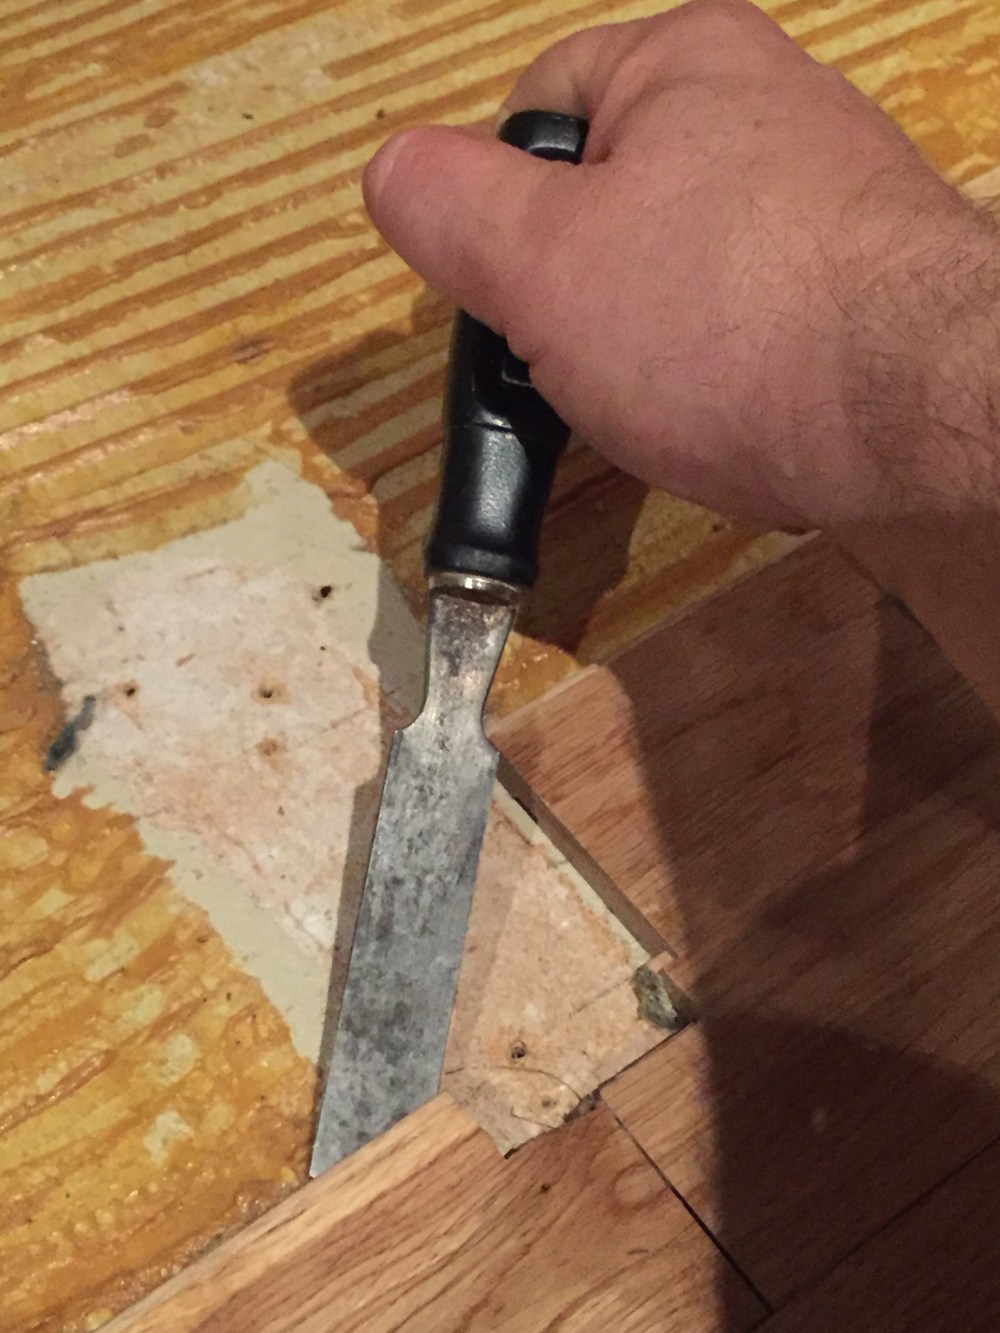
This is….
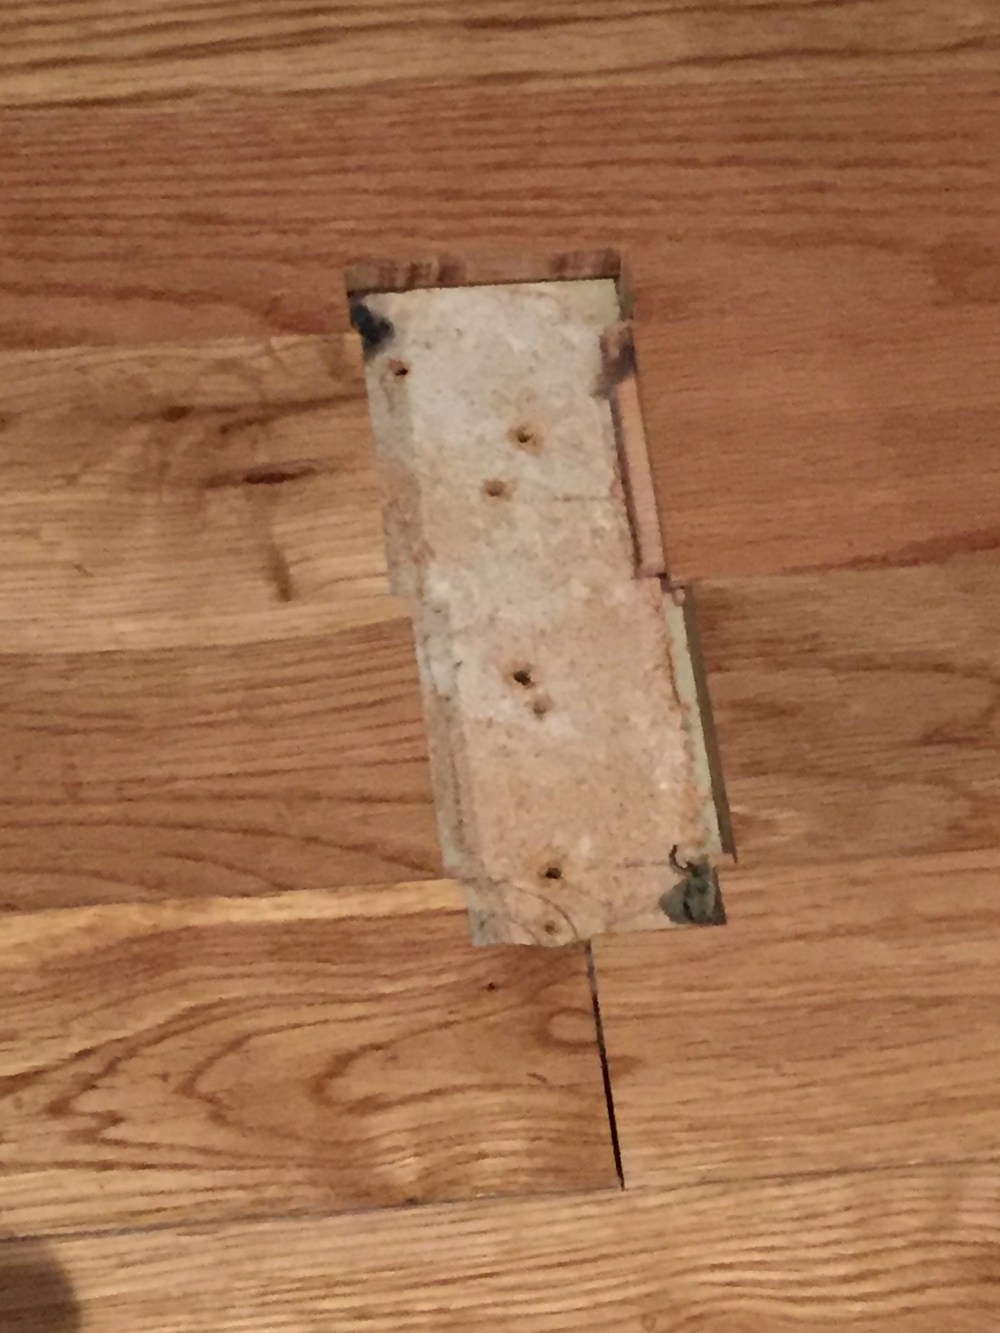
For some reason unknown, he installed the hardwood floor AROUND the sliding door hardware. No kidding. Who does that kind of shit? And it looks like he cut it with a knife and fork…… While high.
There was honestly a moment, brief moment mind you, where I thought I might just “fill in” this hole with wood scraps. But my OCD got the better of me (Thank God)……and I just removed all of the offensive flooring and started fresh.
Glad I did too…
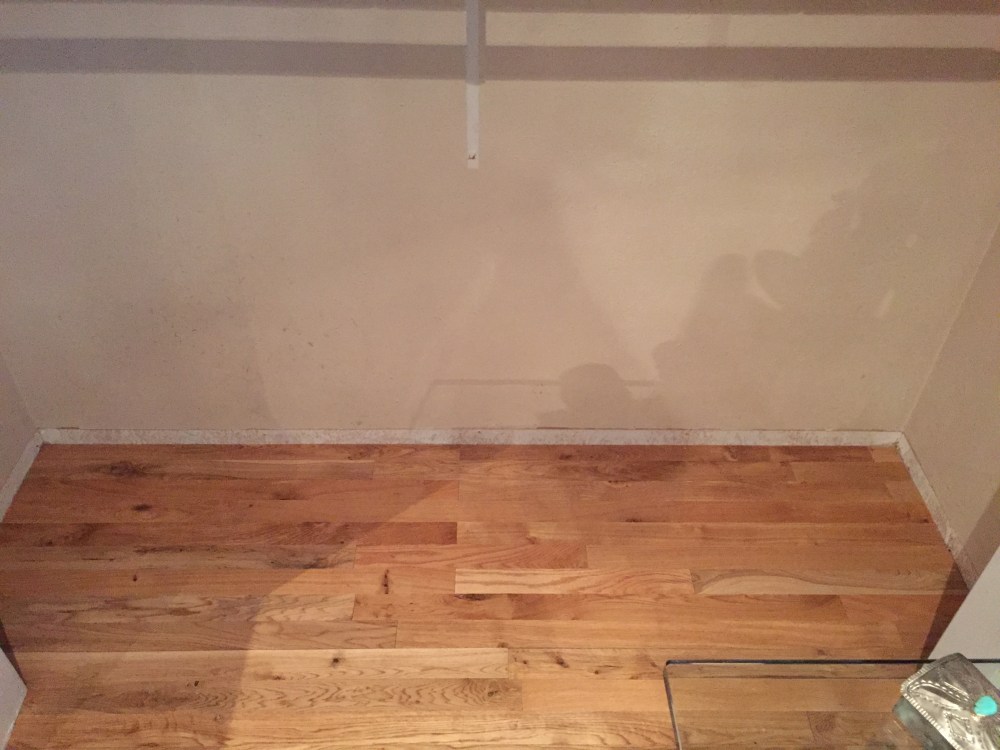
Even though the new wood is a slightly different color. Slightly. I think we can all agree that it looks tons better already.
I painted the interior side walls and the ceiling a fresh, crisp white. Ceiling paint actually.
Except for the back wall, because it will be cedar.
I started with cedar shiplap from the Lowe’s. Joanna Gains would be so proud.
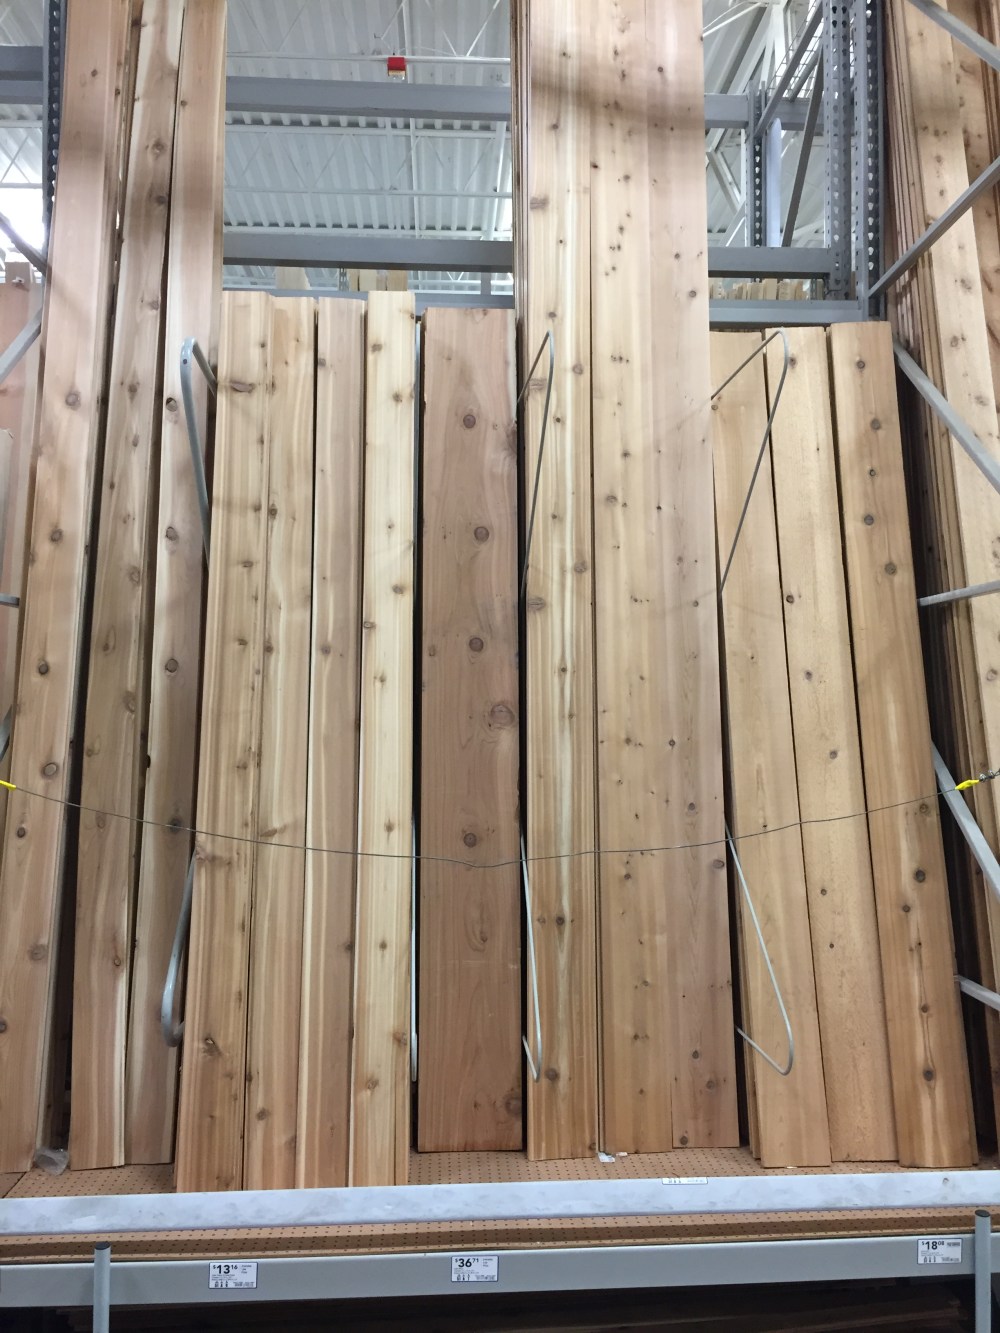
Wise choice to repel moths…..
But not cheap. Not cheap like the fencing cedar we used in the garage. But hey, this is my 35 year clothing investment we’re protecting here.

I started at the bottom, and whipped this out in about 200 dollars. I mean, 2 hours.
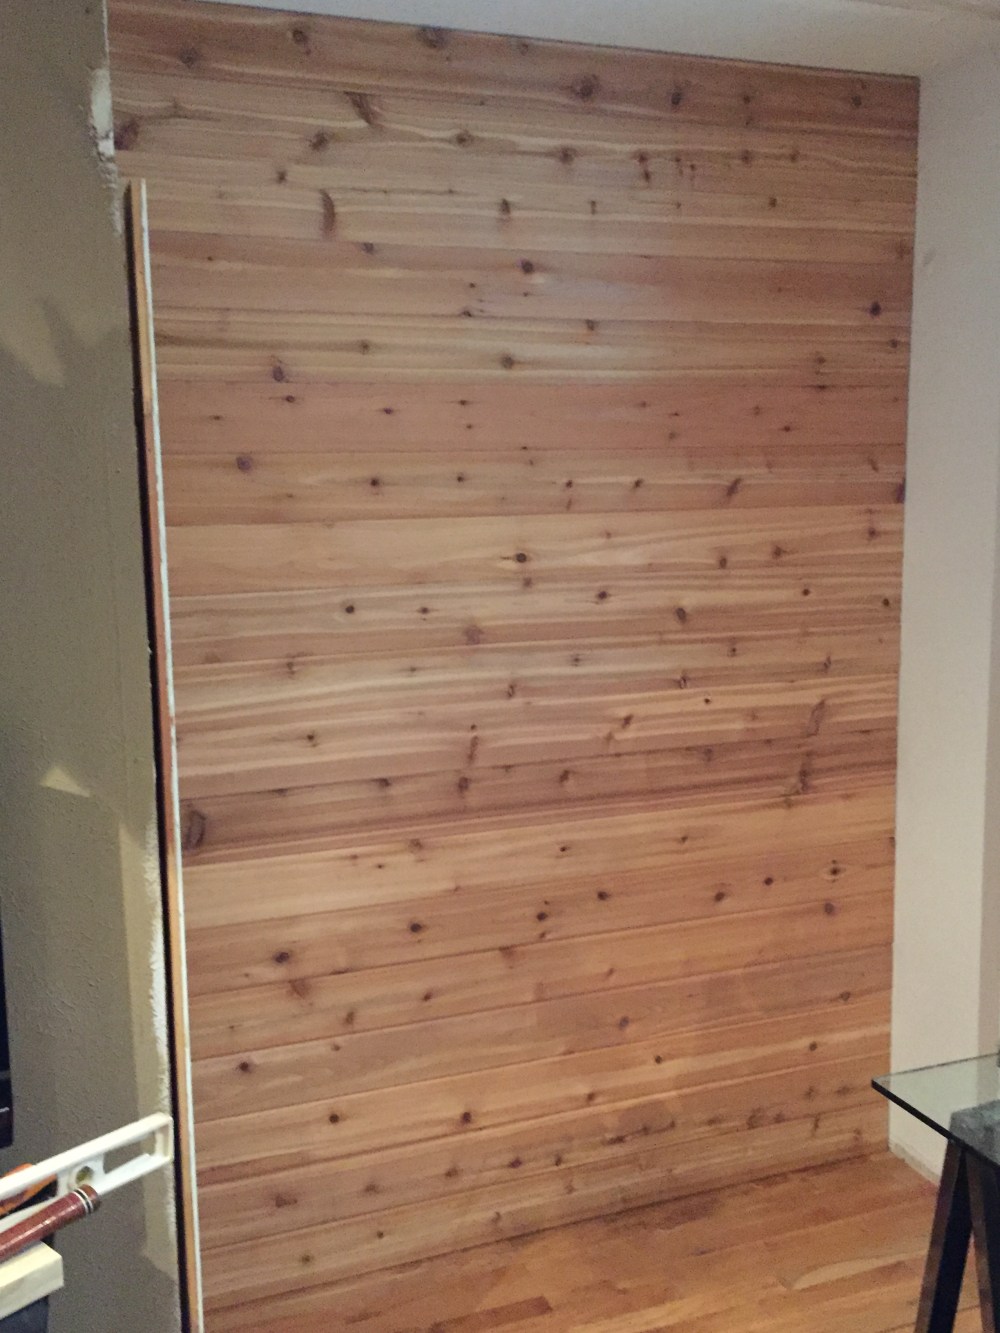
Way, more, much better already.
And it smells just heavenly.
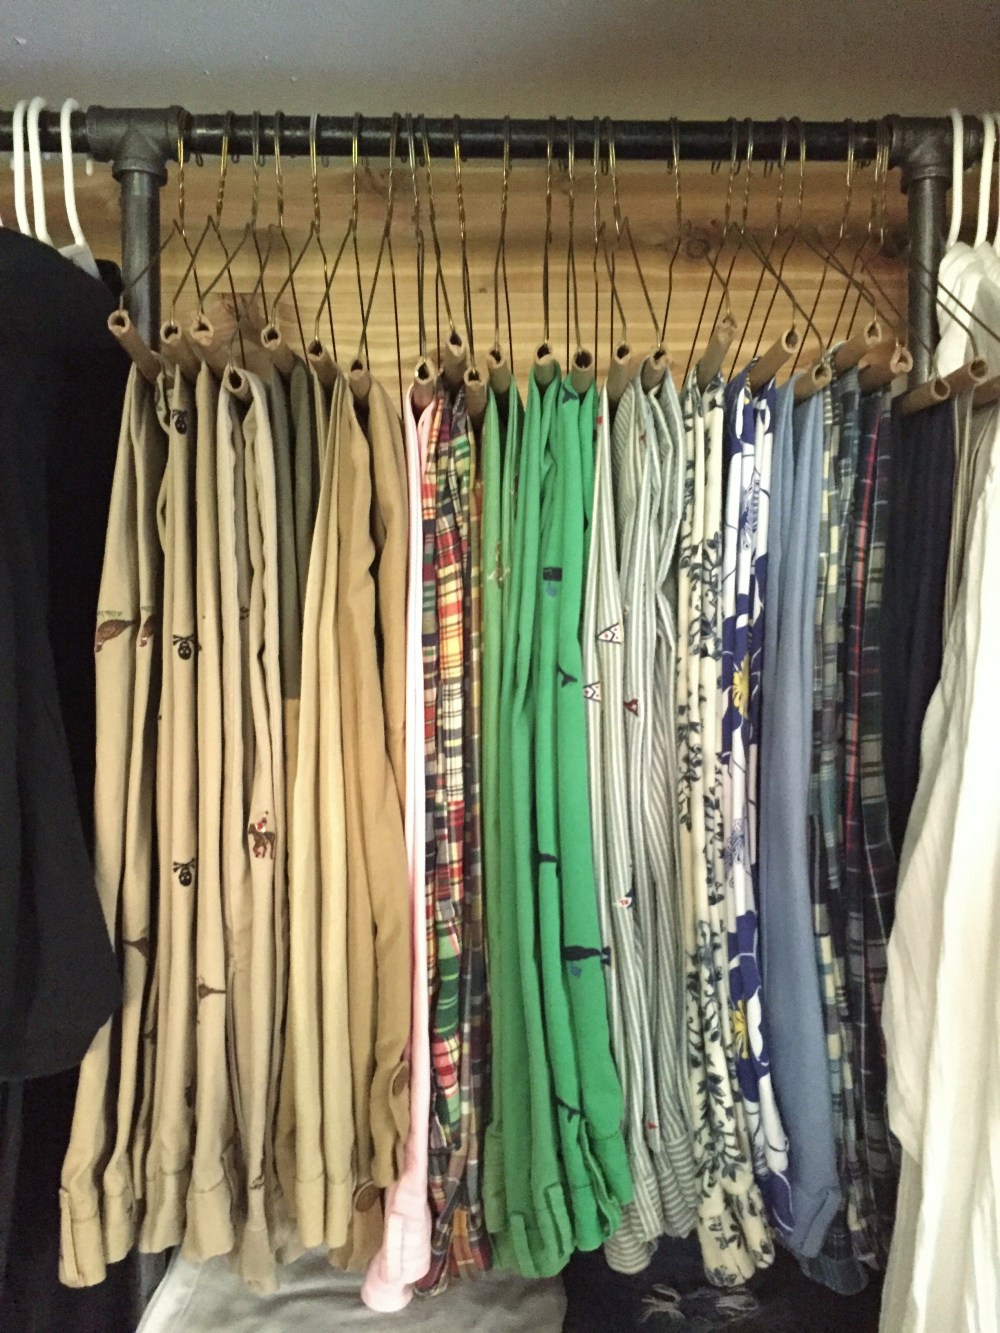
Now, on to fixturing. Plumbing pipe was a given. After all, I wrote the book about using industrial pipes around the house. DIY Industrial Pipe Furniture & Decor available for purchase now on Amazon. Not sure if I’ve pushed it hard enough this week.
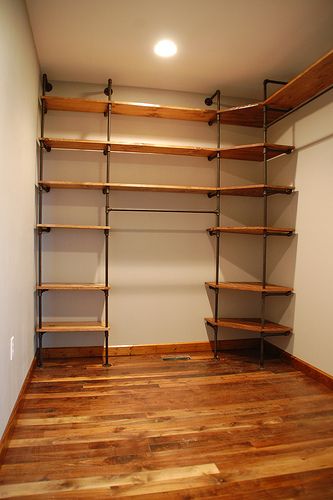
I wanted something like all the dreamy pipe closets I see on Pinterest. Like this one…
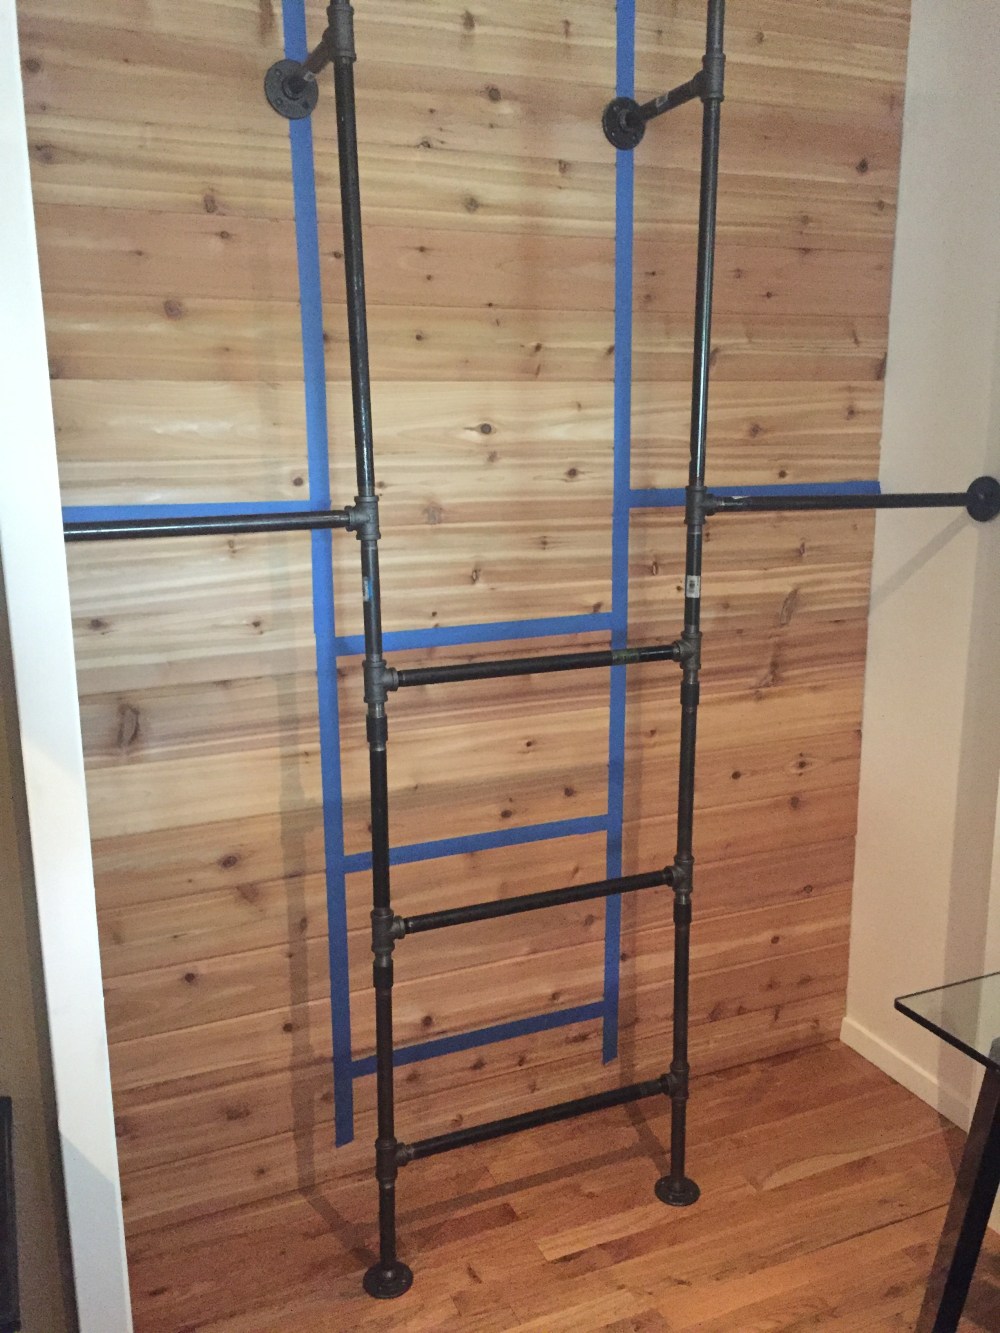
I plotted the pipe layout using masking tape on the back wall, making sure there was plenty of room for everything. In fact the top bar will be about 2 inches from the ceiling.

Easy Peasy.
Then, on grease-stained paper, I plotted all the pipe sizes.
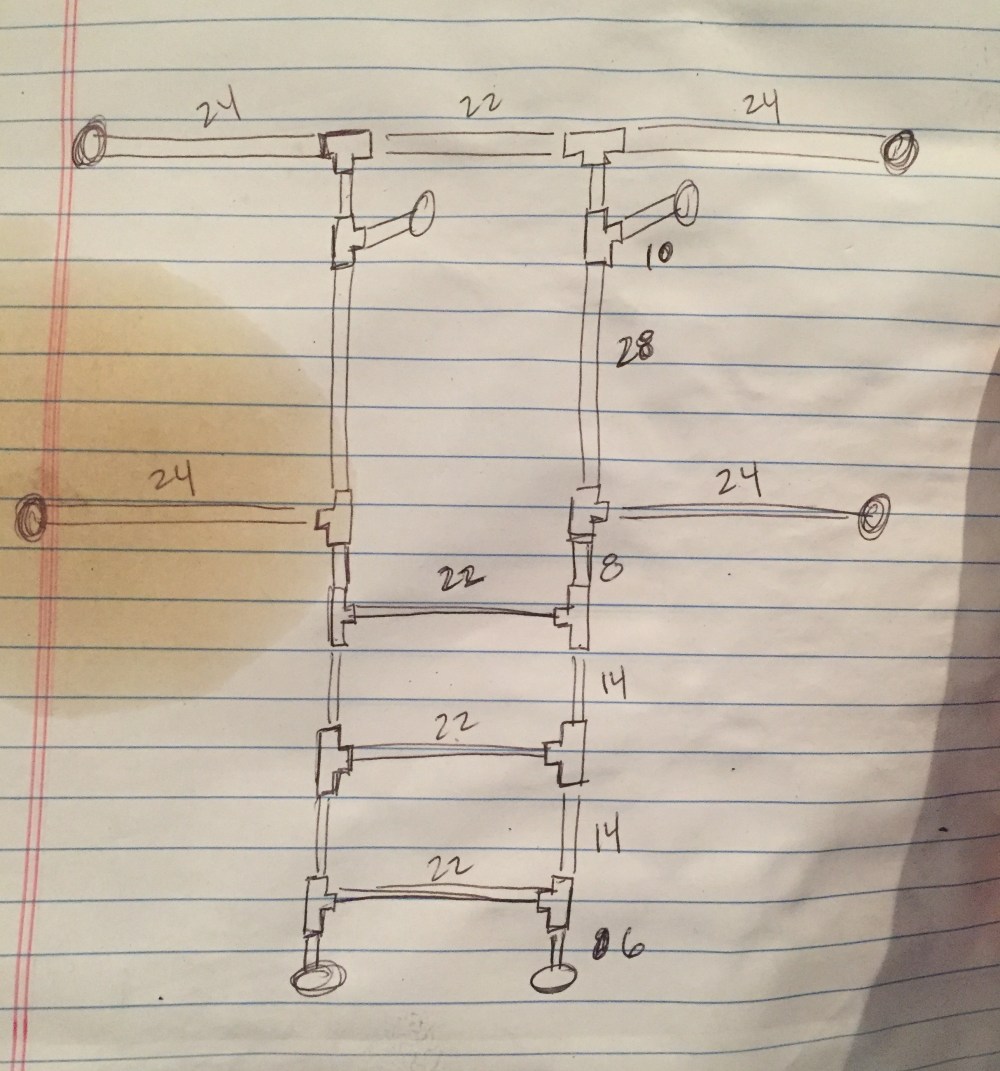
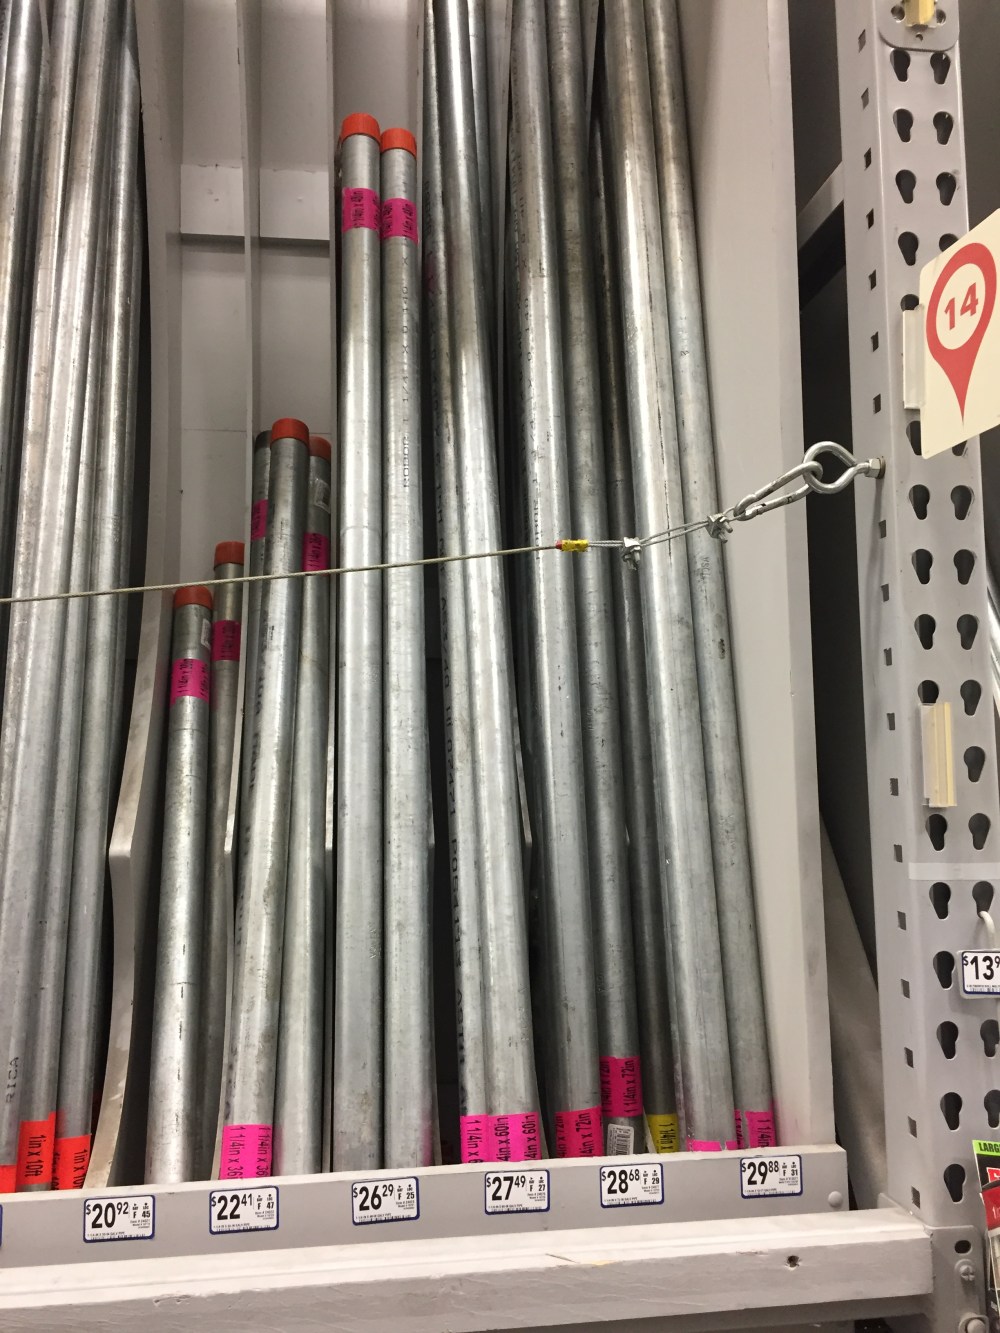
I’m not going to sugar coat the rest, because it took me 5 trips to the Home Depot (and 1 trip to Lowe’s) to get the 3/4″ black pipes right. And I’m a pipe expert. Right?
But I think I finally got it down…..And I guarantee the pipe-cutting dude at the H. Depot will be avoiding me for the next couple of months.
The ladder looking part on the bottom will be wood shelves for jeans, sweaters and shorts. I simply used a 24″X48″, 3/4″ thick, sheet of plywood cut into three 24″ X 15″ rectangles that each rest on a cedar cleat I screwed to the back walls. (What are the odds? My neighbor Steve was tossing cedar scraps at the same time I was working on this.)

I notched the sides of my plywood shelves with a jig-saw to wrap snugly around the side pipes.
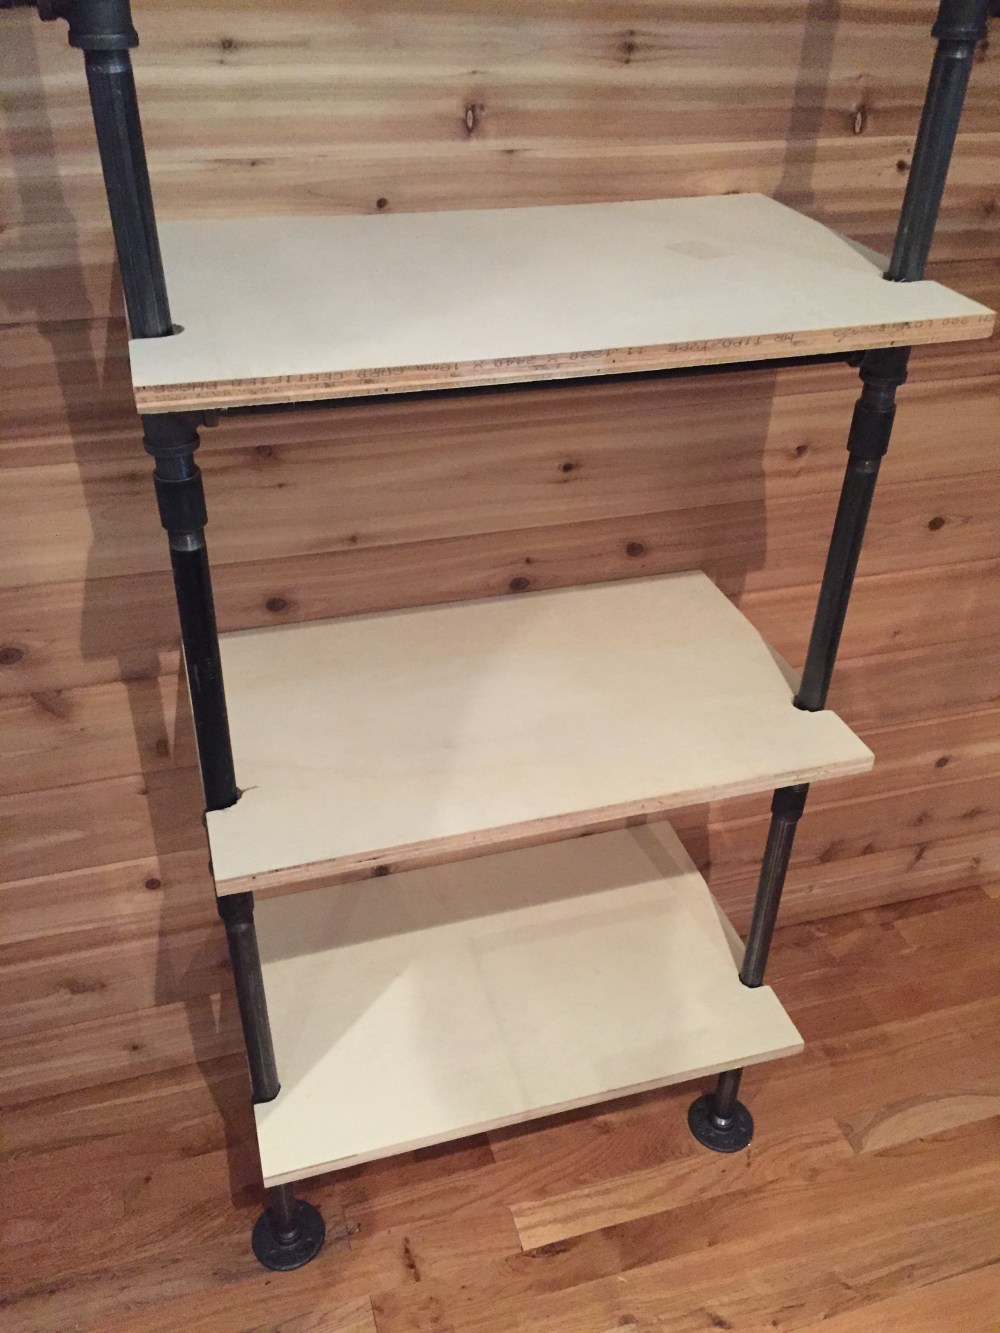
Not too thrilled with that raw plywood edge facing me, so I covered it in more scrap wood, 1 X 2’s this time.
Because I removed the doors, and don’t want them back…I hung a curtain. Imagine being able to see everything at once. No more choosing which side to dig in by sliding the doors back and forth.
These grey wool panels were a throwaway at work because there is some minor bug damage. Not entirely my style. But “FREE” certainly is…and there one for each big closet. But best of all, they have these groovy 1 1/2″ grommets across the top.
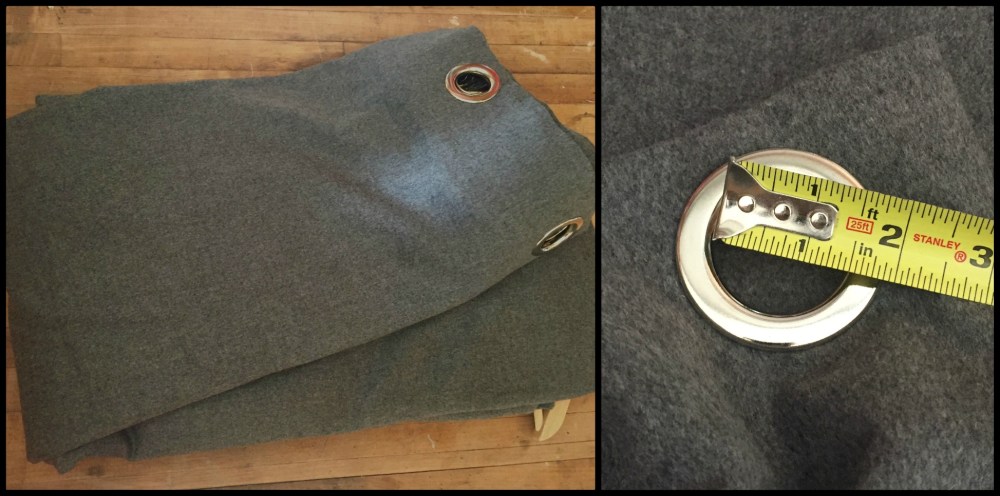
Perfect for threading…y’all guessed it…another pipe; like a 1 inch galvanized from Lowe’s.
I simply had the Lowe’s associate cut it to 58 1/2 ” allowing 1/4″ of flange on each side because my door opening is exactly 59″ wide.
Done deal,
Wanna see the results?
I know, the pic’s a little grainy…but ya’ll get the idea.
A place for everything….

…and everything in its place.
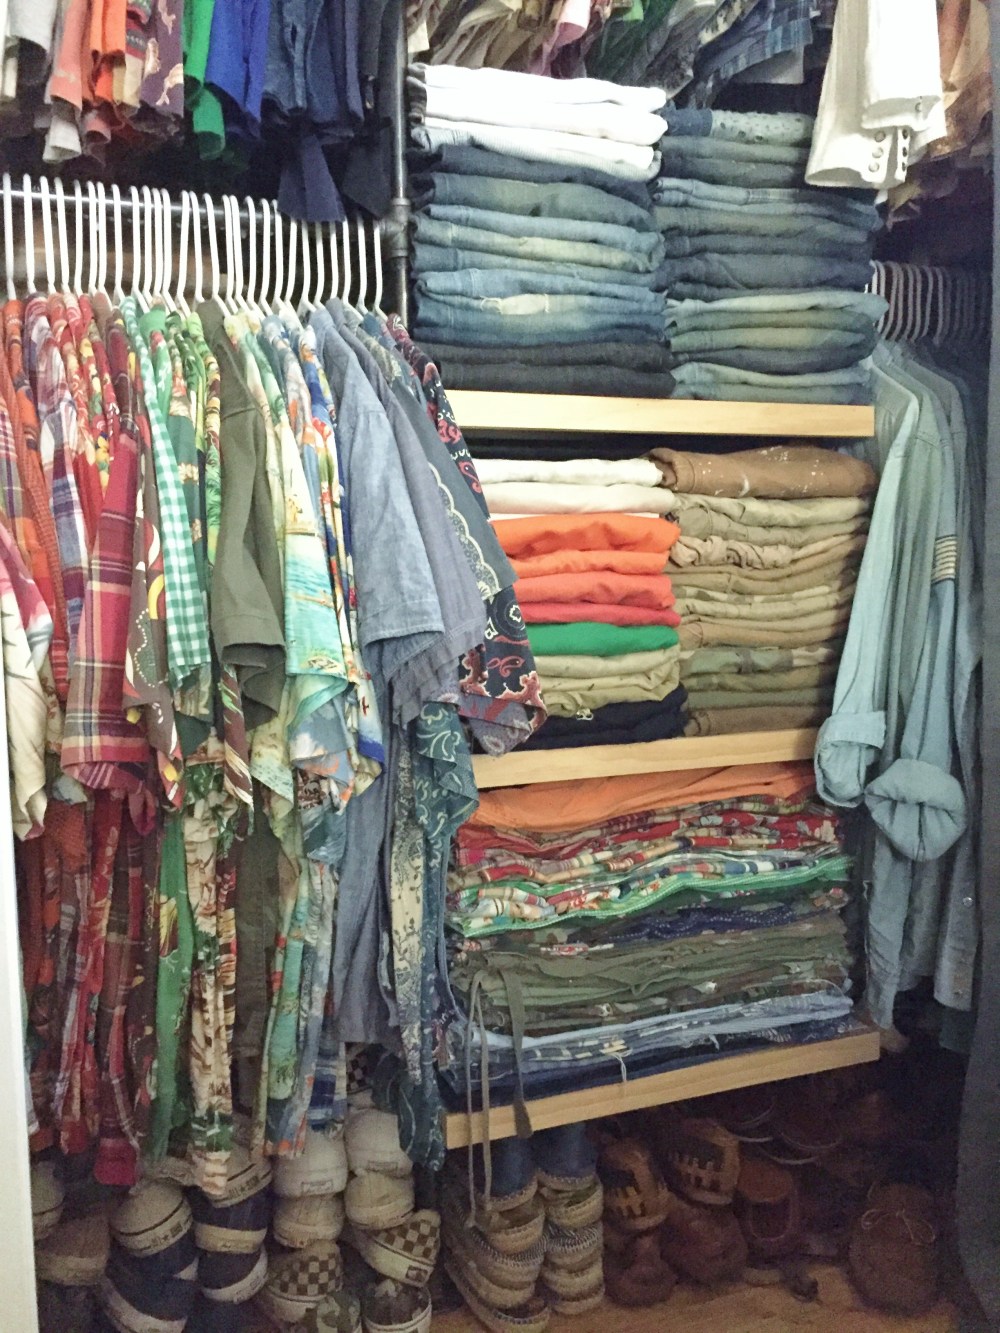
It might look a little tight…but this was all about maximizing every possible square inch.
And I’m pretty sure I did just that.
Best of all. I LOVE it!
Now on to tackle the other 3 closets in this house.

