“As God is my witness, as God is my witness it’s not going to lick me. If I have to lie, steal, cheat or kill. I’m going to live through this and when it’s all over, as God is my witness, I’ll never hang wallpaper on a ceiling again.”
Have any of y’all ever been neck-deep into a project and realized that maybe you’ve finally fucked up and bit off more than you could chew?
Because I haven’t.
I’m the most talented person I know, and I can do anything.
Or so I thought.
Let’s start at the beginning. Do y’all watch Grace Mitchell On HGTV’s One of a Kind? Amongst a flood of shows about twins and shiplap this chick is a breath of fresh air. She designs interiors around her client’s personal experiences. Grace never misses an opportunity to wallpapers a ceiling – sometimes TWO – and they are ALWAYS stunning. Before her, I’d always thought wallpapered ceilings made a room look…. well, short.
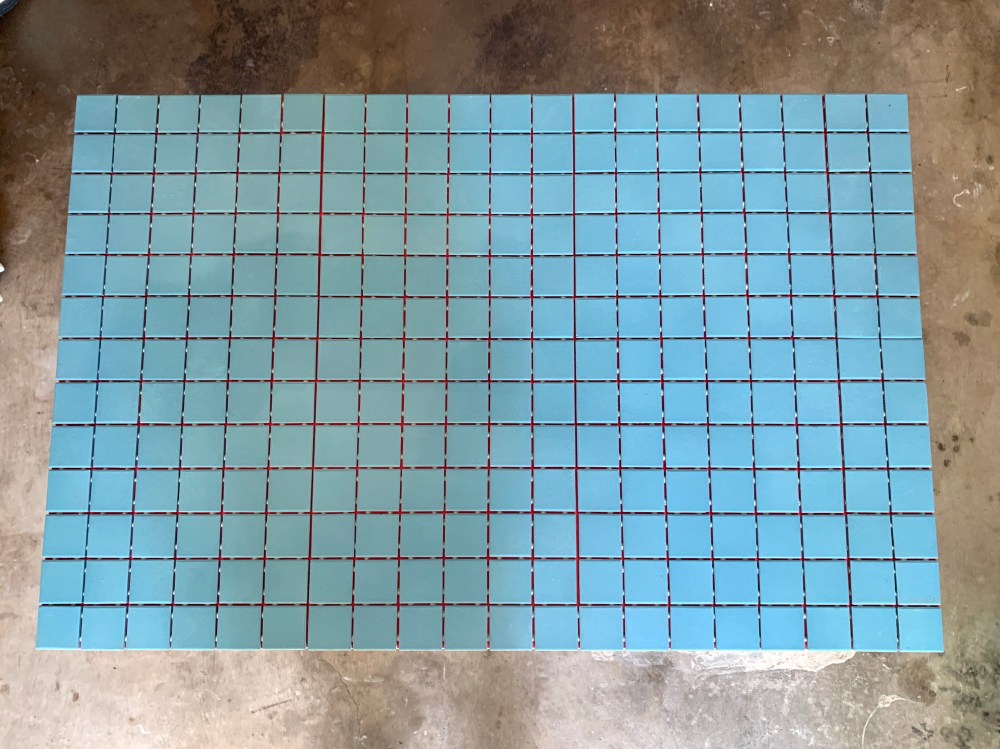
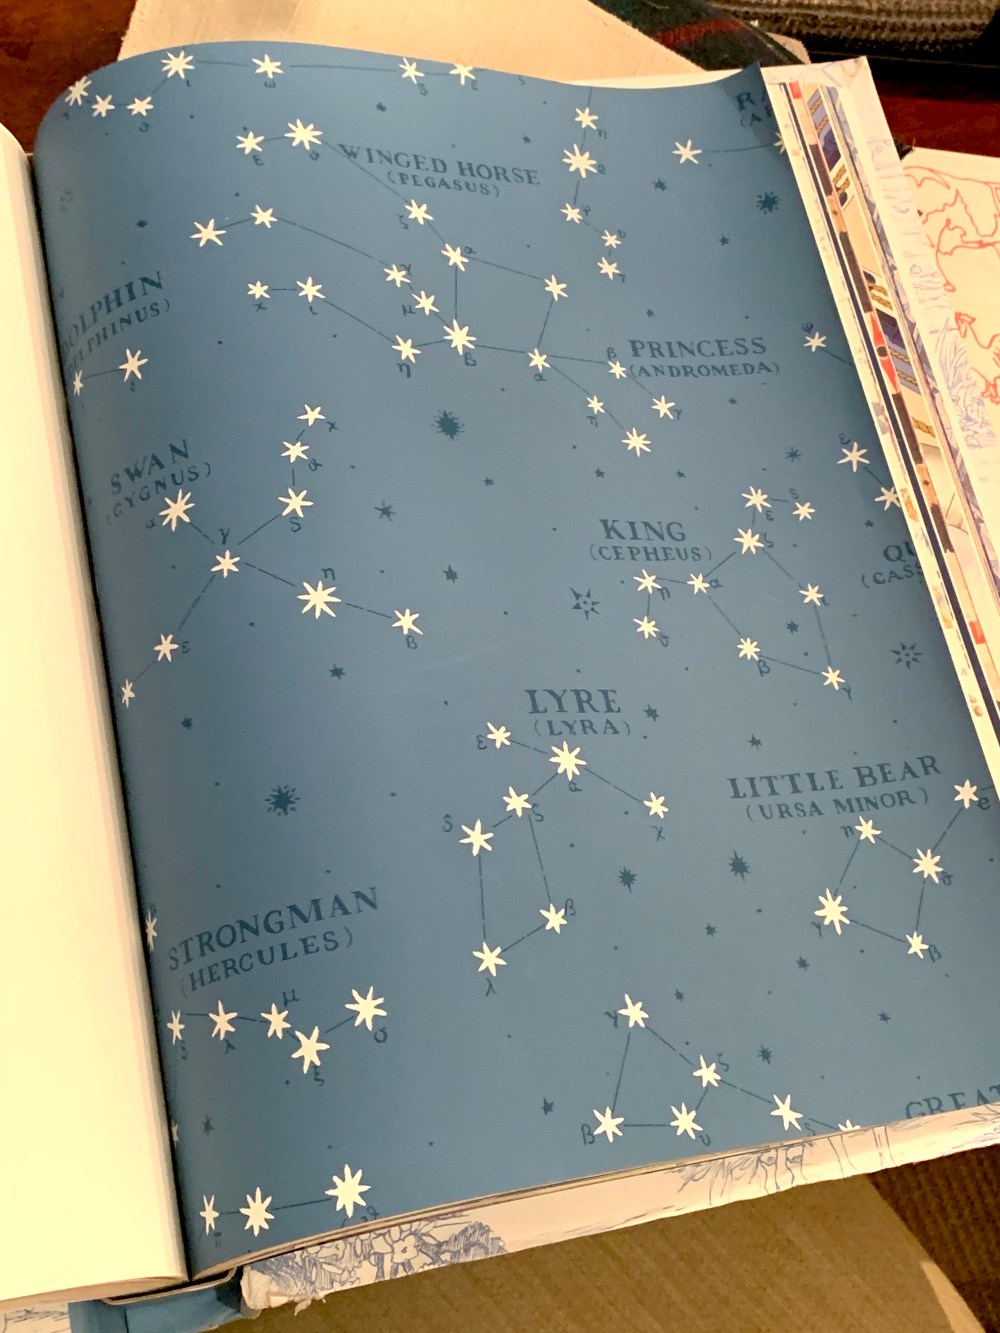
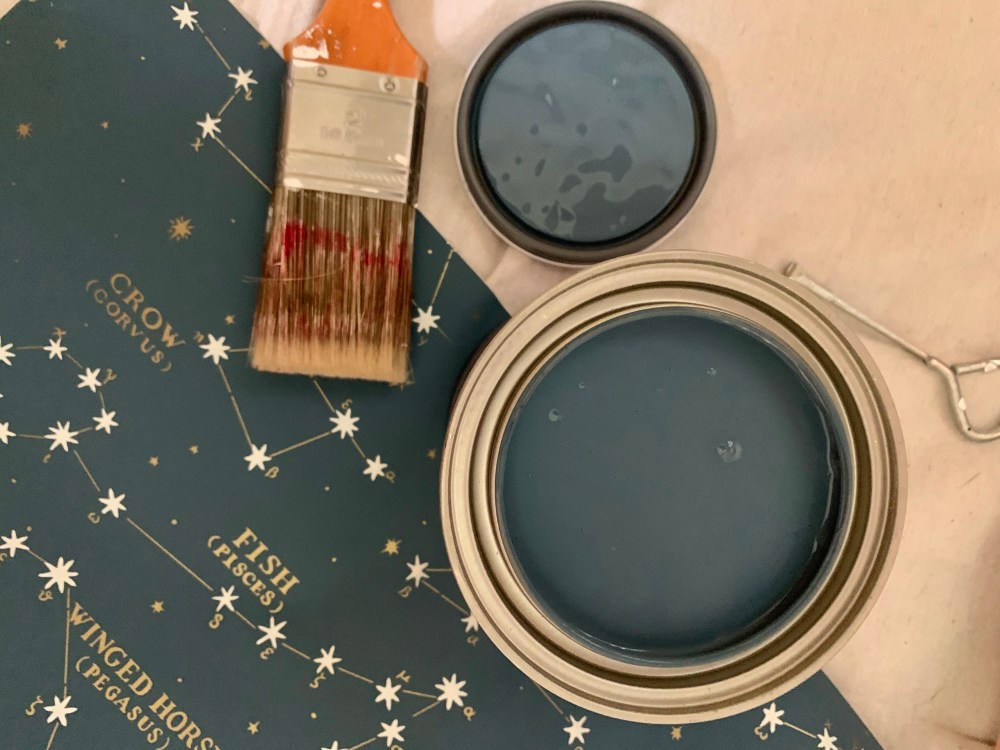
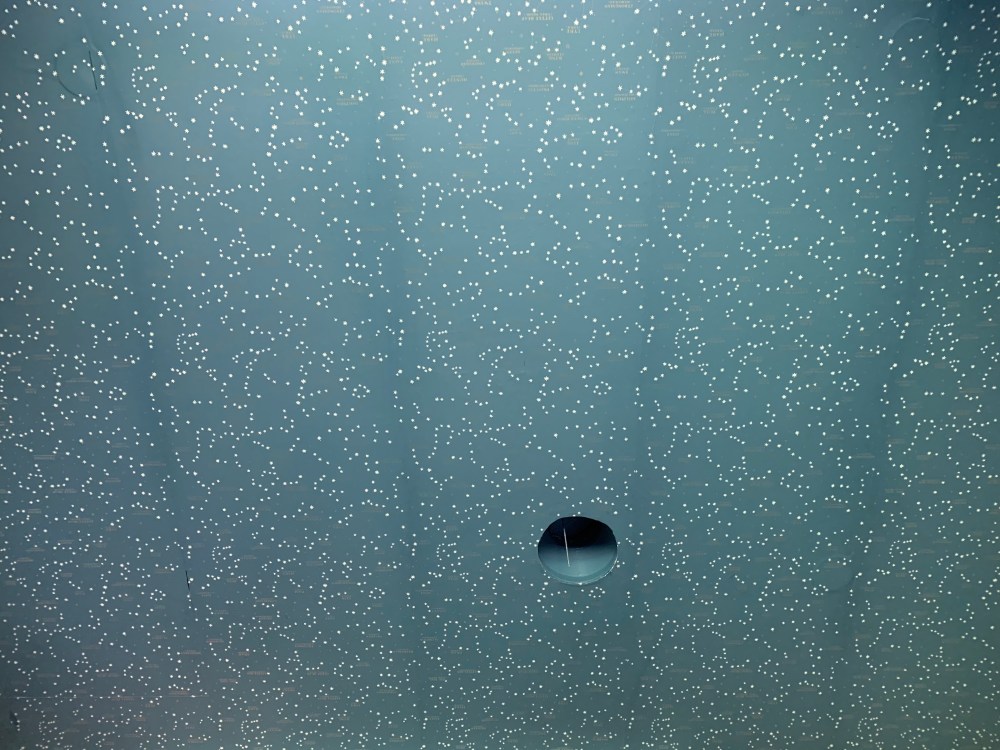
Back in March, with Grace’s inspiration bouncing around my head, I ordered a few rolls of this constellation wallpaper; Ralph Lauren Northern Hemisphere.
If I was going to be stuck at home for a few weeks I might as well make the most of it and paper the guest room ceiling. Right?
After about two months of tapping my foot…… I finally received THIS wallpaper.
Problem numero uno. Wrong paper.
It’s darker…. the difference between Aegean blue and navy….. and all the verbiage is gold.
GOLD
Honestly, it was my mistake. I was in a hurry and didn’t realize that my preferred color was unavailable. If wallpaper on the ceiling makes a room feel short, won’t a darker color make that even worse? So it sat in the garage for a week, while I decided either to return it….. or accept the dark blue and gold.
GOLD
I might as well get this over with.
Wallpaper isn’t completely new to me, I’ve hung it a few times. I’ve also paid close attention while my contractors hung it. It’s the installing it upside down part that has me a little apprehensive. So I refreshed my skills with a couple Youtube videos and read a few online tutorials – Brian Patrick Flynn has several step-by-steps on HGTV.com– and I was ready.
This should just take a few hours.
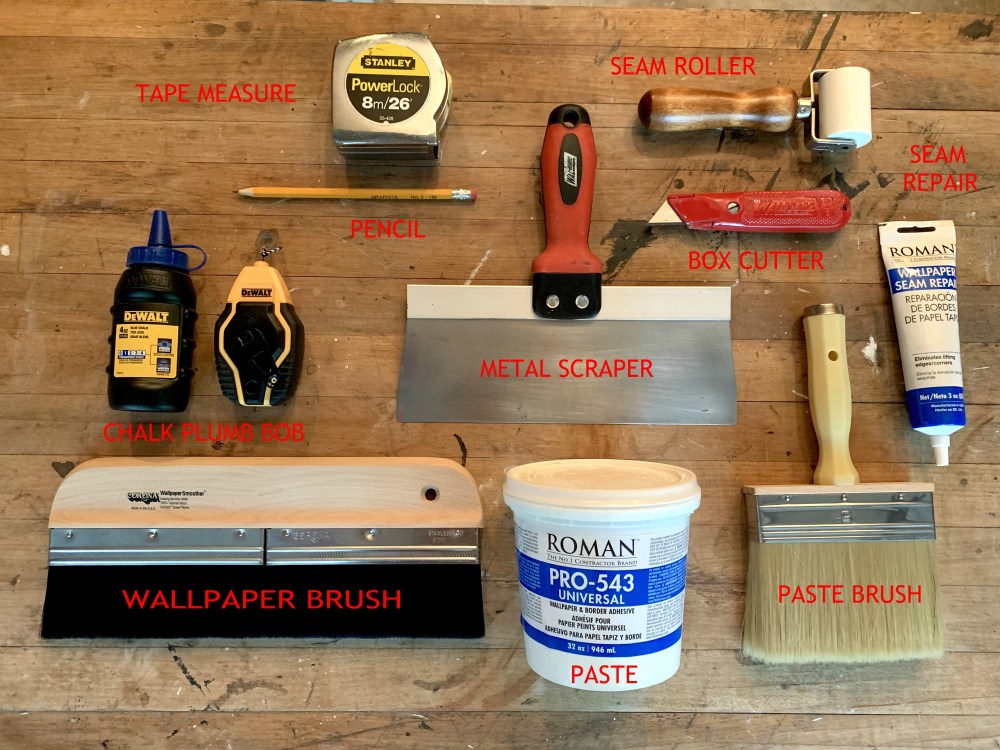
I emptied the guest room and assembled my wallpapering tools…
…then tackled problem numero dos; the work surface.
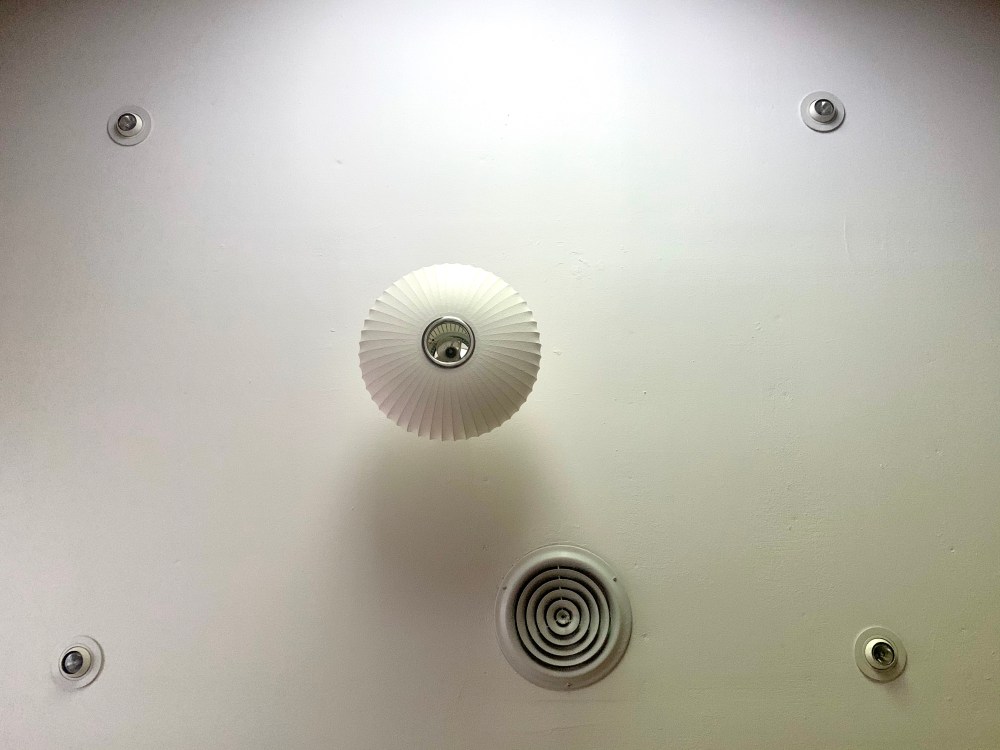
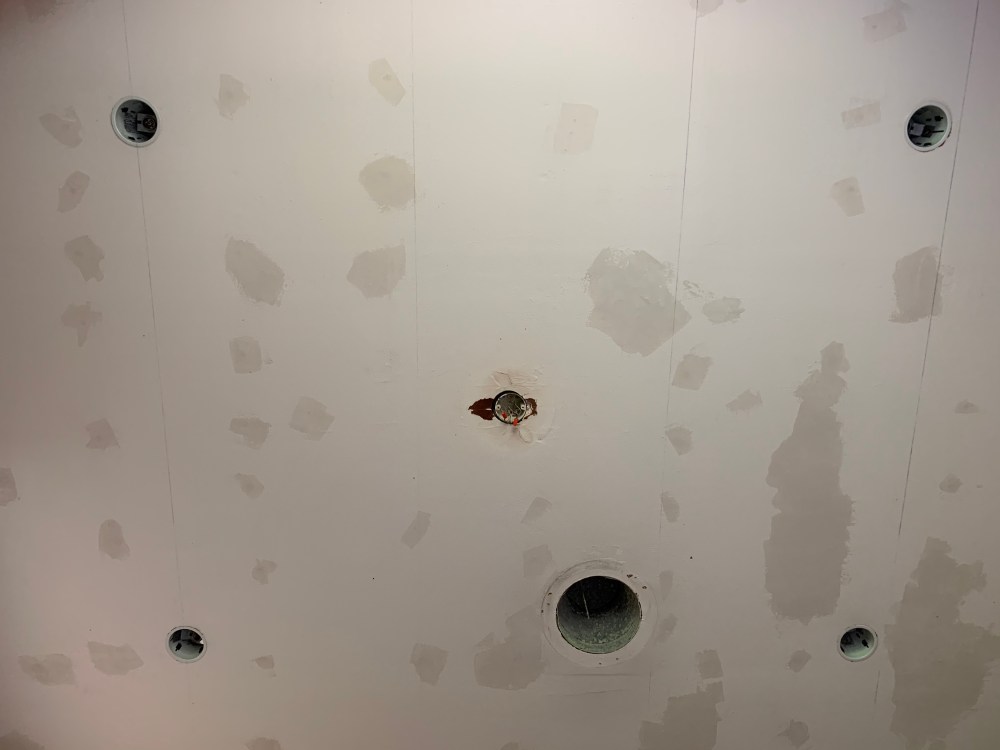
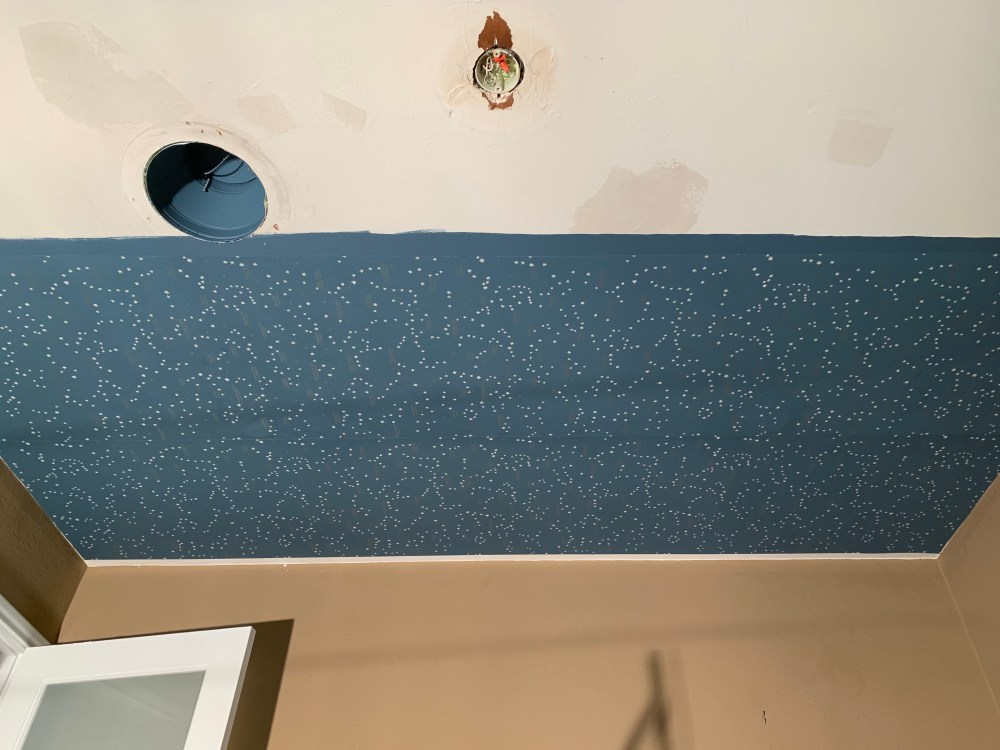
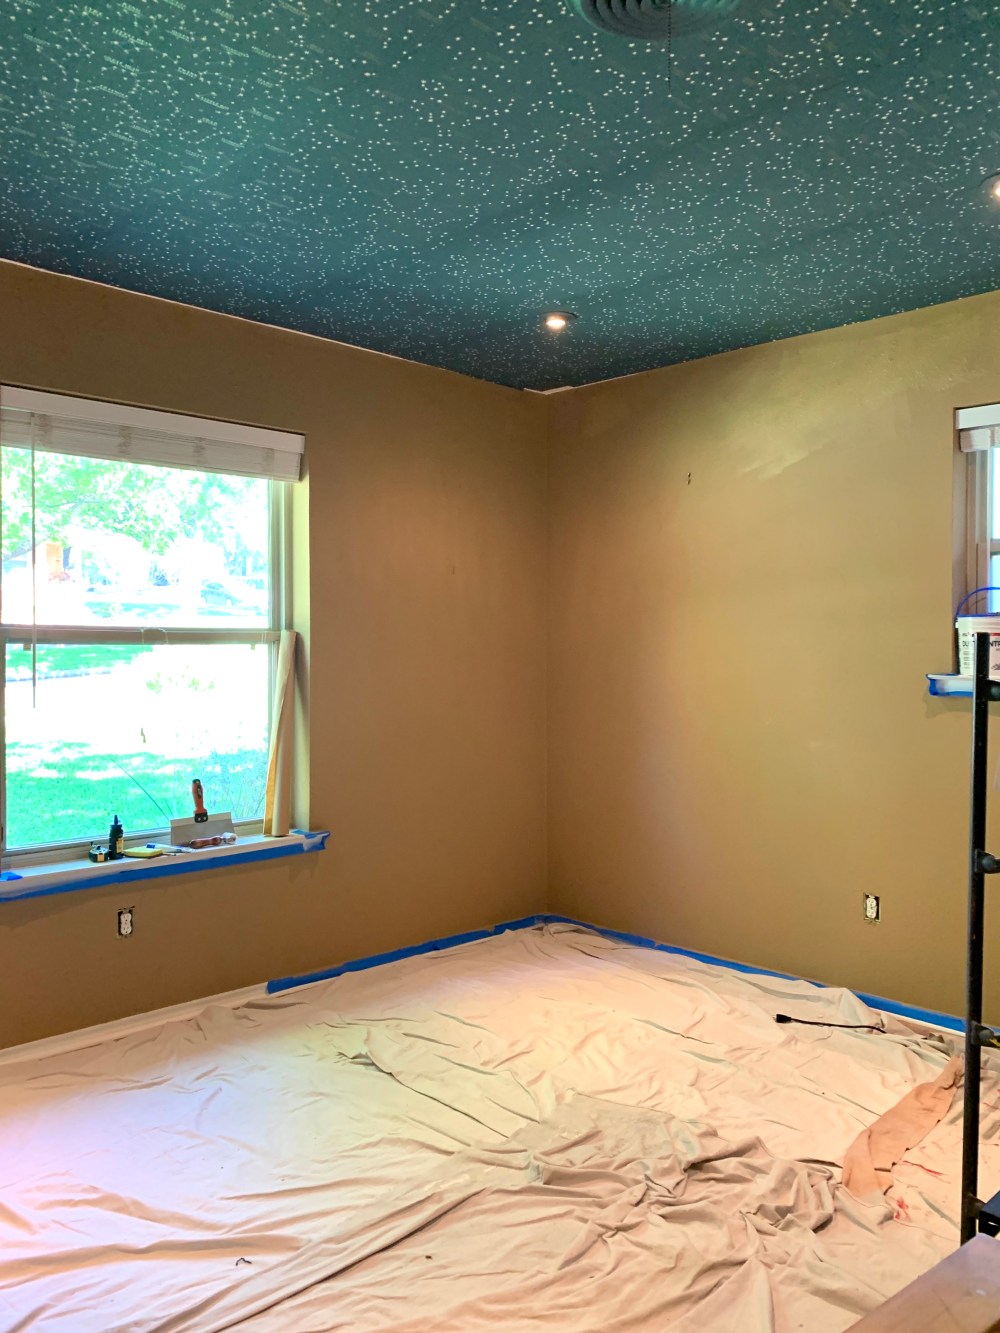
At fist glance, our guest room ceiling looks fine.
Zoom in a little closer and it looks more like the surface of moon.
Is that Aitken?
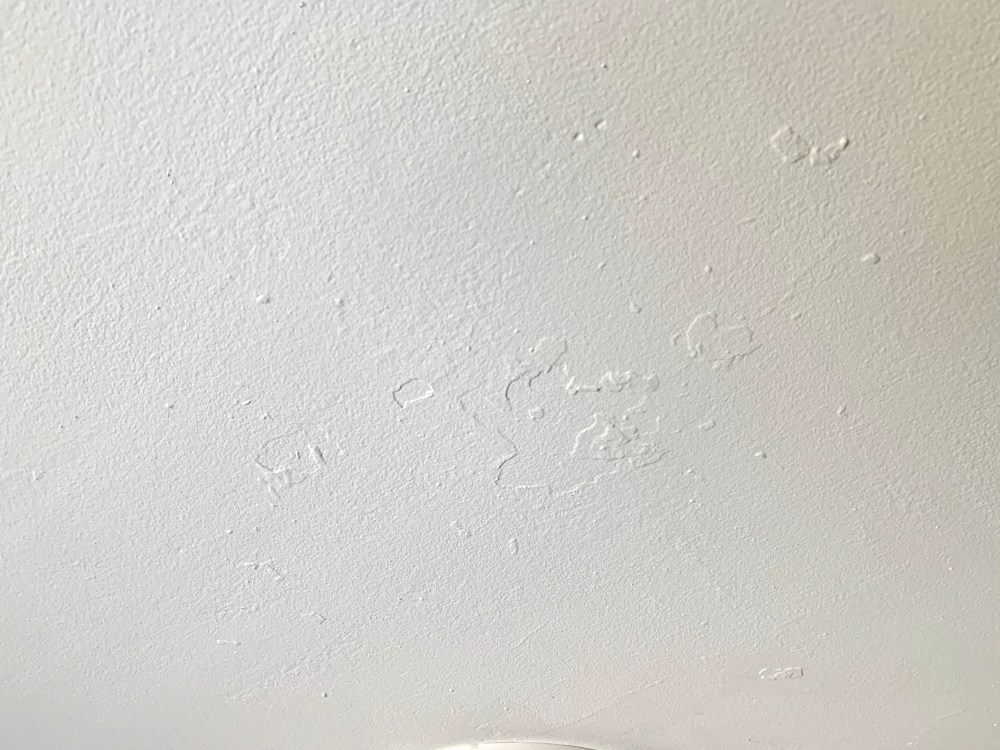
It’s an old house, and we know she used to have popcorn ceilings.
I grabbed a metal scrapper and a razor blade and scraped off as much of the mountainous landscape as I could. I also filled in the “craters” with a light shmeer of drywall compound, followed by an even lighter sanding.
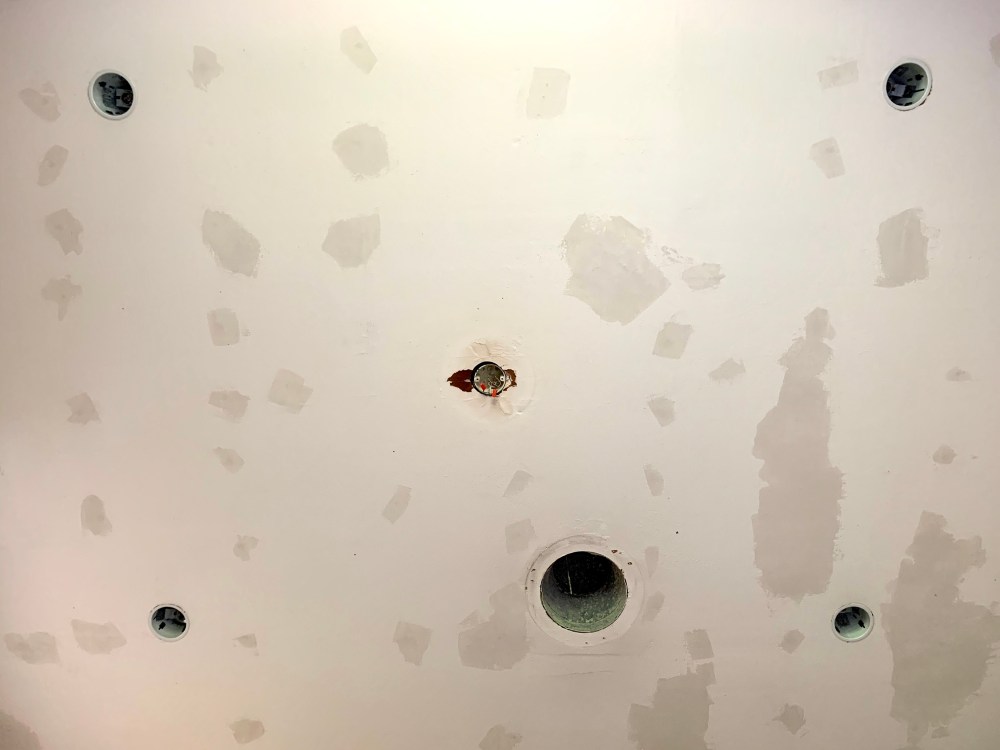
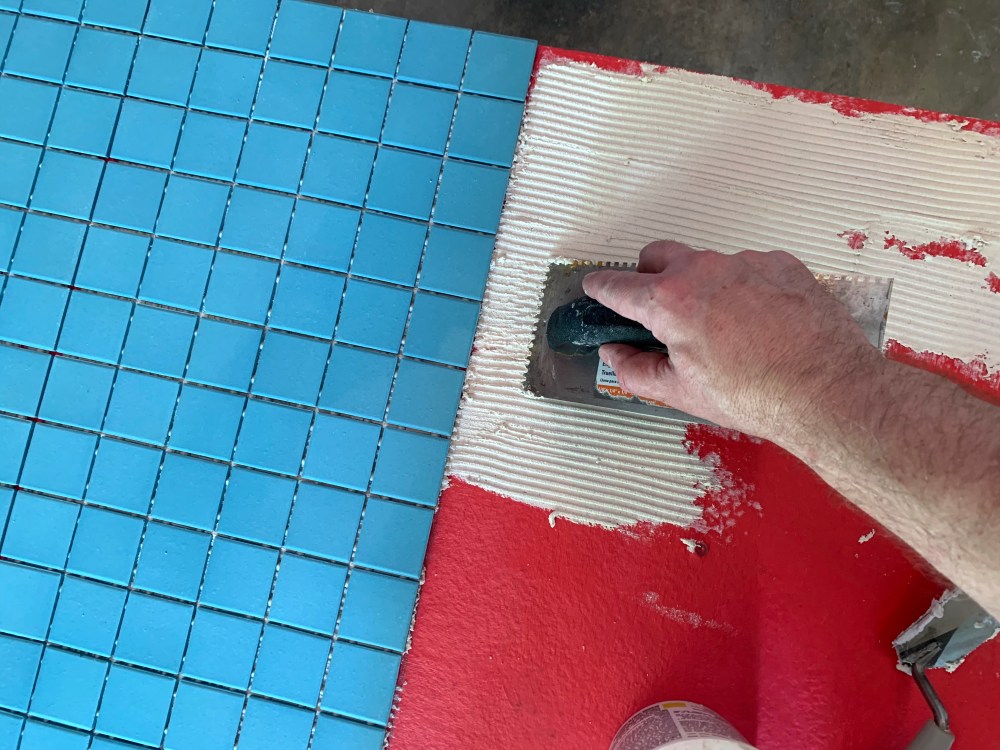
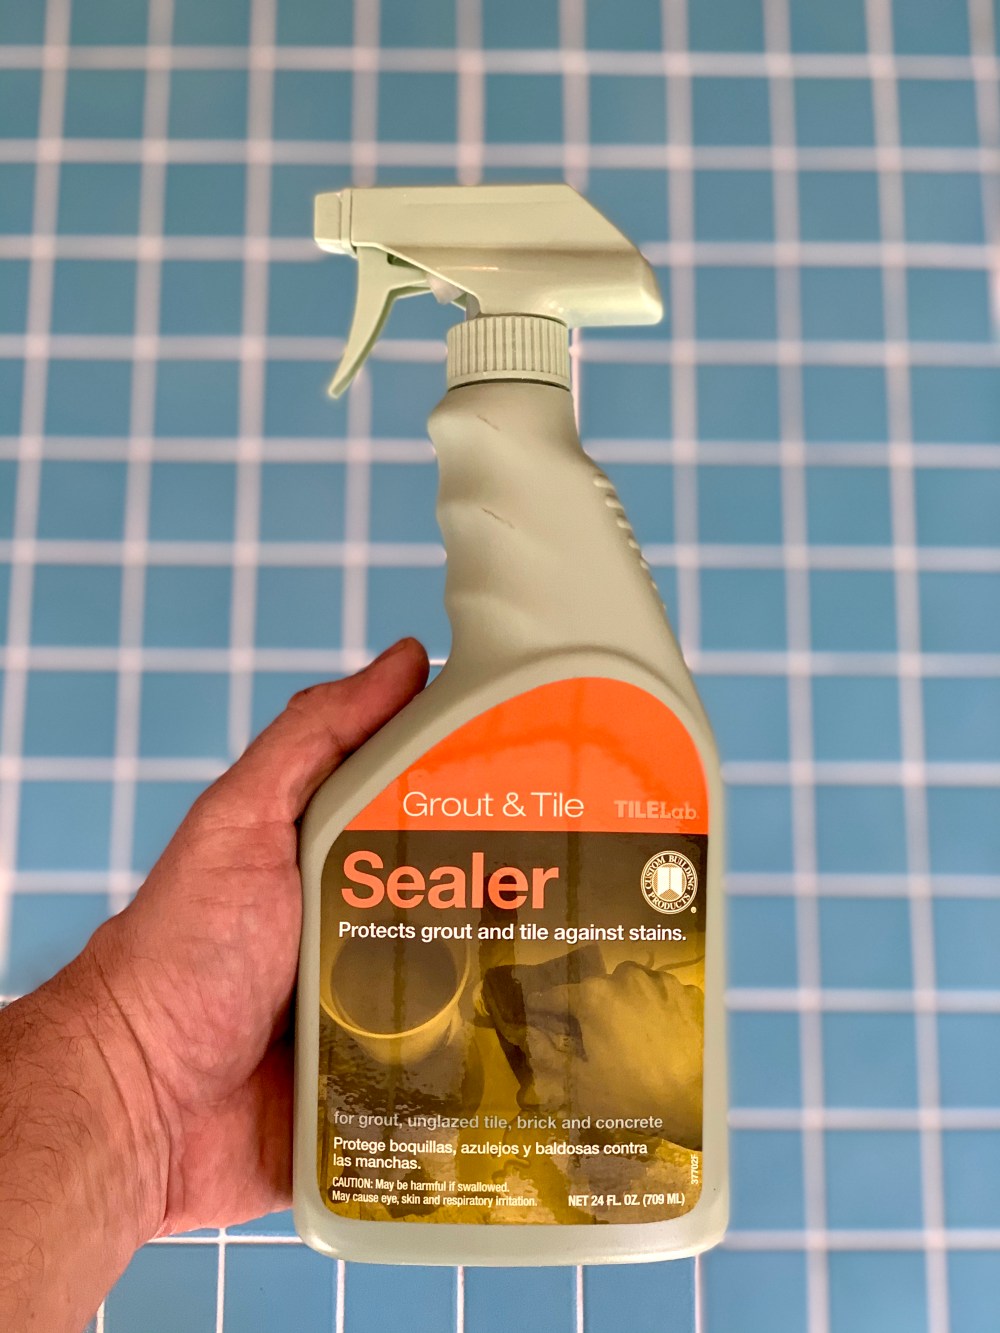
The next step in wallpaper surface prep is to apply a sealer/primer. Like PRO-999. Not only will the sealer/primer help the paper adhere to the ceiling better, it will also make it easier to remove if we ever changed our minds.
I think I would normally just skip this step, but I wanted to use my whole ass and not just half of it… and Lord knows, I’ve got plenty of free time to do things correctly.
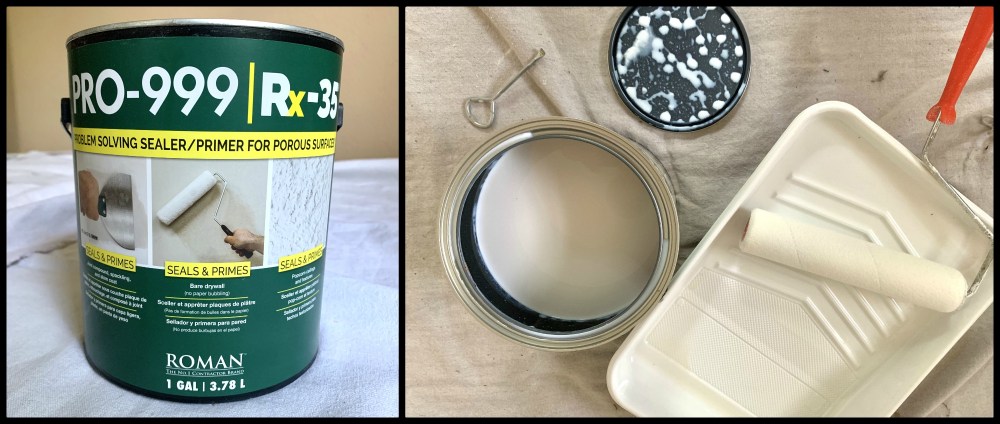
I used a roller with 1/4 inch nap – save the 3/8 nap for paint.
3 – 12 hours of drying time means my fist day is finished.
Day #2
Because I know that my wallpaper is 27 inches wide, the next morning I used the plumb line to mark the ceiling at 27 inch intervals.
Here’s where the wisdom of my vast experience comes in handy. I took my paper to the Home Depot and had the chick in the paint department color-match a quart of flat latex.
With a 4 inch sponge roller, I painted over my chalk lines…. like so.
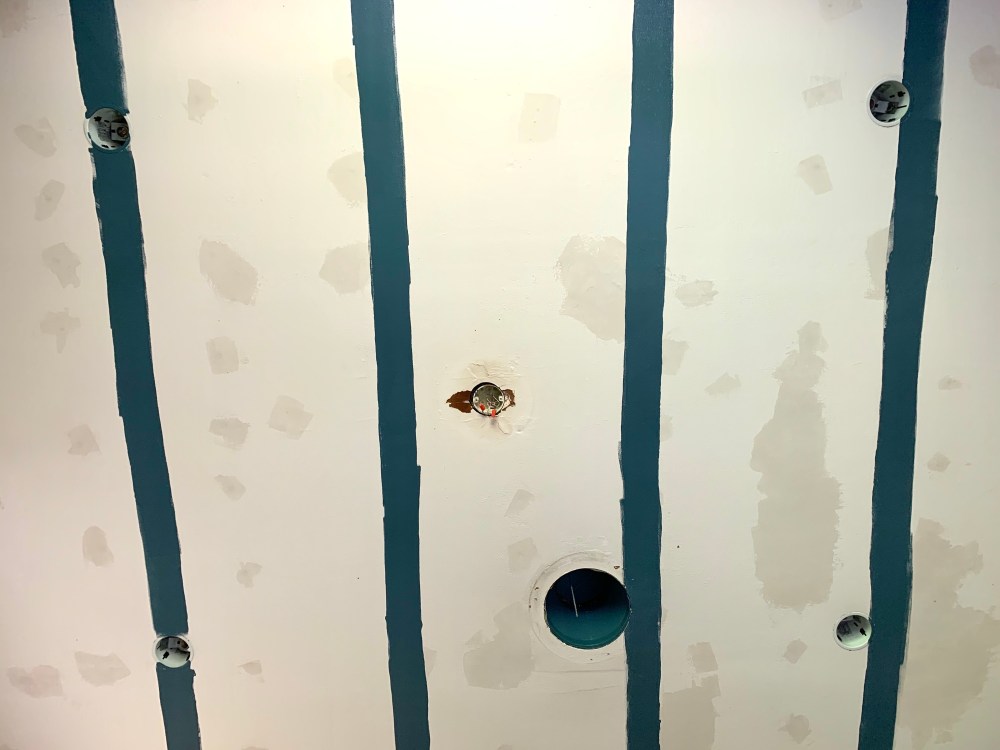
Now if there are any gaps between the paper the blue will show thru instead of glaring white ceiling.
Pretty clever, I know.
Except that I forgot that I just painted over my primer – the seams are where I want the paper to stick the absolute best.
So, one more coat of sealer/primer.
And another 3 – 12 hours of drying time.
Day #3
I made another blue chalk line thru the center of the first painted blue stripe so I would have a straight edge to line up with. Blue chalk line on blue paint. Who saw that one coming? Hmmm,
Everything I read/watched said to dry-fit a run of paper first, leaving several inches on each end to trim off later. Sounds easy enough.
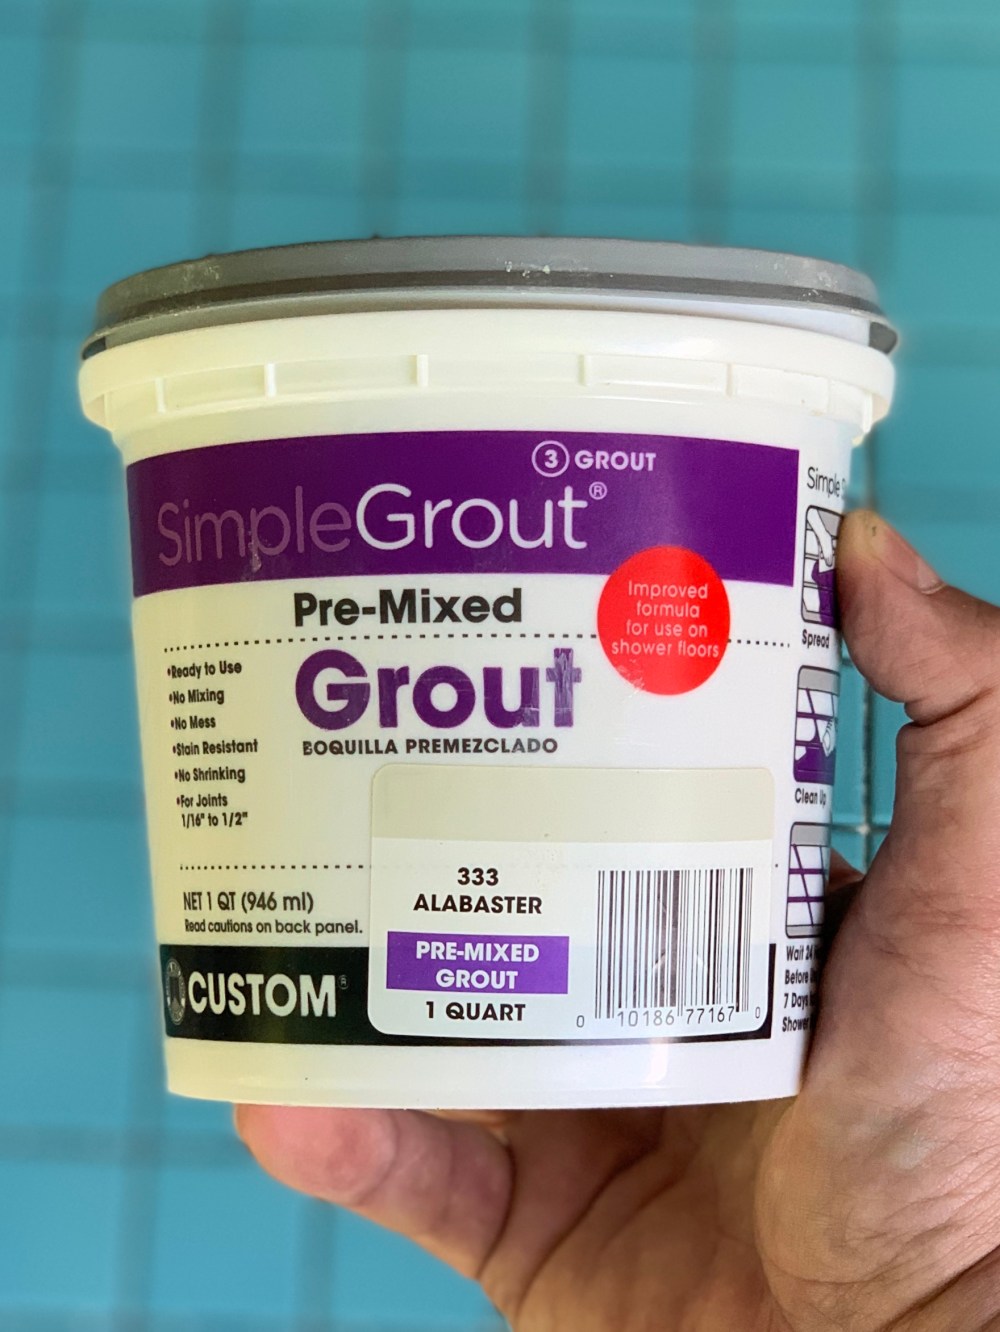
Next spread paste on the backside, folding the wet sides together, and let the paste “cure” for 10 minutes. (There is no mention of “curing” in the directions on the paste can)
There’s no way this is a one man job, so after negotiating with Jamie (My attention to detail makes me an amazing art director, but unfortunately not so much fun to work with), he stood behind me holding the wet paper. We climbed onto the scaffolding and slowly lay the paper across the ceiling with the wallpaper brush. Everyone else, and I mean EVERYONE in EVERY video I watched, was able to slide the paper slightly to make adjustments.
Not me.
It stayed exactly where I put it the first time.
Which, aside from a few minor wrinkles, and that it was sort of lined up with the blue line that I couldn’t see, looked ok.
The second piece is where shit got messy.
For this one we tried glue on paper – wait 5 minutes, and glue on ceiling.
Lining up the seams over our heads was much trickier than just matching a chalk line. Although we were able to slide the paper in place a little easier, my initial run was less than straight, forcing this run to be even less than less than straight. 20 minutes later we at least had paper on the ceiling….. and wallpaper paste all over both of us, and the paper. (Luckily it wipes off with warm, slightly-soapy water) All that tension combined with the heat from the work lights might have caused some sharp words to be exchanged.
And even after I promised to play nice.
At least this piece also looked….. ok.
Thank the maker I had the foresight to paint blue stripes first.
I unrolled the remainder of the double roll to cut the third piece and….
Have I mentioned what a “repeat” is?
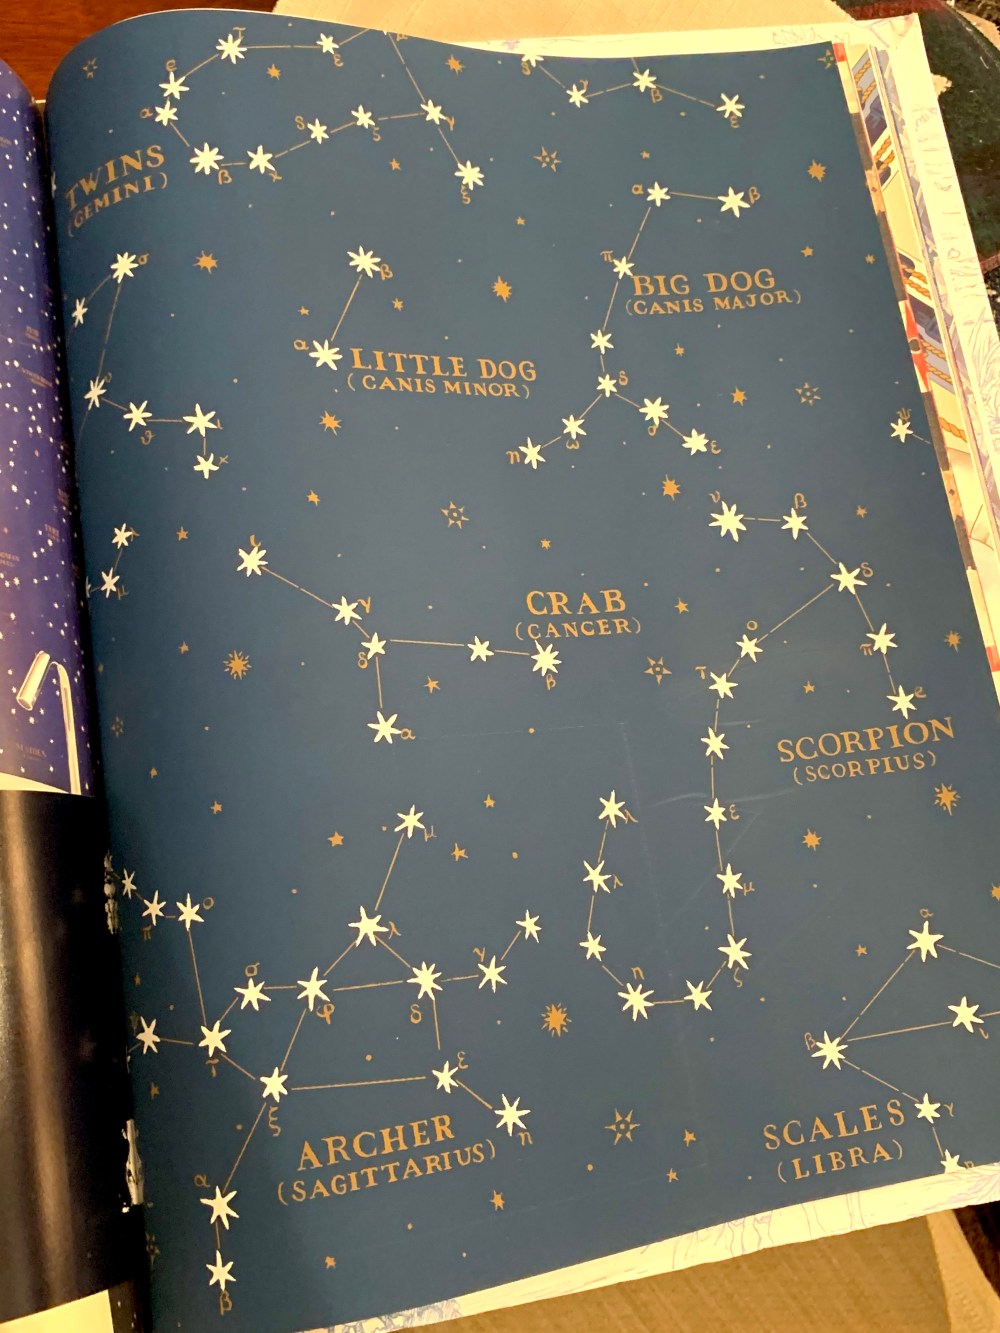
Pay attention, because I’m laying down some serious wallpaper installing wisdom right here. Every wallpaper has a repeat in the pattern so that pieces can be laid next to each other and the pattern continues seamlessly from one to the next. This paper has a repeat every 27 inches.
Over 2 FEET.
That means that I should have planned for at least 26 inches of wasted paper for every run.
I didn’t.
There’s a yardage calculator on the website where you plug-in your dimensions (12 feet X 10 feet) and it calculates how many rolls you’ll need (2 double rolls).
The fine print says to buy at least 10% extra to account for the repeat.
2 double rolls (33 feet on each) isn’t enough paper for 6 complete PATTERN-MATCHING runs.
The best I could get was 4… and about 10 inches shy of a fifth.
CRAP!
I’m not going to sugar coat it…..
This was that moment of extreme panic.
There was much saltier language than before.
If I order another roll it could take another 2 months to receive. We can’t live with the room torn up for 2, or more, months. We don’t have time to hire a profesional installer either; like I should have in the first place. I didn’t want to work this hard and have to look at a
big friggin’ patchwork-quilt mess,
GLUED TO OUR CEILING,
for the rest of our lives.
I closed the door and I made a stiff drink.
Day #4
After apologizing to Jamie and promising not to take any more of my frustrations out on him – seriously, there was no way I could finish this alone – just like Scarlett O’Harra, I put on my big-boy panties and made the best of the situation at hand..
I delivered Melanie’s baby without Dr. Meade.
We knew the formula to make the paste work and together we slowly put up two more runs. We knew that rest of the ceiling was gunna have to be whatever we had left over.
The last 10 inches of run number 5 is just a random piece that kinda matches up, and run number 6 is luckily only 4 inches wide. Three separate pieces, but still only 4 inches wide.
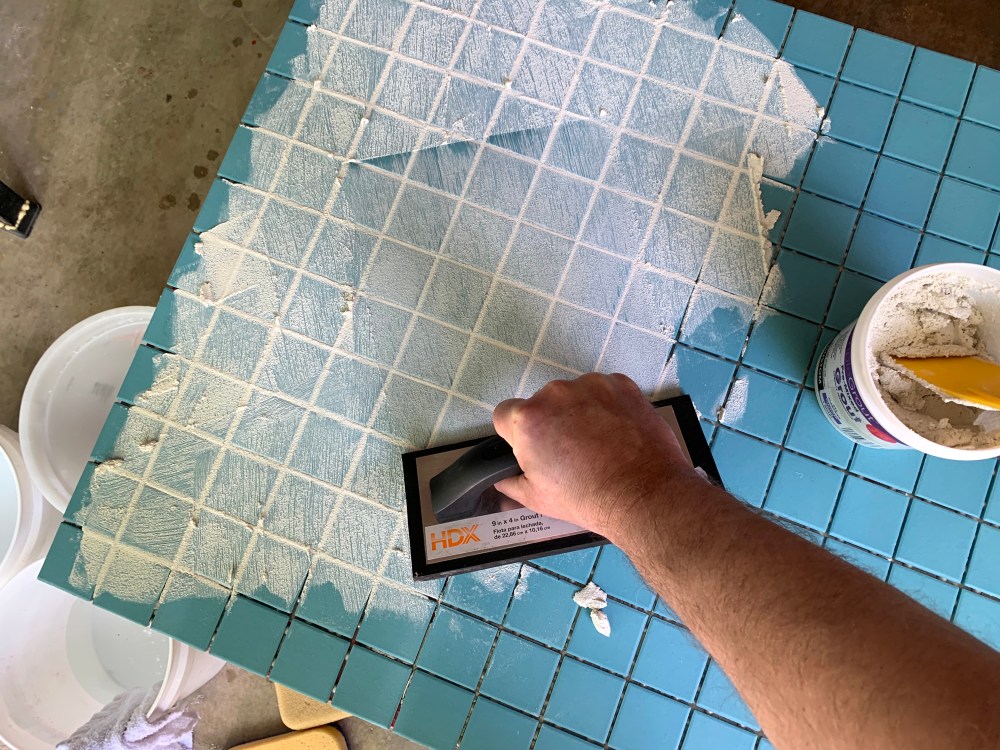
I spent the rest of the day trying to hide all my flaws:
- Painted the exposed edges of the paper blue, it’s white
- Glued down all those loose edges with Seam Repair
- Cut out stars with cuticle scissors and glued them over every star that landed on a seam
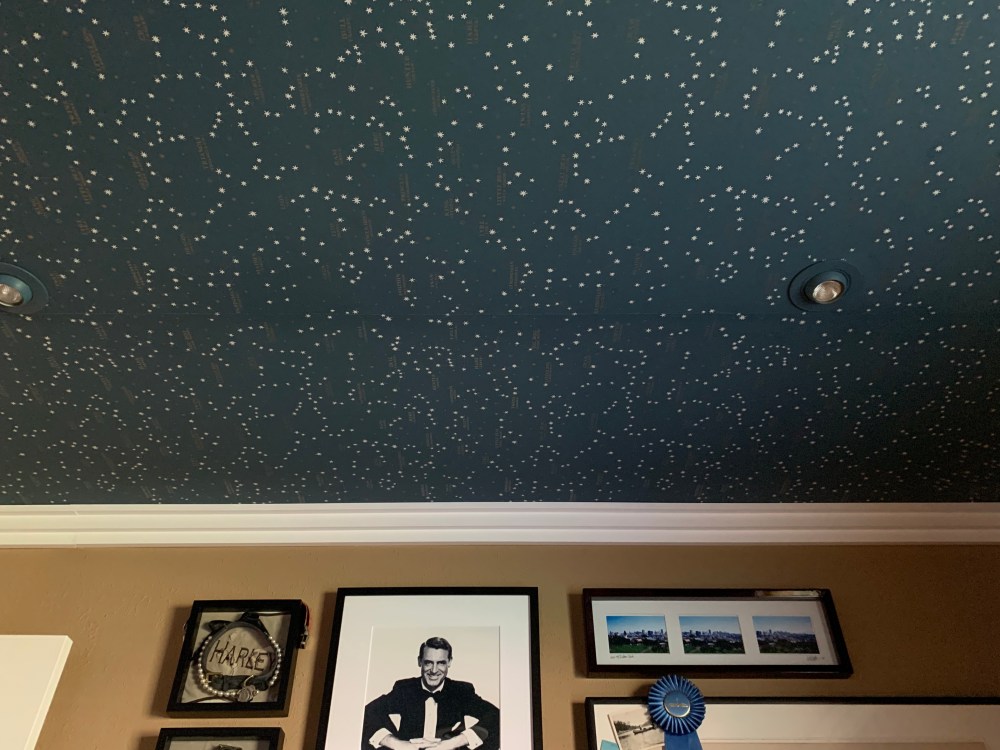
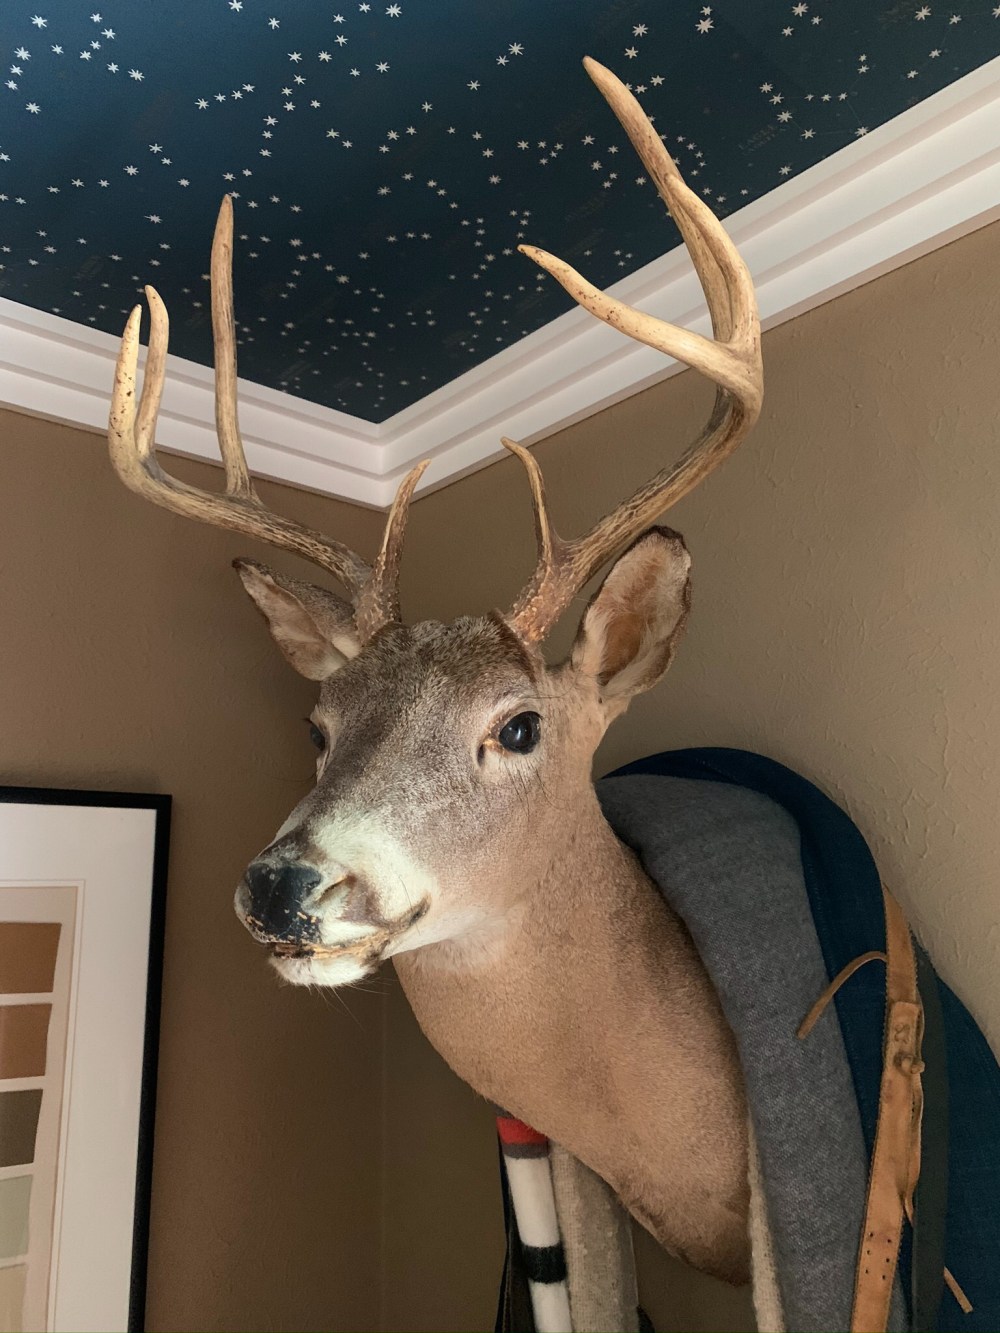
When I look at it now, after three days of cursing and pasting paper over my head, here’s what I realize.
- It doesn’t make the room look short.
- No one will ever notice the pieces I patched.
- It’s far from perfect, and that’s ok.
- The blue changes depending on the light
- The gold disappears depending on the light.
- The seams are what they are.
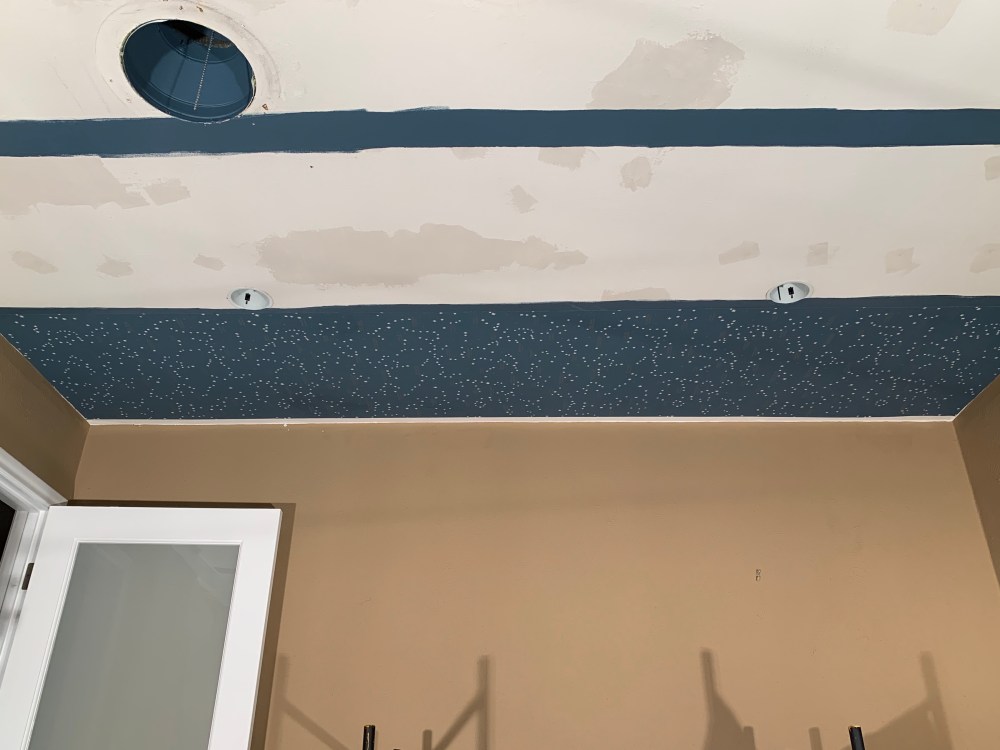
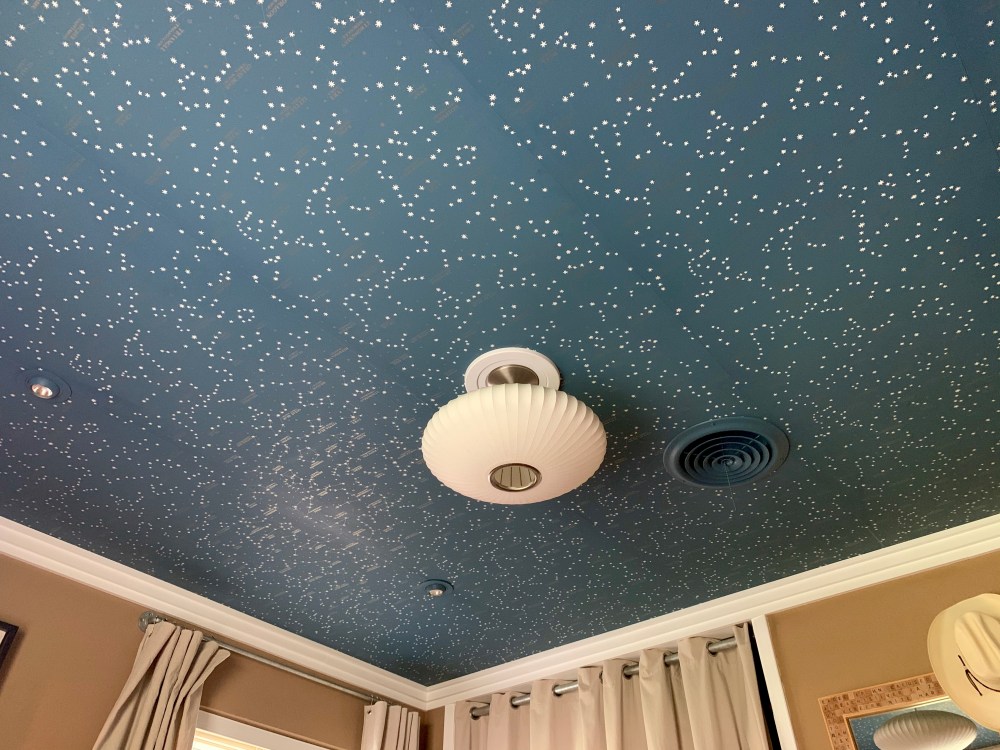
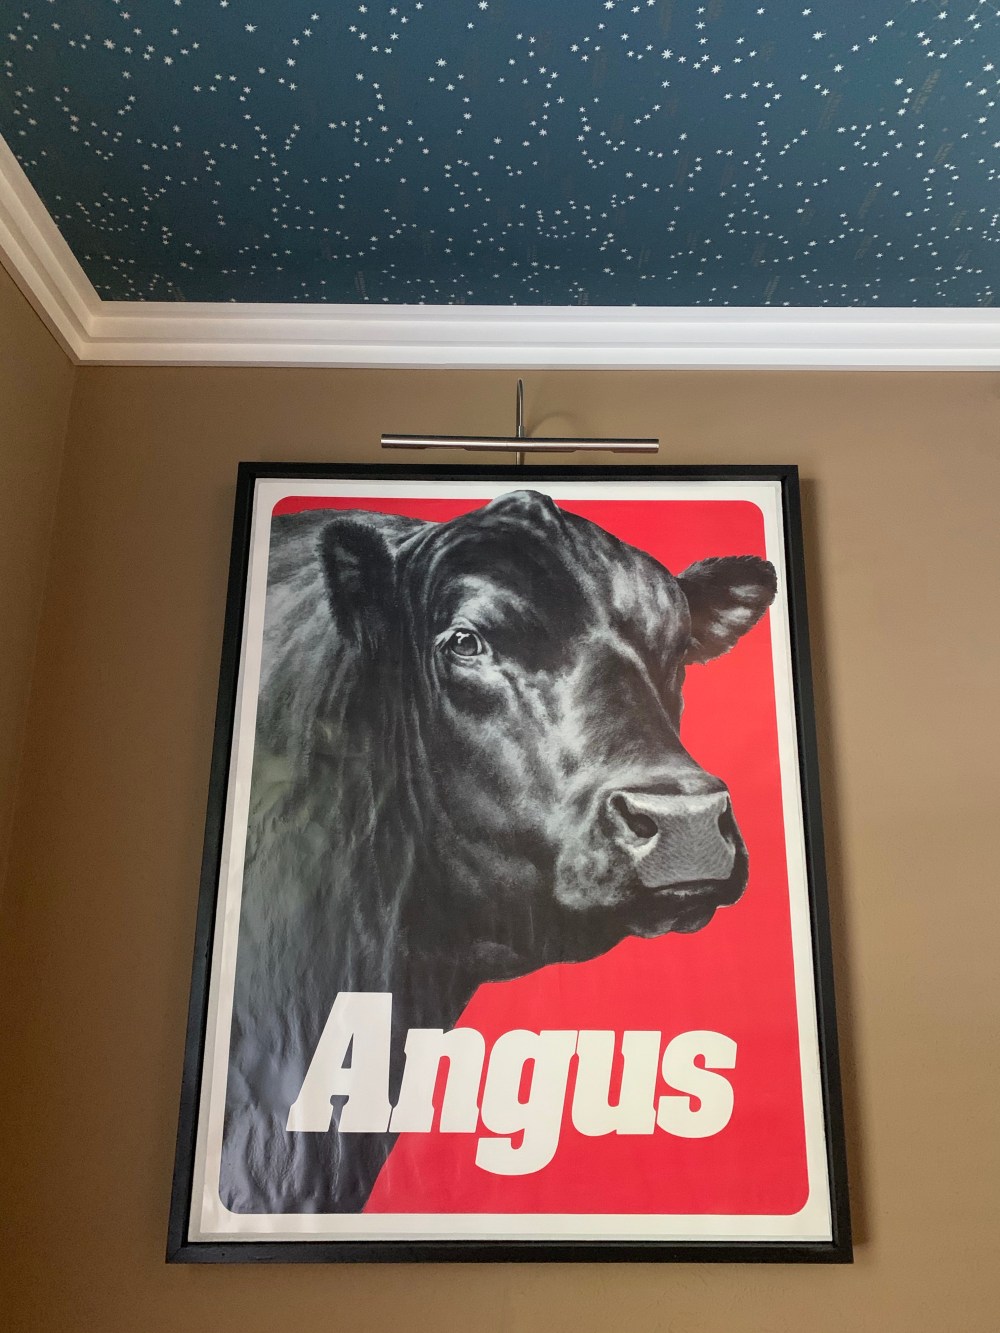
After even more internal debate, I decided to paint the light cans and vent cover to camouflage them against the blue paper. Y’all may have noticed earlier that I already painted blue up inside the air vent.
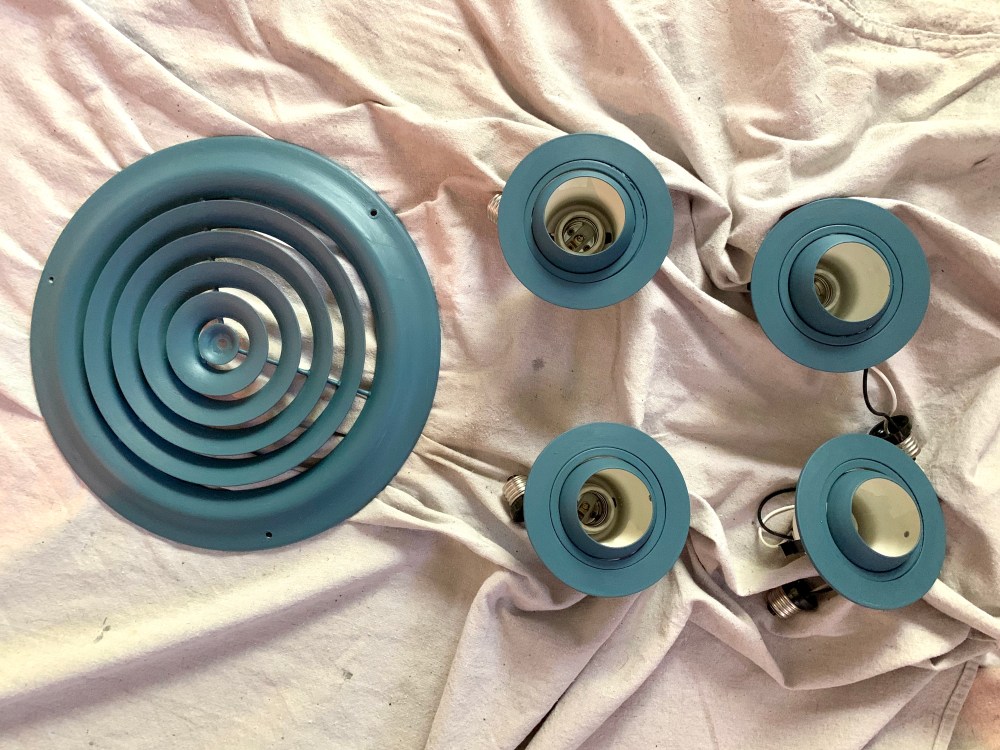
Glad I did too.
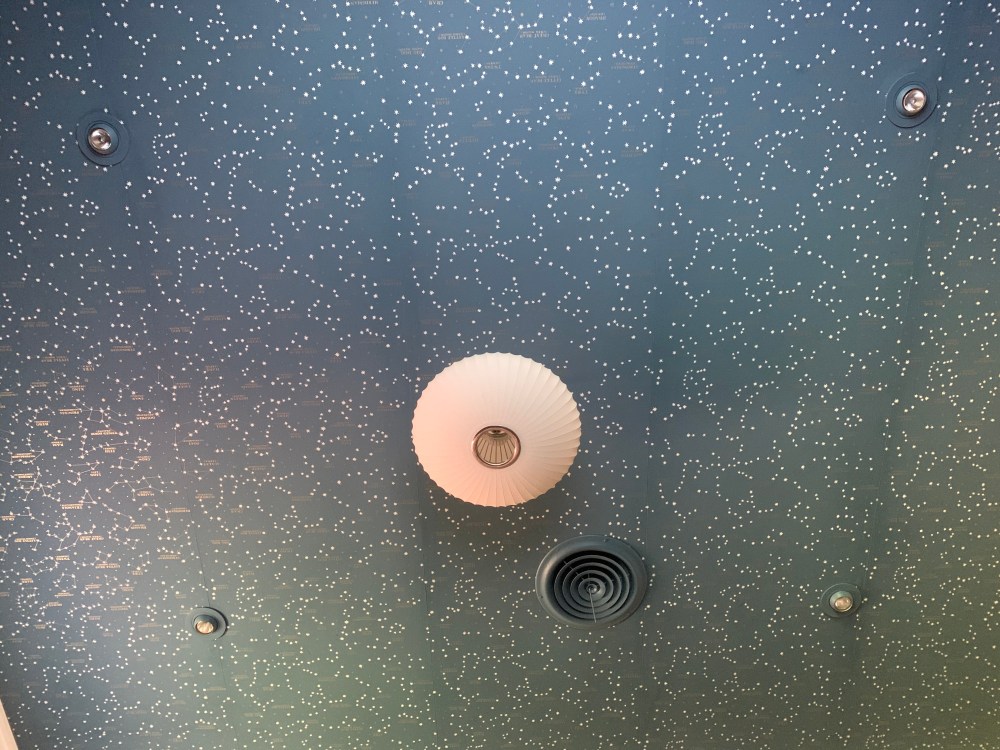
Best decision I made yet.
Day #5
Unfortunately, all that wallpaper paste slinging around the room really gunked up the walls.
What’s one more day to repaint the whole room?
Day #6
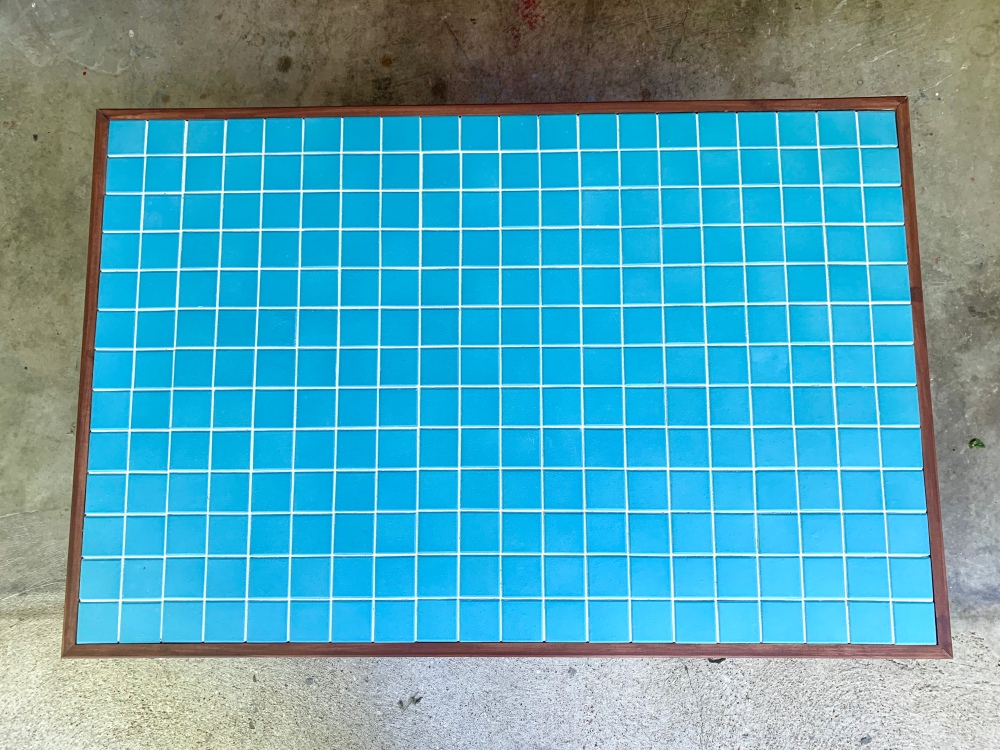
At this point, what’s even one more day to add crown molding too?
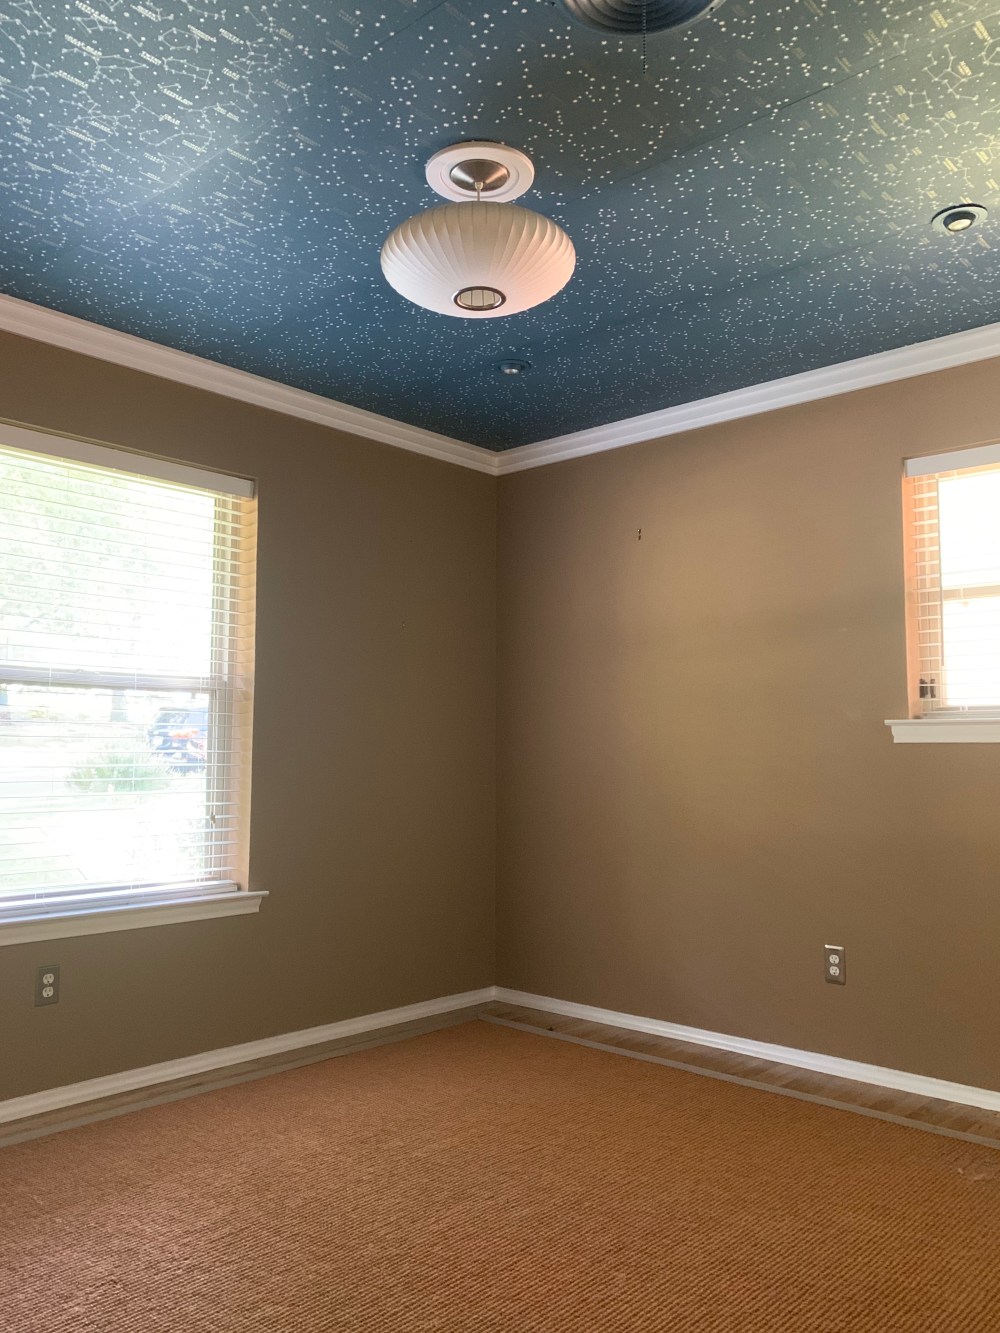
The crown seriously cleans up the edges.
My just-a-couple-hours project took a week.
Yes, this whole process was a tremendous pain in the ass,
(Exhale,)
But I think the end results are pure magic.
It really transforms the whole space.
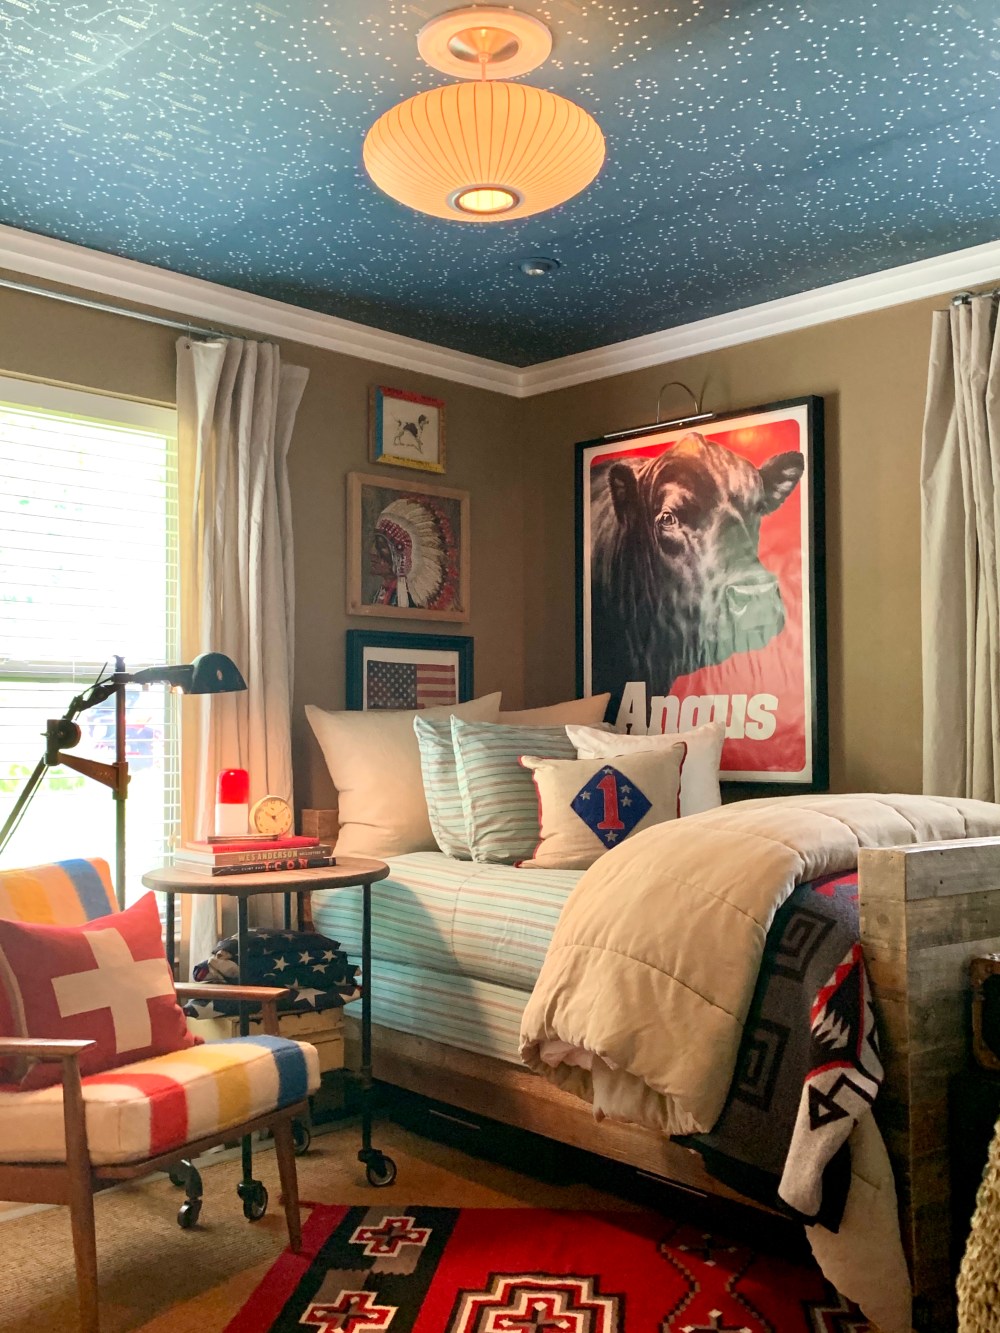
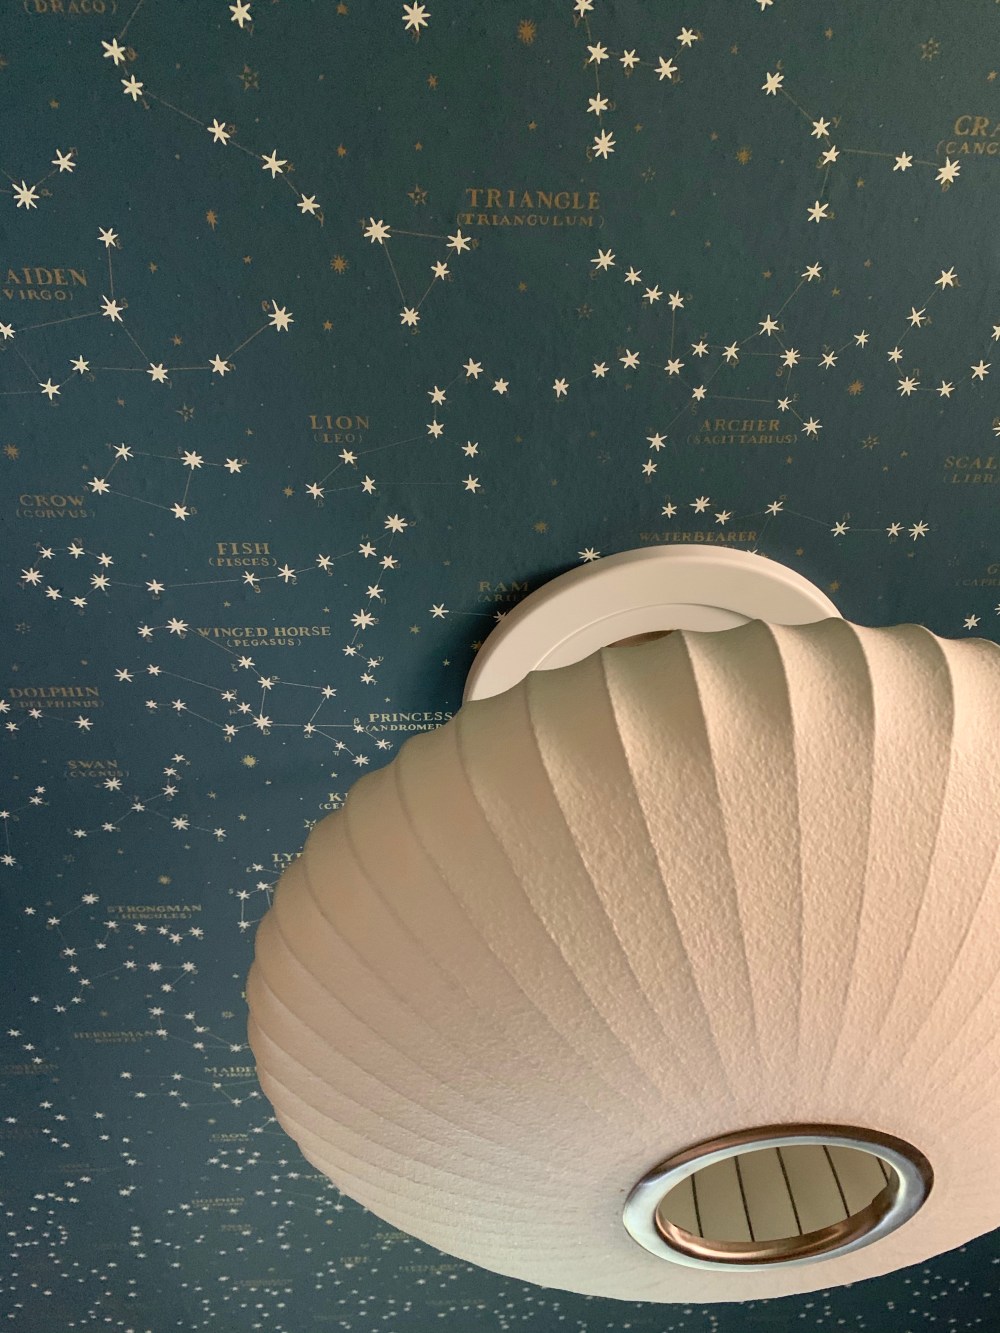
As it stands today, thanks to Boys Life Magazine, I can always find the Big Dipper/Big Bear – Ursa Major. It contains the North Star, and also points towards the Little Dipper/Little Bear – Ursa Minor.
I can usually find the Scorpion, my birth sign. And, of course, Orion – the Hunter.
I could find more when I was in grade school.
I would have lost it if this were my bedroom ceiling as a little boy…. falling asleep every night beneath Cassiopeia, and Andomeda, and Perseus just like our overnight guests someday will.
Did I mention that the stars glow in the dark?
Because they do.
Pure magic.
(Big pain in the ass that I’m never attempting again)
But pure magic.