
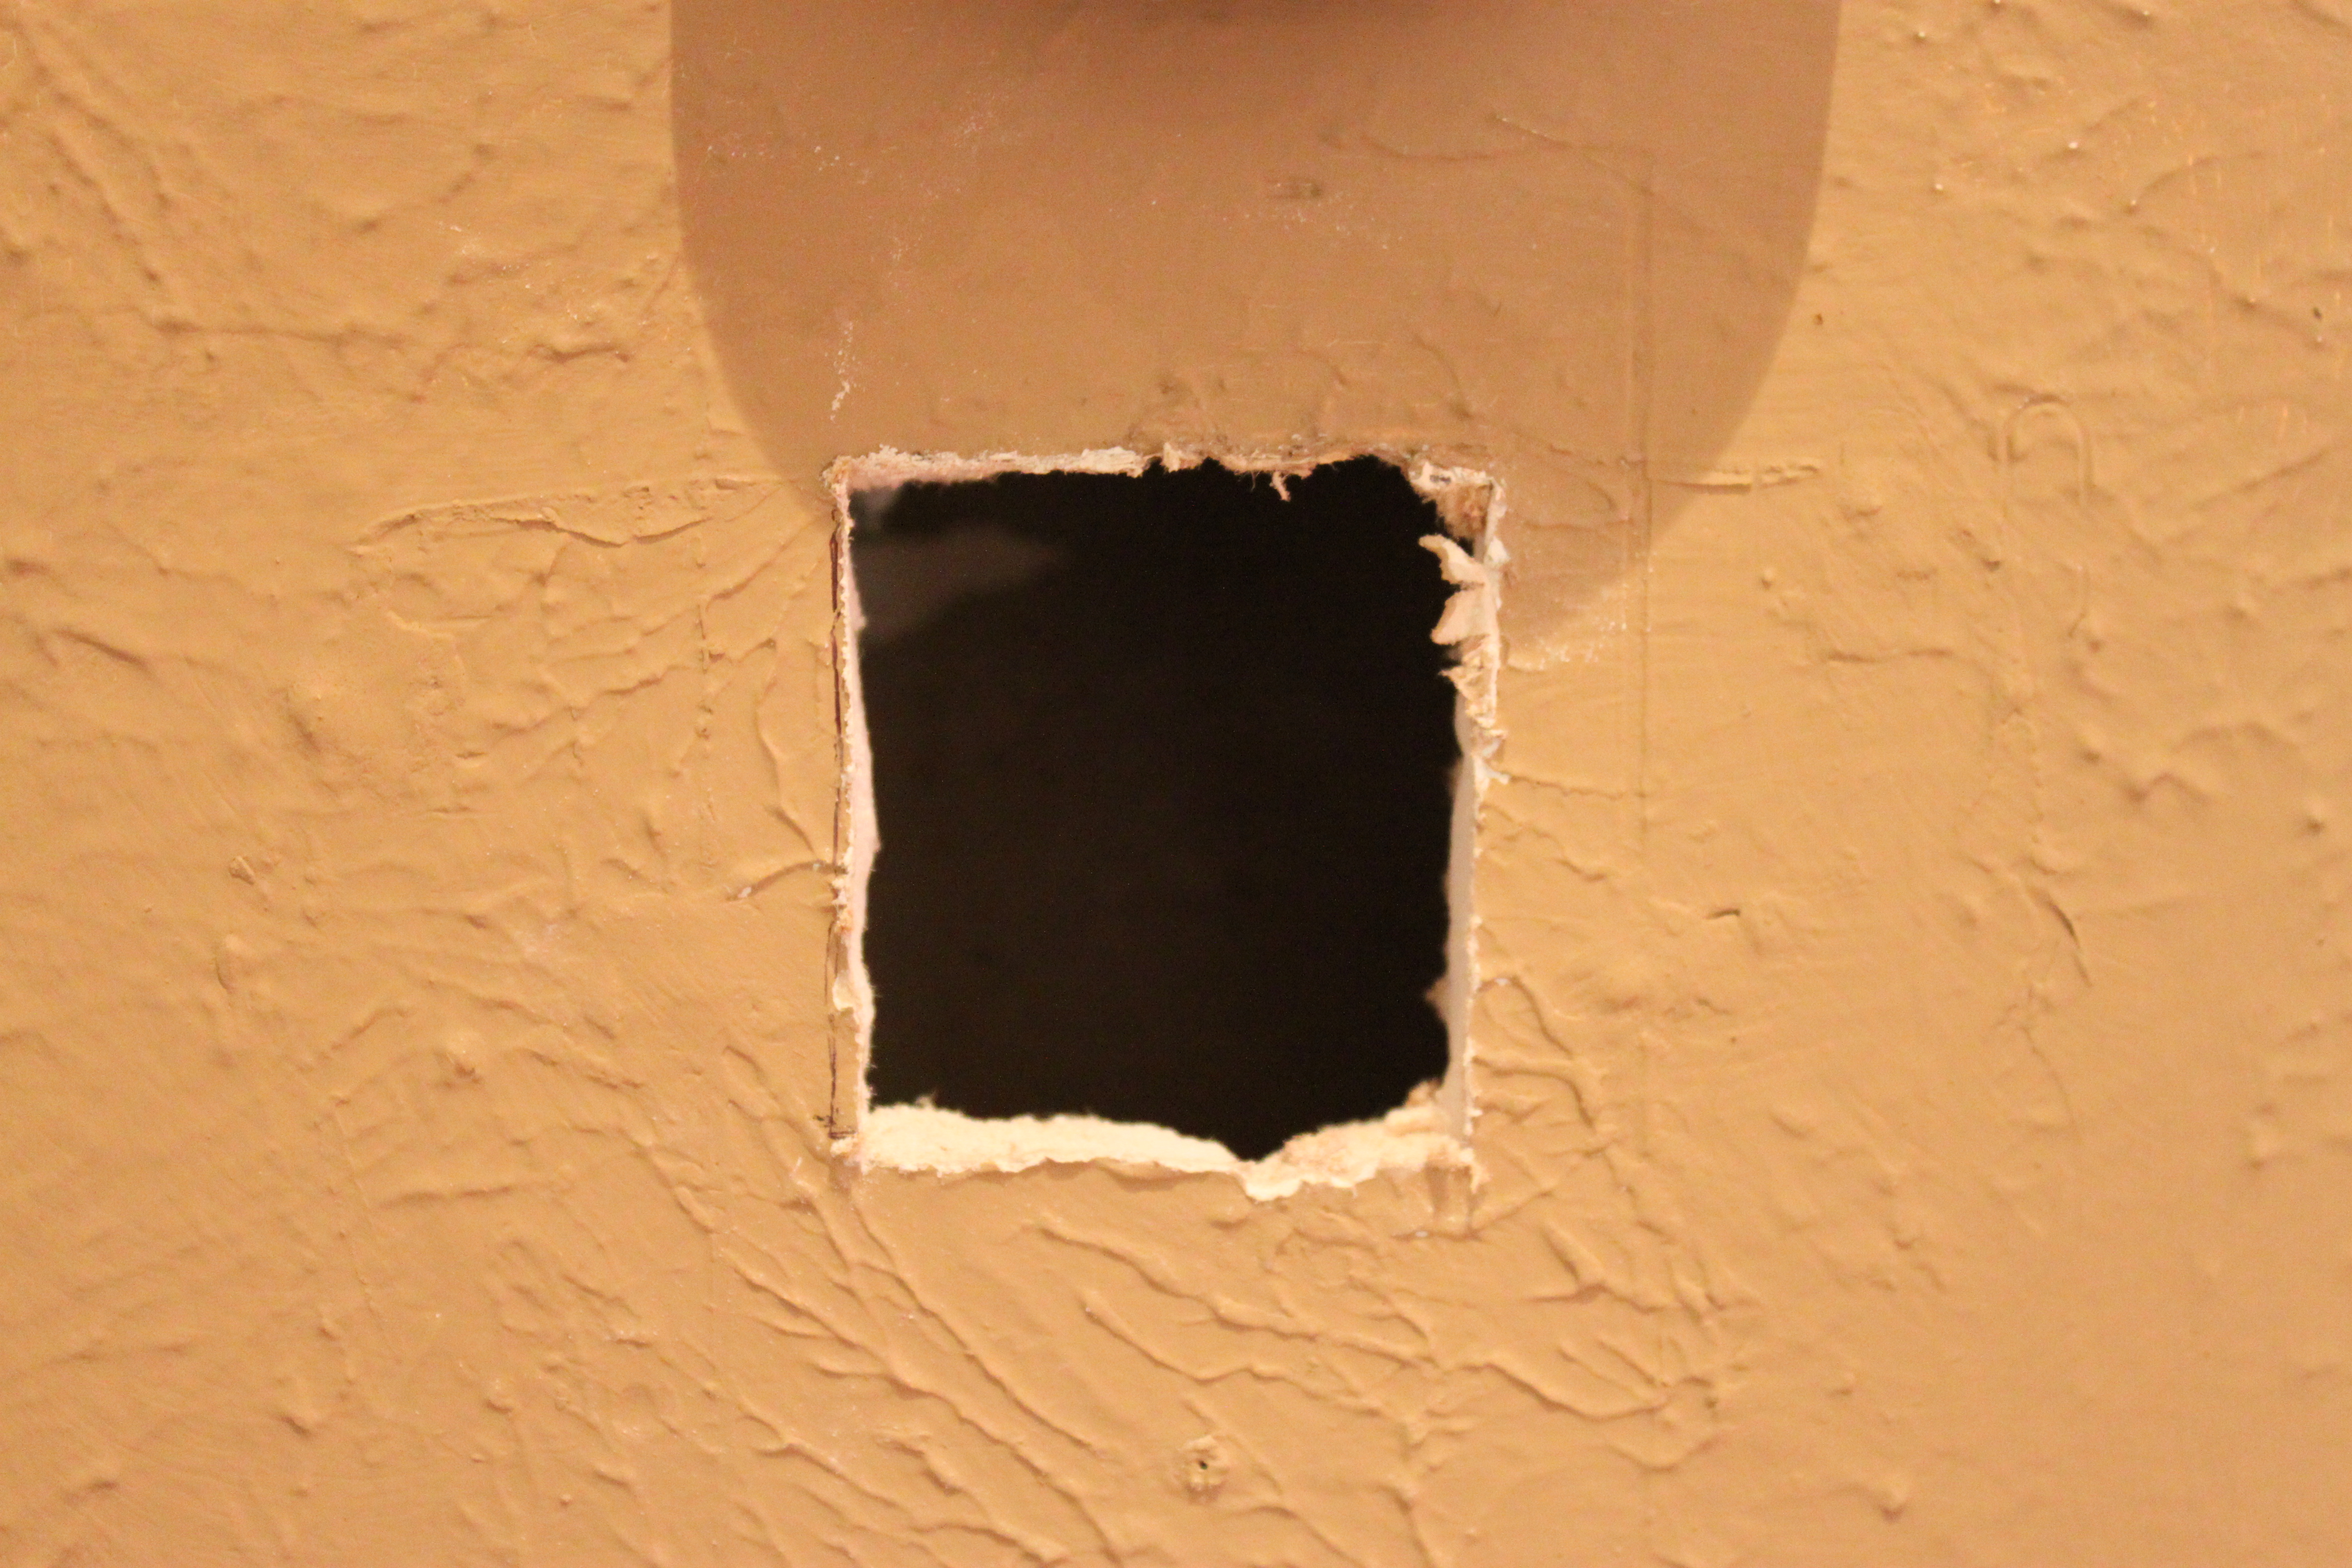
After Jamie upgraded the thermostat in the hall, we were left with a small reminder of the old one.
The gaping hole.
He had to move the device up on the wall because the “swiss cheese” like area where the old one had been didn’t look like it had the integrity for one more hole.
I started by making the hole a bigger, semi-perfect square with a serrated steak knife.

I left an opening that is just slightly over 2 inches square.
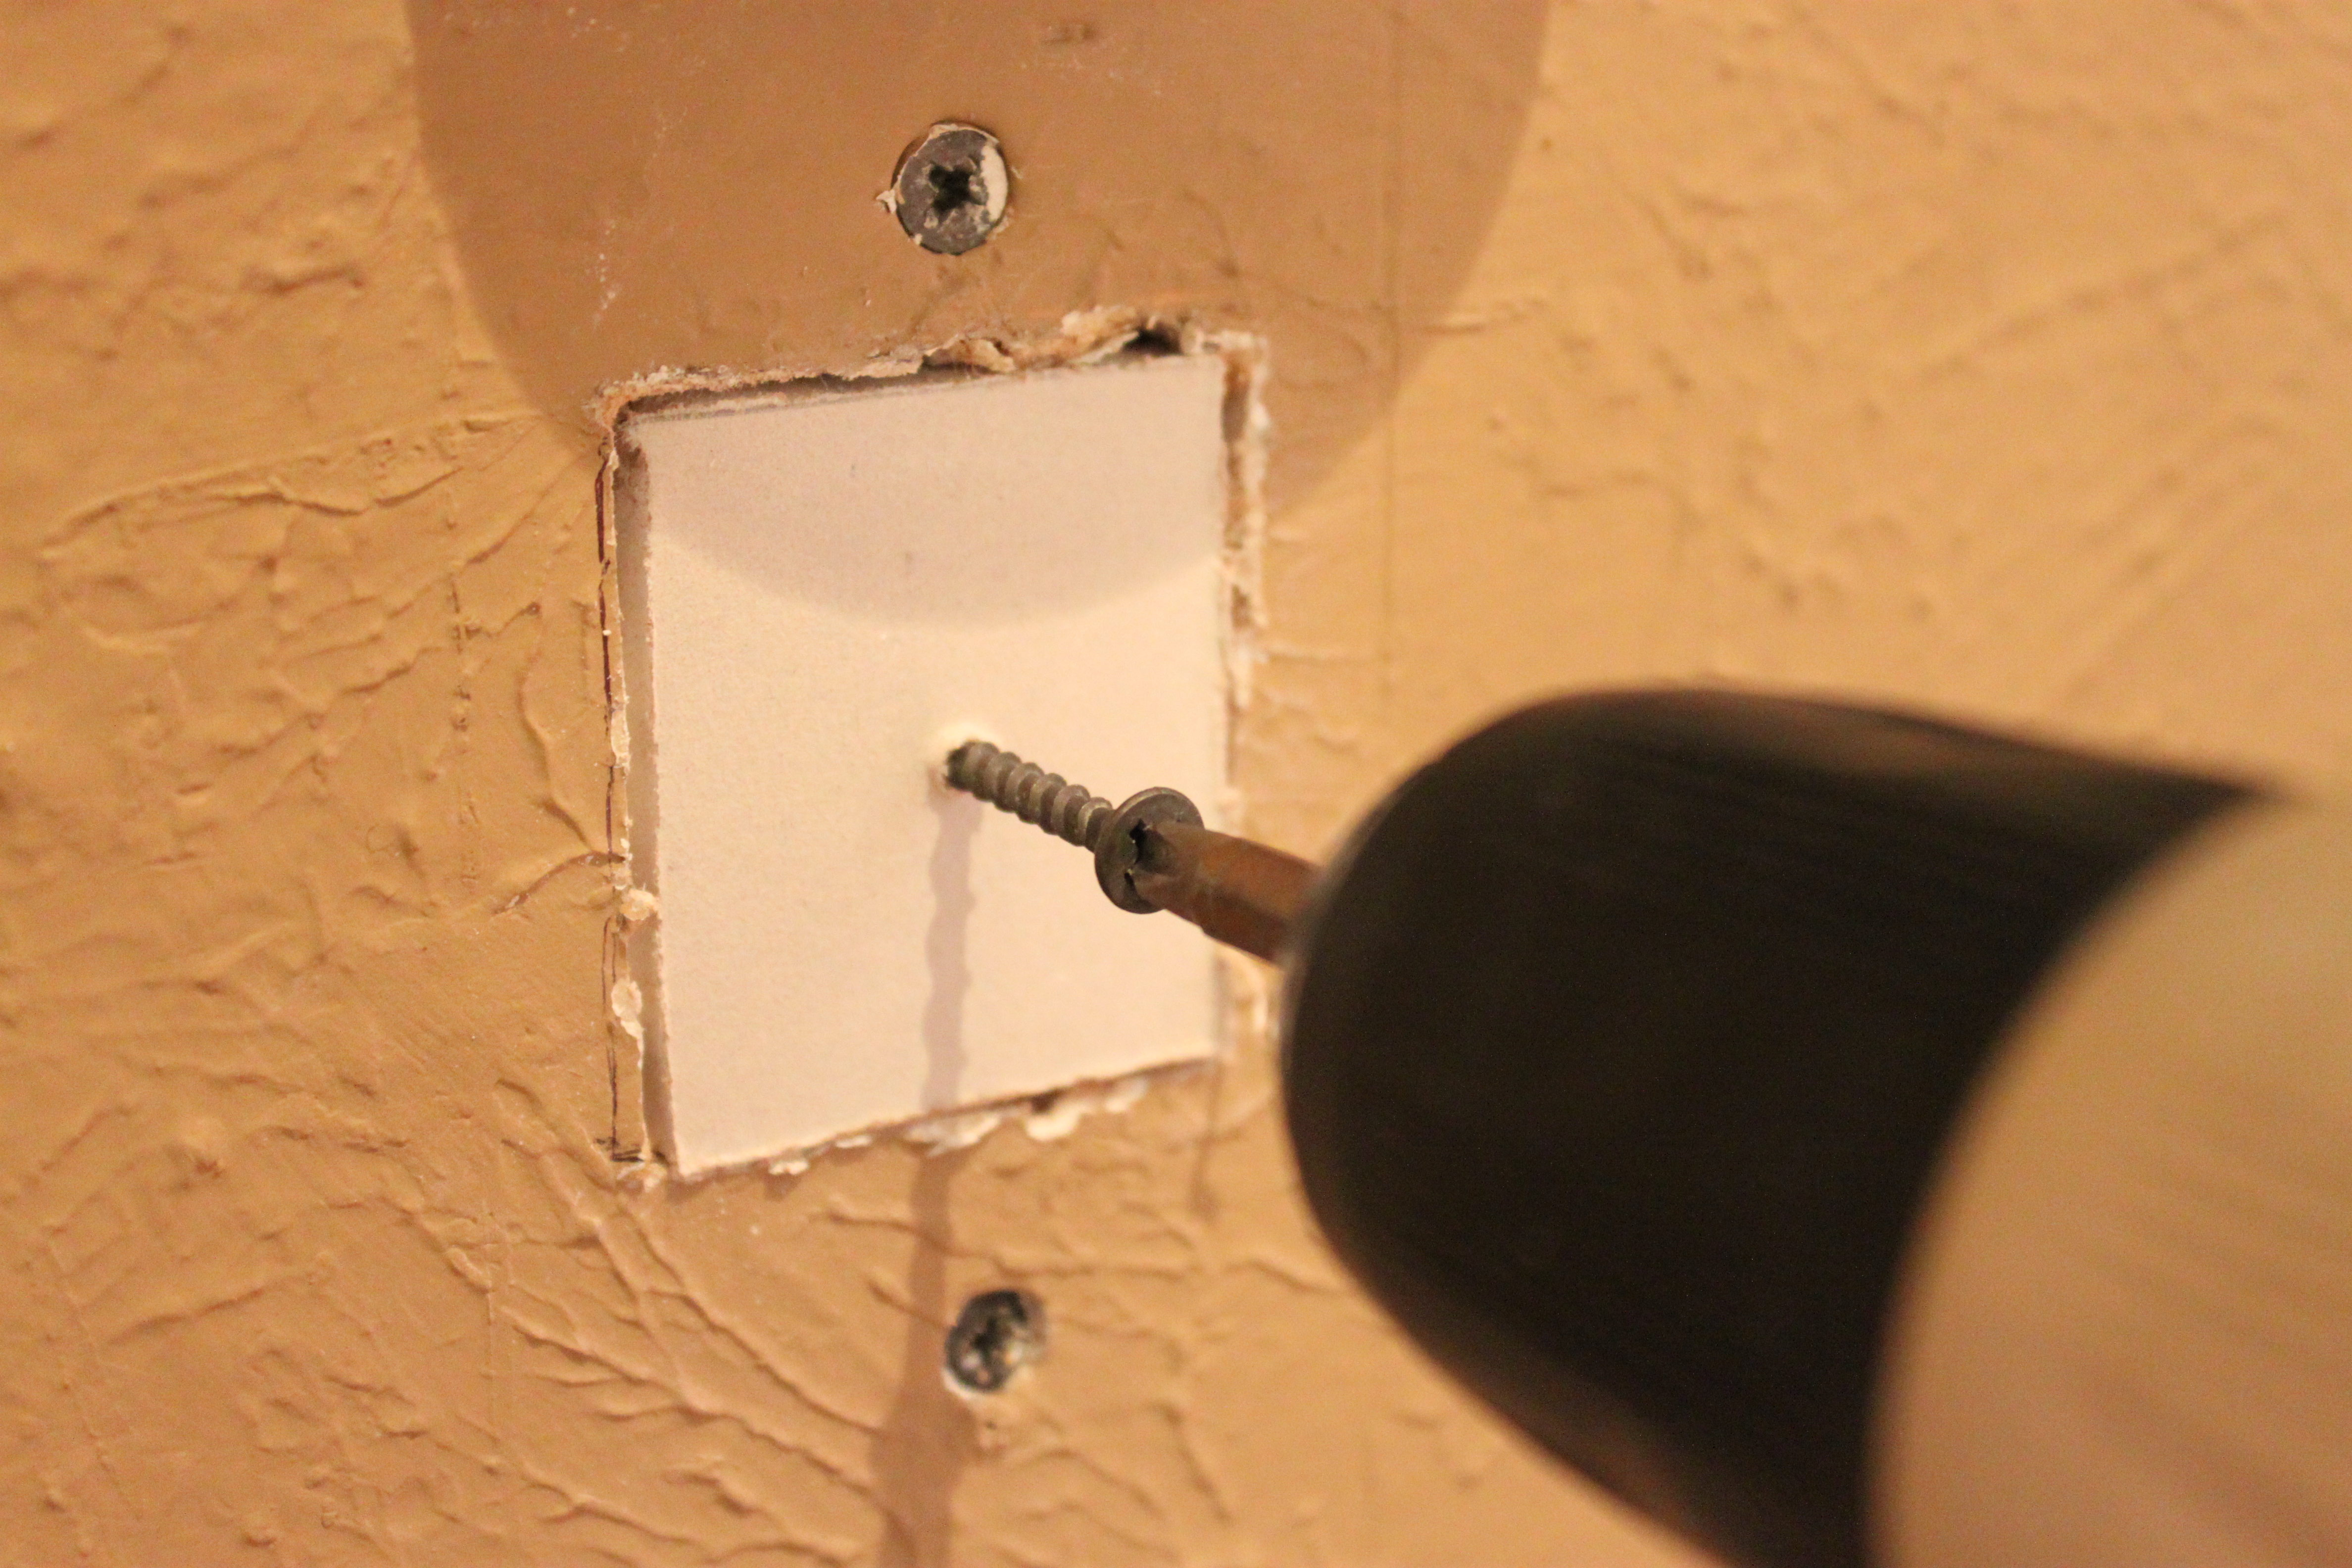
We had a small piece of drywall in the garage, so I cut a simple 2 inch square for my patch. Also with a steak knife…and we wonder why they are always so dull.

Here’s the trick to keeping it all in place. I used a scrap piece of cedar to mount behind the hole, inside the wall, and screw my drywall square into it.

With a drywall screw loosely in the cedar piece, a few inches near the top, I inserted it into the wall and used the screw to hold on to it and pull it close to the wall. Then I screwed more drywall screws at the top and bottom to hold my cedar scrap in place.
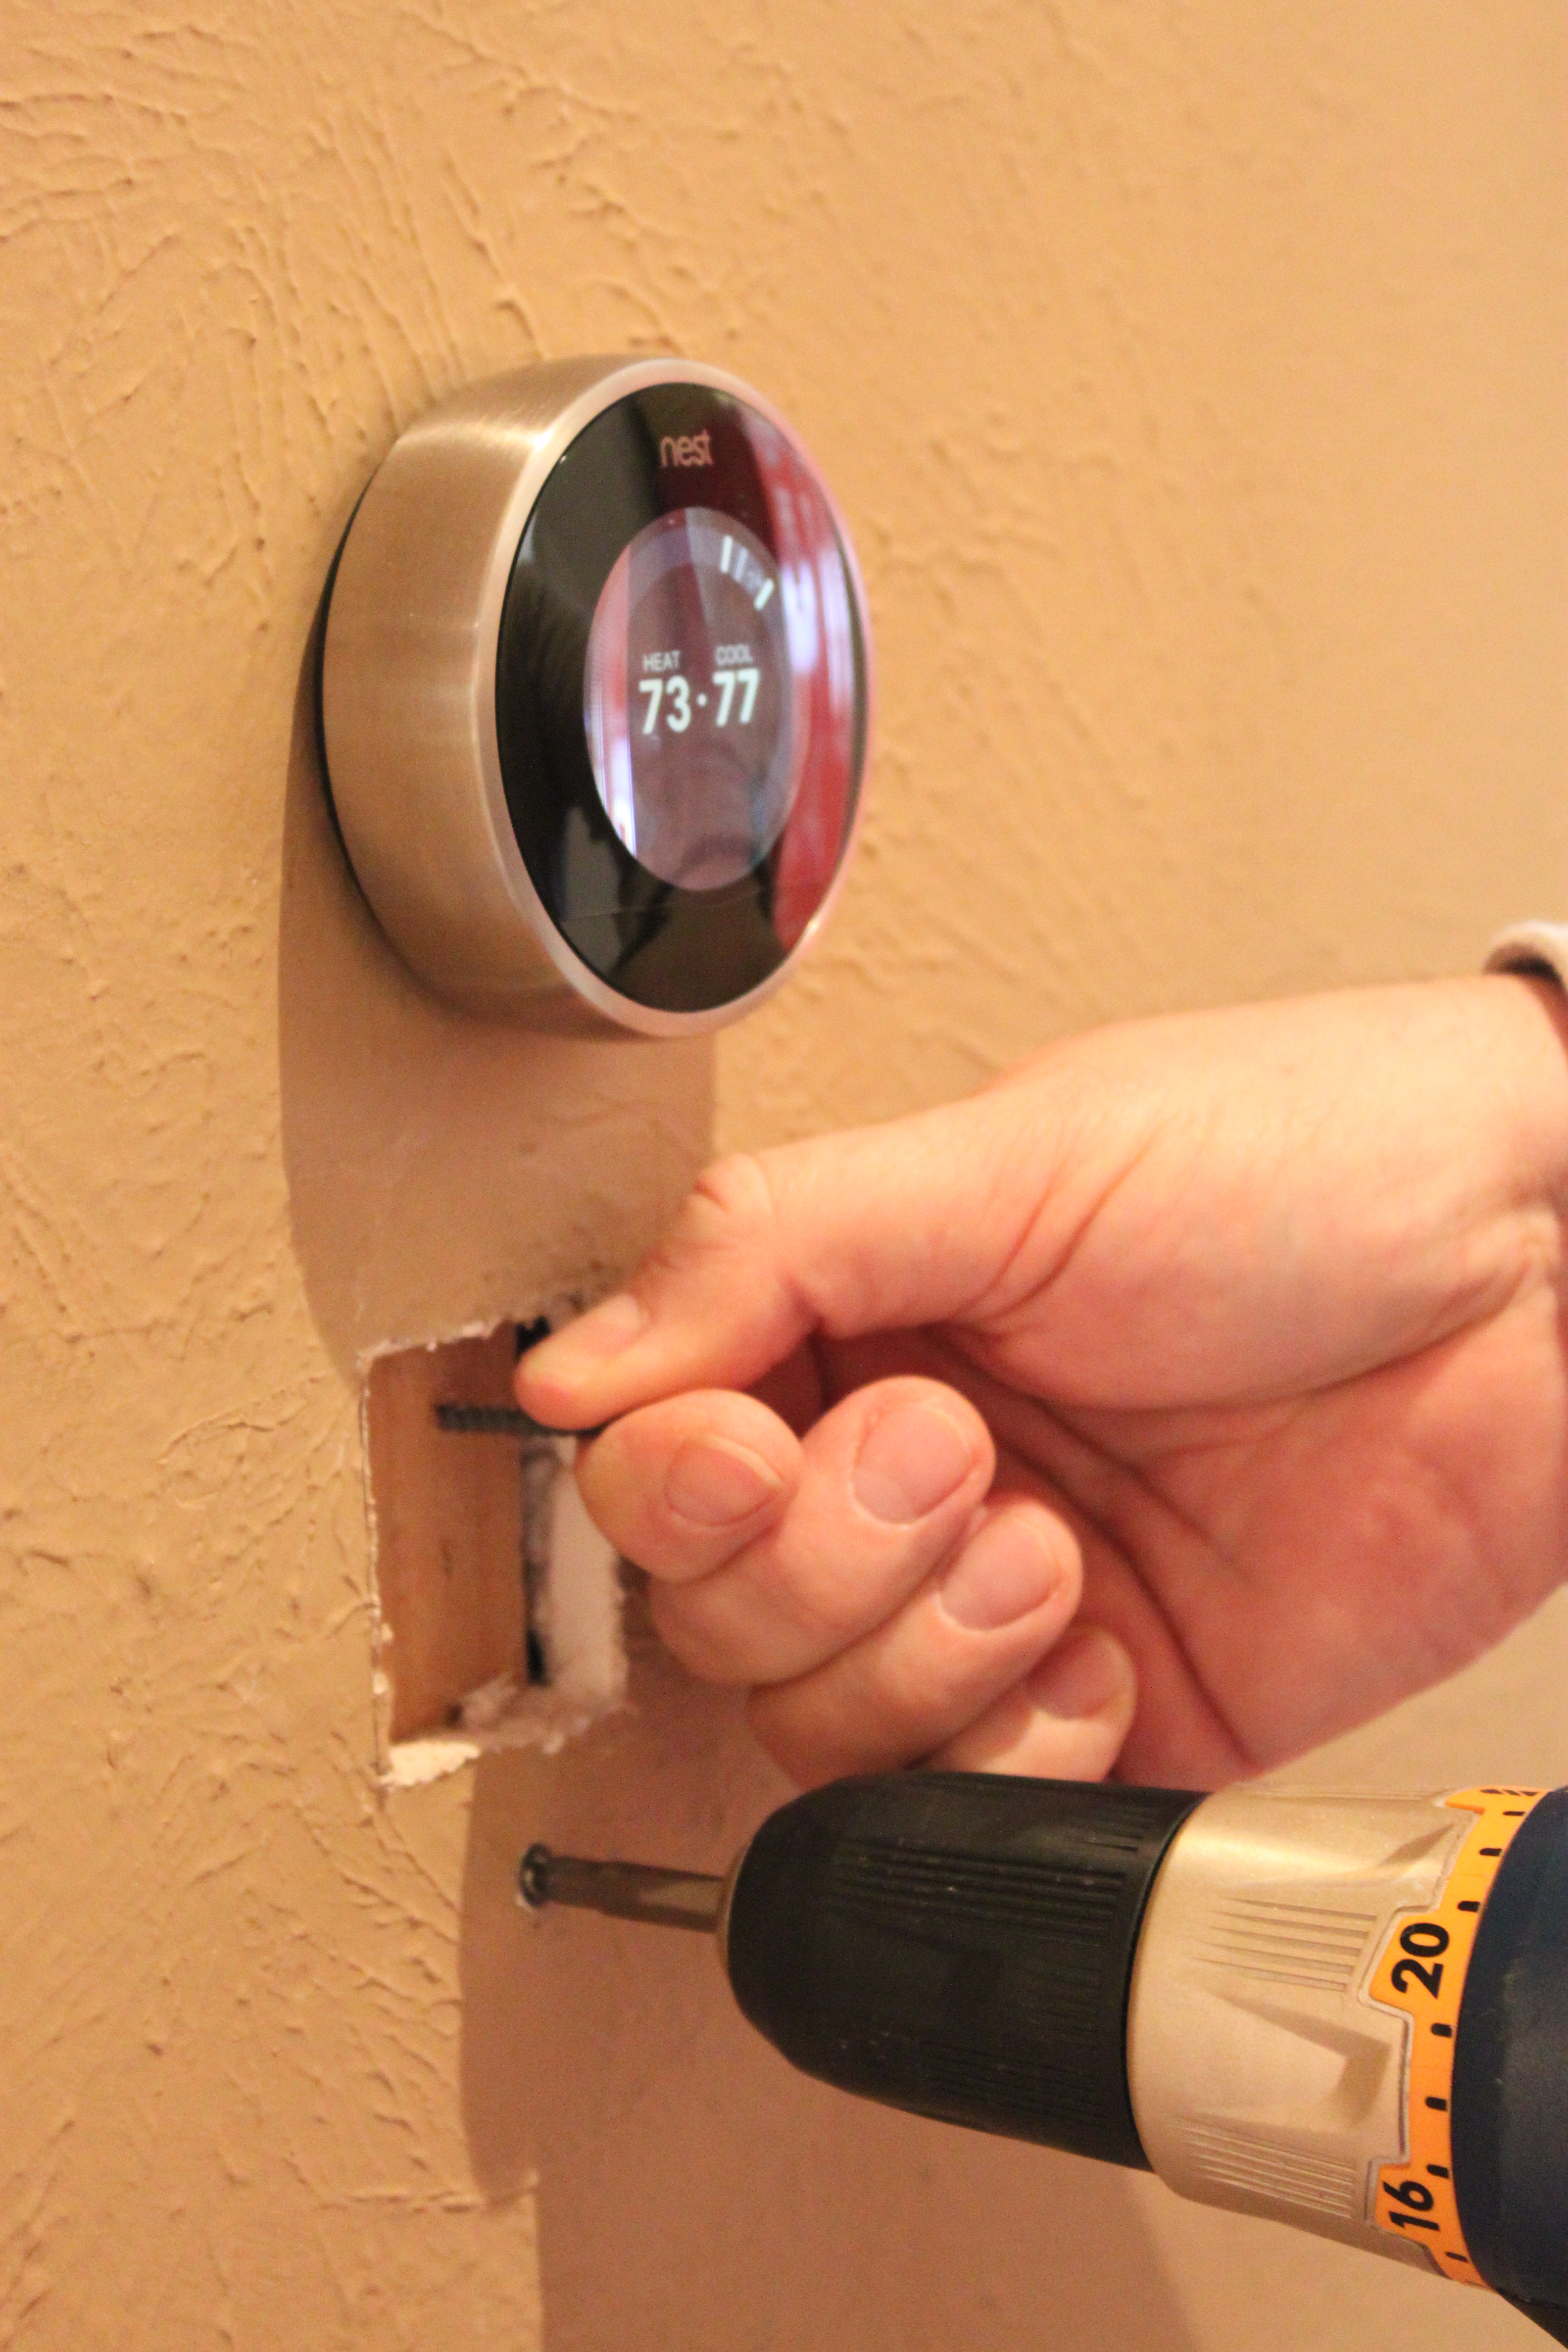
Cedar is pretty soft, so it’s easy to screw into. Make sure that the screws are sunk slightly into the drywall of the wall.

Then I screwed my patch piece into the cedar support…again making sure to sink the screw.
Pretty simple so far…..

A light spread of spackle with a putty knife will hide everything nicely….
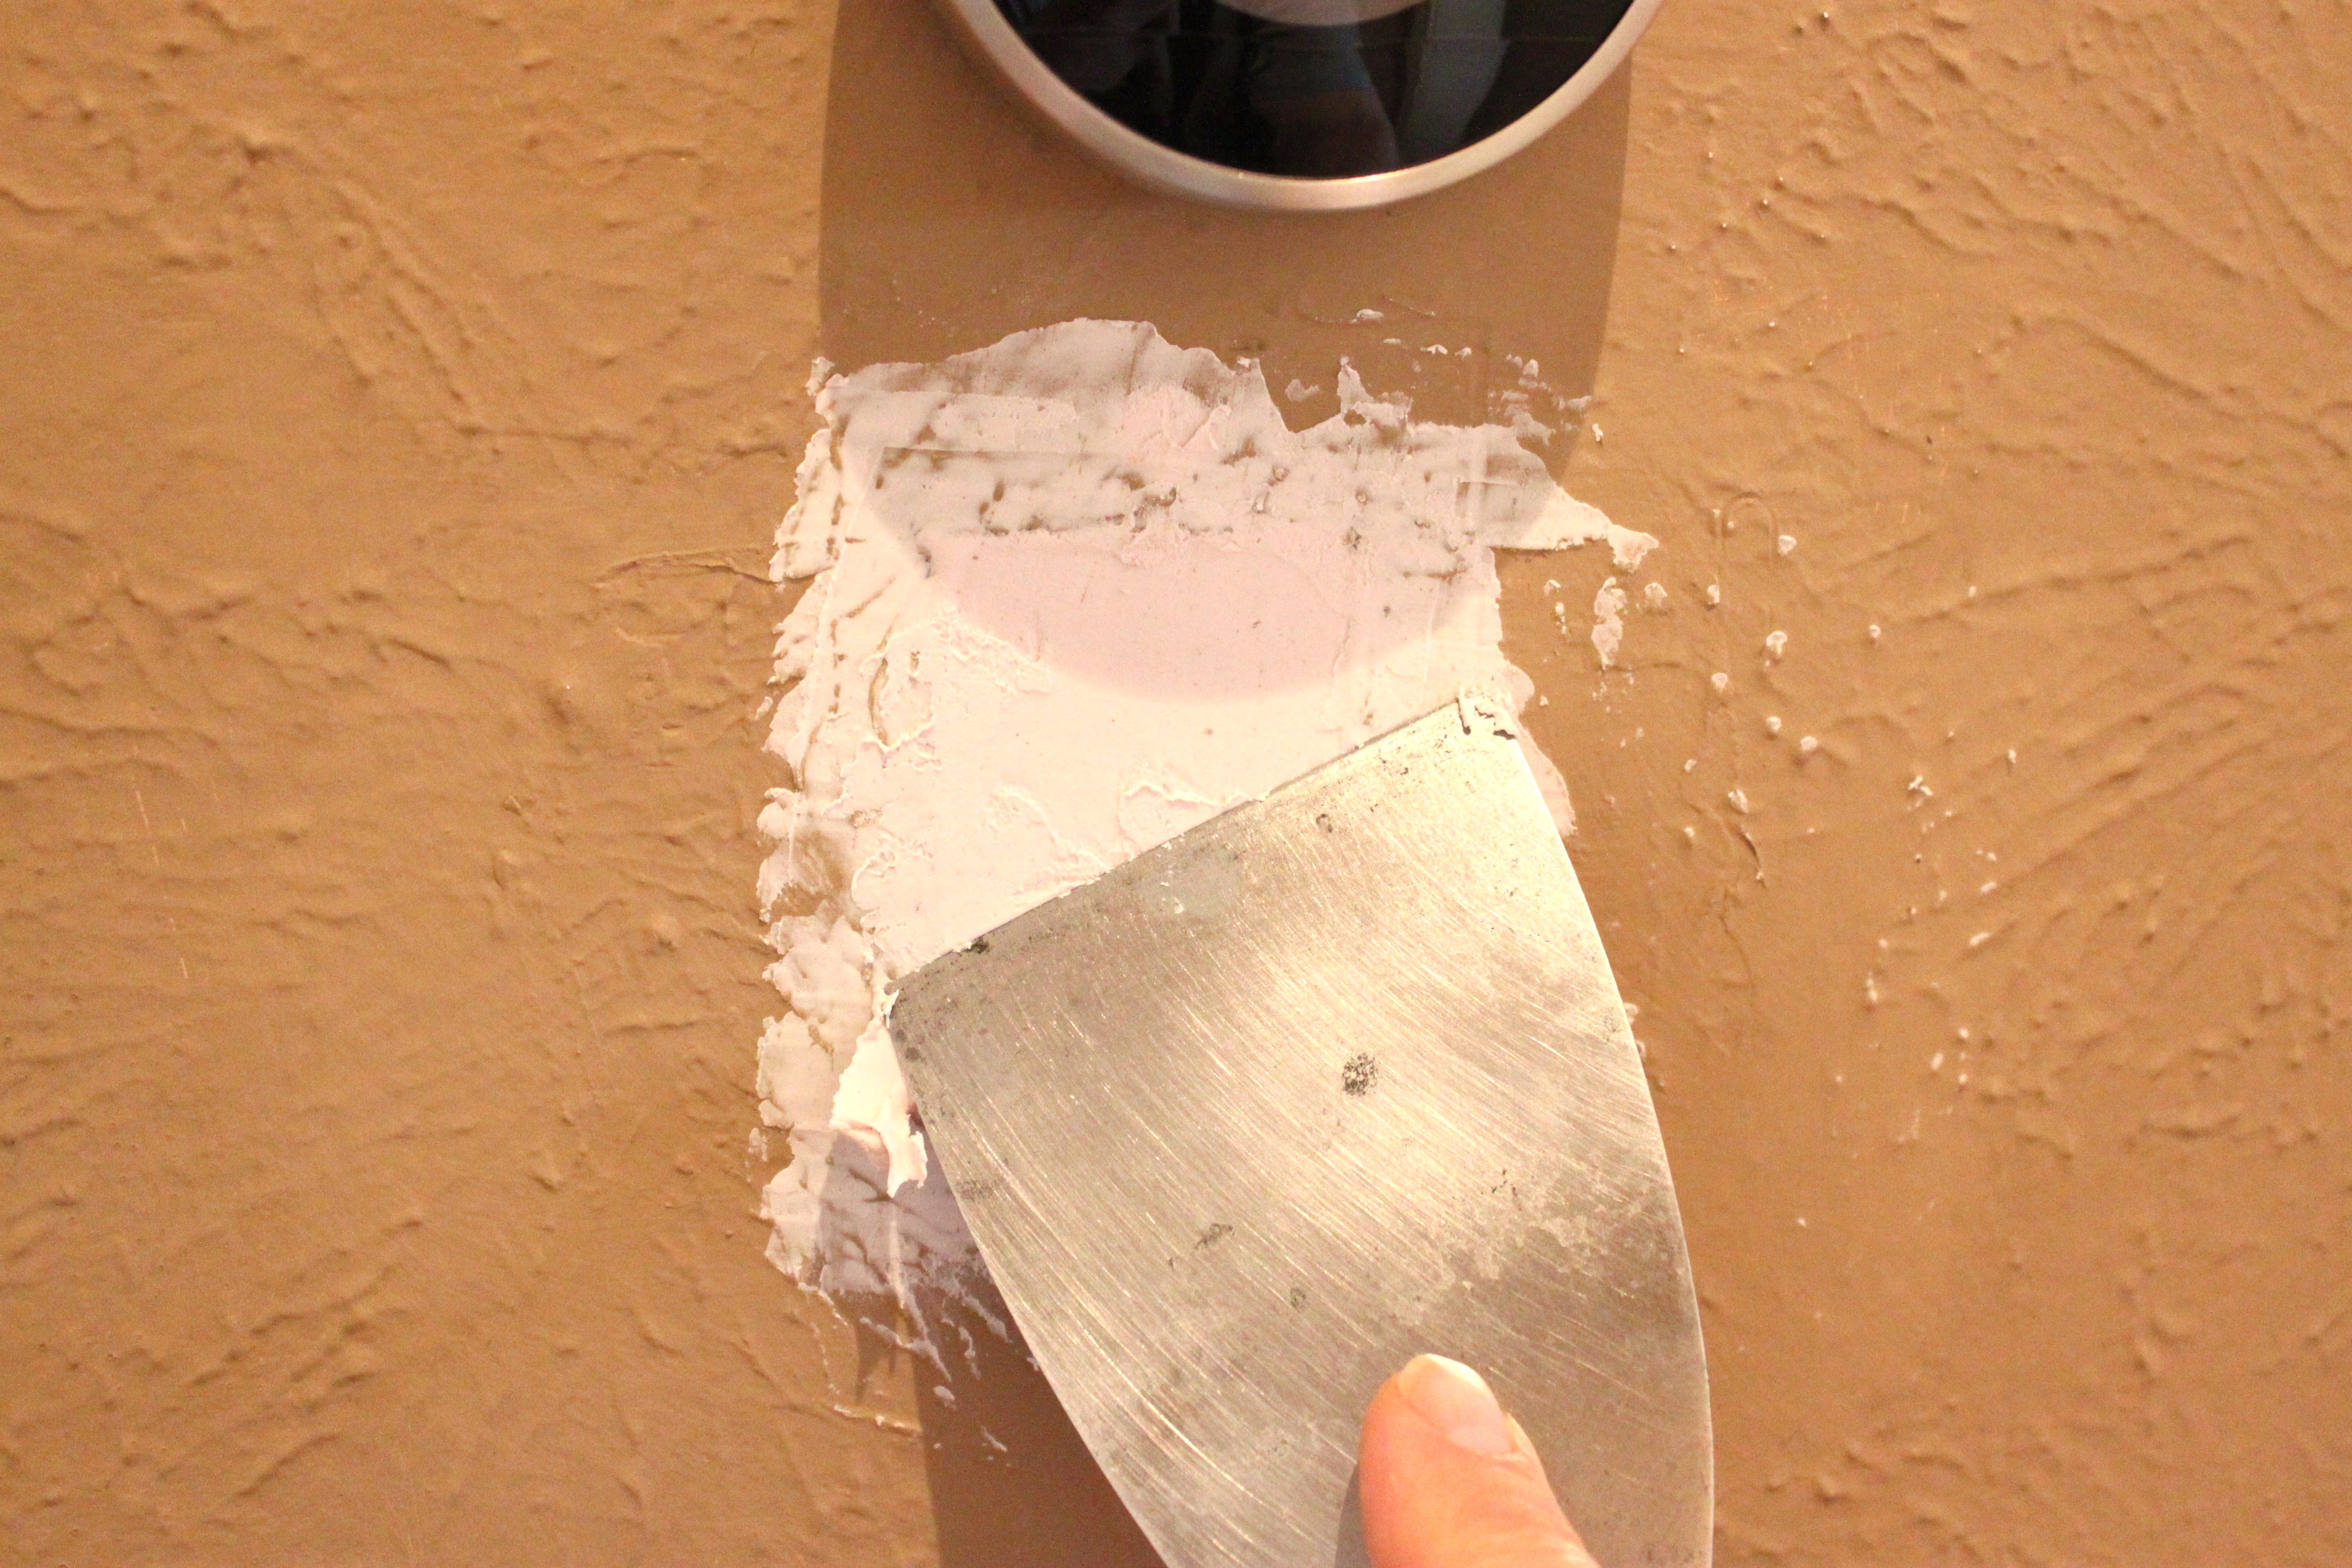
See?

Now for the second part of our illusion.
To match the “crow’s foot” wall texture, I use a moist sea sponge dipped in joint compound……….and just dab it on.
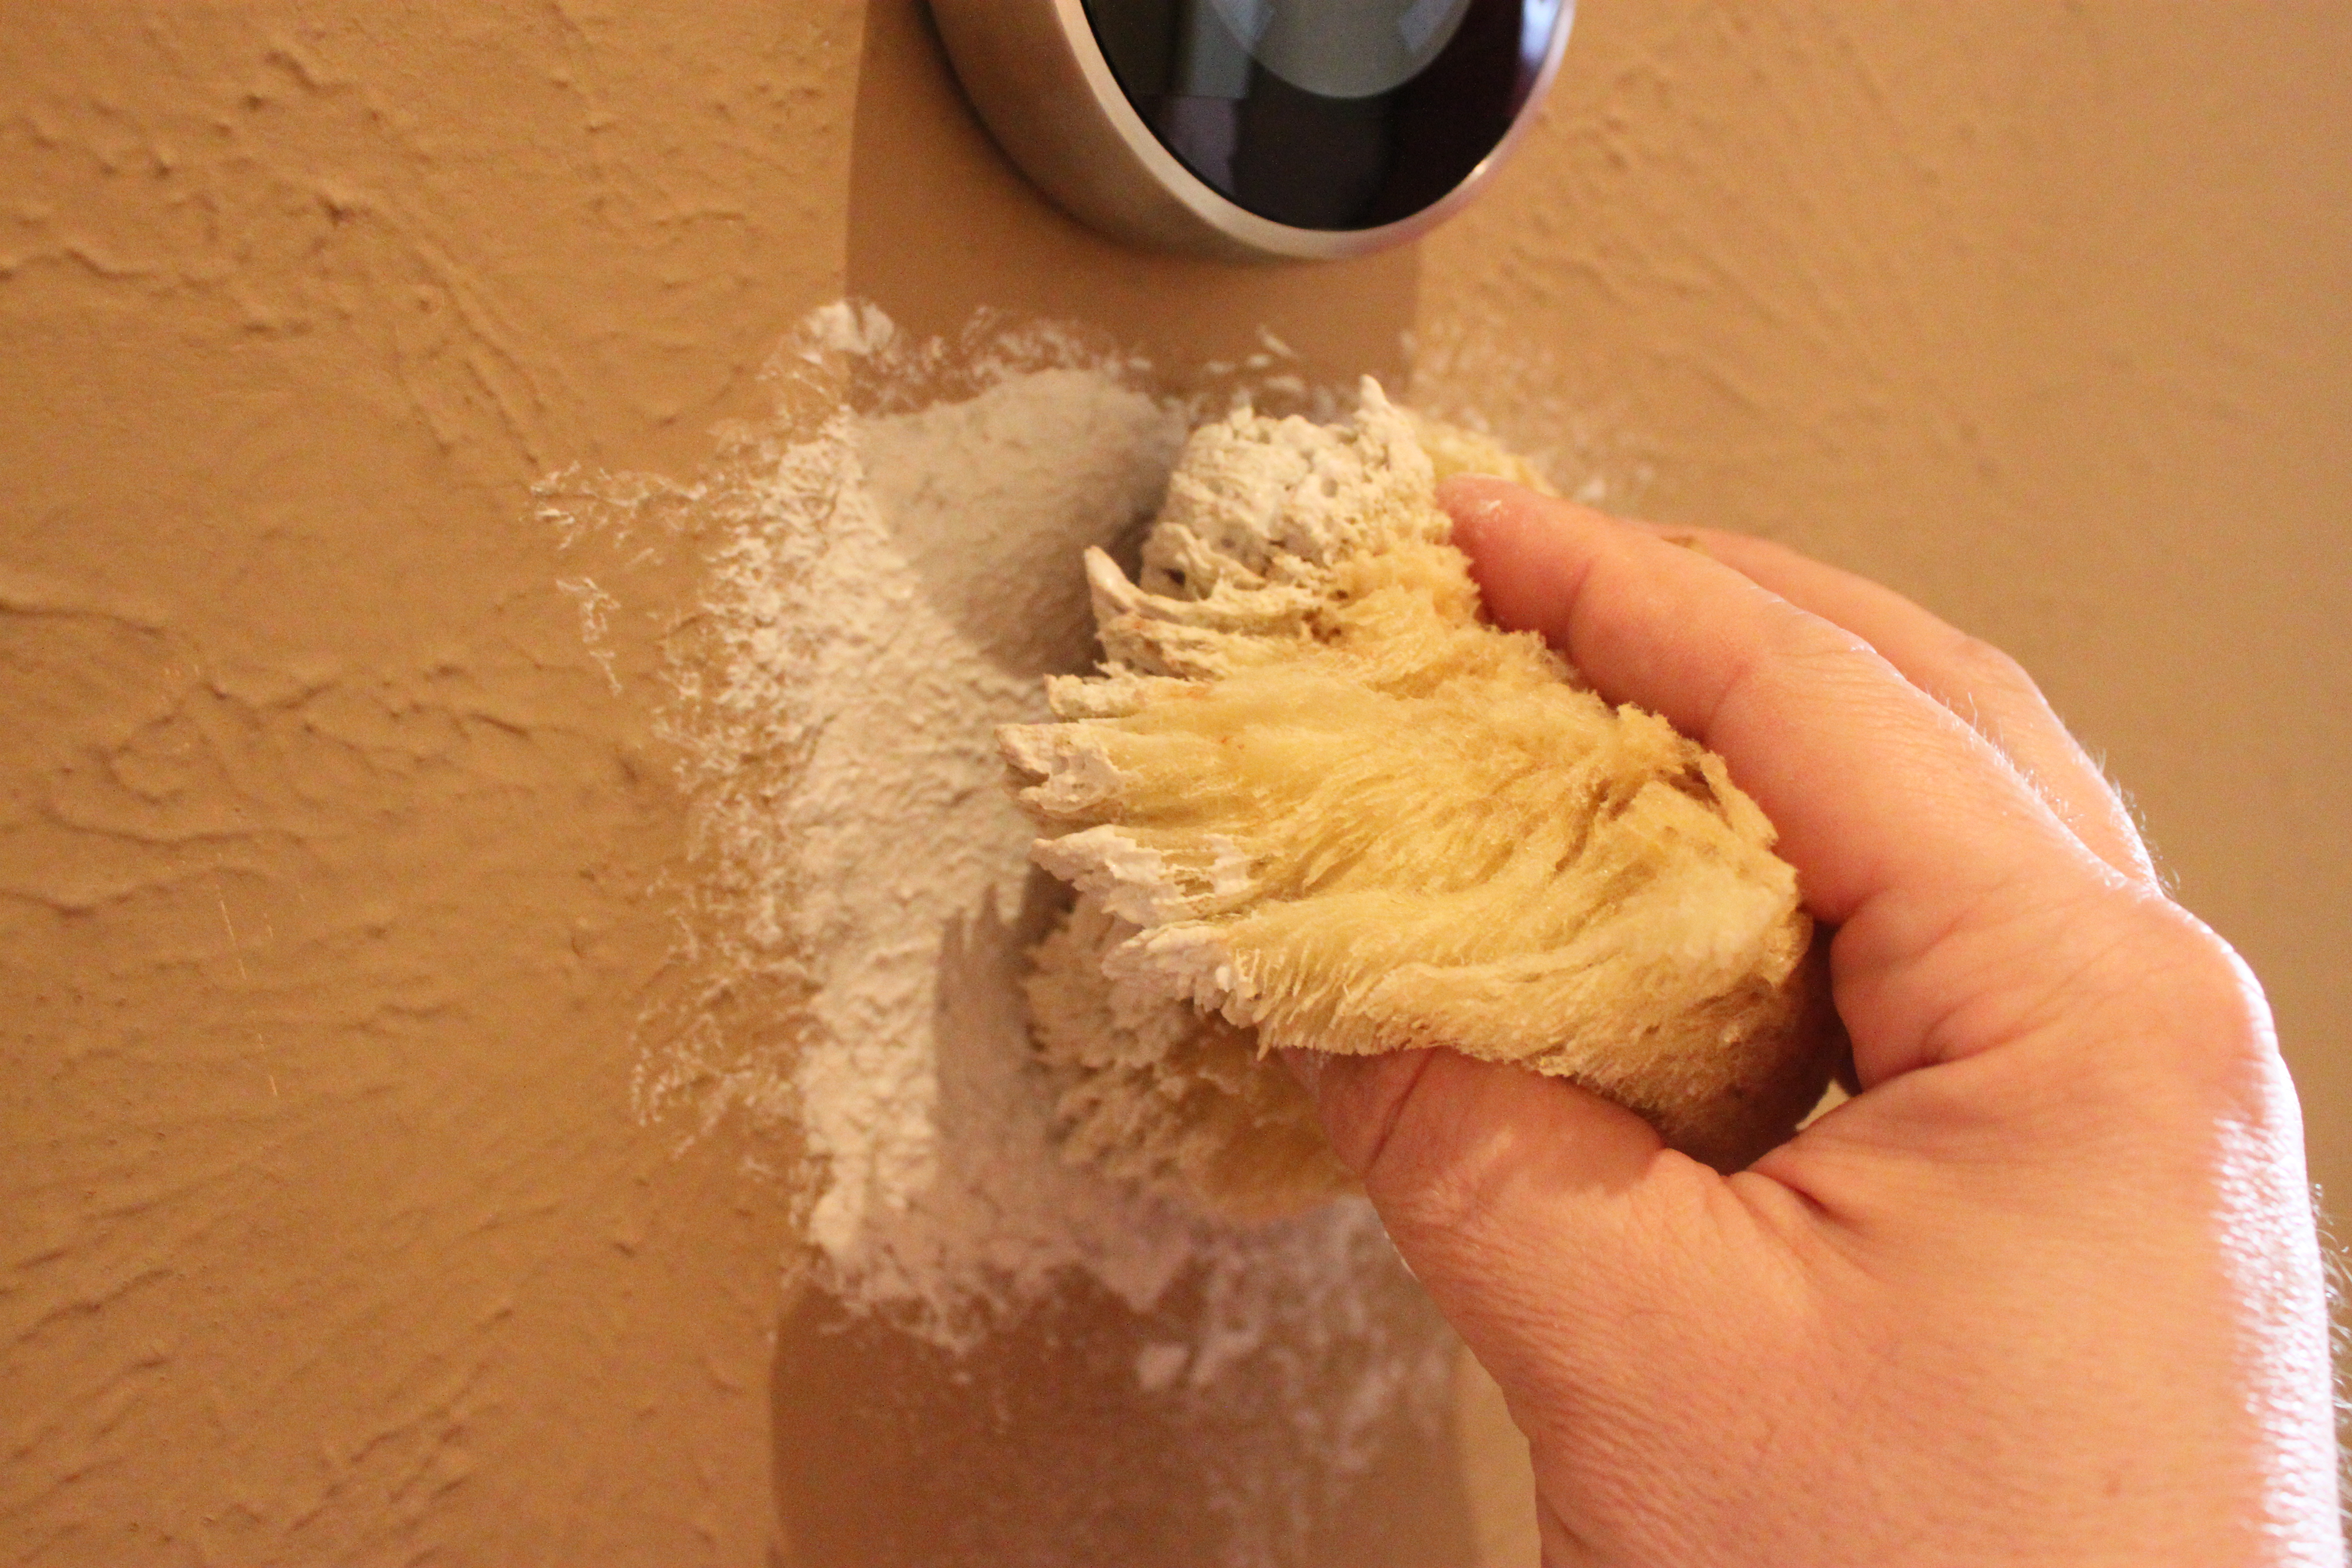
If it looks too heavy, just wipe it off and try again. Too thin, add more.
The sponge method works great for touching up small wall sections. For large patch jobs, you should probably use a crow’s foot brush. They sell those in the same section as drywall and joint compound at the home improvement store.
All better, now.


Wow! As always, you make look easy, so much so, that I’ll try that next time. Had no idea how to fix things like tat.Thanks for the informative post.
You know that section in “Real Simple” magazine where you write in new uses for stuff you normally use for something else. I think using a steak knife as a saw would be a good write in! You might be a winner!
That is my Mother’s knife…..from about 30 years ago. I used to us it for cutting cardboard for projects when I was a kid and it’s STILL in my tool box.
Jeez, Louise, never would have thought of that! I do ,however, use my trusty serrated steak knives for lots of unusual things I probably shouldn’t (my Cutco’s are awesome carpert cutters!).
Pingback: Restoration Hardware Swing Arm Lamp | The Cavender Diary
What I liked about this article was the clear presentation of information. It is a great help to those who read it.