
About time that we did something about the lighting in that master bathroom.
Because currently……..there isn’t any.
My brother Ben replaced the old, ecru mini-switches ……

…..with a modern white toggle (for the fan) and a dimmer (for the overhead lights).

There used to be a chrome 1970’s vanity light over the sink…..well, more over the mirror than the off-centered sink,
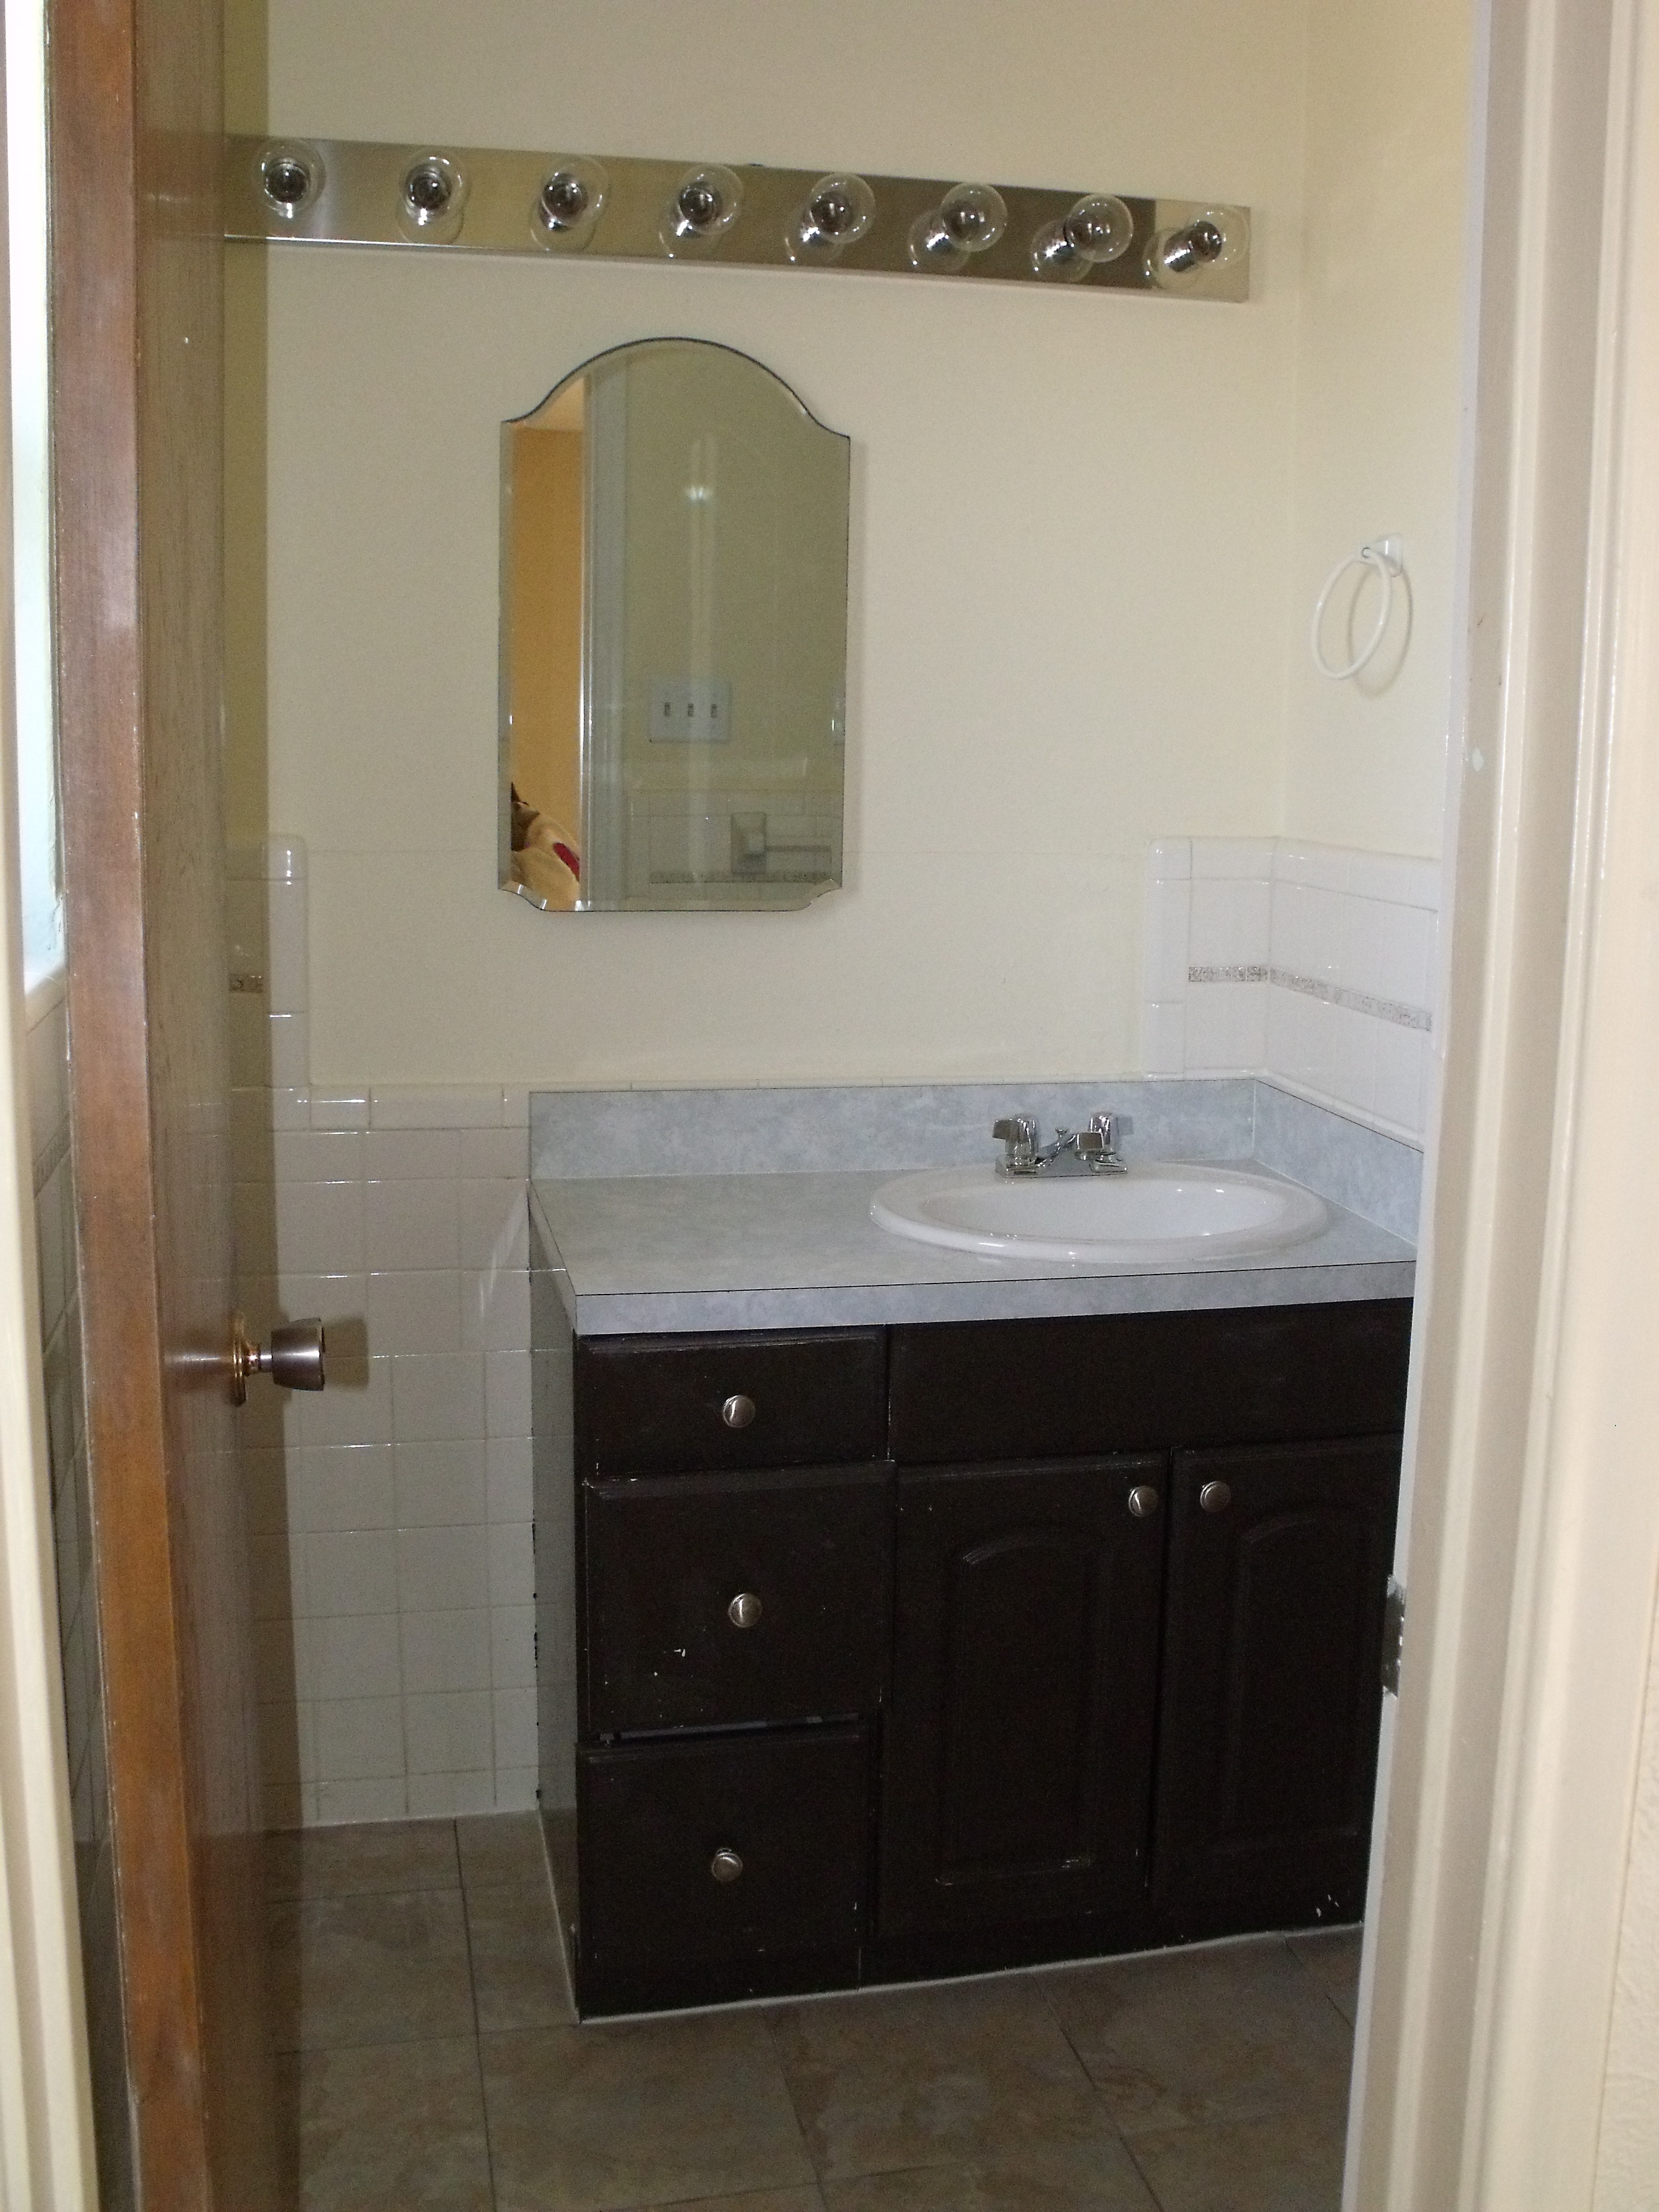
Since we’re adding 4 can lights to the ceiling, we aren’t going to need that now. So Ben cut it down to just 2 switches. (He simply disconnected the fixture from the power source and shoved the now unused wire back into the wall)
I know what y’all are thinking here, “You’re NOT going to do sconces over the sink?”
Ahhhh nope. Not this time. Probably in the other bathroom.
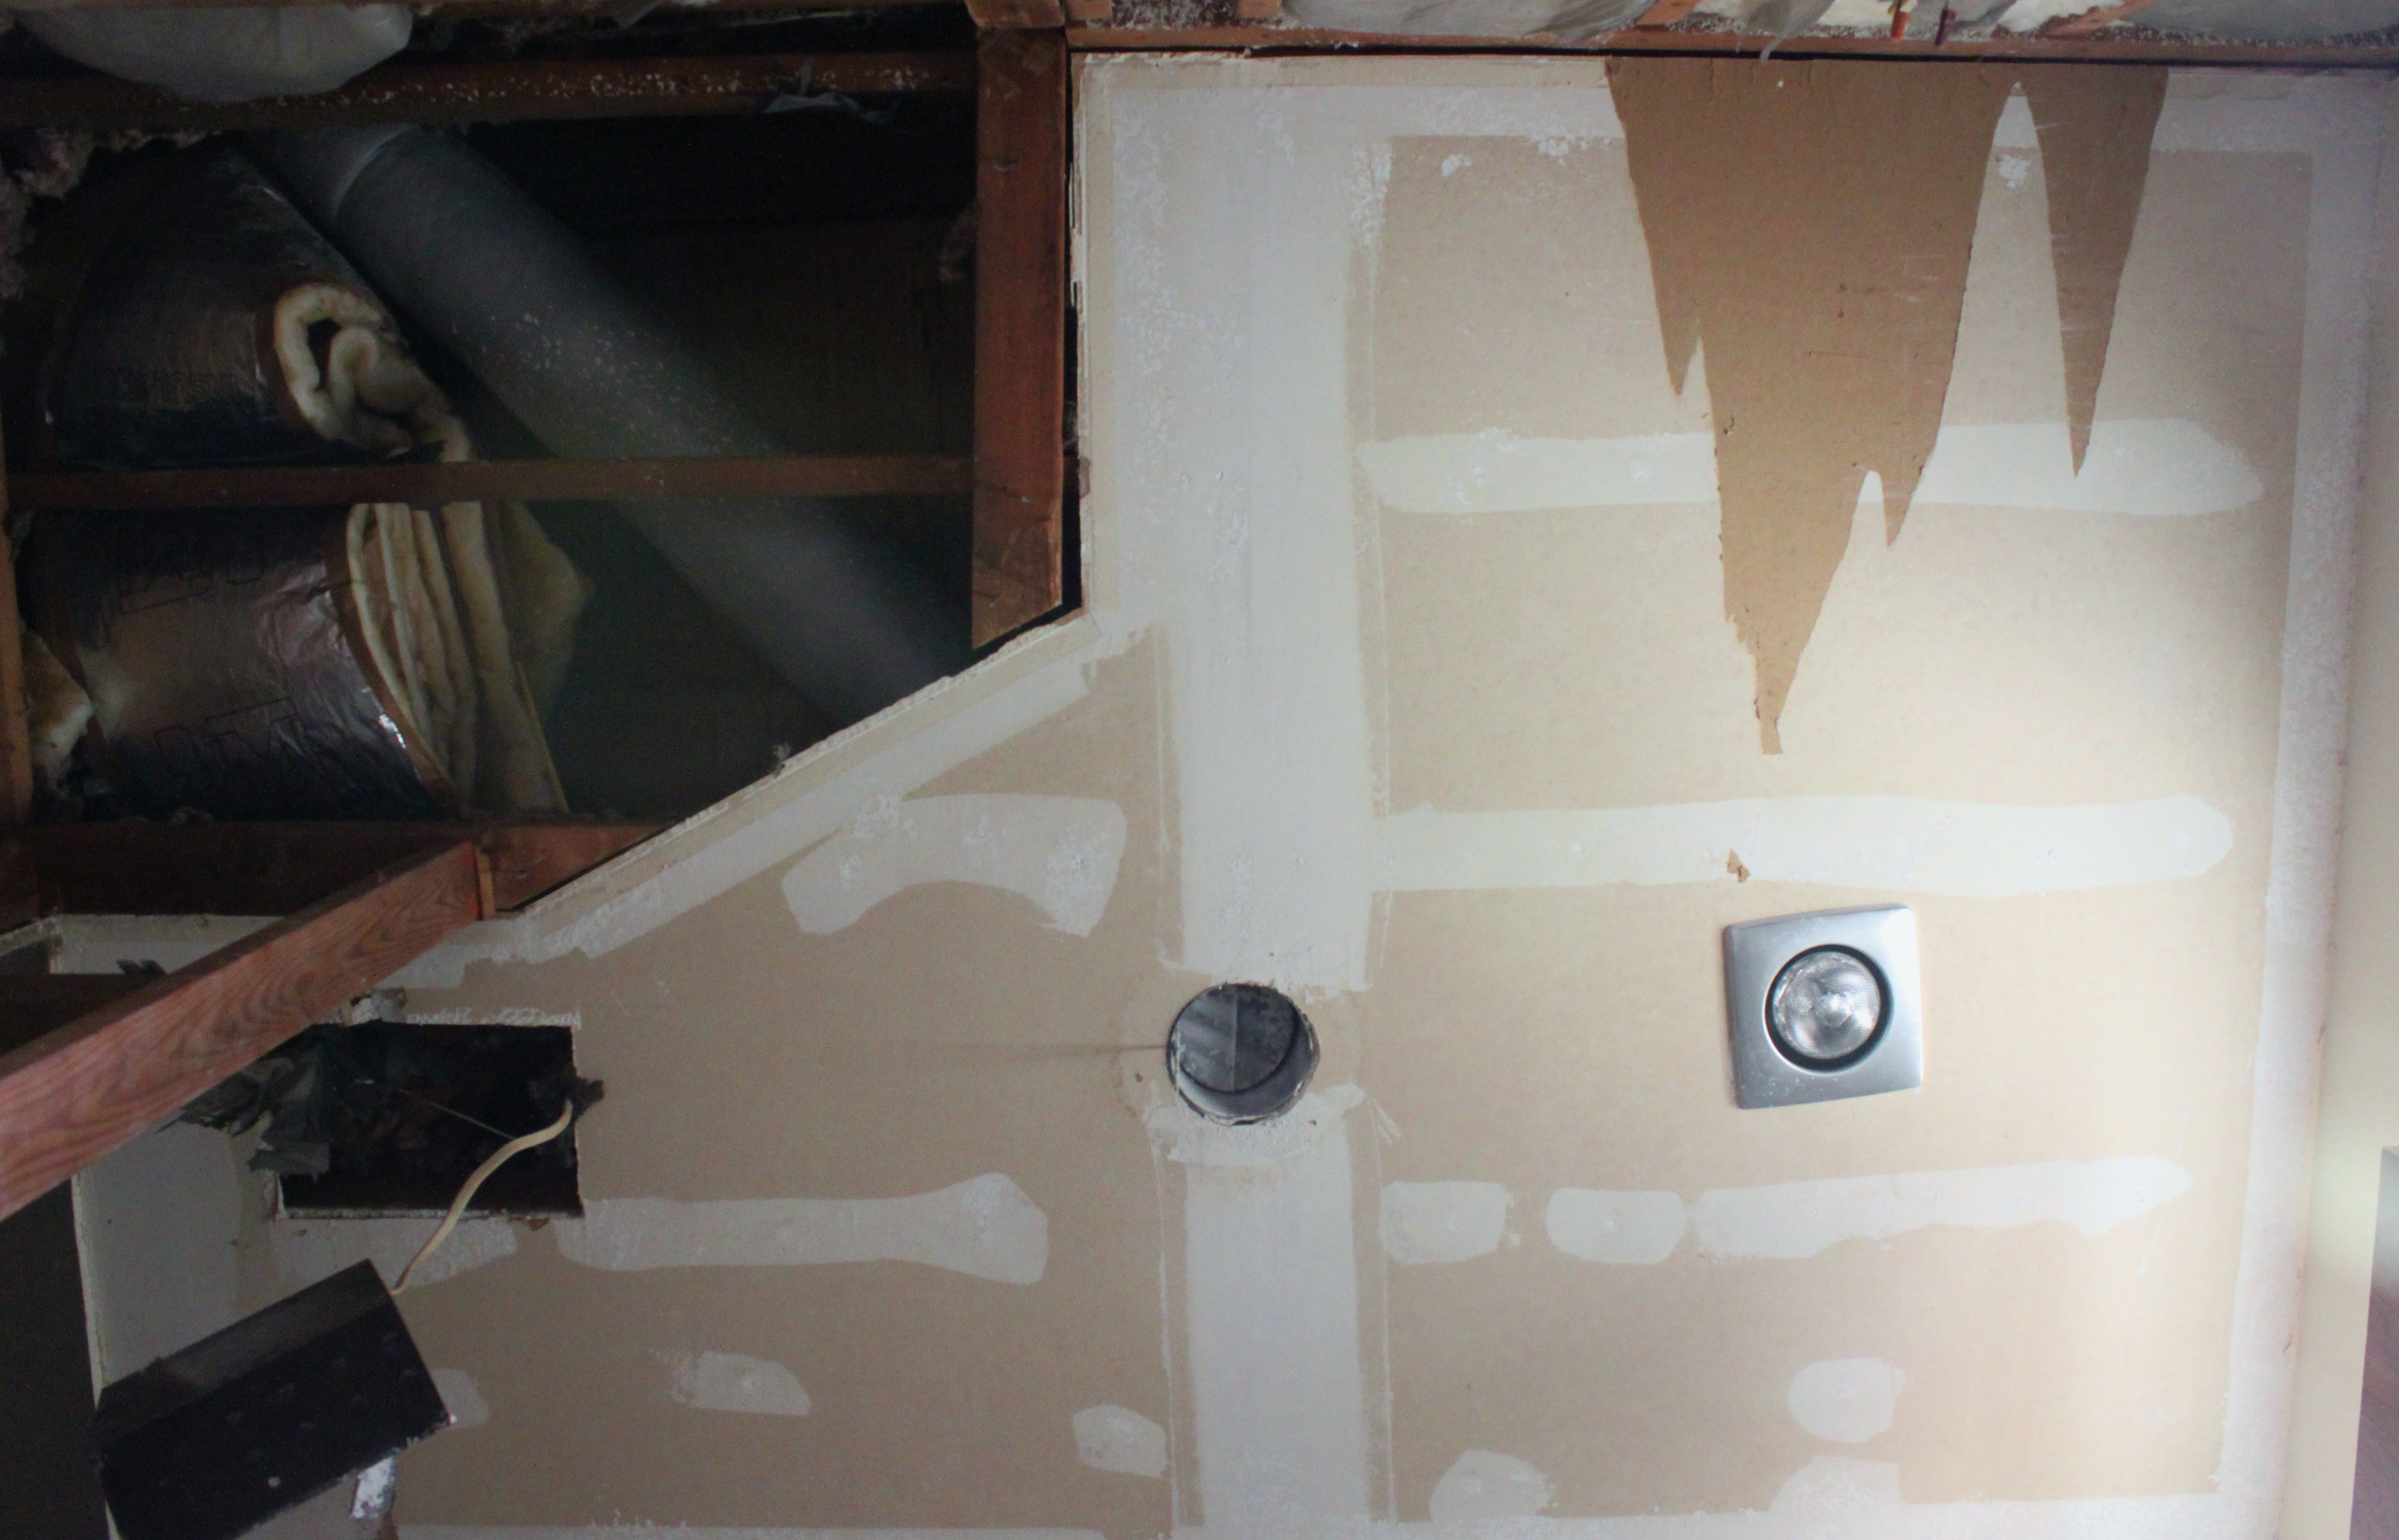
Before we drywalled the ceiling, I labeled the power cable for the new can lights (formerly the power for the also off-centered heat lamp in the ceiling) and shoved it back up into the attic.

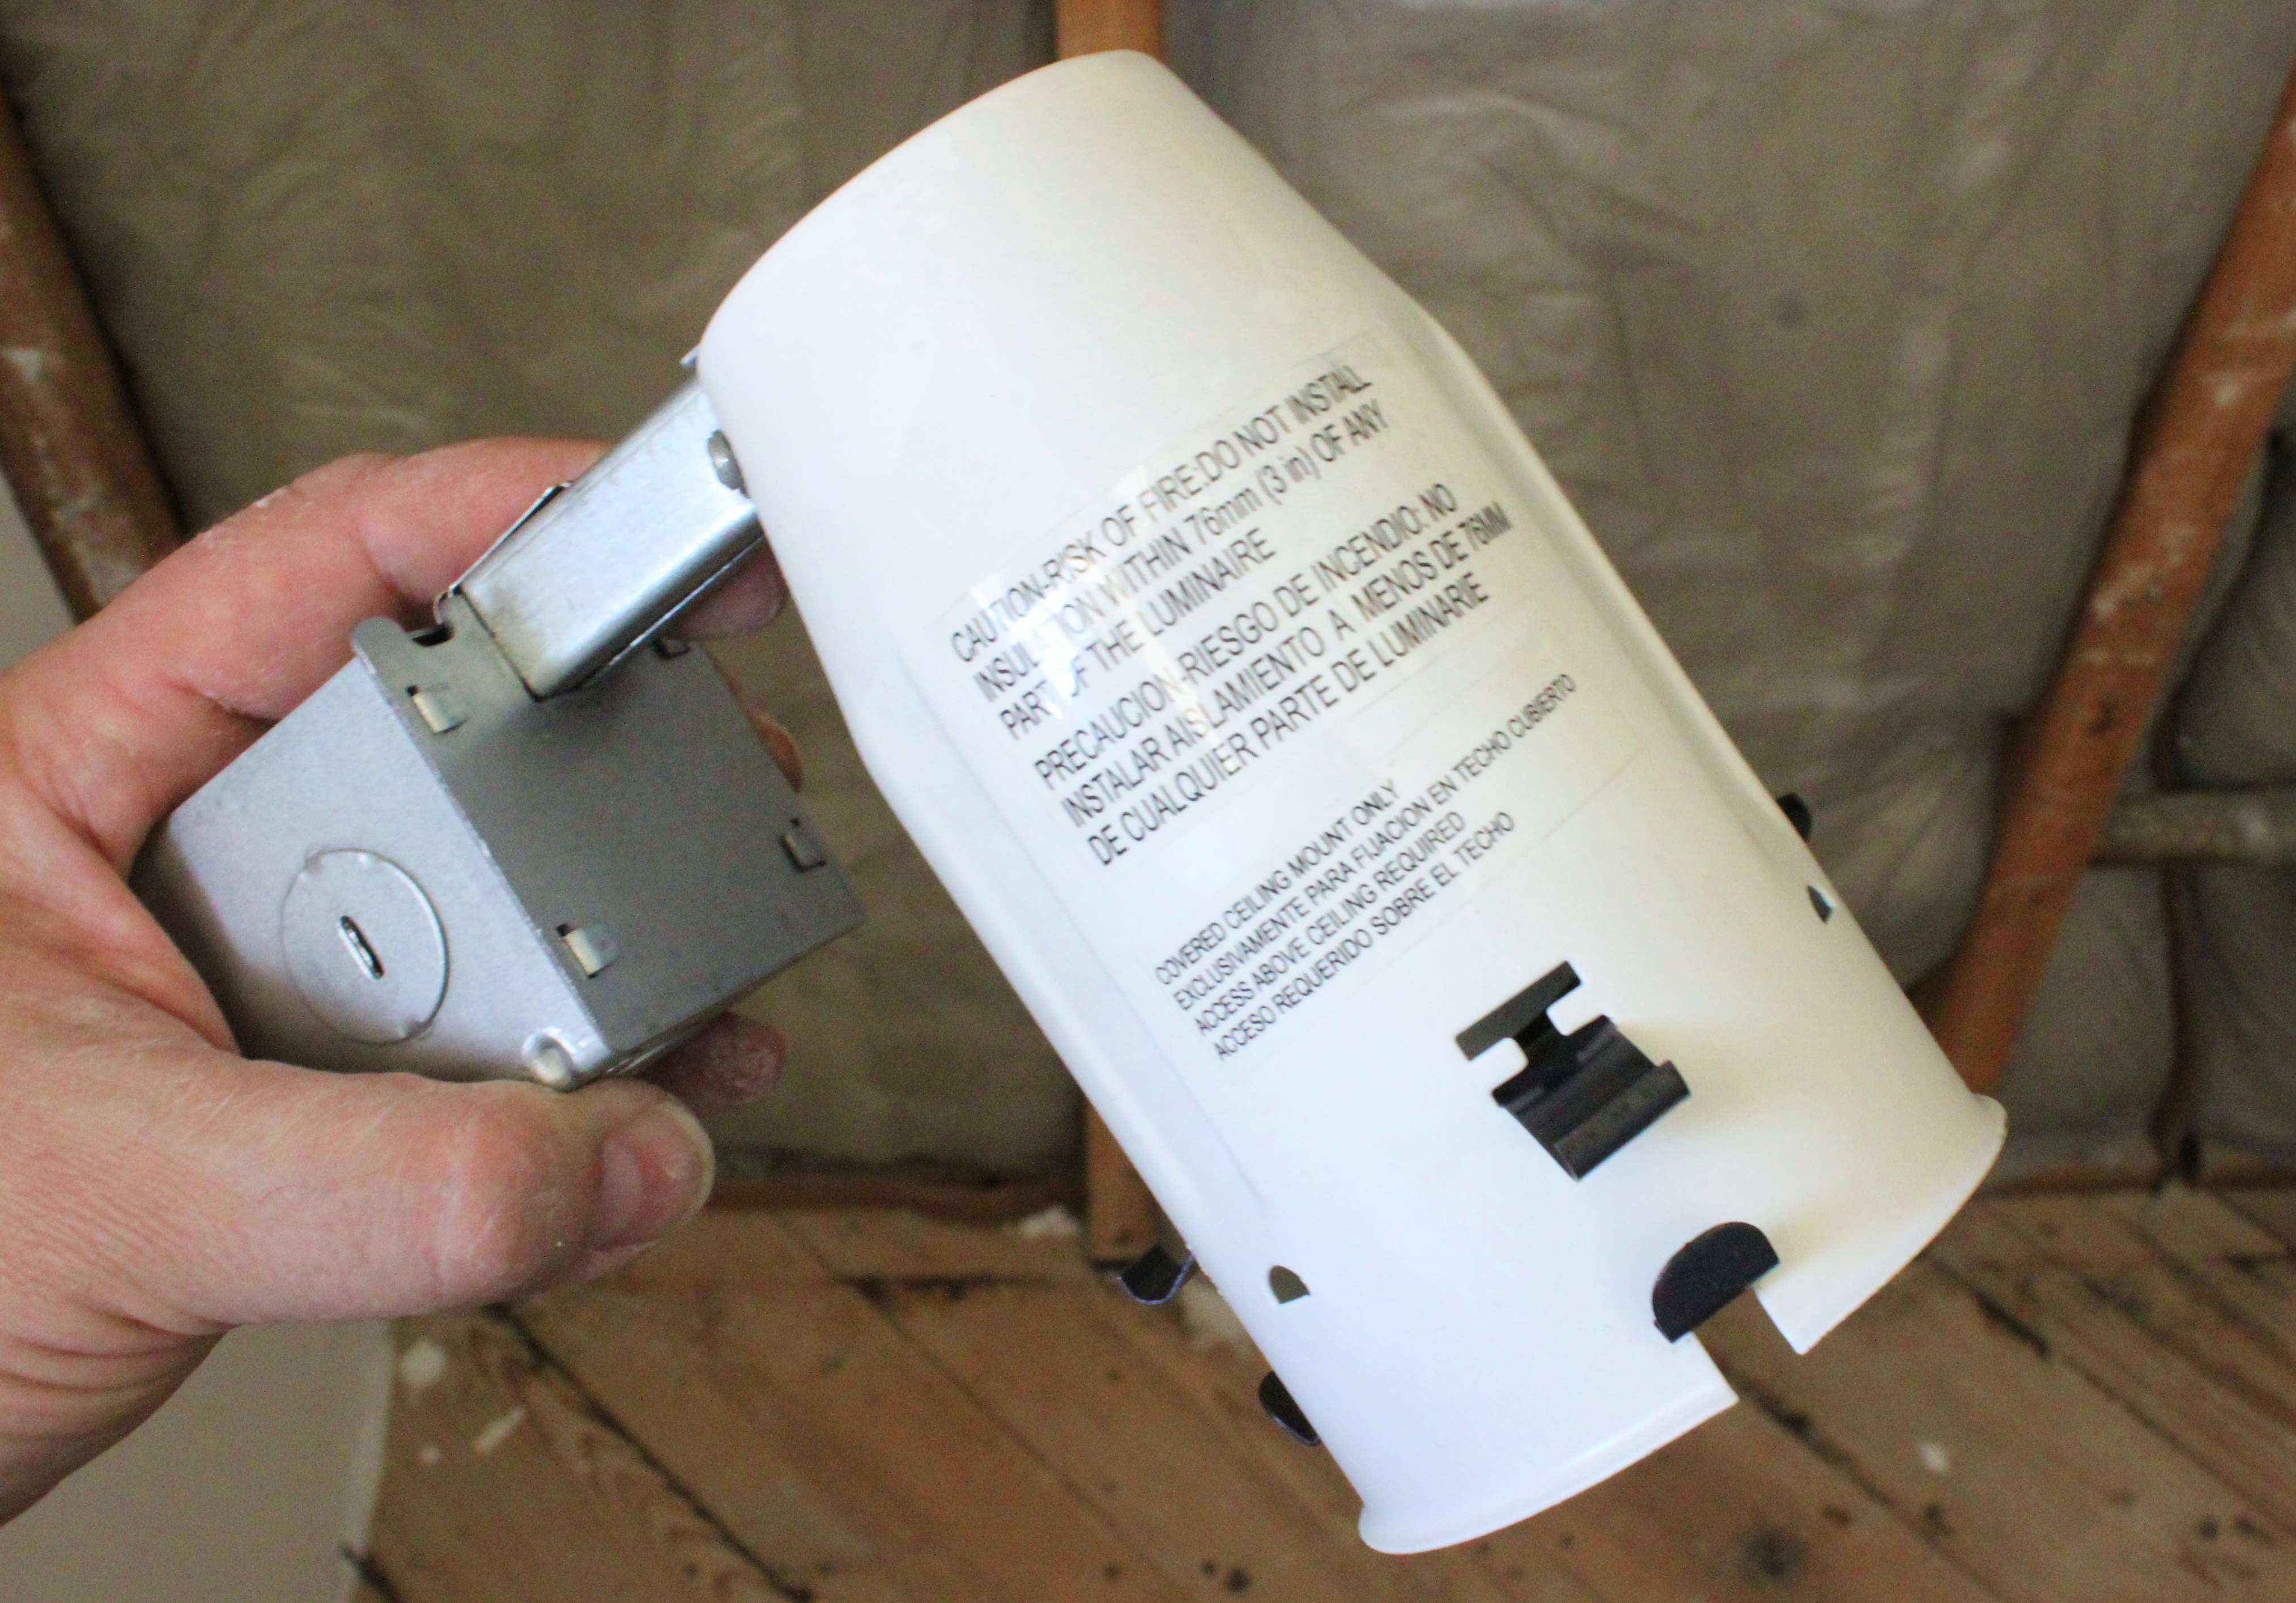
The rest of the house has 4 inch can lights. But the bathrooms are both so small – only 5’X8′ – that we’re going with 3 inch cans.
These specific 3 inch can lights.
3 inch White Gimbal Recessed Light Kit from the Home Depot.
If you’ve never hooked up a light fixture before, they’re pretty easy. The hardest part is centering them between beams on the ceiling.
We had a bit of an advantage.
Before we installed new drywall on the ceiling over all this ugliness…..
Ben and I made a spacing map of exactly where each new can light should go,
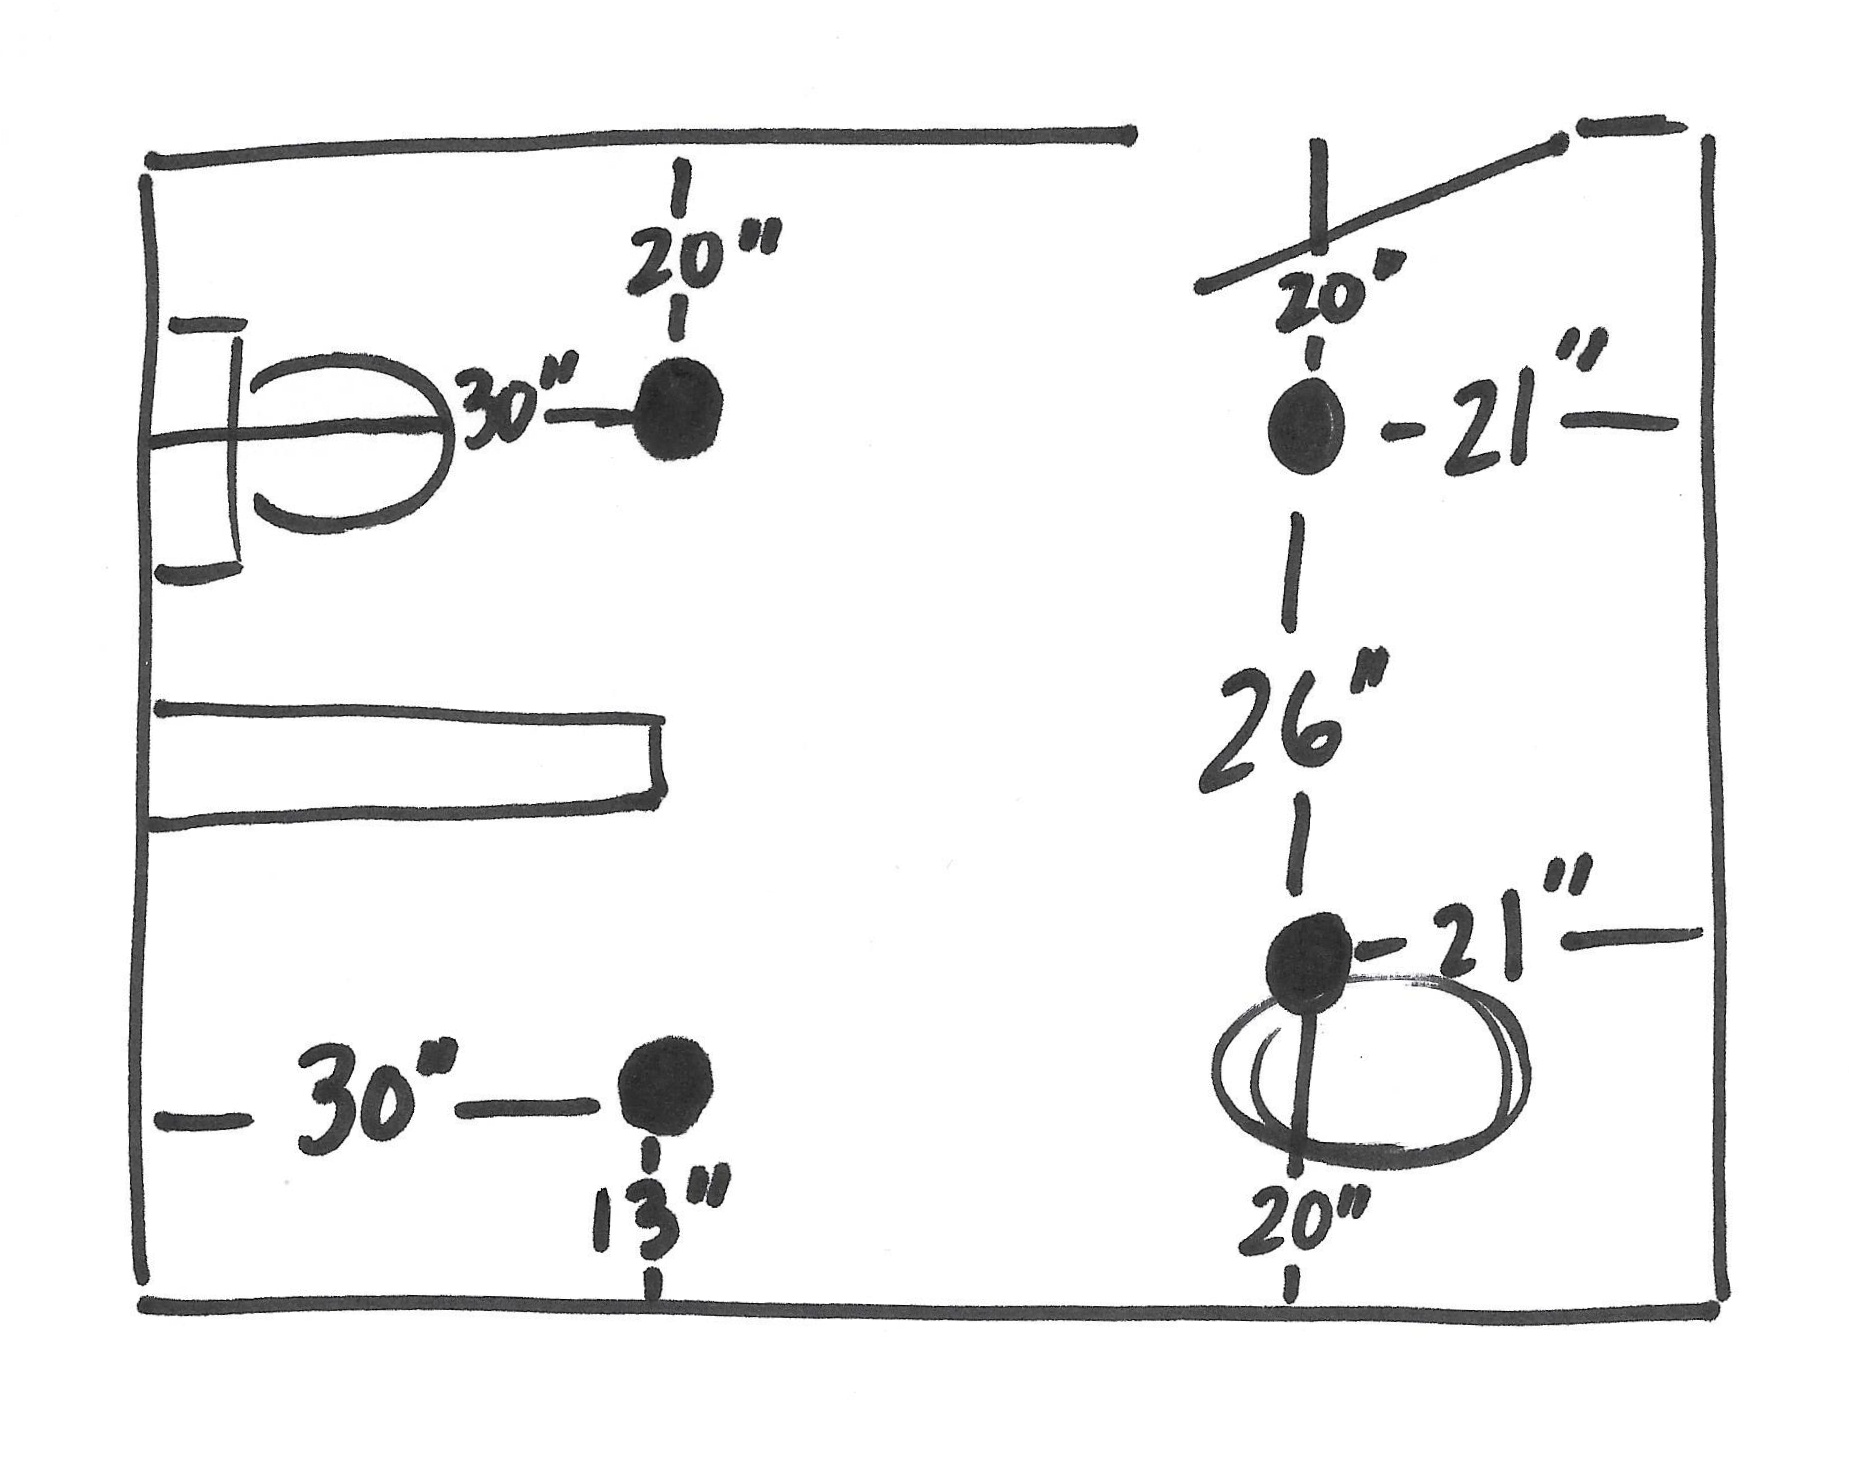
……because there is only so much space between all the oddly placed beams and vents and what not.
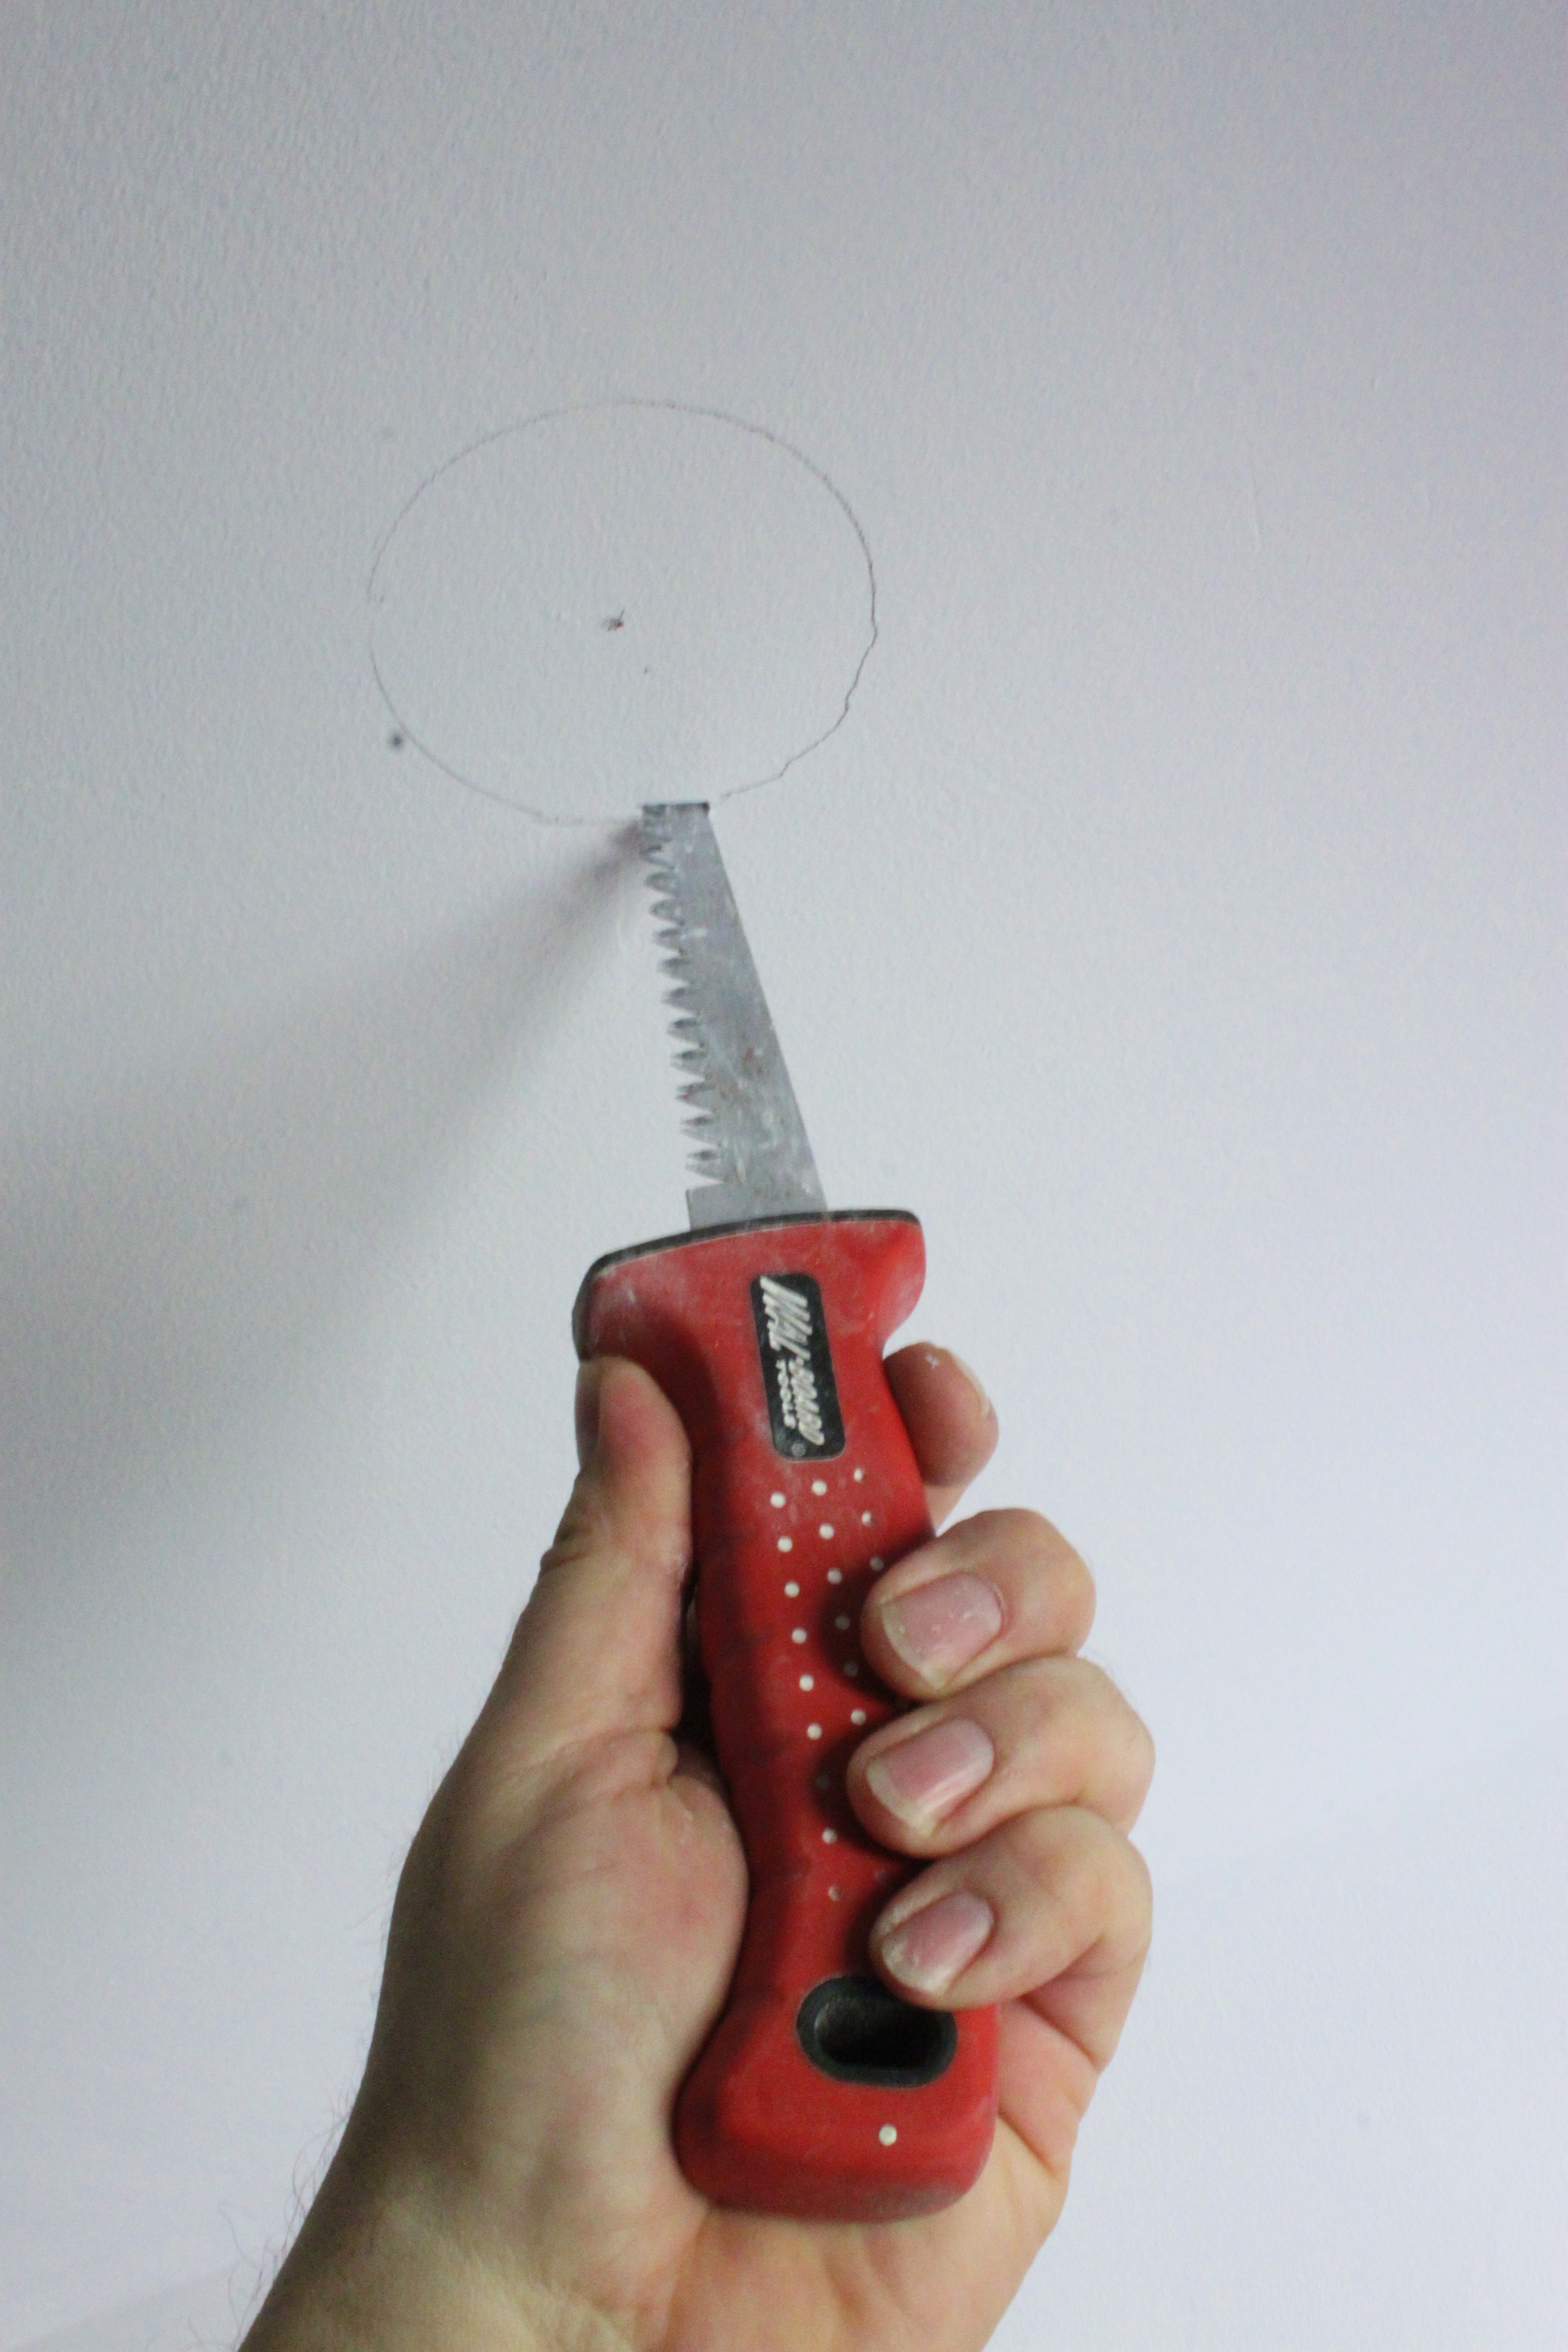
Each light kit comes with a paper template to mark the hole location on the ceiling…..

I just thumb-tacked it to the newly dry-walled ceiling just where the can light needed to be, and traced it with a pencil.

Then I used a drywall saw to cut my hole.
I could use a drill with a hole-cutting attachment…but drywall is pretty easy to saw through with a hand-saw. Or even a serrated steak knife if you have too.
I stuck my hand through the hole and pulled out the first electrical cord I could reach.
There were 2….One from the heat lamp and one from the vanity light…..Good thing I labeled my power source before we dry-walled the ceiling.

I’d love to show y’all the exact steps for connecting the can lights. But I was too busy to take photos.
So here’s the summary:
- White connects to white,
- Black connects to black,
- The whole unit gets shoved into the hole in the ceiling.
- Done.
Here’s what we see now when we lay on the bathroom floor and look up….

I know. They aren’t perfectly gridded – that one light in the shower is just a few inches away from his 3 friends – and they never will be.
Not without rebuilding the ceiling, anyway.
I’ve made my peace with that fact.
No one will even notice.
All anyone will see if a beautifully lit bathroom.


I’m warm for the form of those switches! Excellent!