
This was bound to happen eventually.

If you read any sort of “Home” blog in the internet………you’ve seen this a thousand times. Maybe more.
Time for us to catch up with everyone else.
The only wall in our living room has been begging for some shelves since the first time we stepped foot in the Cavender house.
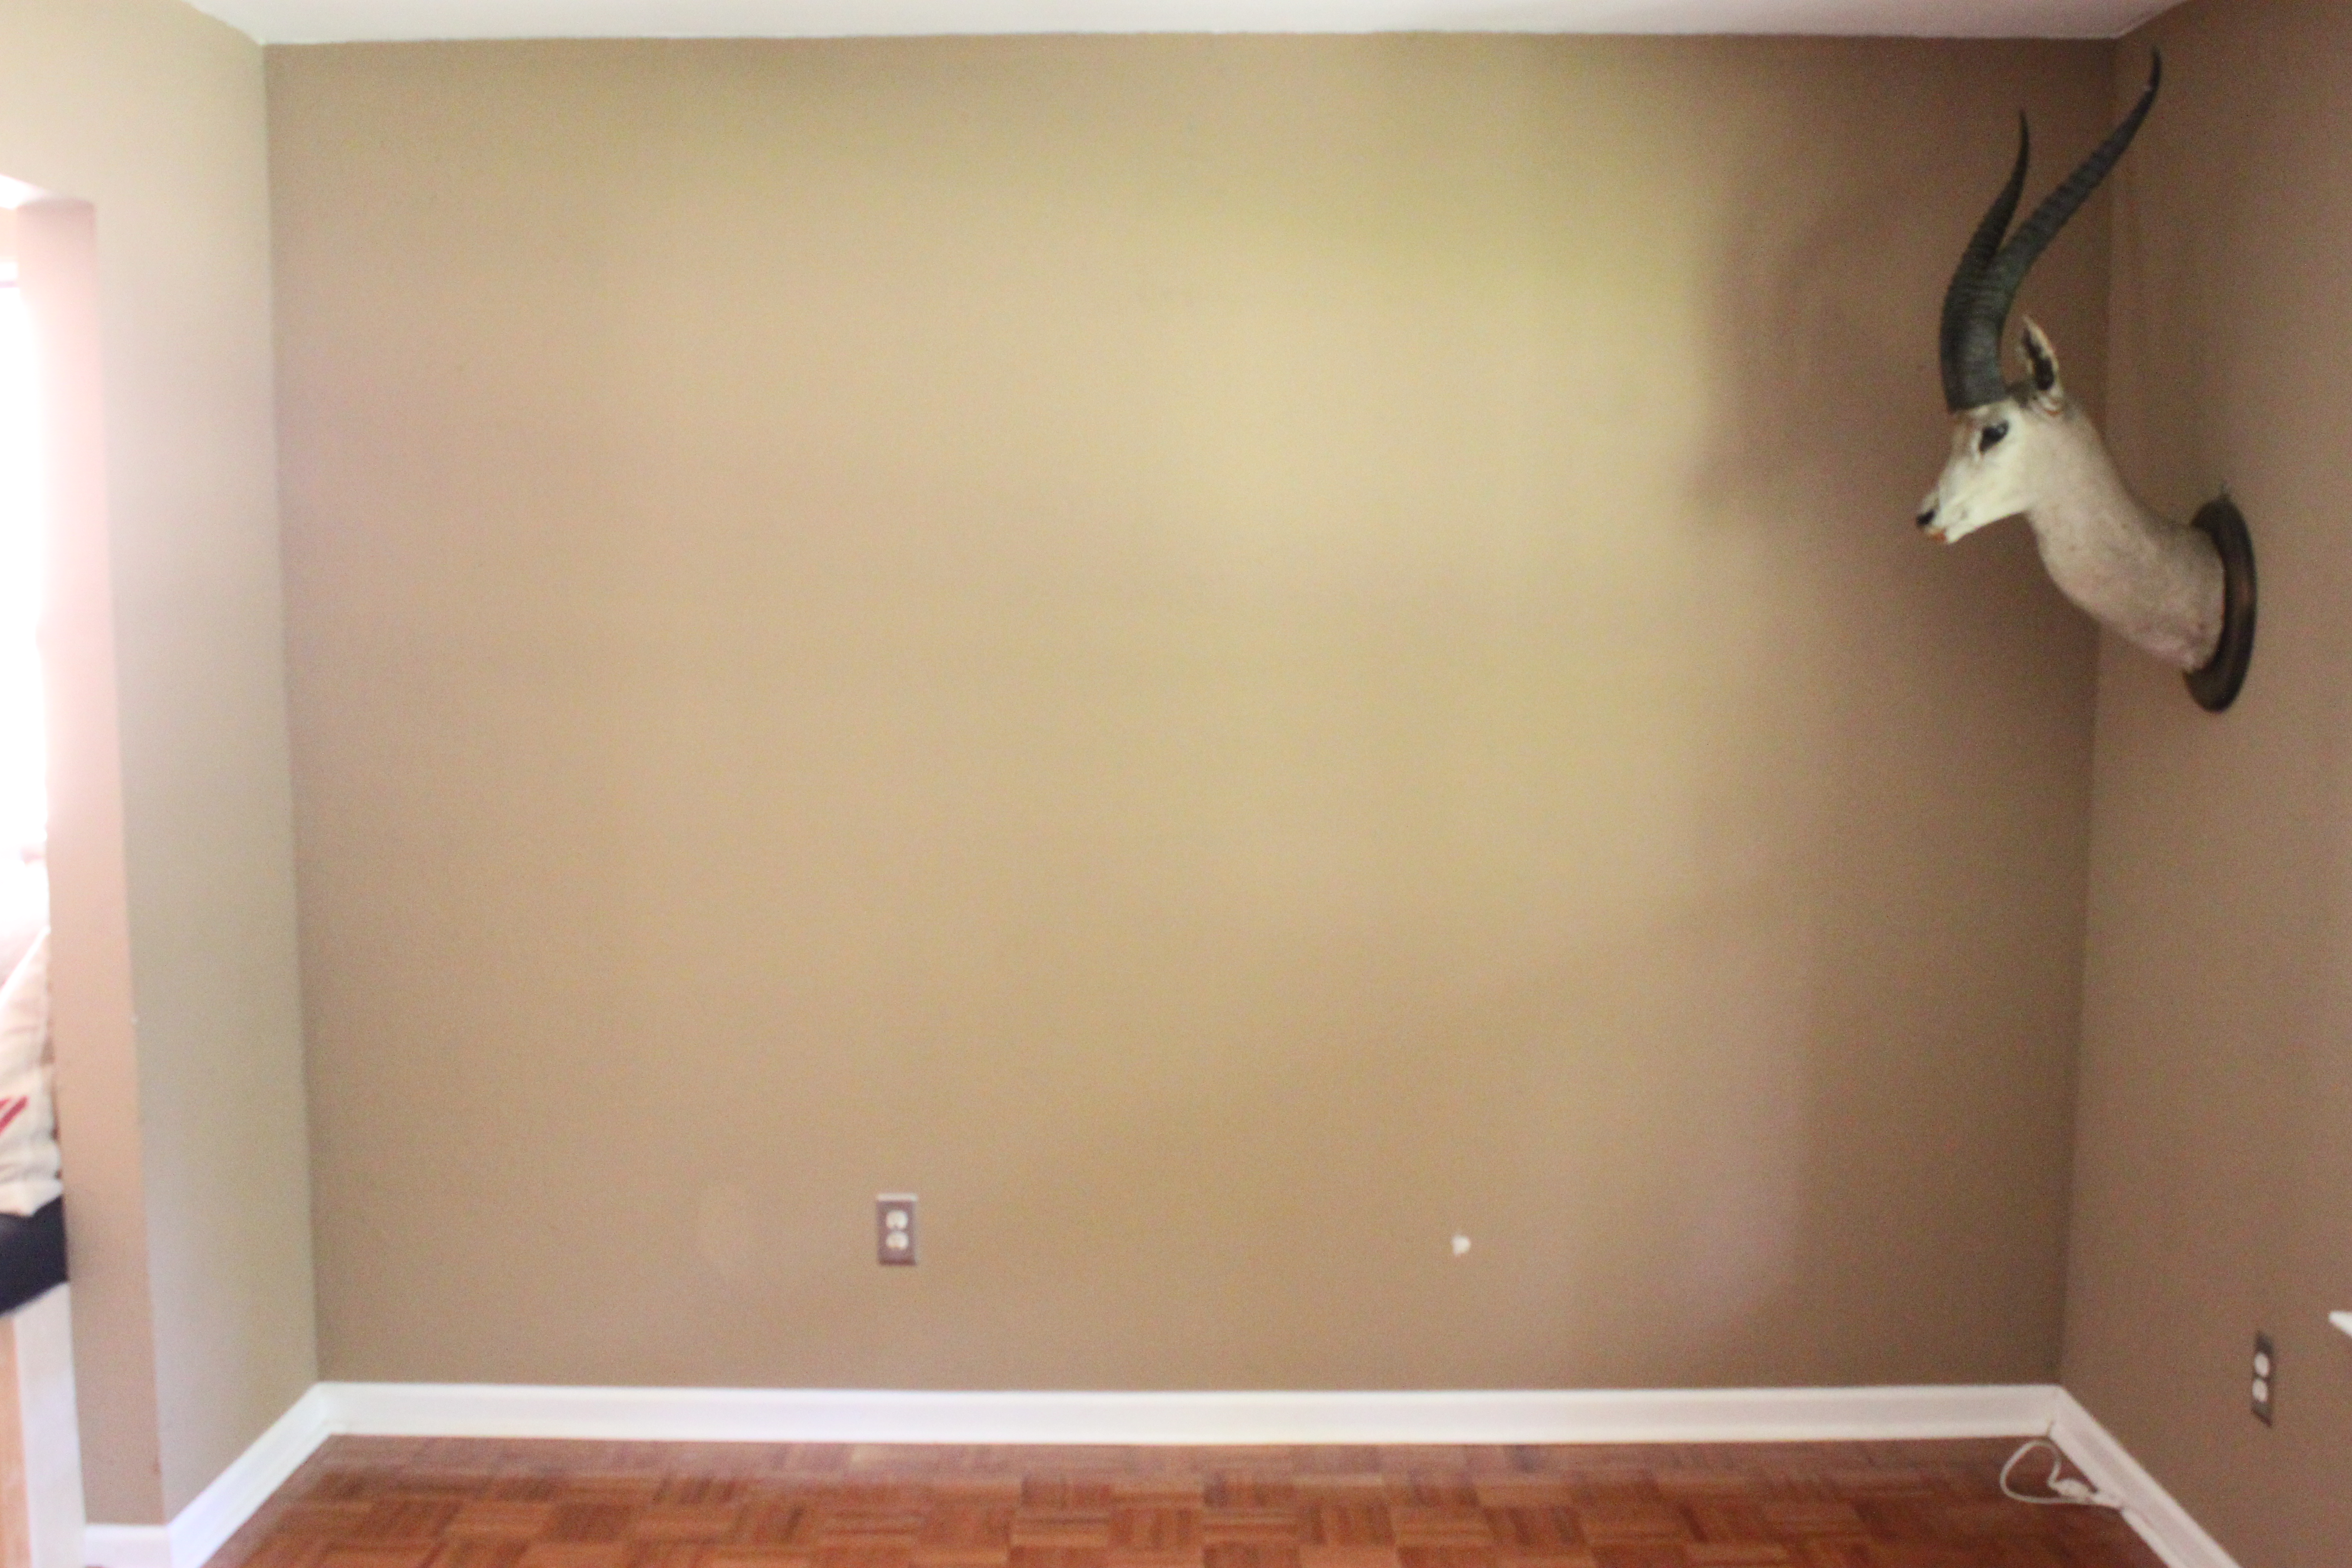
There were some “modernish” chrome/black glass ones there for a few years. Thought we could live with them, they were so cheap, but I just couldn’t any longer. Black Glass????
We’ve been using plumbing pipe for projects all over the house; like the Rolling Log Holder, our Vintage-Looking Dog Bed, and in the Garage for storage. We’re going to use even more in the closets and maybe even as a shower curtain rod. Stay Tuned
After much rooting around the Home Depot plumbing isle, here’s what we came up with to hold our 10 foot wooden shelves together.

Here’s a footing, completely screwed together….

I spaced 4 of these babies across the wall and attaches the back flange to the wall with drywall screws.

Ignore the tall pipe on the left. I was just getting a feel for how tall I wanted it. 4 shelves including the top…..43 1/2 inches from the floor.
The wood shelves, almost the entire length of the wall, slide down on each pipe and rest on the “T” joint.
I use a 1 inch paddle bit to make 1 inch holes in my shelf boards for the 3/4 inch pipe. My pipes are set 30 inches apart, and 15 inches from each side of the end of the shelves.

The boards rest perfectly on the “T’ connectors. 1 in the front and the second in the back

Lots and lots of measuring, but connecting the pipes and sliding on the wood shelves was a pretty easy process.
One shelf at a time, and attaching each back flange to the wall with drywall screws.
Looking good so far.

The final posts are topped with flanges just like the feet.
I carefully measured so that each one is exactly 42 1/2 inches from the floor. They easily twist to adjust the height.

…and 14 1/2 inches from the back wall.

I leveled a 10 foot “cleat”, made from a 1X4, across the back wall……again, I attached it with drywall screws.

……with 1X4 inch notches cut out and lined up perfectly with my flanges.(See where this is headed yet?)

14 1/2 inch supports, cut from a pine 1X4, fit in these notches and rest on the flanges in front.
Like so…..

And the top boards sit on the supports.

A 1X2 trim piece hides all the ugly and makes my cap shelf look more substantial.

I didn’t want to stain my shelves, so I aged them a little with a mixture of steel wool and vinegar….(More on that to come later)
…..and then filled them with crap. Like so…..

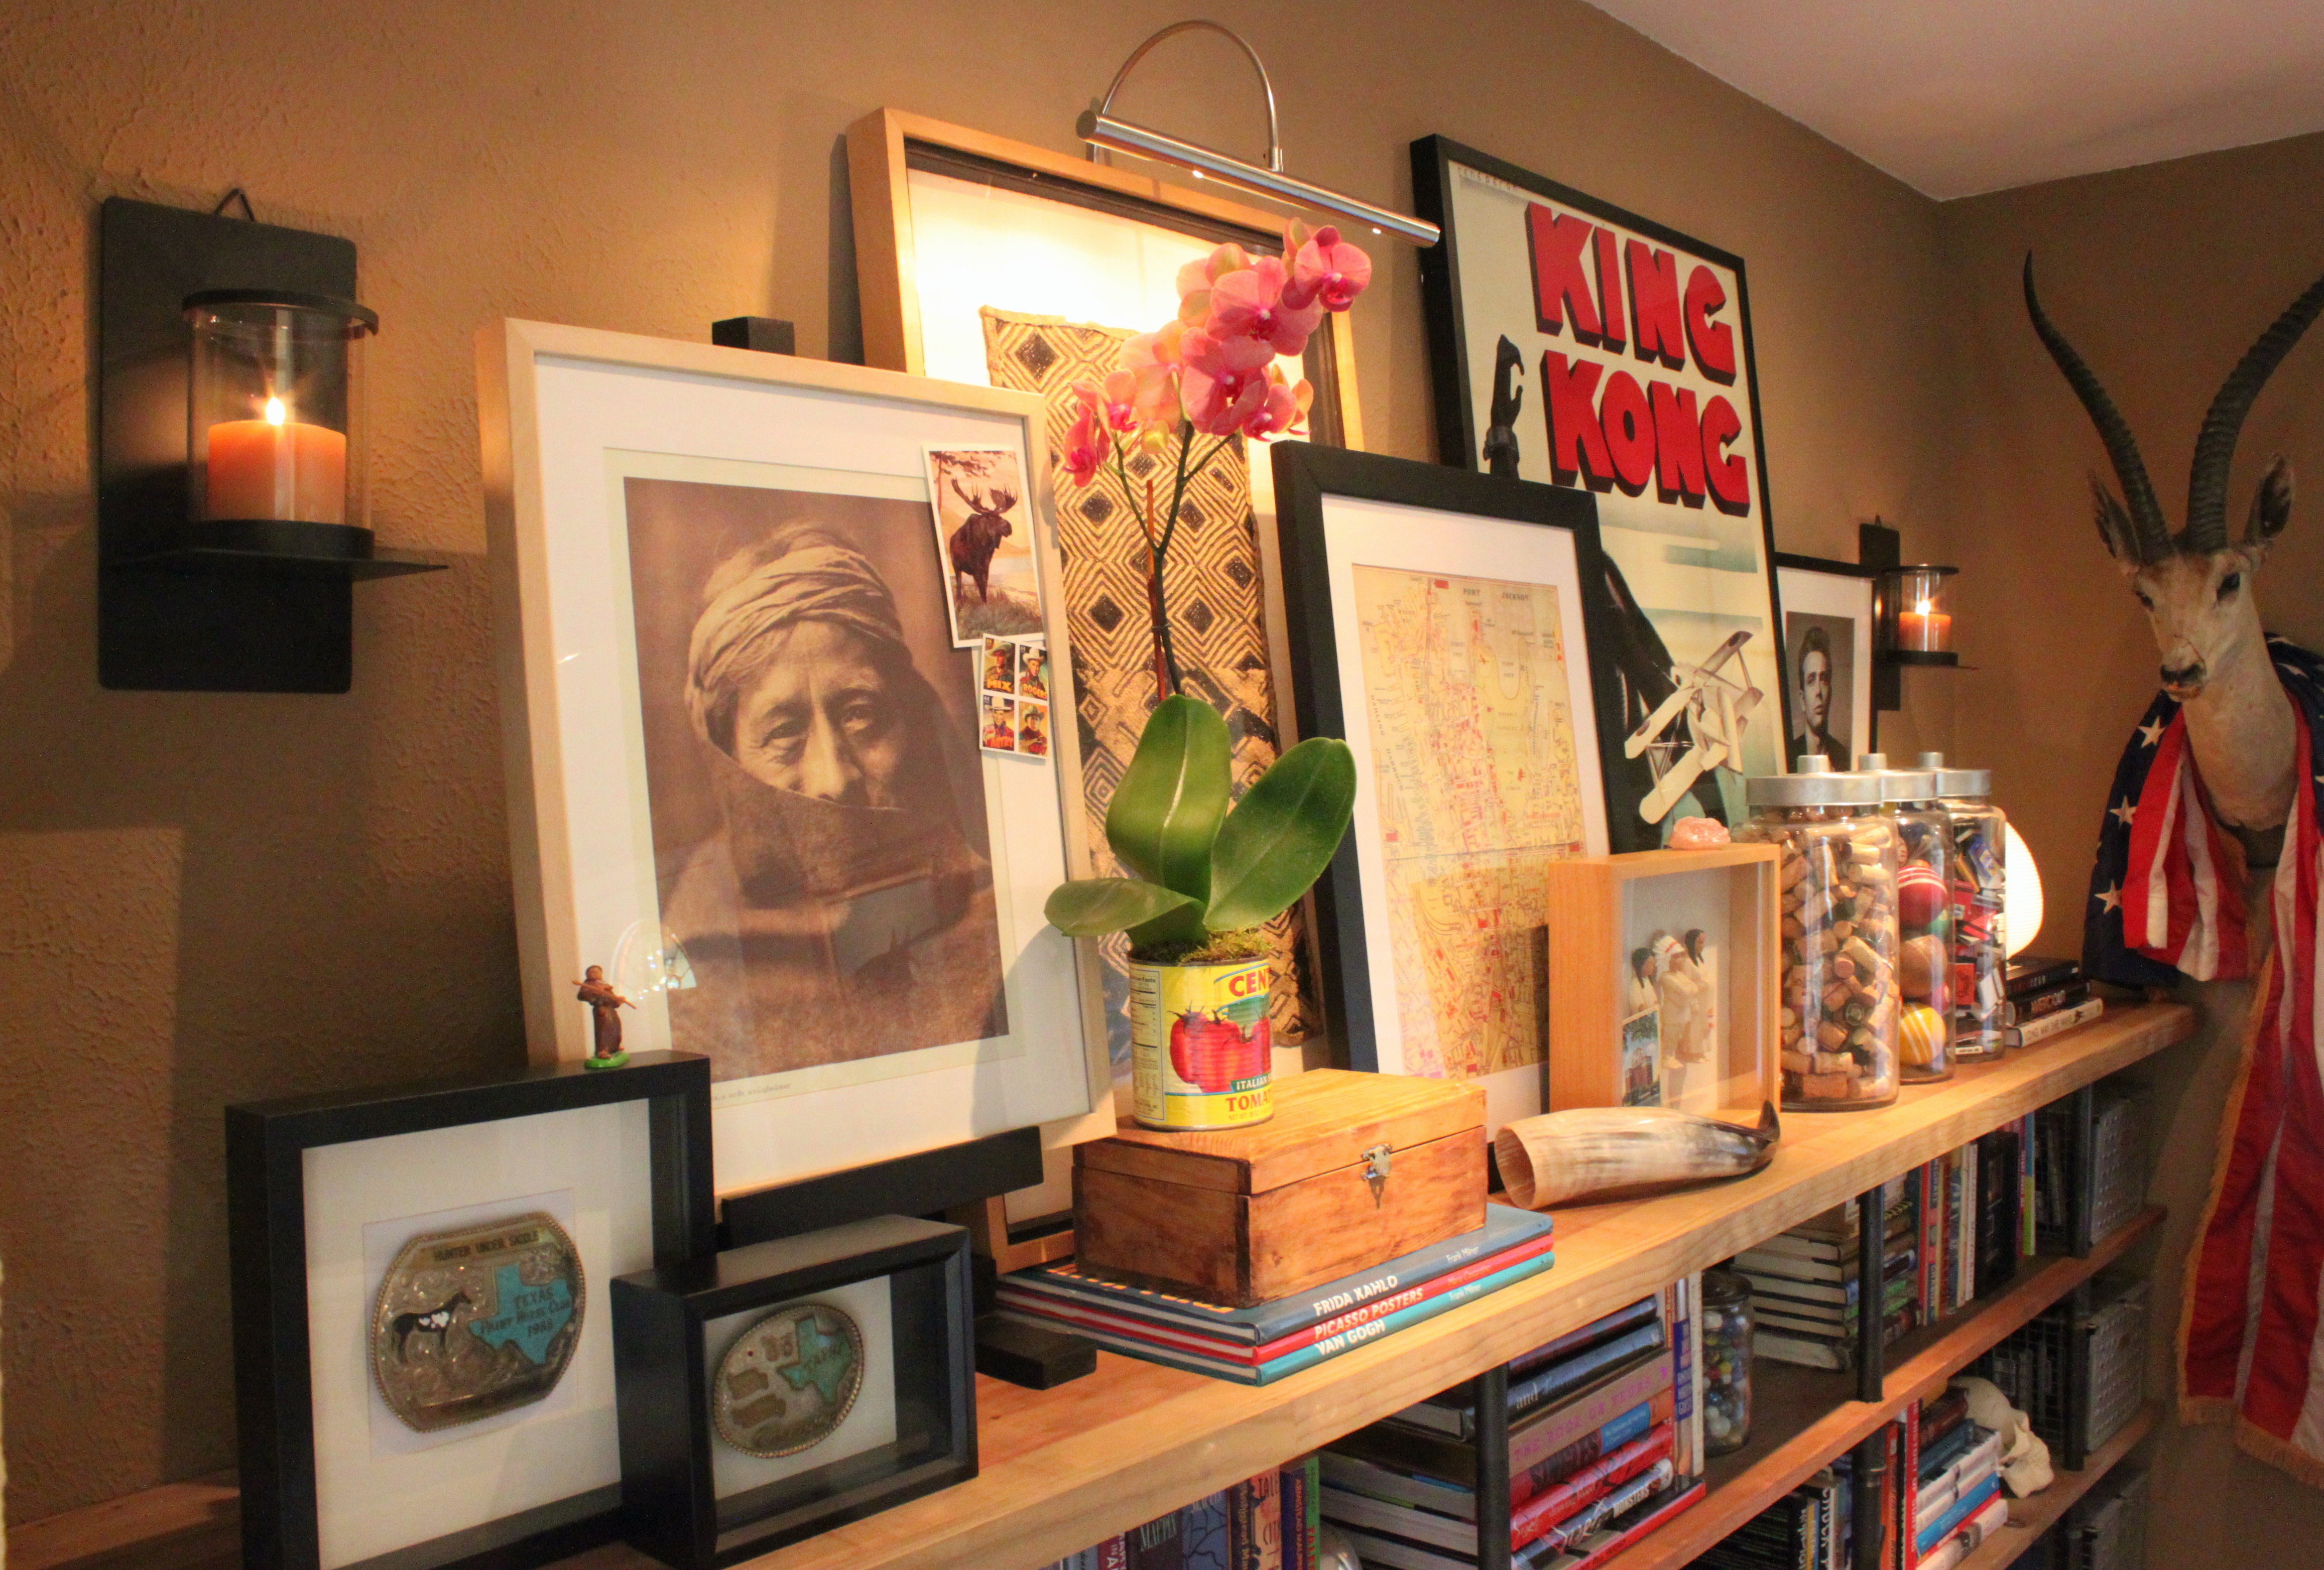


Good place to fit the overflow of books from the den.
I’ve been collecting the vintage locker baskets to use in the closets someday. (big sigh) But for now, they hold paperbacks and CDs. Yepp, we still own CDs.
But who’s even going to notice what’s in the baskets……
…… when the shelves are so freakin’ cool?


Beautiful. You have an incredible eye for arrangement of books and “crap.” This looks awesome!
Thanks Jennifer, I actually did a tutorial for arranging “crap” a few years ago…check it out here https://thecavenderdiary.com/2012/06/08/displaying-our-treasures/ Has some good pointers…..
Great shelves. I especially like the trim on the top shelf. It really finishes it off. I’d love to hear more about your aging process. Also, how much did this project cost for the materials?
I could spend days just looking at all the cool stuff you guys have in your house! Well done!
Thanks JT, I started to trim them all with a trim piece, but it hid too much of the pipe (So just the top) This wasn’t a cheap project…..I proll’y spend close to $250. The pipe adds up quickly…and I had some pipe pieces already. The boards were $25 bucks each.
I promise there is more to come on that steel wool/vinegar process. Just wait.
Glad you like all our “Treasures”….pretty much everything in our house has a story behind it.
Guys, that looks so amazing!
Thank you, Thank you very much (In my best Elvis voice)
Wow, great job! You have the most important Gift of design. When you think you are done, add some more goodies to your shelves. Love this look!
Carolyn, I actually scaled back on the “goodies” for the pics……over time, more things just appear around the house. I don’t know how that happens (EG)
a pipe dream! Jennifer beat me to it and said just what I was going to say…
“Pipe Dream” would have been a great name for the post….I need to work on my puns……
Wow. love everything you have placed on the “awesome” shelves. Love, Love it!!!!!!!!!!
Last name should be Schulte
Thanks Bonnie!!!!
Way cool!! Thanks for the extremely clear, well-photographed instructions. I know what tutorial I will use if I ever decide to build some!
Go for it. It was pretty easy…..I think anyone could do this one….
Your shelves look awesome, and I really like how you chose to use the space with books/decor and display items. I’ve seen a lot of tutorials on how to make these shelves…but I like yours the best.
Awwwwww we’re blushing over here….Thanks for the love.
One word…..FAB! You guys really do it right!
“Fab” is a descriptive we will glady take! Thanks Joan!
I’m beyond impressed with both your construction skills and your styling ones – wish I had a quarter of your talent. Well done!
Michelle, you could do this. Hardly and “real” construction….I even used the wood in the size it came in, no cutting at all. Now it was a slight hassle driving it home sticking out the back of my Jeep. 🙂
Another project that is absolutely fabulous! I am jealous I don’t have your talent. I just look at your pictures all the time trying to figure out how to make my stuff look as terrific. I will just keep trying. Have a restful weekend.
Awww thanks Tracie, I did a tutorial on displaying “crap” a few years ago, check it out…https://thecavenderdiary.com/2012/06/08/displaying-our-treasures/
You guys are amazing! Love the shelves and the amount of stuff (crap) you have on them stores so much! Congratulations, you should write a book, or magazine, or something! Thanks for your posts, I love them!
Thanks Pam! That means a lot. Bring on the “Book Deal” offer and we’ll take it.
Unbelievable! Just love everything about it 🙂
So do we Amber! Glad that we can share it.
I’m not sure what I like more. The shelving OR the styling of the shelves. You really do have a way with display. Great job!
A www thanks Elizabeth! There’s still a pile of things in the garage that were edited out…….for now anyway. So glad that you like!
Pingback: How to Build Plumbing Pipe Shelves - SHTF & Prepping Central
Pingback: How to Build Plumbing Pipe Shelves | THE CAVENDER DIARY - Freedom Prepper
Pingback: Prepper Ornament Wreath Diy | Extreme Survival Guide
Did you do anything to darken the pipes? They look much darker than in the first photo where they are all just laid out. Love the finished piece!
Nope, I think it’s the lighting….I have spray painted the flanges before. But now they come in black. AND glad that you like it.
Thank you so much for the response! I didn’t even know that they come in black. I will definitely look out for those!
Love this project!!! Trying to do some similar shelves but having trouble finding pine shelves wider than 12 inches. Can you tell me where you found these? Thanks!!
Those are 12 inch boards, (11 3/4 anyway) guess I forgot to mention that in the post…the top is 2 boards pushed together…that’s why there are supports under it.
Are they two by twelve or one by twelve? My old eyes can’t tell… Lol
1 X 12 , Beth….
We are building a table and the pipe we have has lettering on it. Did you have that, and if you did how did you remove it? I’m contemplating painting all the piping, but if there’s an easier way I’m game!
I turned all the print to the back…….you could always spritz a tiny bit of black paint over the printing……
Pingback: How to Make Super Cool Plumbing Pipe Shelves | RenoCompare
nife job on the shelves! Did you clean the pipe and clear coat it or paint it with something before assembly? I was at homedepot and this pipe and fittings are very oily and dirty when taken off the shelf.
Good question, Yepp sometimes they are a little greasy. I use an Orange hand soup that mechanics use to clean their hands. Can’t remember the brand name but they sell it at auto parts stores.
Do you have a special place you buy the industrial pipe or do you buy it at Home Depot/Lowes? Just thought if you buy that much there might be cheaper places.
Nope Erik, just plain old Home Depot. I’ve done so many pipe projects over years that I have a small pipe surplus in the garage hoard.
Out of curiosity, the photo with the disassembled footing has a different sized connector near the wall flange than the photo of the assembled footing. It looks to be 4″ in the disassembled version. Is that the size that works for your 12″ boards?
Caught me! I started with a 4 inch connector, but it was just a little too far from the wall….so I switched it up with a 1 inch-er…..It worked much better. Can’t always retake pictures after all the work is done. Totally up to you though…use what looks best too you.
Ha! I actually got impatient and bought the 4″, but I agree. I went back and got the 2″. I bet the 1″ was even better. Looks great though. Thanks for the post!
What are the size of the pipes please? Trying to build a closet. Thank you.
Do you mean the diameter of the pipes I used? They are 3/4 of an inch
My best friend sent me your page when I was looking at building a shelf. I used your inspiration to build one of my own to sit my projector above my couch. thanks for sharing!
Thomas! That sounds awesome, so glad that could inspire you. I’d love to see a pic! I’m currently writing a book of plumbing pipe projects……I think you’ll like it.
Hi! What width of shelving did you use?
Thanks!
Andy
Andy, I can’t believe it’s not in there. I think they are 12″ deep, ill have to measure the next time I’m at home.
Pingback: Pipe Guys | wholewheatdiet.com
Amazing Work. I’m going to have to do this project for my wife’s clothing store. Keep up the great work
Thanks Marc. I’d love to see what you come up with ….
Pingback: how to build wooden shelves for closets | DIY Woodworking Projects
Pingback: How To Build A Wooden Quarter Pipe | Danol Plan
What do you use to cut the pipes to the correct size?
Hi Summer, I used pipe sizes that are precut from Home Depot. If they don’t have the sizes you need, they will cut them for you for free.
Pingback: How To Build Wooden Shelves For Closets – ALV WoodWorking COM
Pingback: Wooden Shelves Pics – Finn P Ramsey
My 12 yo son and I are going to make these shelves this summer — a project for him and crossing it off the wish list for me — thanks to your clear and inspiring tutorial! Could we skip the step of cutting the notches from the cleat, install it a bit lower and screw or nail the supports on to it? TX!
Of course you can! Or take the shelves all the way to the ceiling. Or even add angled pipes on top to anchor it to the wall. I just redid this project for my upcoming book…..but I’m sure you want to build yours before it get published.
hi james! we are in the mids of the project and have a few questions…
we are having a devil of a time attaching the flanges to the wall with the other parts of the shelf supports attached, but having an equally hard time attaching the supports to the flange once it is attached to the wall (clearance + measuring really difficult)… how did you do this? with a drill, or by hand? any tips appreciated…
do you have suggestions for drilling straight with the paddle bit? i am re-drilling with a 1-1/8″ bit today as for me, the 1″ bit didn’t make a big enough opening (straight or otherwise!)…
thanks!
So sorry, I’m just now seeing this…you’re probably finished. Are you sure your screw bit is long enough? Like 3-4 inches long….Could make a difference. And yeah, it’s tough to drill straight down with the paddle bit, it takes some practice, Try clamping all the shelves together so the holes line up. a 1 inch bit is still pretty tight. I think I used a white rubber mallet to pound my shelves down on the pipe….or the pipe down through the hole. Either way. Hope this isn’t too late.
Pingback: How To Build Angled Shelves | Africabank
Did you paint the pipes or leave them raw? I have read a lot about rust concerns. Have you had any rust issues?
Hi Elijah, Unless your house if particularly humid there shouldn’t be any rust. Galvanized, the silver pipe is coated so it won’t rust. (it still does a little at the threading part) and is best outside or in a bathroom. The black pipe will rust a little too…..my log roller is 6 years old and still looks fine. A lot of people will spray paint the whole finished unit, (always paint after it’s completed….I’ve seen people spray pieces individually and this is wrong) , so that the fittings match the color of the pipe. Spray paint doesn’t really deter rust….it just covers it up.
Pingback: How To Build A Wooden Quarter Pipe | Danol Plan
Pingback: How To Build A Quarter Pipe Cheap | Information
Pingback: How To Build A Wooden Quarter Pipe | Danol Plan
Well I’m late to the party but I wanted to thank you for posting this project. I have looked at similar pipe shelves & instructions, but yours were the best. Specifically, your version has the t-fitting that the boards rest on AND a flange on the wall, whereas others just have a elbow/bent connector at the back for the board to rest on and zero support secured to the wall ( others only have the sports at the bottom and top flanges ). Your shelf looks very sturdy. We will be building our shelving unit down south and have to worry about humidity ( rust ), so thank you for pointing out that the galvanized is already pre coated.
Erin! I’m so glad that you found me. Yupp, my shaves are pretty sturdy. I even sat on them. Great news! Not only did I post this how-to I also wrote a book. https://www.amazon.com/DIY-Industrial-Pipe-Furniture-Decor/dp/1612436064 The shelves are the last project…and actually have more detail than the blog post. Check it out, and I’d love to see you finished shelves when you’re done!!!
Thank you, that is great to know as we will have a 10’x10′ wall to make a bookshelf and another wall for shelving and a TV etc. I will take pics for sure ( if I ever get around to it, I’m going to start a blog about building our house, in Trinidad, W. I. ) I will check out your Book for sure.
Today ( after another day of Jury duty selection, a experience which I would not wish upon anyone ) I went to Home Depot to look at Pipes and fittings to cheer myself up and do some research. As I was looking at pipe, a older gentleman my dad’s age, saw me staring at the shelving and my phone, and he asked me if I was making a pipe shelf. Turns out, he has your book and is making a shelf!
I have been reading your blog this evening from the beginning and I love your home and style and “collecitons” ( I have pineapples of all sort but monkeypod ones are my fav ) & think your Harley is adorable . Keep up the good work! P.S. If you still ever want a Hudson Bay blanket, check out hula popper.vintage on instagram. He is a friend of mine who deals in vintage clothing and blankets. Cheers
Glad you like our adventures in home ownership. That part where you said the guy a H Depot had my book is the coolest thing anyone’s ever told me…..
The pipes really add beauty with your work. I am planning to make a shelves and I hope I can do the same thing as yours.Thanks for sharing!!
Joel, are you in luck. I just published a book full of Pipe building ideas. And my shelves are included in much more detail than in the blog…..check it out https://www.amazon.com/gp/aw/d/1612436064/ref=mp_s_a_1_1?ie=UTF8&qid=1484149255&sr=8-1&pi=AC_SX236_SY340_QL65&keywords=james+angus&dpPl=1&dpID=51xXmQiUsML&ref=plSrch
Hi there – Love this. Trying out a similar design myself. What size screws did you use to secure the wall flanges? And how wide was your wall? Mine is about 11.5 feet and I’m thinking of just using 3 sets of pipes along the boards, instead of 4.
Hi Denise, I used simple silver 3 inch screws to attach the flanges to the wall. You could search for studs, but it’s not necessary if there’s not going to be too much pressure on the shelves when completed. My wall is about 10 feet long, and I wouldn’t recommend doing less than 4 sets of pipes on a wall that long…your boards will warp and bend over time. But you could possibly if you use thicker pipes and wood shelves…Food for thought. Hey, have you checked out my book? I explain this project in much more detail. https://www.amazon.com/DIY-Industrial-Pipe-Furniture-Decor/dp/1612436064/ref=cm_cr_arp_d_product_top?ie=UTF8
Pingback: Strong and Sturdy Plumbing Pipe Shelves DIY Project | The Homestead Survival
Just found this page, looks great! I’m planning on building one very soon. Just wanted to know if it will be sturdy enough for a 60″ tv, plus my stereo gear? being a plumber, this is perfect!
Hi Randy, Should be sturdy enough. I don’t have any electronics on mine…but there are plenty of books. If you’re a little hesitant…I’d attach as much as you can to the wall studs. ANd I’d LOVE to see how yours turn out…Send pictures. BTW, This is the most popular project in my book.
Thanks for getting back to me so quick.
Pingback: INSPIRATION PINSPIRATION ~ Industrial Pipe Shelving
This is awesome. Thanks! Just so you know, I read the whole thing in the voice of Tommy Chong.
Kari!!!! I just reread it in the same voice! That is hysterical!
Love these shelves. I want to build a set in my basement but attach it to the concrete wall. What size/length/type screw would you recommend? And why did you choose 3/4″ pipe diameter rather than 1/2″? Would you change anything to make the array taller than 43″? I’m thinking of 6′.
Hi Bill, you can make them any height you want….like tinker toys. The bigger the furniture, the bigger the pipe. I mean, it’s not like steel pipe will bend, but ya never know. Not sure about the screws, but they should be made for drilling into concrete. Not to plug…..but have you checked into my book? https://www.amazon.com/DIY-Industrial-Pipe-Furniture-Decor/dp/1612436064 I explain a lot about working with pipe, and the shelves project is explained in greater detail….I’d absolutely love to see what you build, send a picture! Seriously. And happy building.
Love this shelving. Thanks for the instructional derail. What would recommend to attach the flanges to a concrete wall? Why did you opt for 3/4″ pipe rather than 1/2″? And what would change to raise the height to 6′? Thanks.
Thanks for the quick response. I just ordered the Kindle version of your book. I’ll check back with progress reports.
Pingback: #style How to Build Plumbing Pipe Shelves from the Cavender Diary - this would be awesome in the master bedroom closets and the butler's pantry / laundry room... - DIY Ideas
Am a little behind on reading the blog so have had a fun evening catching up. The pipe shelves are wonderful! And of course you all style your collections beautifully. Not sure I am ready to tackle a big job like that, but had fun daydreaming! Thanks for the inspiration. As usual!
I am (finally!) ready to install my pipe shelves. The wall where the shelves will stand is concrete.
What size and length screws do you recommend? Somone mentioned Topcon, 2 1/2″ long. What’s your advice?
HI James: Fully inspired, I purchased your book and I’m ready to start! But mine will be about 8.5 feet high, with each level (6) about 100 linear inches, but in an L-shaped configuration around a corner. I’m purchasing 12″ nipples to put between the levels, so the shelves will be about 14″ apart.
Using black pipe with a cherry stain on the shelves.
Question: on the horizontal “arms”, I can’t find 1″ nipple. Is that also known as a “close” nipple? I found those on supplyhouse.
Also, any advice on how to do the corner?
LORI!!!!!! OMGOD, I’m so sorry. I thought I responded to you a week ago. And you – an elite member of my book club – should be treated much better than that. I love the idea of corner shelves, sounds pretty cool. Make sure the brackets are as close to the corners as you can. There will be greater stress on the connection, and will need all the extras suppost they can get. I personally, would miter the 2 connecting shelves and biscuit them together, Biscuits are little wood discs that get glued inside the wood. Sounds complicated, but it’s not. If you’re looking for an easier way, you could use flat straps under the connection. Like an “L” bracket, but not bent. They come silver, but you could spray paint them to match the wood. 1″ nipples aren’t that rare, I think there’s a 1/2″ one too. the 1″ refers to the distance of the pipe that isn’t grooved to fit into the next pipe. “Close” nipples are entirely grooved. I’m pretty sure you could use any size nipple, as long as they’re all the same size. But check out a Home Depot and see what they have in stock. I’d love to see pics when you’re done. Please send some….
Awesome doing this next week ! I’ve been looking for industrial modern shelves and nothing seemed right. Now here is the answer. I’m going to take them up to the coming though . Great article Tnx !
Glad that you’re inspired, Ron. Not to plug my book…but this project did inspire an entire book of pipe building..and I revisited these shelves. I think I did a better job of explaining them the second time….But trust me, use mine as a jumping off point and make your shelves fit your needs. Like all the way to the ceiling! OOHHHHH!!!! and I’d love to see pictures when your done too!!
Pingback: 20 Easy DIY Pipe Shelves – Ideas & Plans - Lemon Slide
Hi
I love your shelves and I’m ordering parts to build a floor to ceiling version. I had one question in the picture where you lay out the pipes with the isizes needed there isn’t a size marked for the connector from the wall to the free shelf support . But in picture 1 it appears to be the same size as the 4” foot connecter but in the progress pictures it appears to me much shorter. Can you tell me the length on the wall flange connector thanks
Hi Ron, I started with a 4” nipple, but decided that I wanted my shelf just slightly closer to the wall……so I changed to a 1”nipple. Can’t believe you caught that. I promise , the directions in the book are much more detailed. Good luck with your shelves…
I had the same question! Great minds think alike!
This is great! I was looking for adequate shelving for my new beer cellar. I didn’t want to buy an industrial shelf as it wouldn’t fit the space. I’ll be doing a modification of this! Since my shelves will be holding heavy liquid I’ll most likely add a few more supports. LOOKS AWESOME!!!
“Beer Cellar”!!!!!….I’ll be right over!!!!
hey, sorry if I’ve missed it. but did you have a parts list?
Love this idea can’t wait to do mine.Thanks
Send pic! We’d love to see how they come out!
These are AWESOME!! Such a well done job!! And, this is EXACTLY what I’m looking for to place in a double width closet. But my favorite line that you wrote is, “…and then filled them with crap. Like so..” LOLOLOLOL!!!!!!! Are we related? I’ll be in touch if I get stuck! Thanks for the inspiration!
Glad I can inspire, Patty. You know…..I did write a book all about building things with pipes. DIY Industrial Pipe Furniture and Decor…if you do get stuck. And I’m a certifiable “crap-aholic”
I have some pics to send you of my amazing project inspired by you. How can I send them?
Hi Lori, you can reach me at James@thecavenderdiary.com . So excited to see!
First post of yours I have read. I will read them all. Thank you for taking the time to share this.
Thanks Andy, Glad you like.
Pingback: 20 Easy DIY Pipe Shelves – Ideas & Plans
I love seeing creativity!! Way to go boys.
I like this ideas. I though I was the only one. Now I see you here I am happy to see other innovative artistic smart person.
I am from third world country. And I used plumbing pipes for my shelf in my garage It’s economical, stronger, look rough and tough and it’s like art everybody like my garage shelf.
But I love how you did shelf inside the house.
I’ll copy your idea.
inside the house all my shelf will be plumbing pipes.
Do you have any idea how many pounds will support the center of 10 feet of 2 inches pipe.
I am thinking to build a calisthenic park with plumbing pipe but I have concerns about safety and durability.
If you know something like that please let me know I appreciate it.
Thank you for sharing and congratulations keep the pipe on
Pingback: Tự thiết kế kệ ống nước từ A-Z
Pingback: How to Develop Pipes Pipeline Shelves – DIY Home Decor Ideas
Pingback: Interior Design: 23 DIY Plans to Build a Pipe Bookshelf – CrochetingHearts.org
Pingback: Empty Living Room – Home Site
This is beautiful – now I’m gonna try and copy you. Thank you
Hi DF, If you need a little extra assistance… check out my book “DIY Pipe Furniture and Decor” on Amazon. And I’d LOVE to see pics of your finished shelves!!
Pingback: 17 estantes impresionantes de la tubería de bricolaje para una organización económica | Alist of Games
Pingback: 15 DIY Pipe Shelving Initiatives For That Industrial Look | Best ideas creative cooking recipes Menu Ideas
Pingback: 15 proyectos de estanterías de tuberías de bricolaje para esa apariencia industrial - Privada Home
Am youth of 20 years l like to be manually to know how to understand and learn more about build plumbing pipe am finish form four when your attention to save call or text in 0787885191/0747600513