THE CAVENDER DIARY

2 GROWN MEN vs a 40 YEAR OLD HOUSE

  • Home
  • Who Are We?
  • House Tour
  • To Do List
  • Projects
  • Recipes
  • Did Ya Know?
  • Books
  • Our Press

Nationally Graphic as well,

Posted by James on August 22, 2015
Posted in: Did Ya Know?, New Home. Tagged: National Geographic, National Geographic Magazine, National Geographic Society, Sharbat Gula. 4 Comments

National Geographic magazine, the official magazine of the National Geographic Society, was first published in 1888. The first few issues were mostly a scientific journal, but the popularity and quality of the exotic images quickly changed it to a mostly pictorial magazine. National Geographic strives to include only the best photographs by some of the world’s most renowned photographers. The June 1985 cover, with a 13 year-old Afghan girl shot by Steve McCurry, is one of the most widely recognized magazine covers of all time.

National Geographic June 1985 Afghan Girl Cover

Sharbat Gula’s piercing gaze on that cover came to symbolize the plight of refugees around the world.

National Geographic is circulated world-wide, printed in 40 languages, and has a monthly print of nearly 6.8 million magazines.

With so many copies floating around, no wonder they keep “popping up” in interiors.

Hipster Dining Room with Shelves of Yellow National Geographics

Huge Stack of National Geographics in Corner of Room

Kids Reading Area

Nightstand with Big Ol' Stack of National Geographics

Shots of Yellow in a Neutral Room

Console with National Geographics Underneath

Emily Henderson Designed Room with National Geographics on the Shelves

Fireplace Mantle with Stacks of Yellow National Geographics

Workspace with Stacks of National Geographics for Inspiration

That Perfect Shot of Yellow on a Bookshelf

(Images via Pinterest)

I’m not a fan of “decorating”, I think interiors should evolve. Nothing says “This just sort of happened”, more than a pile of old magazines in a room. (It almost takes an act of congress for me to throw out a magazine.)

And you have to admit, that shot of graphic yellow makes you smile.

Certainly makes me smile.

(and LONG LIVE MAGAZINES!)

Share this:

  • Click to share on Facebook (Opens in new window) Facebook
  • Click to share on LinkedIn (Opens in new window) LinkedIn
  • Click to share on X (Opens in new window) X
  • Click to share on Pinterest (Opens in new window) Pinterest
Like Loading...

Drain Flies are Gross

Posted by James on August 19, 2015
Posted in: New Home. Tagged: Drain Fly, Drain Fly Infestation, Master Bathroom. 6 Comments

First there was one.

One tiny, furry little…..”moth-thing”.

Then I noticed a couple of them……

These Black Flecks Turned out to be Drain Flies

A week later there was a whole flocking flock of them. I counted 30 in about a minute.

Small Heard of Drain Flies in the New Master Bathroom

What-the-What?

They’re drain flies.

Here’s one magnified.

Close-Up of a Drain Fly

The little buggers feed off the slime, lay eggs, hatch larvae, and become furry little flies…..all in the drains of our plumbing. In just a couple of days too.

YYYUUUCCCCKKKK,

We’d never heard of them before either.

Here’s where ours were living…….in the toilet drain.

IMG_9479

There’s been a rag stuffed down that hole since we started the remodel. When I pulled it out……20 flies flew out with it.

YYYUUUCCCCKKKK, again.

A quick Google search suggested that I buy something…..No surprise there.

So I did, No surprise there either.

InVade Bio Drain

IMG_9487

and InVade Hot Spot,

INVade Hot Spot Drain Cleaner

Since we’re pretty certain that this place is the source of our infestation, I poured a bucket of hot water down the hole. And followed that with a pretty good scrubbing with an old toilet brush. (I was planning on splurging on a fancy new one anyway)

I then sprayed both products down the toilet-hole. Gel first, then foam.

Toliet Drain Filled with Foam

…….and stuffed a “clean” rag in. just in case there were some flies/larvae living on the old rag. YYYYYYUUUUCCCKKK,

The Invade directions said to give it a few days…..then repeat the process. I did.

The next day I saw 1 fly……

…and not a single one since.

Share this:

  • Click to share on Facebook (Opens in new window) Facebook
  • Click to share on LinkedIn (Opens in new window) LinkedIn
  • Click to share on X (Opens in new window) X
  • Click to share on Pinterest (Opens in new window) Pinterest
Like Loading...

Goodbye Side-Walk…Goodbye

Posted by James on August 16, 2015
Posted in: New Home. Tagged: Backyard, Home Depot Jack Hammer, Lucy and Ethel, New Deck. 8 Comments

Remember that episode where Lucy and Ethel rent a jack hammer and go to town with it on their stupid little backyard sidewalk?

What? They didn’t make that episode. Are you sure?

That’s weird, because I’m pretty sure Jamie and I reenacted it in our backyard yesterday.

Jamie and the Jackhammer in the Cavender Backyard

Maybe I should start at he beginning….

The back of our house looks like this: (Ignore the blurry Doberman)

Back of the Cavender House with Running Doberman

Not too big, not too small.

Ok, the backyard is a decent size, but that 6’X8′ slab of concrete the builder called a “patio” is ridiculously small. Not at all meant for entertaining.

A few years ago we planted the sage bushes and spruced up the furniture a little. But the Big Plan has always been to build a deck that extends the whole length of the back of the house. And one day add double doors from the den and master bedroom. Ahhhhh……perchance to dream.

This week, our contractor* assures us that he can make it happen. The deck part of the dream at least.

*Yes, we are a couple of “Do-It-Yourself” guys, but come on…..lets be realistic here. We don’t have to do everything ourselves. Especially when we have a home improvement credit card with an open balance on it. (Yepp, completely paid off the air conditioner/heater install, new electrical panel, granite counter tops, and sprinkler system….. So let’s do this)

The biggest issue with the new deck, since it will hover over the current patio and old air conditioner slabs, is the goofy little side-walk connecting the driveway to the patio.

This one:

That Backyard Sidewalk That Has to Go

We plan on adding huge pavers surrounded by pea gravel as a walkway….so that sidewalk has to go.

It’s about 12 foot long…shouldn’t be that hard to remove. It’s just 45 year-old concrete? Right?

After a failed attempt to lift the pieces with a shovel and a few swings with a pick ax and a baby sledge-hammer, it became apparent that it might be a little more solid than we thought.

“I’m going to Home Depot”, and I assumed that Jamie would come back with a larger sledgehammer.

Nope, he pulled out the big guns. A Makita jack hammer, all ours for 4 hours.

No instructions, just a power cord and an “ON” button built into the handle.

Jamie and the Jackhammer Collage

I guess that’s self-explanatory.

Aim it at the thing you wish to destroy, and hold the trigger. Texans understand this all too well.

I changed out of my flip-flops (Safety first) and gave it a try……

How hard could it be? I see meat-heads doing this in commercials all the time.

James Giving the Jackhammer a Try

It’s a little more strenuous than it looks. The darn thing weighs about 80 pounds….and you have to lean all your weight on it. The vibrations are killer too….it’s not really as sexy as Hollywood makes it look in the movies.

We both jiggled like high-speed lava lamps.

But it worked fast. Real fast. Taking turns, it took the 2 of us about 30 minutes to break up the whole sidewalk.

Evolution of the Removal of the Goffy Sidewalk Collage

The August Texas heat didn’t help matters, but we managed to haul all the concrete debris downhill to the alley behind our fence.

Jamie counts that as burning about 400 calories each.

Lord knows that Lucy and Ethel, and possibly these boys too, could stand to burn 400 calories each.

Now bring on that new deck…..

Share this:

  • Click to share on Facebook (Opens in new window) Facebook
  • Click to share on LinkedIn (Opens in new window) LinkedIn
  • Click to share on X (Opens in new window) X
  • Click to share on Pinterest (Opens in new window) Pinterest
Like Loading...

Den & Delve, Camp and Scout Bags

Posted by James on August 9, 2015
Posted in: Did Ya Know?, New Home. Tagged: Boy Scout Bags, Den & Delve. 6 Comments

Den & Delve Large Bag

That’s the “Scoutmaster 83” large zippered pouch.

Den & Delve created this amazing bag from a piece of an old canvas duffel bag and a slice of leather from a vintage jacket. It’s lined in the greatest red serape too.

Isn’t it just the coolest?

OOOhhh, and how about those patches? They’re vintage Boy Scout camporee patches and pins from the 60’s and 70’s.

Vintage Boyscout Patches from the 1970's

Y’all can find this bag, and a handful of other one of a kind handmade bags, for purchase in the Den & Delve Shop.

Den & Delve Medium Girlscout Bag

Den & Delve Large Camp and Scout Bag

Den & Delve Medium Camp and Scout Bag

Be sure to check out the Den & Delve Blog for more of the story behind these limited-edition (When they’re gone, they’re gone) bags inspired by nostalgic childhood summers. Can’t you just smell the campfire, pine needles and “Deep Woods Off”? I know that I can.

Huge Pile of Den & Delve Camp and Scout Bags

(On a side note here; Yes, everyone of y’all knows that I could make my own version of these….So stay tuned. Because it just might happen)

Share this:

  • Click to share on Facebook (Opens in new window) Facebook
  • Click to share on LinkedIn (Opens in new window) LinkedIn
  • Click to share on X (Opens in new window) X
  • Click to share on Pinterest (Opens in new window) Pinterest
Like Loading...

Taco Night in a Box

Posted by James on August 4, 2015
Posted in: New Home. Tagged: Homemade Gucamole, Housewarming Gift, Taco Night Gift Box, Taco Tuesday. 21 Comments

The day after we got our keys to the Cavender house we had a handful of friends over to judge, I mean view, our new home.

Since our friends are all well-mannered – that’s why they’re our friends, after all – they all brought us a little something as a housewarming.

Champagne (Hell to the Yeah), candles, Mexican pastries (from a bakery in the neighborhood) and even a few good luck charms: like an old horse shoe, a glass evil eye (for repelling bad spirits), and a bundle of sweet-smelling sage. All perfect house-warming gifts. Thanks again everyone.

But our friends the Fletchers brought the cleverest gift of all: a rubber bucket filled with hand soap, a scented candle, paper towels, T. P.(duhhh), Windex, and a roll of trash bags…..

….all things they knew we would need that first week in a new home. Clever, clever, clever.

When we heard that Vinnie and Tana were moving into a cute little house just a few streets away from us, we knew that wanted to do something practical for them too. (But maybe not quite as “bathroom related“)

They’re a fun young couple with 2 adorable little toddlers to juggle. I’m sure they’re pretty overwhelmed. Especially when it comes to feeding everyone.

How about a “Taco Night in a Box” as a housewarming?

Taco Night in a Box from the Cavender Diary Boys

Pretty simple really,

We already had the Pepsi crate in the hoard……we just filled it with all the things that make for a most excelent taco night.

All the Ingredients for a Taco Night Box

  • Tortillas (Made fresh daily down the street)
  • Shredded Chicken
  • Homemade Guacamole
  • Queso Fresco (Soft, mild Mexican Cheese)
  • Bundle of Cilantro
  • Salsa (Could have made it, but El Fenix is so good)
  • Tortilla Chips
  • 6-Pack of Corona (I mentioned the 2 toddlers, Right?)
  • Plenty of Limes
  • Maria of Guadalupe Candle (just for the good Juju)

For the shredded chicken, we use a fork to shred 2 precooked chicken breasts. Then tossed in a teaspoon of taco seasoning mix. (Just a teaspoon, no one needs that much salt)

Toss a Few Teaspoons of Taco Seasoning with the Shreaded Chicken

Don’t ever buy premade guacamole. Most of it doesn’t even contain avocados. I know, W.T.Fudge?

It takes about 2 minutes to make your own with ripe avocados.

“How can you tell if they’re ripe?”

Good question,

Avocados should be soft to the squeeze, but not too soft. Pop the stem off the end, the fruit underneath it should be bright, chartreuse green. If it’s black – put it back.

Check the Ripeness of an Avocado by Looking Under the Stem

Homemade Guacamole from Ripe Avocados

Use a fork to mash 5 – 6 avocados. Don’t ever blend it in a blender or food processor, you want guacamole to be a little chunky.

Use a Fork to Mash the Ripe Avocados

To the mashed avocado, simply add:

  • The juice of a Lime
  • A pinch of Salt
  • Some Cracked Pepper
  • A Crushed Garlic Clove
  • Maybe, some Diced Onion (I hate raw onions)
  • Some finely chopped Cilantro.

That’s it. Let the fresh flavor of the fruit shine through.

If you are one of those people who adds mayonnaise or Worcestershire to your guacamole………we can’t be friends.

One more excellent suggestion; Throw an avocado pit back into your finished guac. The pits excrete an enzyme that prevents the fruit from browning in the exposed air.

Taco Night in a Box from your Cavender Diary Boys

Taco Night in a Box

I know, how simple…and delicious.

Kinda wishing that someone would bring us one……

Anyhoo,

Welcome to our neighborhood guys! and Happy Taco Night!

Share this:

  • Click to share on Facebook (Opens in new window) Facebook
  • Click to share on LinkedIn (Opens in new window) LinkedIn
  • Click to share on X (Opens in new window) X
  • Click to share on Pinterest (Opens in new window) Pinterest
Like Loading...

The Weird Bathroom Ledge

Posted by James on August 2, 2015
Posted in: New Home. Tagged: Master Bathroom, Master Bathroom Remodel, medicine cabinet, Mirrored medicine cabinet. 8 Comments

“So…what’s the deal with that fireplace-shaped build-out on the sink wall?” you might be thinking…..

Bathroom Wall with Weird Build-Out for Sink

There’s a reason for the madness, I assure you.

It’s a small room, with absolutely no storage. And…we….kind of have…..a lot of “product”. Jamie likes his fragrances. I need pomade (like y’all thought my hair naturally dried like that) and quarts of mustache wax………and all that stuff has to go somewhere.

Somewhere, like this Ikea “Godmorgon” Mirrored medicine cabinet. Seen here with a handsome man reflected in it. (Notice his perfectly sculpted hair)

Godmorgon Medicine Cabinet and Bathroom Mirror from Ikea

We’re actually looking forward to this because we’ve never shared a medicine cabinet before. Relationship baby steps.

Yeah!

The Godmorgon cabinet is wicked-huge. We went with the medium size, 27″ X 37″, should hide tons of cologne and wax and other beautifying stuff.

Problem is…..it’s 5 inches deep.

5 INCHES

That means it would hover over the faucet……which seems kinda weird……and there’s no way to recess it in the wall because the drain vent is in that wall.

Our solution: simply build out the sink wall a few inches. And Bonus: we also create a little ledge to rest even more stuff on. (I imagine an orchid and candles…… Jamie – cologne)

Here’s the wall, directly in front of the door where our sink will rest.

The Wall Section Where the Sink Build-Out Will Be Longways

I just framed it out with 2 X 4’s

The Wall Section Where the Sink Build-Out Will Be Longways (2)

Our first thought was to extend the ledge across the entire wall into the shower. Perfect place for soap and shampoo. But the shower is sadly small to begin with. Believe it or not, we just couldn’t give up 4 inches of shower space……

Framed Out Wall Section Where the Sink Build-Out Will Be

We covered the 2X4 square in Hardi Board and left a little panel for the plumber to access the pipes.

The Sink Build-Out With Cement Board

That’s why it looks like a little fireplace.

Then, of course, Jamie used thin-set mortar on the seams and painted on a layer of pink water-proofer.

Jamie Painting on the Pink Water-Proofer

But wait……Something didn’t seem right

I checked the size with our tile sample on top of the ledge,

My Tile is Just a Fraction too Large for the Ledge

Crap!

I know better than that. (2 X 4’s are technically 1.5 X 3.5)

Even with the 1/4 inch layer of Hardie Board, we’re still a little shy of 4 inches on top.

…and we plan on cutting as few tiles as humanly possible.

So on with yet another layer of Hardie Board.

Sink Build out with Second Layer of Hardie Board

….and more thin-set mortar.

Once Again Jamie Taped and Grouts the Sink Build Out

Much better now.

(Exhale slowly………)

Now it’s slightly over 3 3/4 inches. That quarter inch of  turquoise tile that we will plaster on the front should make it just right.

Top of the Sink Build out is Closer to 4 Inches Now

Way, More, Much Better

and it will all make more sense when we’re finished.

Bathroom Wall with Weird Build-Out for Sink

On to the shower pan portion of our bathroom.

Share this:

  • Click to share on Facebook (Opens in new window) Facebook
  • Click to share on LinkedIn (Opens in new window) LinkedIn
  • Click to share on X (Opens in new window) X
  • Click to share on Pinterest (Opens in new window) Pinterest
Like Loading...

Turquoise Bathrooms…To Persuade You

Posted by James on July 25, 2015
Posted in: New Home. Tagged: Master Bathroom Remodel, Turquoise Bathrooms, Turquoise Tile. 19 Comments

Not that we need any convincing,

We know that we’ll love it.

and besides, the tile has been purchased and there’s no going back now.

But here’s a few inspirational pics of floor to ceiling turquoise tile.

Glazed Turquoise Bathroom with Glass Enclosed Shower

Modern Bathroom with Turquoise Square tiles

Turquoise Accent Wall in Modern BAthroom

Turquoise-Bathroom-By-Garry-Mertins3

Better Homes and Gardens Turquoise Tile Bathroom

Tiny Turquoise Tile in Frameless Shower

Turquoise Tile in Kids Bathroom

Turquoise Glass Bricks in Shower

(All photos via Pinterest)

Aren’t they just ………….refreshing?

This last one is probably our favorite. It’s a nice little “punch” of color.

But still not exactly what we’re going to do.

Y’all will just have to wait and see…….

Share this:

  • Click to share on Facebook (Opens in new window) Facebook
  • Click to share on LinkedIn (Opens in new window) LinkedIn
  • Click to share on X (Opens in new window) X
  • Click to share on Pinterest (Opens in new window) Pinterest
Like Loading...

Bathroom Color Inspiration

Posted by James on July 21, 2015
Posted in: New Home. Tagged: Daltile, Master Bathroom, Master Bathroom Remodel, Master Bathroom Tile, Turquoise Tile. 37 Comments

I’m sick of hearing about “Resale Value”.

Who honestly cares what the next people who live in your house will think?

We live in this house now, God willing for the next 30 – 40 years, and we’re going to make this OUR house.

The way that we want it, and for the way that we live in it.

That being said…….we want a master bathroom with colored tile. (cue gasp)

Color Options for Daltile Ceramic Tiles

A color like turquoise.

Specifically, this turquoise.

Vintage Fiesta Ware Sugar Bowl as Bathroom Color Inspiration

The color of my vintage Fiestaware sugar bowl.

Stunning, ain’t it?

Turquoise reminds us of the water in Hawaii, jewelry shopping in Santa Fe, and vintage Fiestaware sugar bowls for some reason…..

It looks like this in un-glazed 2 inch ceramic tile form…….

Unglazed 2 Inch Square Turquoise Tiles

“Ocean Blue” it’s called, from Daltile.

Took a bit of work to get 144 square feet of it.

You can only look at tile in the Daltile showroom, can’t purchase there, and can’t purchase on their website either. (In fact, even the showroom person didn’t know of any tile dealers that we could purchase it from) When we finally did find a dealer, Daltile had so little in stock that we had to wait 3 months for them to make it for us. All from one dye-lot, mind you. Guess where you pick the tile up from? Daltile….sort of. Not the showroom, we were told after waiting in line there for 20 minutes, but their warehouse a few short miles away from the showroom. Naturally, the Daltile warehouse attendants couldn’t find our tile in their warehouse. And for some reason our tile dealer hadn’t paid for it yet (3 months after we paid them……..they also charged us about 70% more than Daltile charged them. Just for placing the order) and we had to wait for the warehouse Einsteins to sort it all out.

Once everything was solved…..an hour later……they asked us if we wanted them to leave it on the pallet.

Pallet?

Just how much did we buy? 350 pounds, apparently.

That’s just 6 boxes. (Accounting for 20% more than I think we need)

Anyhoo……it’s sitting in a stack in the garage. Waiting for us to install it…..

Which should be soon.

Ohhh, God I hope it’s soon,

Share this:

  • Click to share on Facebook (Opens in new window) Facebook
  • Click to share on LinkedIn (Opens in new window) LinkedIn
  • Click to share on X (Opens in new window) X
  • Click to share on Pinterest (Opens in new window) Pinterest
Like Loading...

July 17, 1955

Posted by James on July 17, 2015
Posted in: Did Ya Know?, New Home. Tagged: Disneyland, Disneyland Opening Day, July 17 1955, Walt Disney. 7 Comments

60 years ago today was the first day of Disneyland.

Disneyland Grand Opening

After so many requests for tours from fans flooded the Disney Studios, Walt wanted to build something for Disney tourists to visit. After considering a few acres close to the studio…..briefly, Walt settled on 160 beautiful acres of orange and walnut groves in Anaheim California.

It’s hard to believe, but Disney had trouble raising the money to build his theme park. But I suppose that 17 million was quite a fortune in 1954. He joined forces with the fledgling television network ABC, who agreed to help fund the park if Disney would broadcast a show in the network. Which, of course he did. Ever heard of the Mickey Mouse Club? For the first five years of operations, Disneyland was owned by the joint venture of Walt Disney Productions, Walt Disney himself, Western Publishing, and ABC. With the popularity of the park, and of course Disney Studios, in 1960 Disney was able to buy the others out of their shares.

Construction on the park, originally called Disneylandia?, began in July of 1954 and was completed exactly one year and one day later.

Map of Disneyland on Opening Day 1955

18 Jul 1955, Anaheim, California, USA --- Original caption: Walt Disney, the cartoonist-producer and lately creator of Disneyland, the 160-acre, $17,000,000 playground for children, sits in front of his Fantasyland castle during a telecast of the official opening of the playground. The premiere was televised nationally. --- Image by © Bettmann/CORBIS

Disneyland Opening Day Racecars

Vintage Mickey and Minnie

Disneyland was dedicated at an “International Press Preview” event held on Sunday, July 17, 1955, which was only open to invited guests and the media.

28,000 people attended the event, but only about half of those were actual invitees, the rest having purchased counterfeit tickets….. which Disney knowingly honored.

The Crouds at Disneyland Opening Day

ABC broadcast the opening day festivities, hosted by a few of Mr. Disney’s Hollywood friends; Bob Cummings, Art Linkletter, and Ronald Reagan. Because it was a live event, everything that could go wrong, did go wrong….and on camera no less. The hosts were caught fumbling back and forth with each other. Disney himself, started a dedication and was interrupted by something off camera. Route 101 had been expanded by 2 extra lanes in anticipation of the traffic the park was sure to bring, but cars were still backed up on the 2-lane Harbour Boulevard. The temperature that day was an unbelievable-for-southern-California 101 degrees. Park guests were constantly tripping over the camera cables and sticking to the asphalt that has just been poured the day before. A plumbers strike forced Disney to choose between working toilets of water fountains. He chose the wiser of the two forcing many park guests to question if the un-working water fountains were just a ploy to get them to purchase drinks. Lines for rides were so long that eager parents actually threw their children over the crowds. Finally, a gas leak closed down several sections of the park for the afternoon.

Govenor Ronald Reagan, Opening Day Disneyland

In later years, Disney would refer to that Sunday as “Black Sunday”.

Disney Teacup Ride on Opening Day 1955

Admission to the park, by the way, was a dollar for adults and 50 cents for kids.

Share this:

  • Click to share on Facebook (Opens in new window) Facebook
  • Click to share on LinkedIn (Opens in new window) LinkedIn
  • Click to share on X (Opens in new window) X
  • Click to share on Pinterest (Opens in new window) Pinterest
Like Loading...

SNAKE BITE LAKE SIGN

Posted by James on July 13, 2015
Posted in: New Home, Projects. Tagged: Hobby Lobby Mache Letters, Liquid Nails for Small Projects, SNAKE BITE LAKE. 16 Comments

How to Make a Vintage-ish Lake Sign from the Cavender Diary Boys

This one’s a little “crafty”……sorry.

We don’t go to Hobby Lobby very often,

Practically never.

I don’t agree with their politics……they don’t approve of , well, just about everything in our lives.

But it’s the place that all the “Lady-Bloggers” have been going on about. Row upon row of plastic Christmas balls (in July, mind you), ceramic hippos next to pipe cleaners, and almost everything has scripture printed on it. What could be more wholesome?

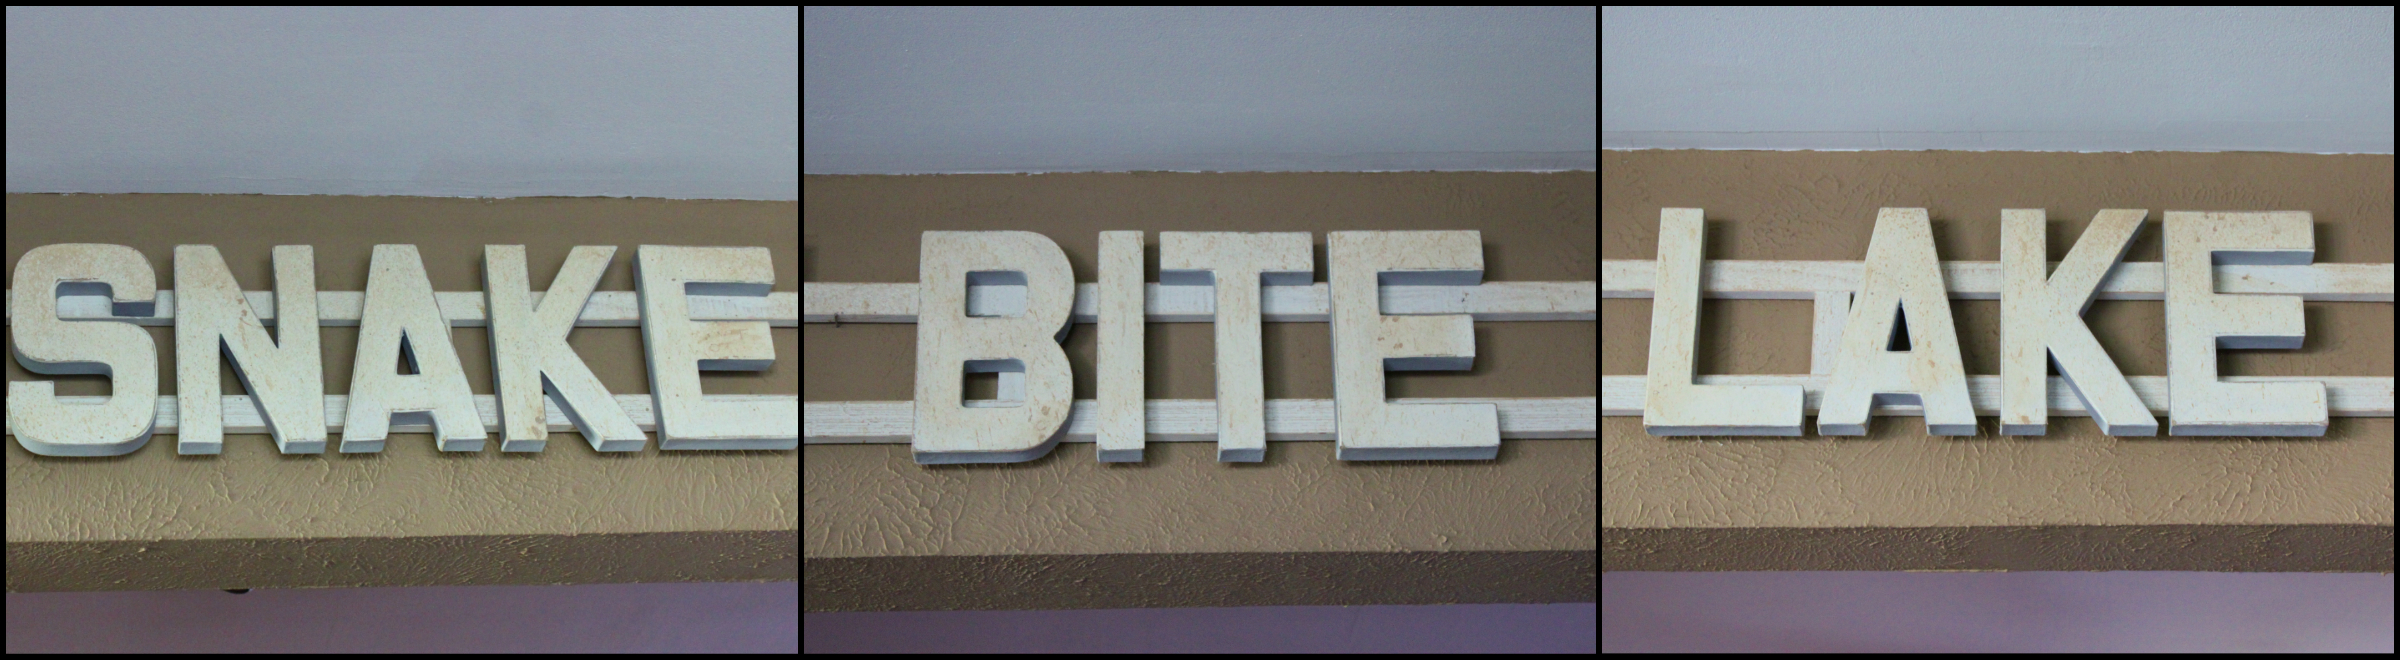
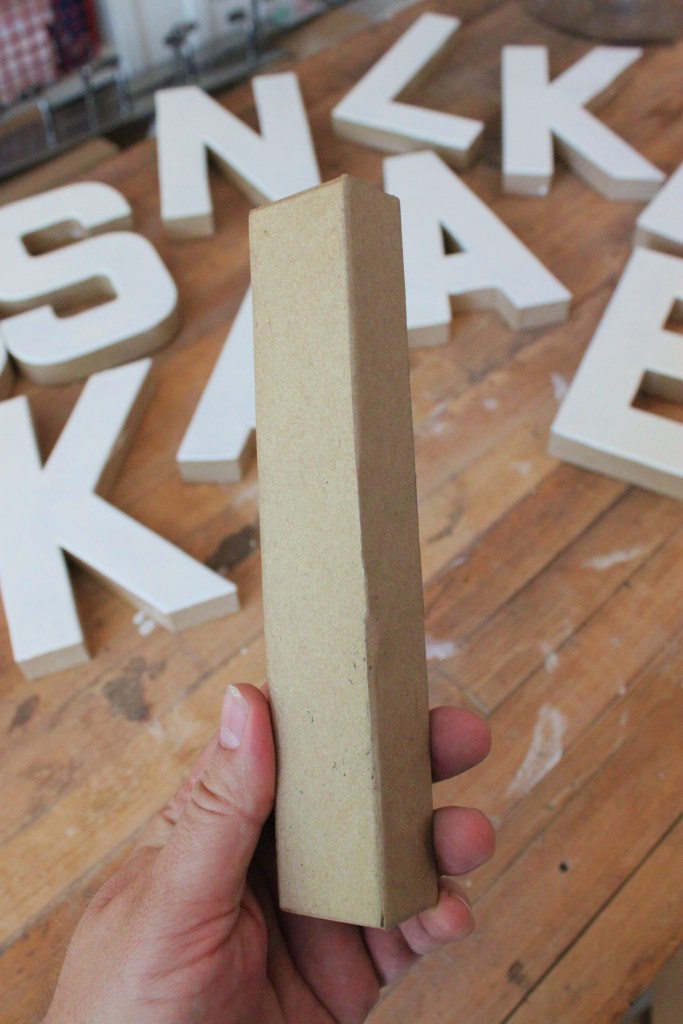
I’ve been watching these 8″ paper mache letters on the website for weeks.

Paper Mache Latters from the Hobby Loby

They’re 3 bucks each. Which isn’t bad….but I knew there’d be a 50 off promotion if I could wait long enough.

The other morning I checked the site….Half off. Short road trip later, we returned with 3 complete words.

NO, I’m not going to spray paint them silver and spell out E.A.T. to hang in the kitchen…….If I ever do, shoot me.

I have a much better plan. But first I have to make them look like…….ummmm, not cardboard.

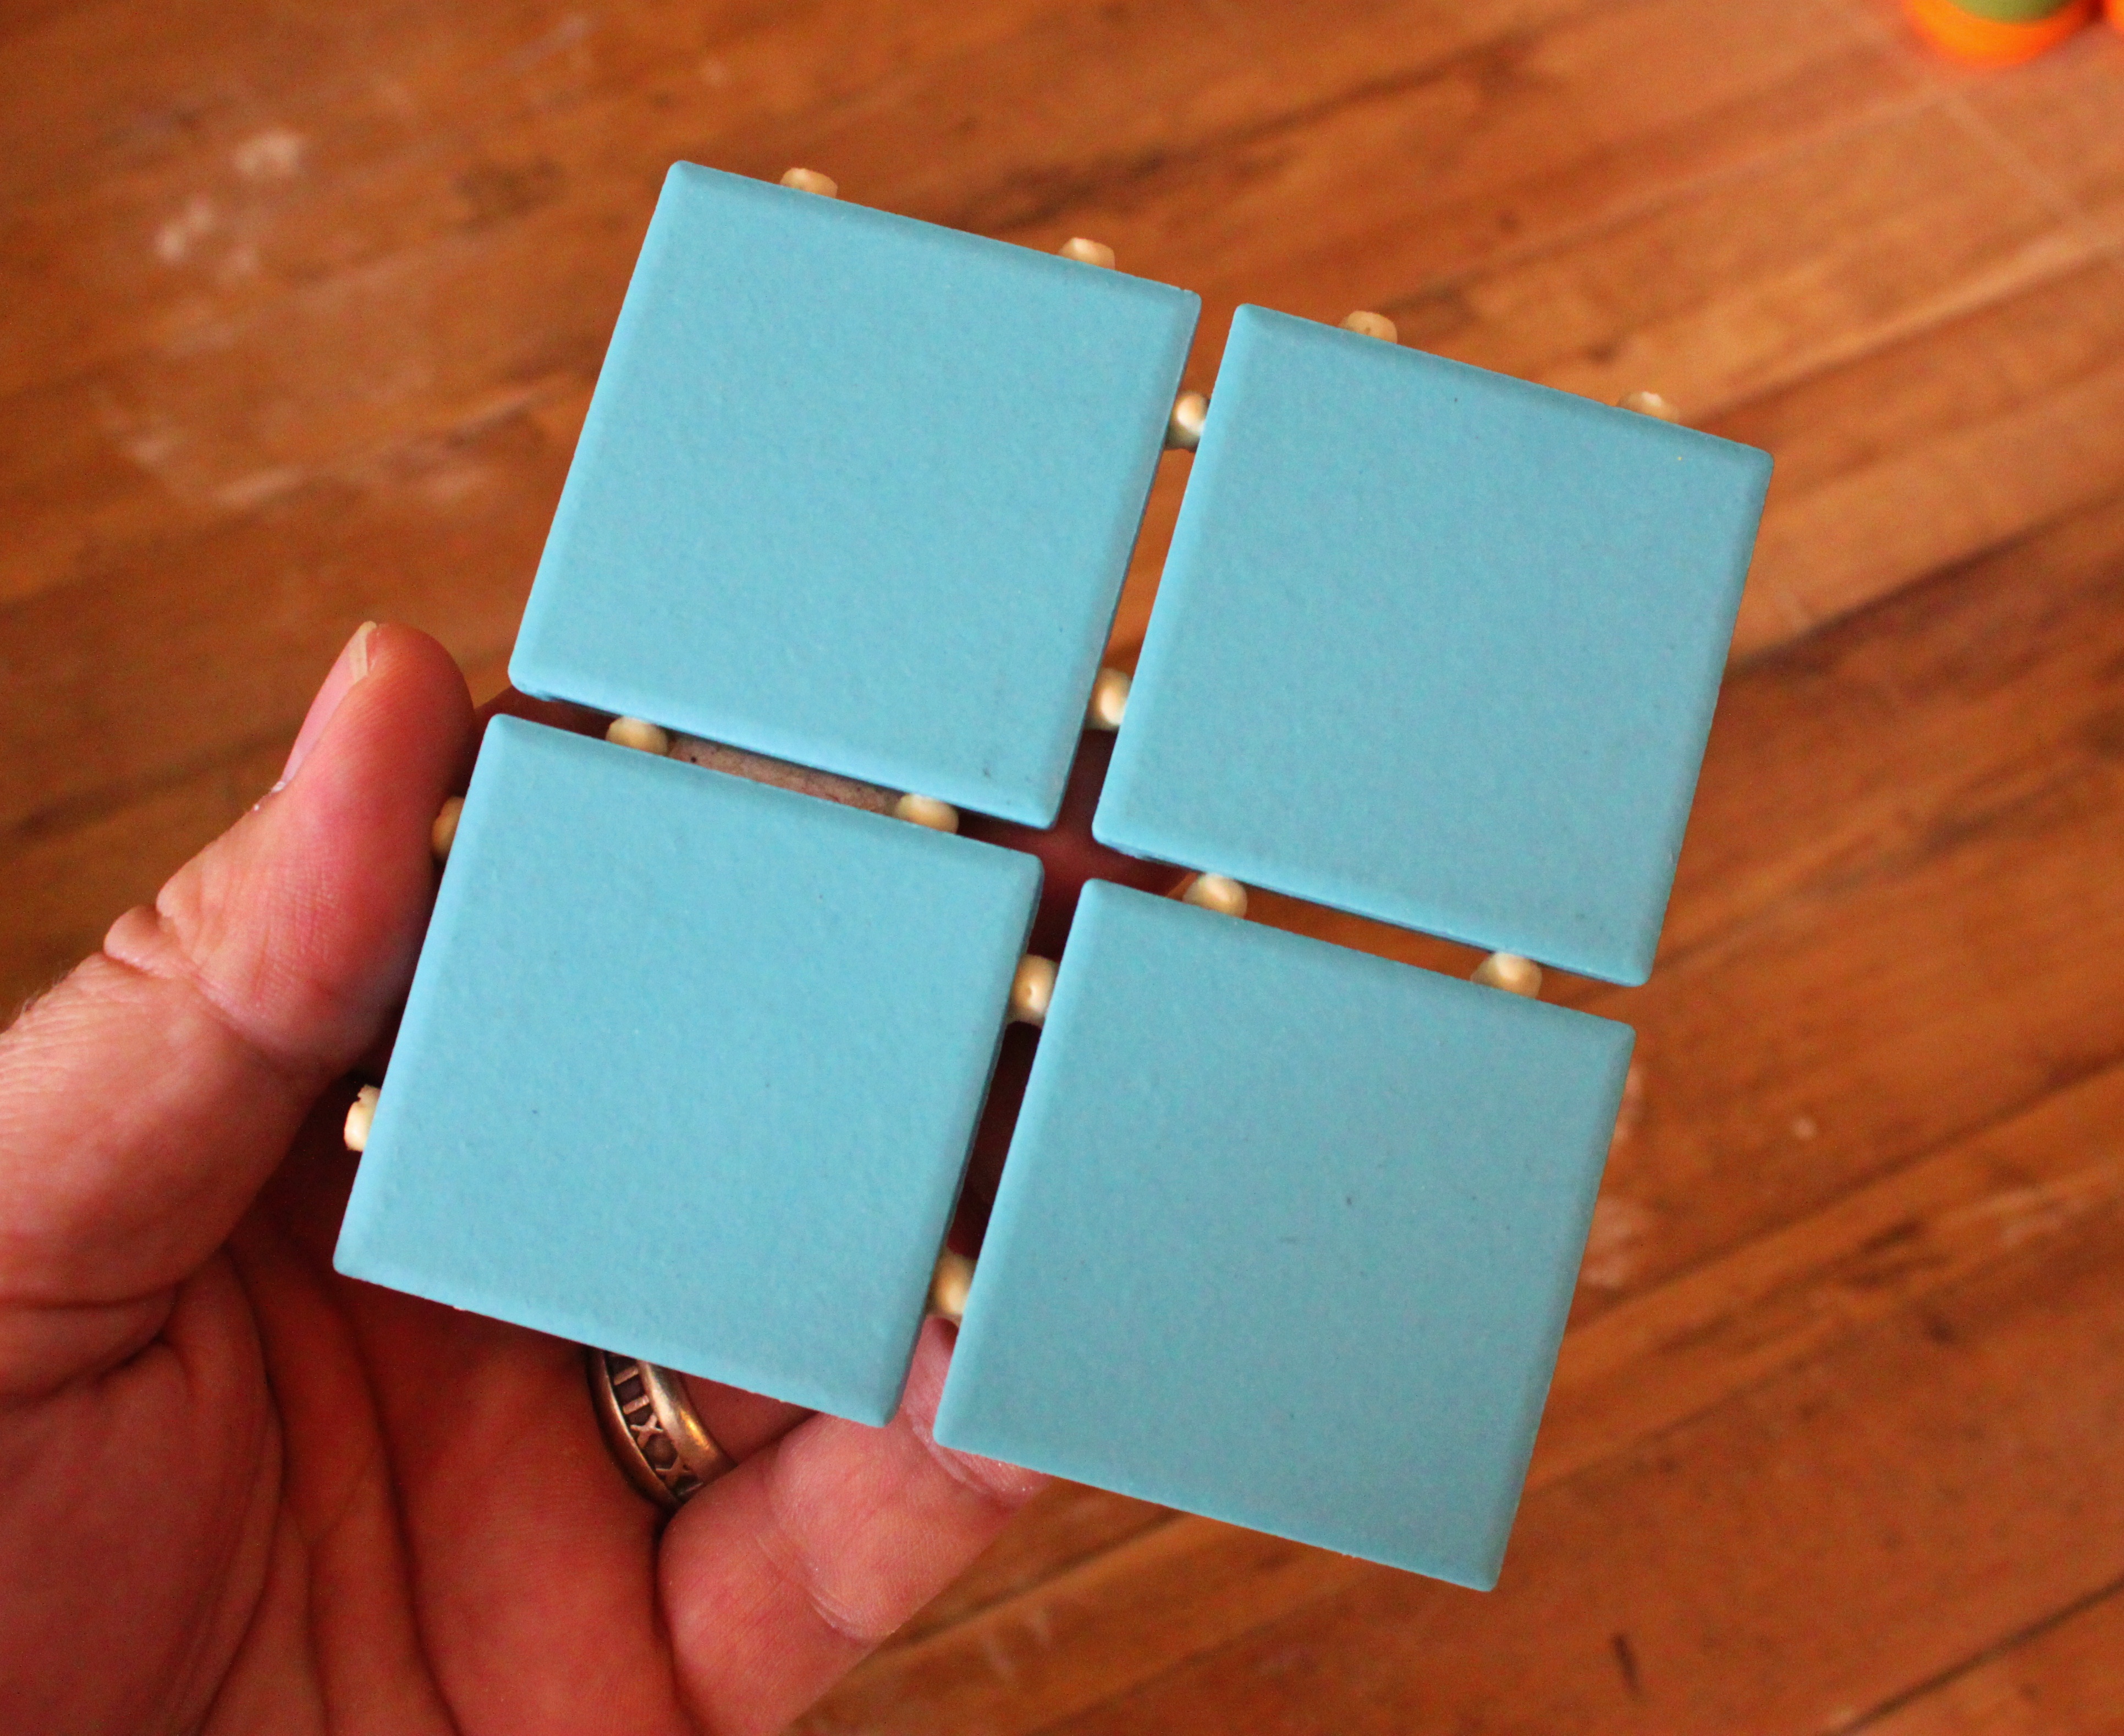
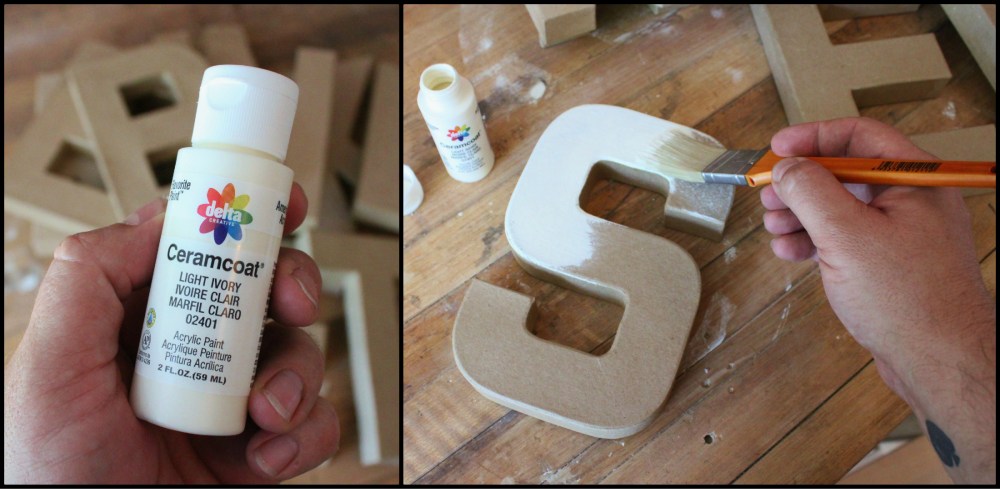
I used craft paint, in “Light Ivory”, to paint the fronts of each letter.

Paint  the Fronts Light Ivory Collage

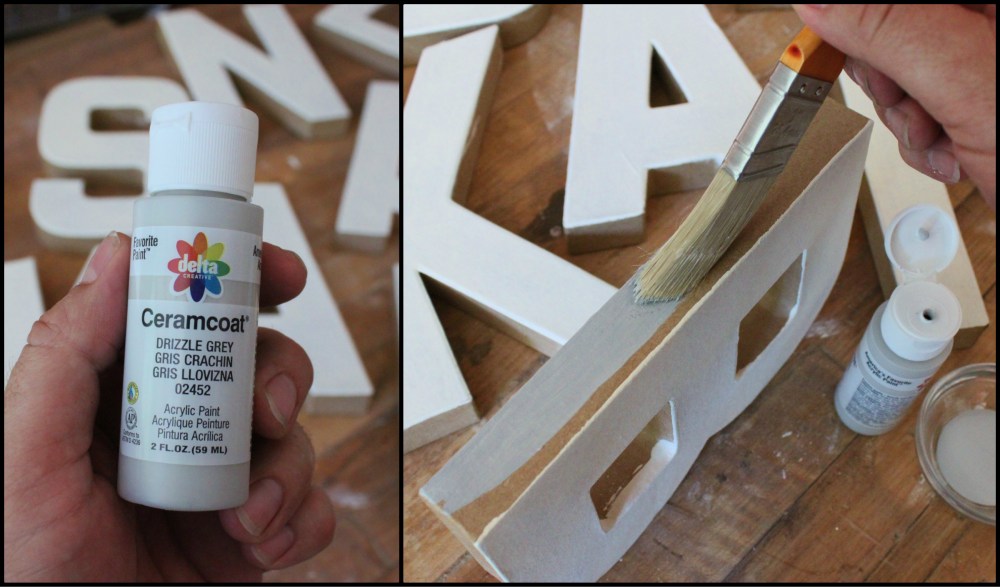
The sides I painted “Drizzle Grey”, just for a contrast really.

Paint the Sides Drizzle Grey Collage

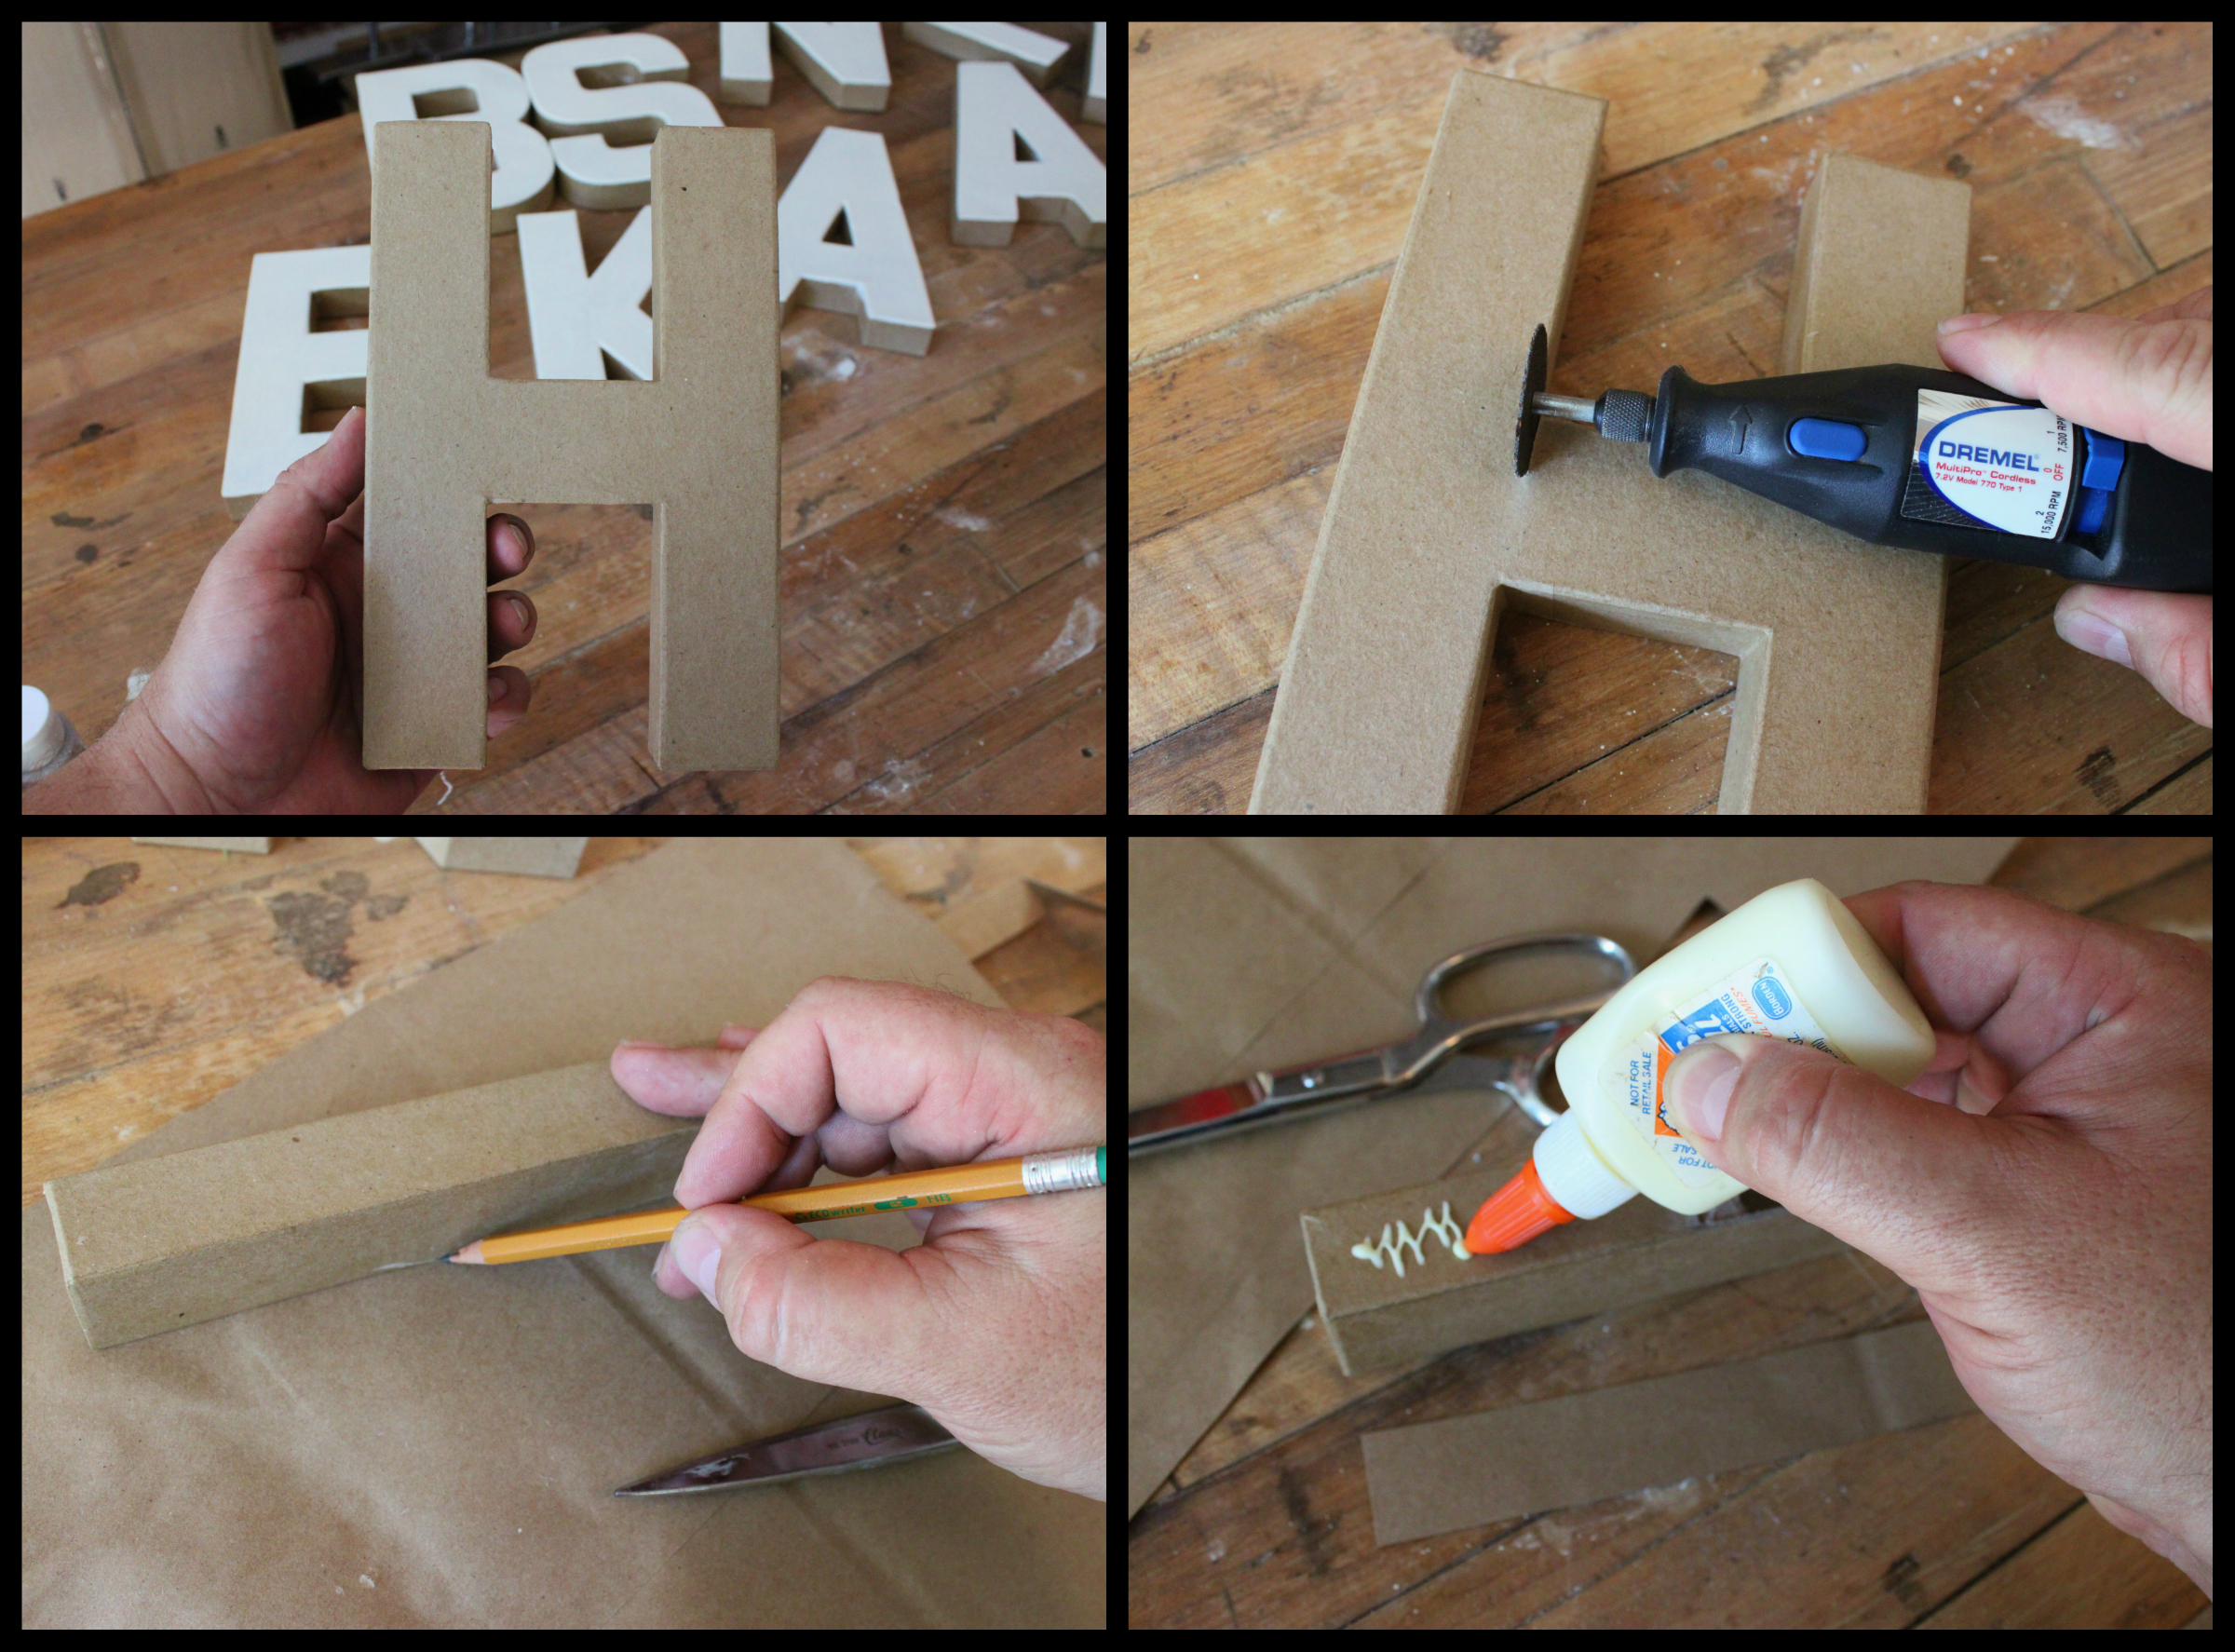
I didn’t like the option for an I, it looked too much like a Roman numeral, so I made my own with a H.

(Used a Dremel to cut the side off, traced the open side onto a grocery bag, cut the piece out of the bag and glued it on with Elmer’s)

Making an I from an H Collage

Pretty perfect I, if I do have to say so myself.

My Finished, Much Better, I

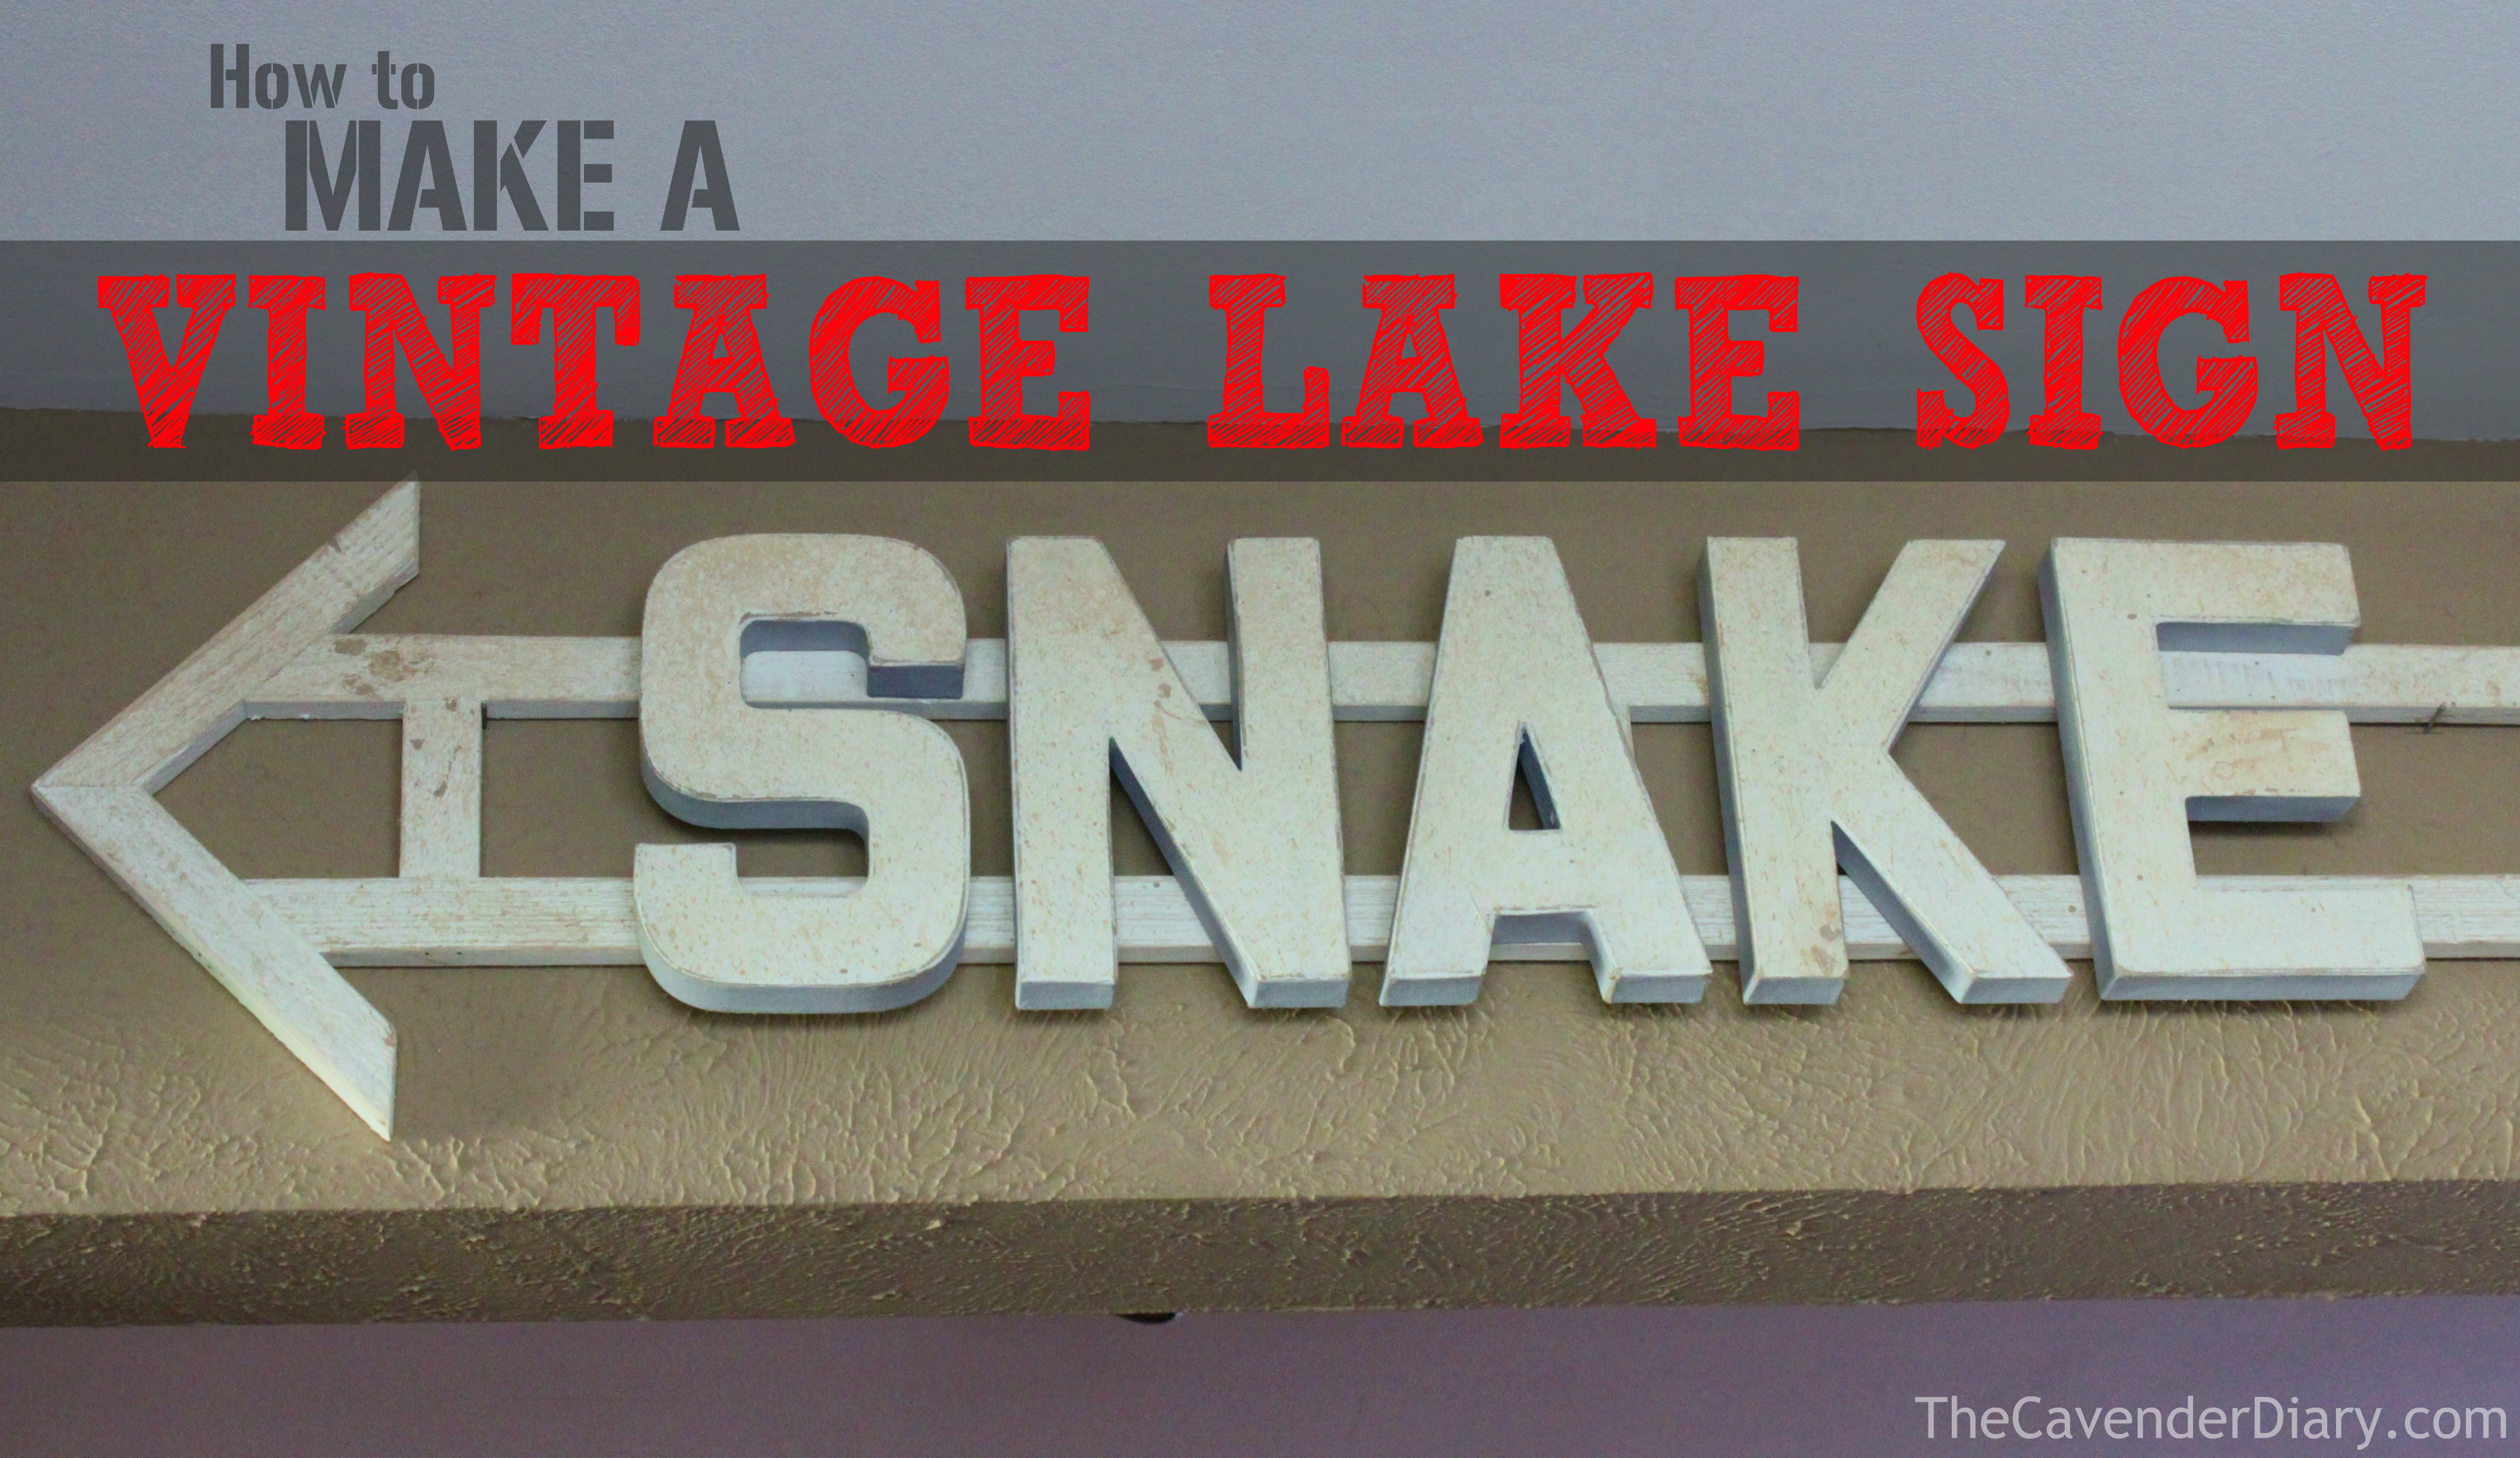
Now, for something to mount them on. I imagined an arrow. You know, pointing to the lake.

I started with primed cedar from Home Depot. It’s about 1 1/2 inches wide and 1/2 inch thick. OOOOhhh, and about 10 foot long.

I cut them down to 7 feet with a 45 degree angle at the ends.

Primed Cedar and a few 45 Degree Cuts Collage

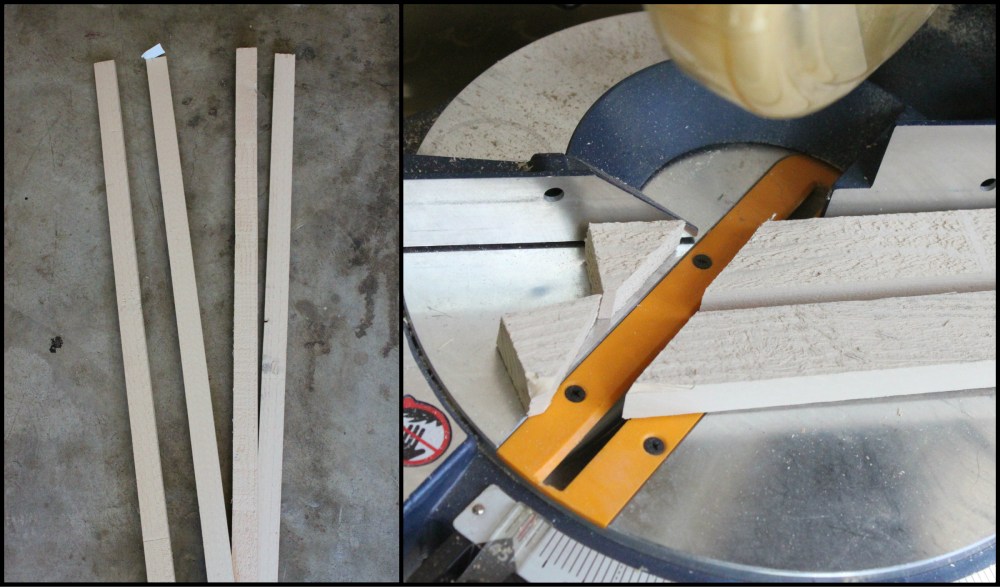
Then I cut 2 8″ angled pieces to form the arrow head.

Like so.

Use a Brad gun to Attach the Arrow Shape

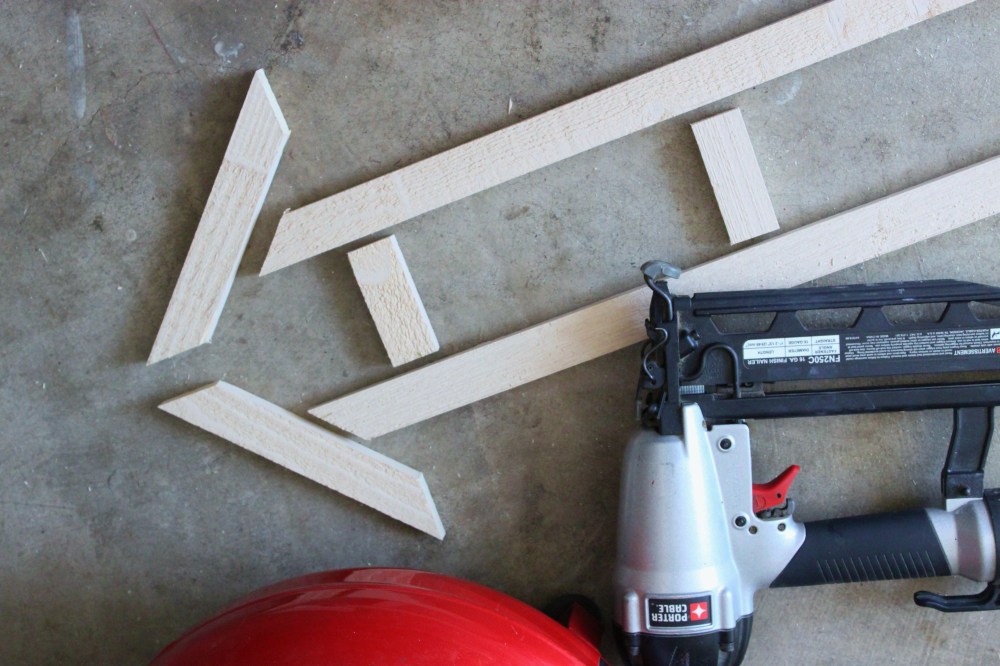
Shot it all together with a brad nailer…and added a few small pieces for support in the middle.

Painted it with the light ivory craft paint too.

My Finished Arrow with a Coat of Cream Craft Paint

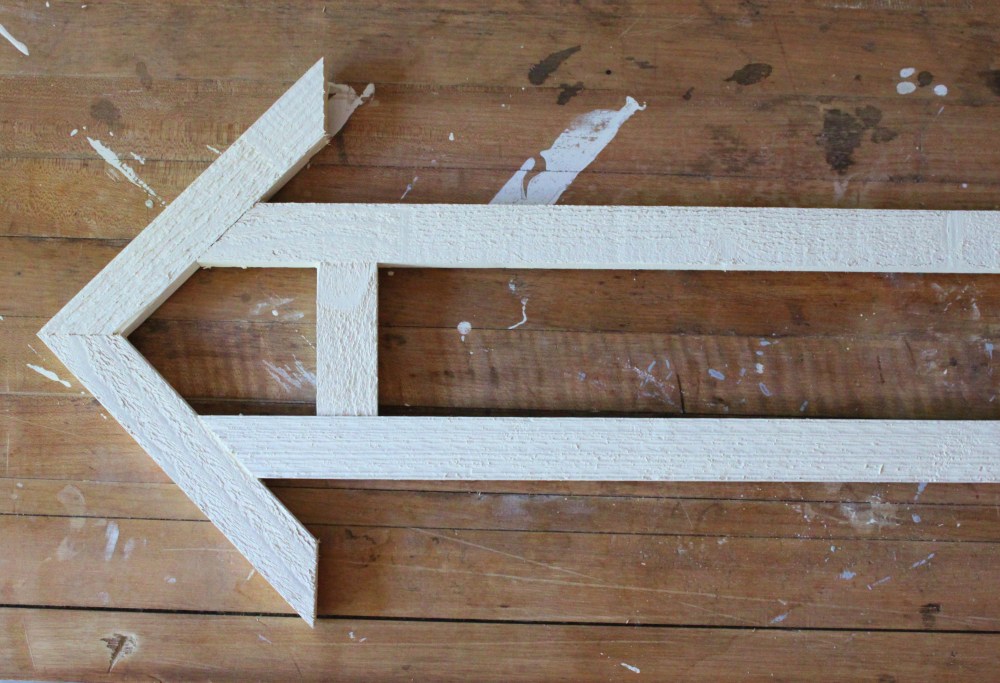
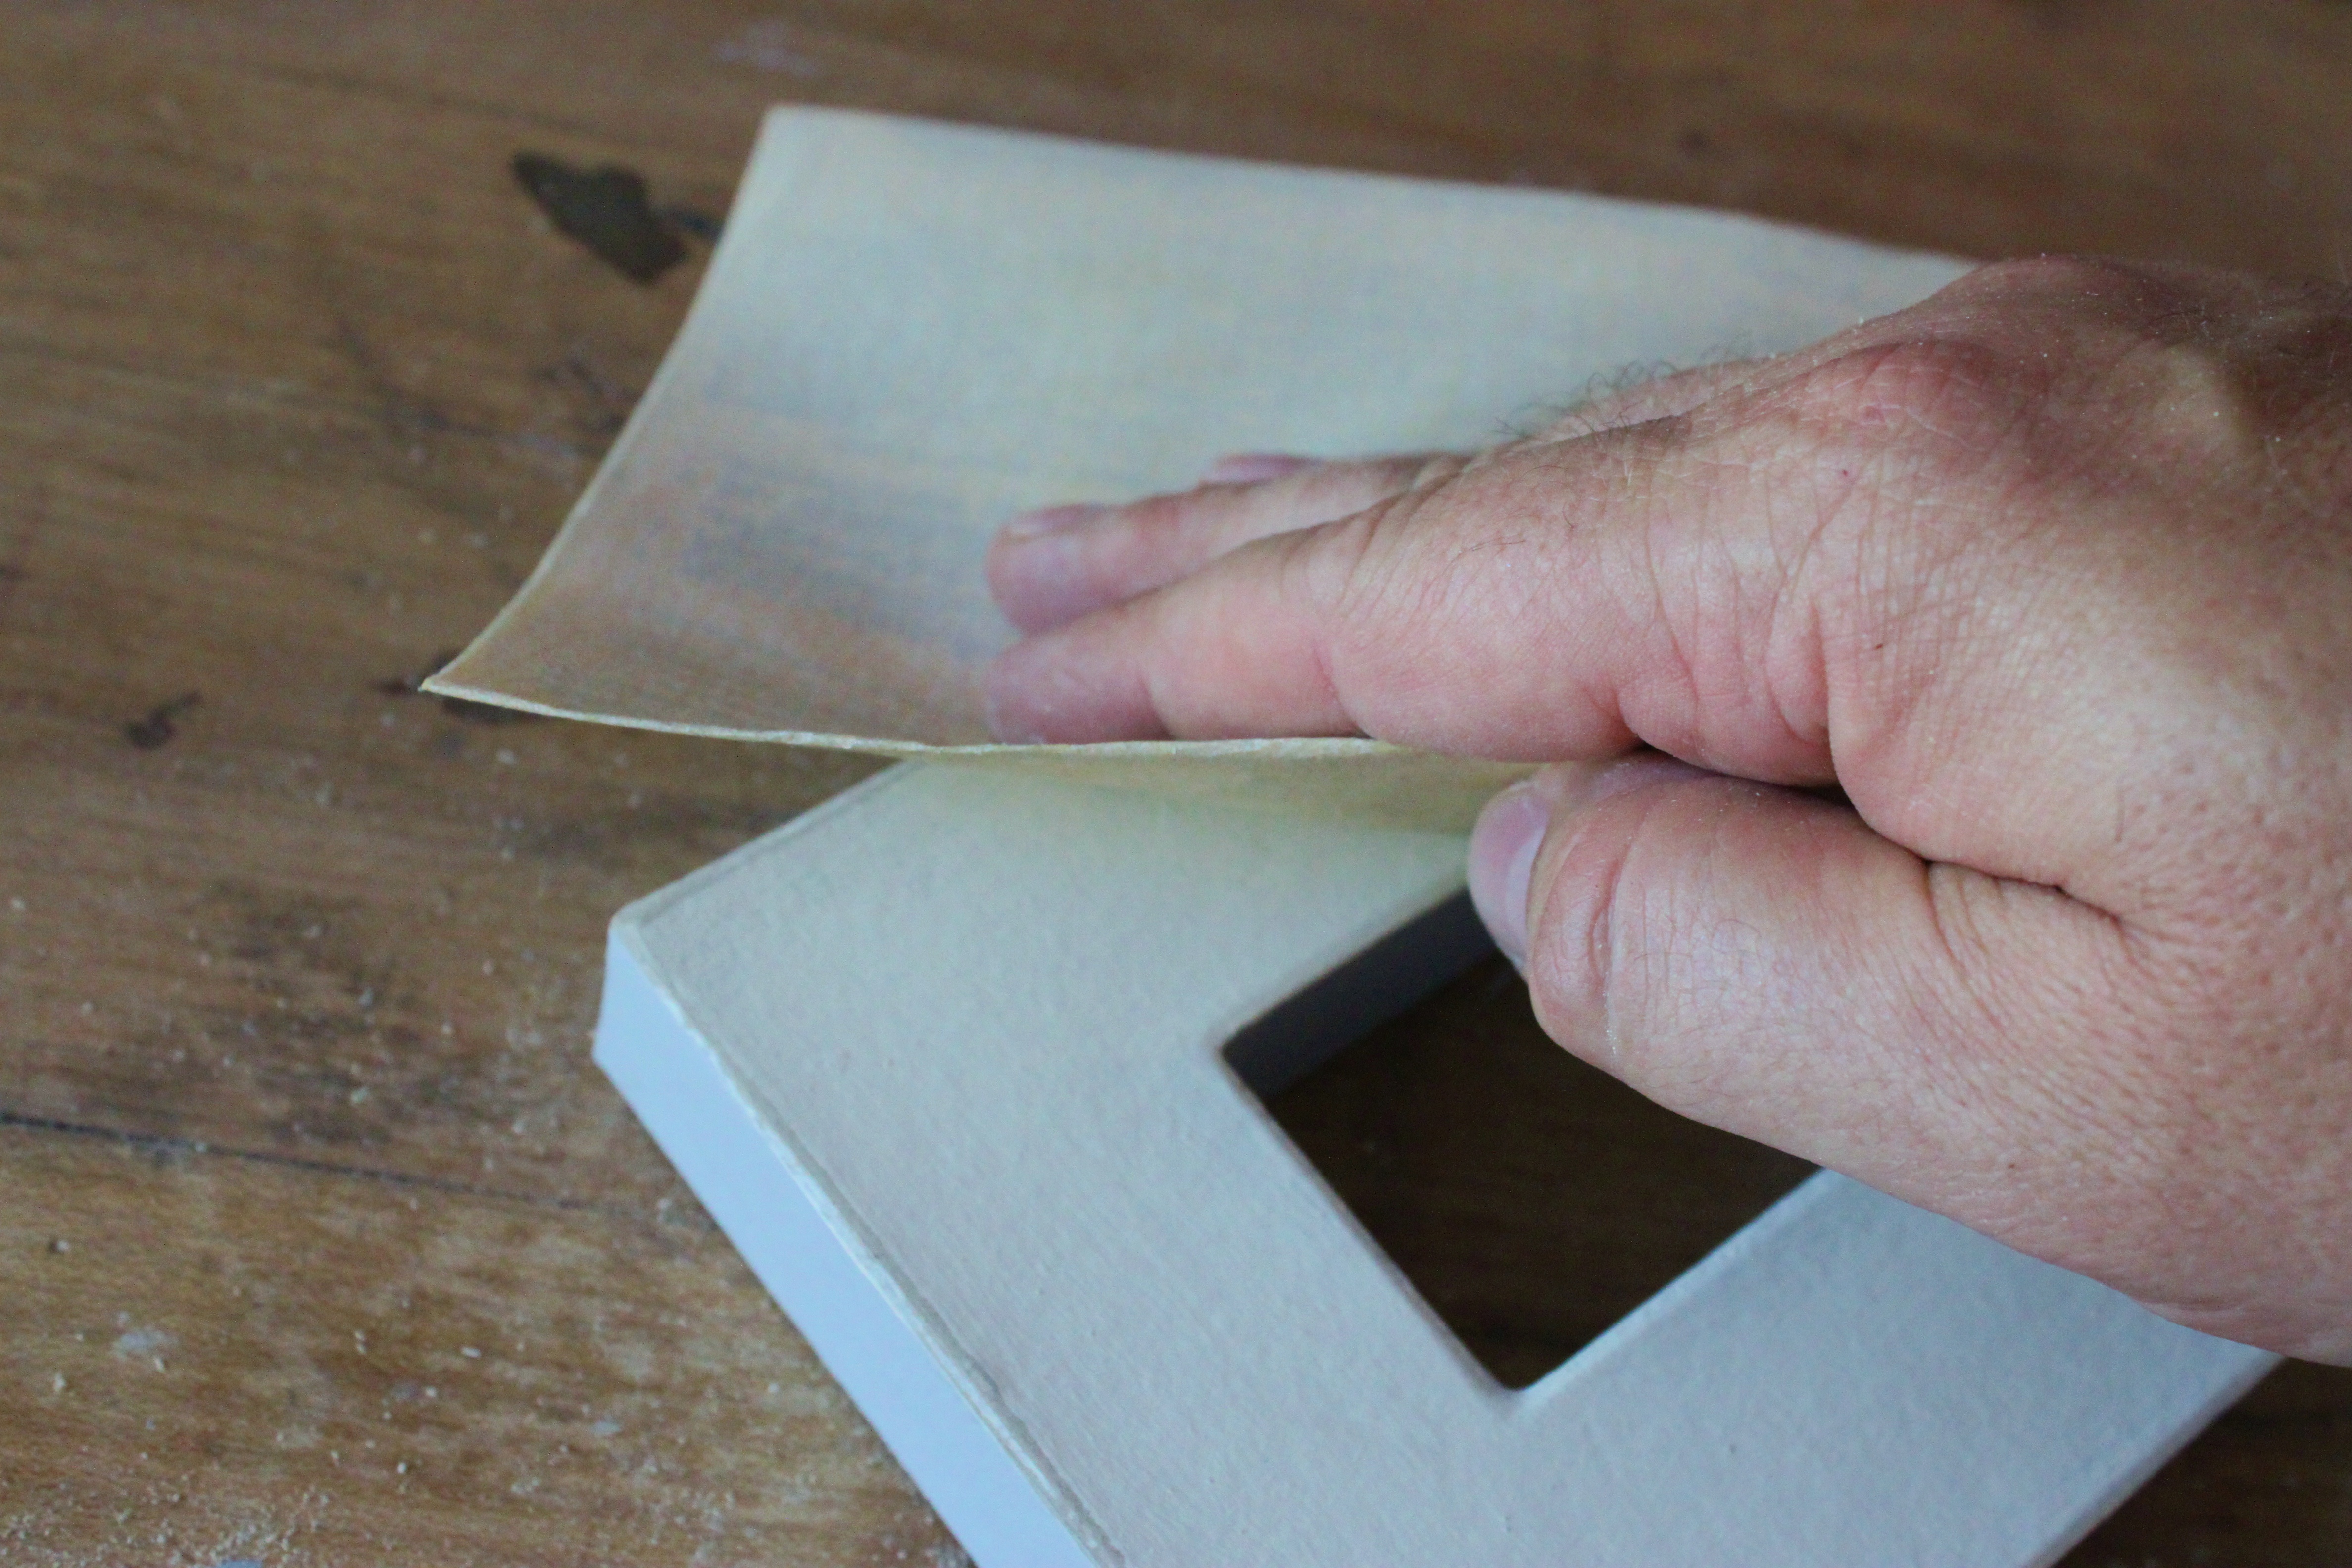
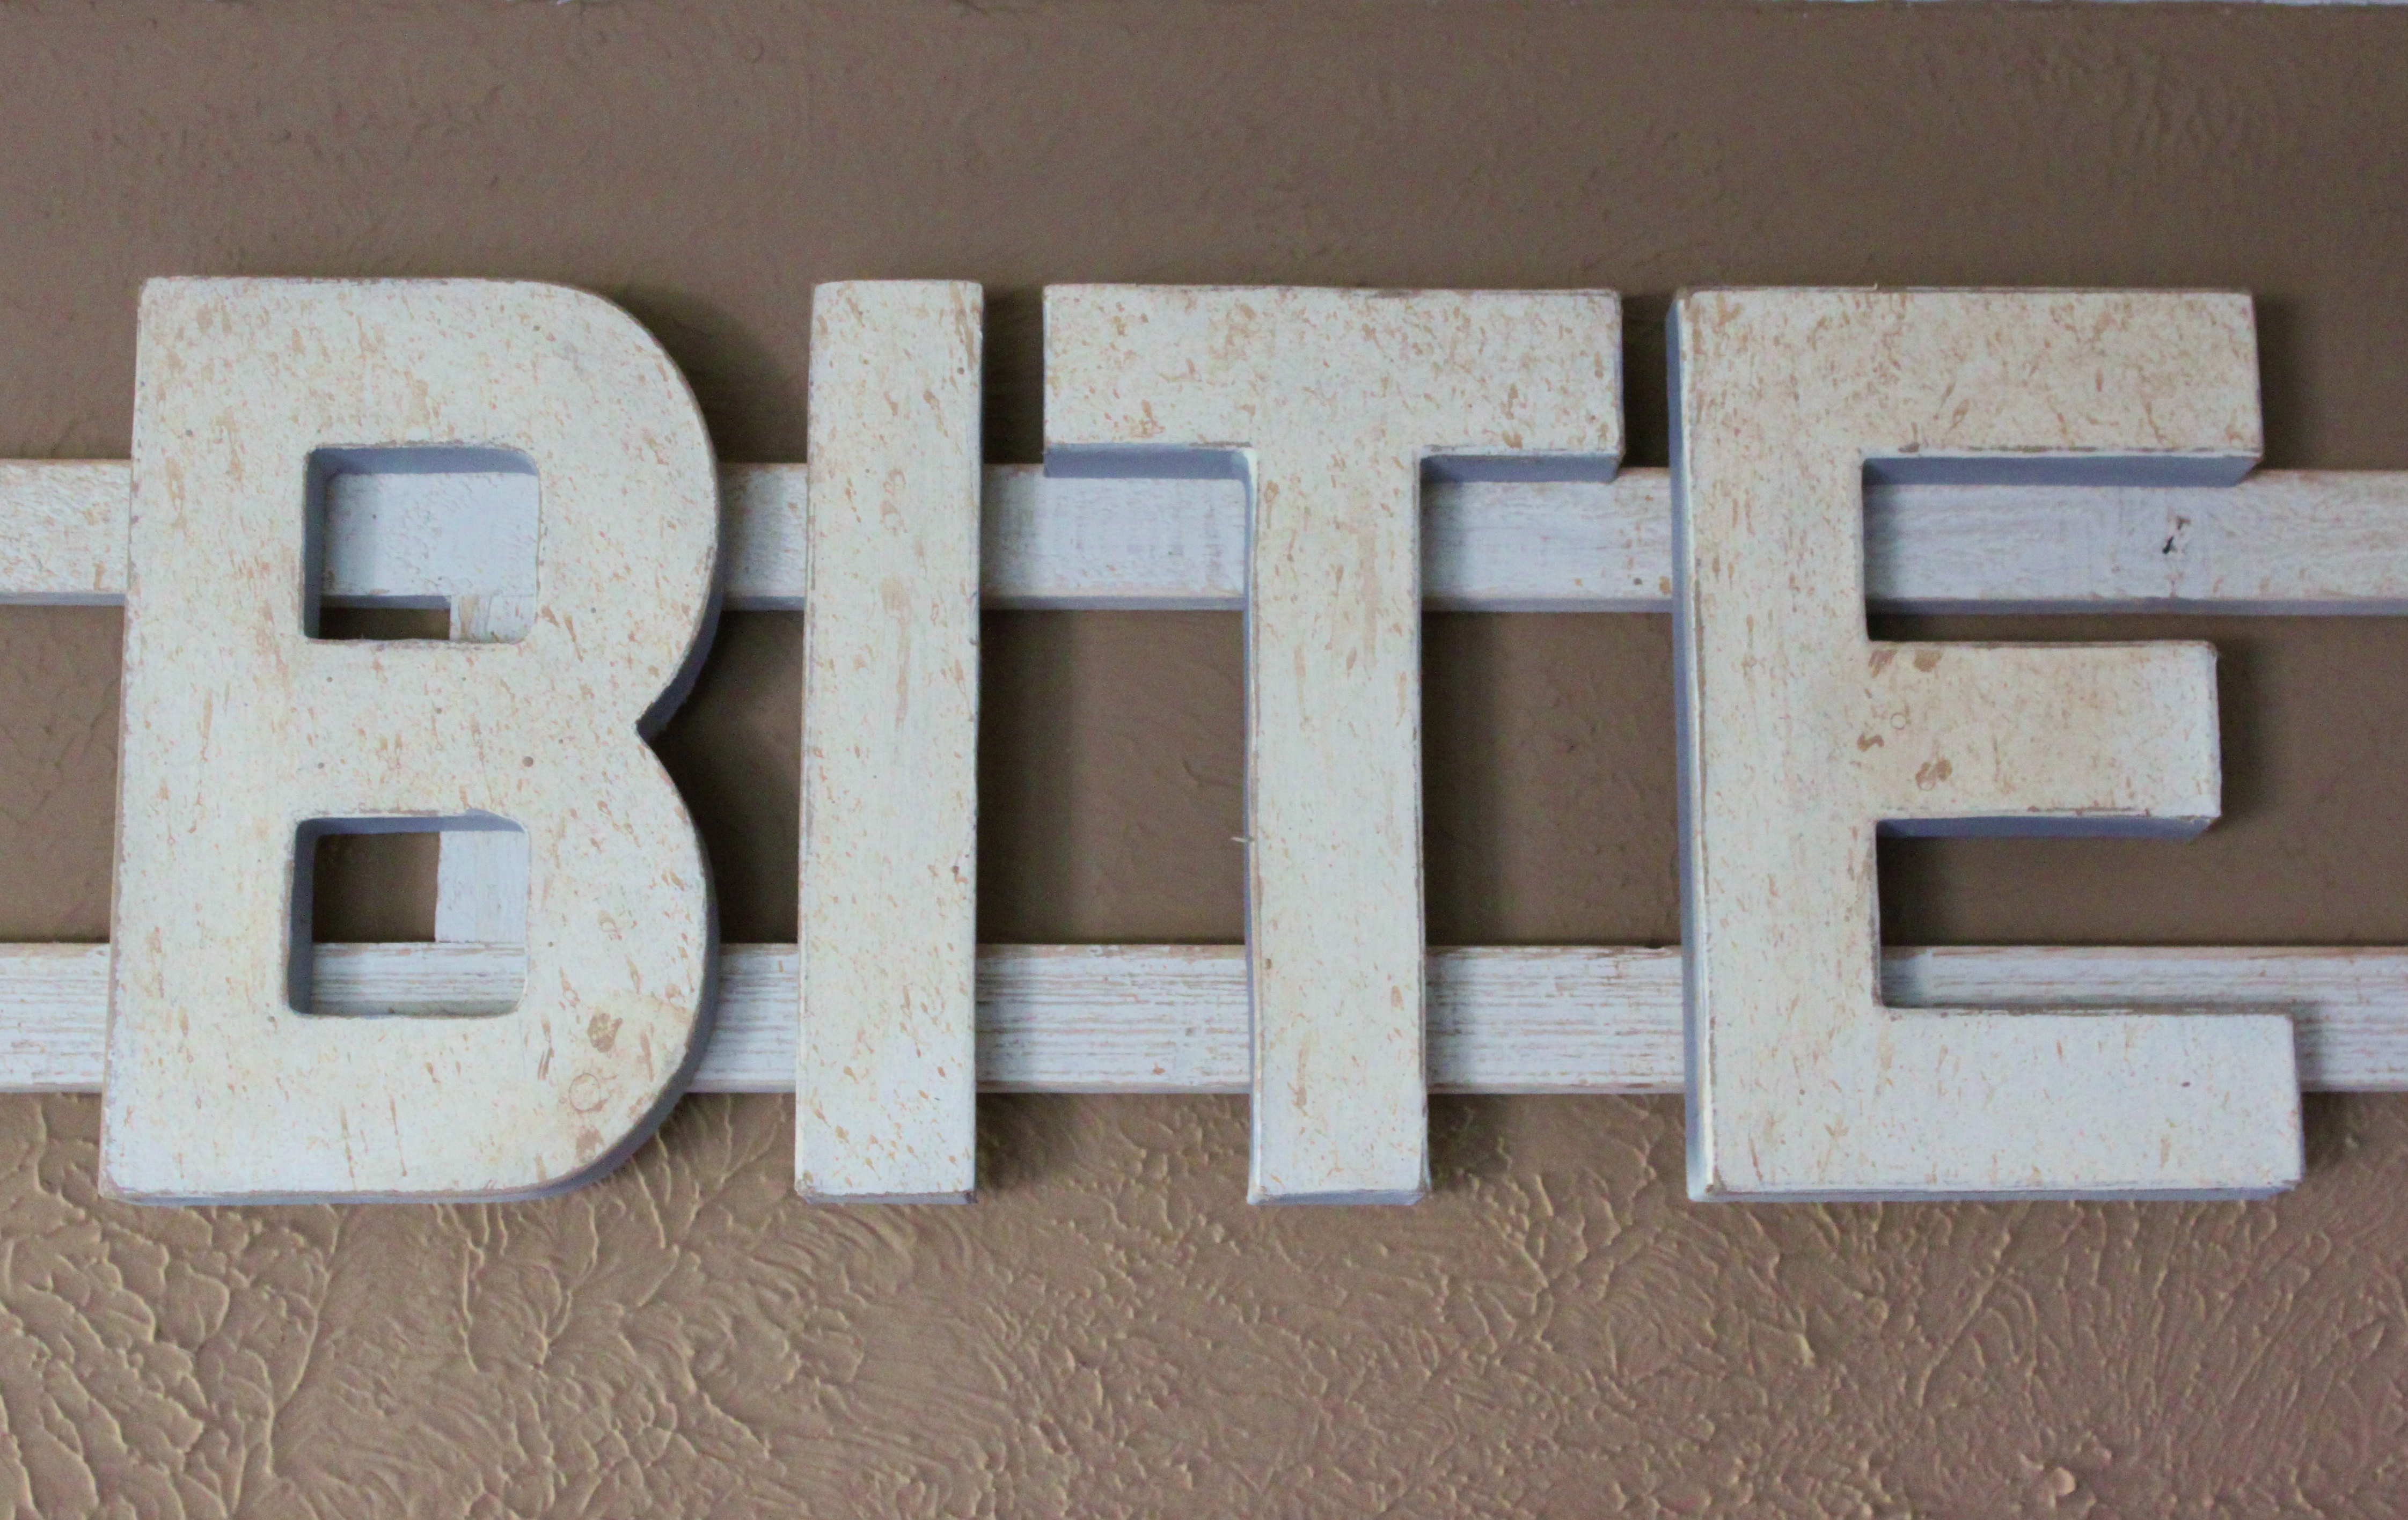
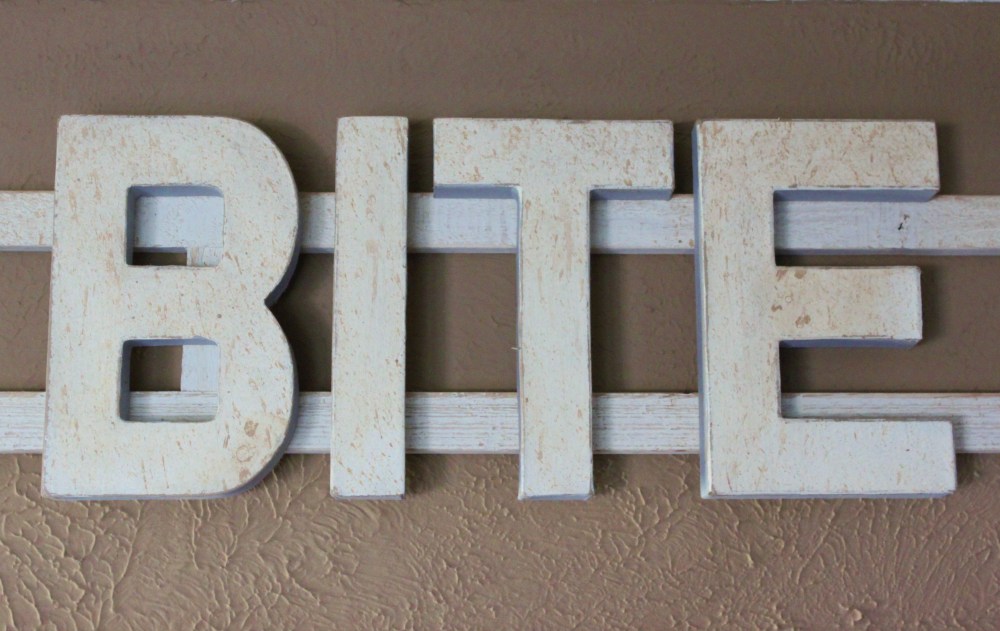
To roughen-up and “age” my arrow, I sanded as much of it as I could with 60 grit sandpaper.

Use a Rougher Paper for the Wood

I used 120 grit sandpaper on the cardboard letters.

Use a Softer Sandpaper for the Cardboard

Just that little bit makes them look nicely aged and patinaed.

See?

Here's an Un-sanded and a Sanded Letter for Comparison

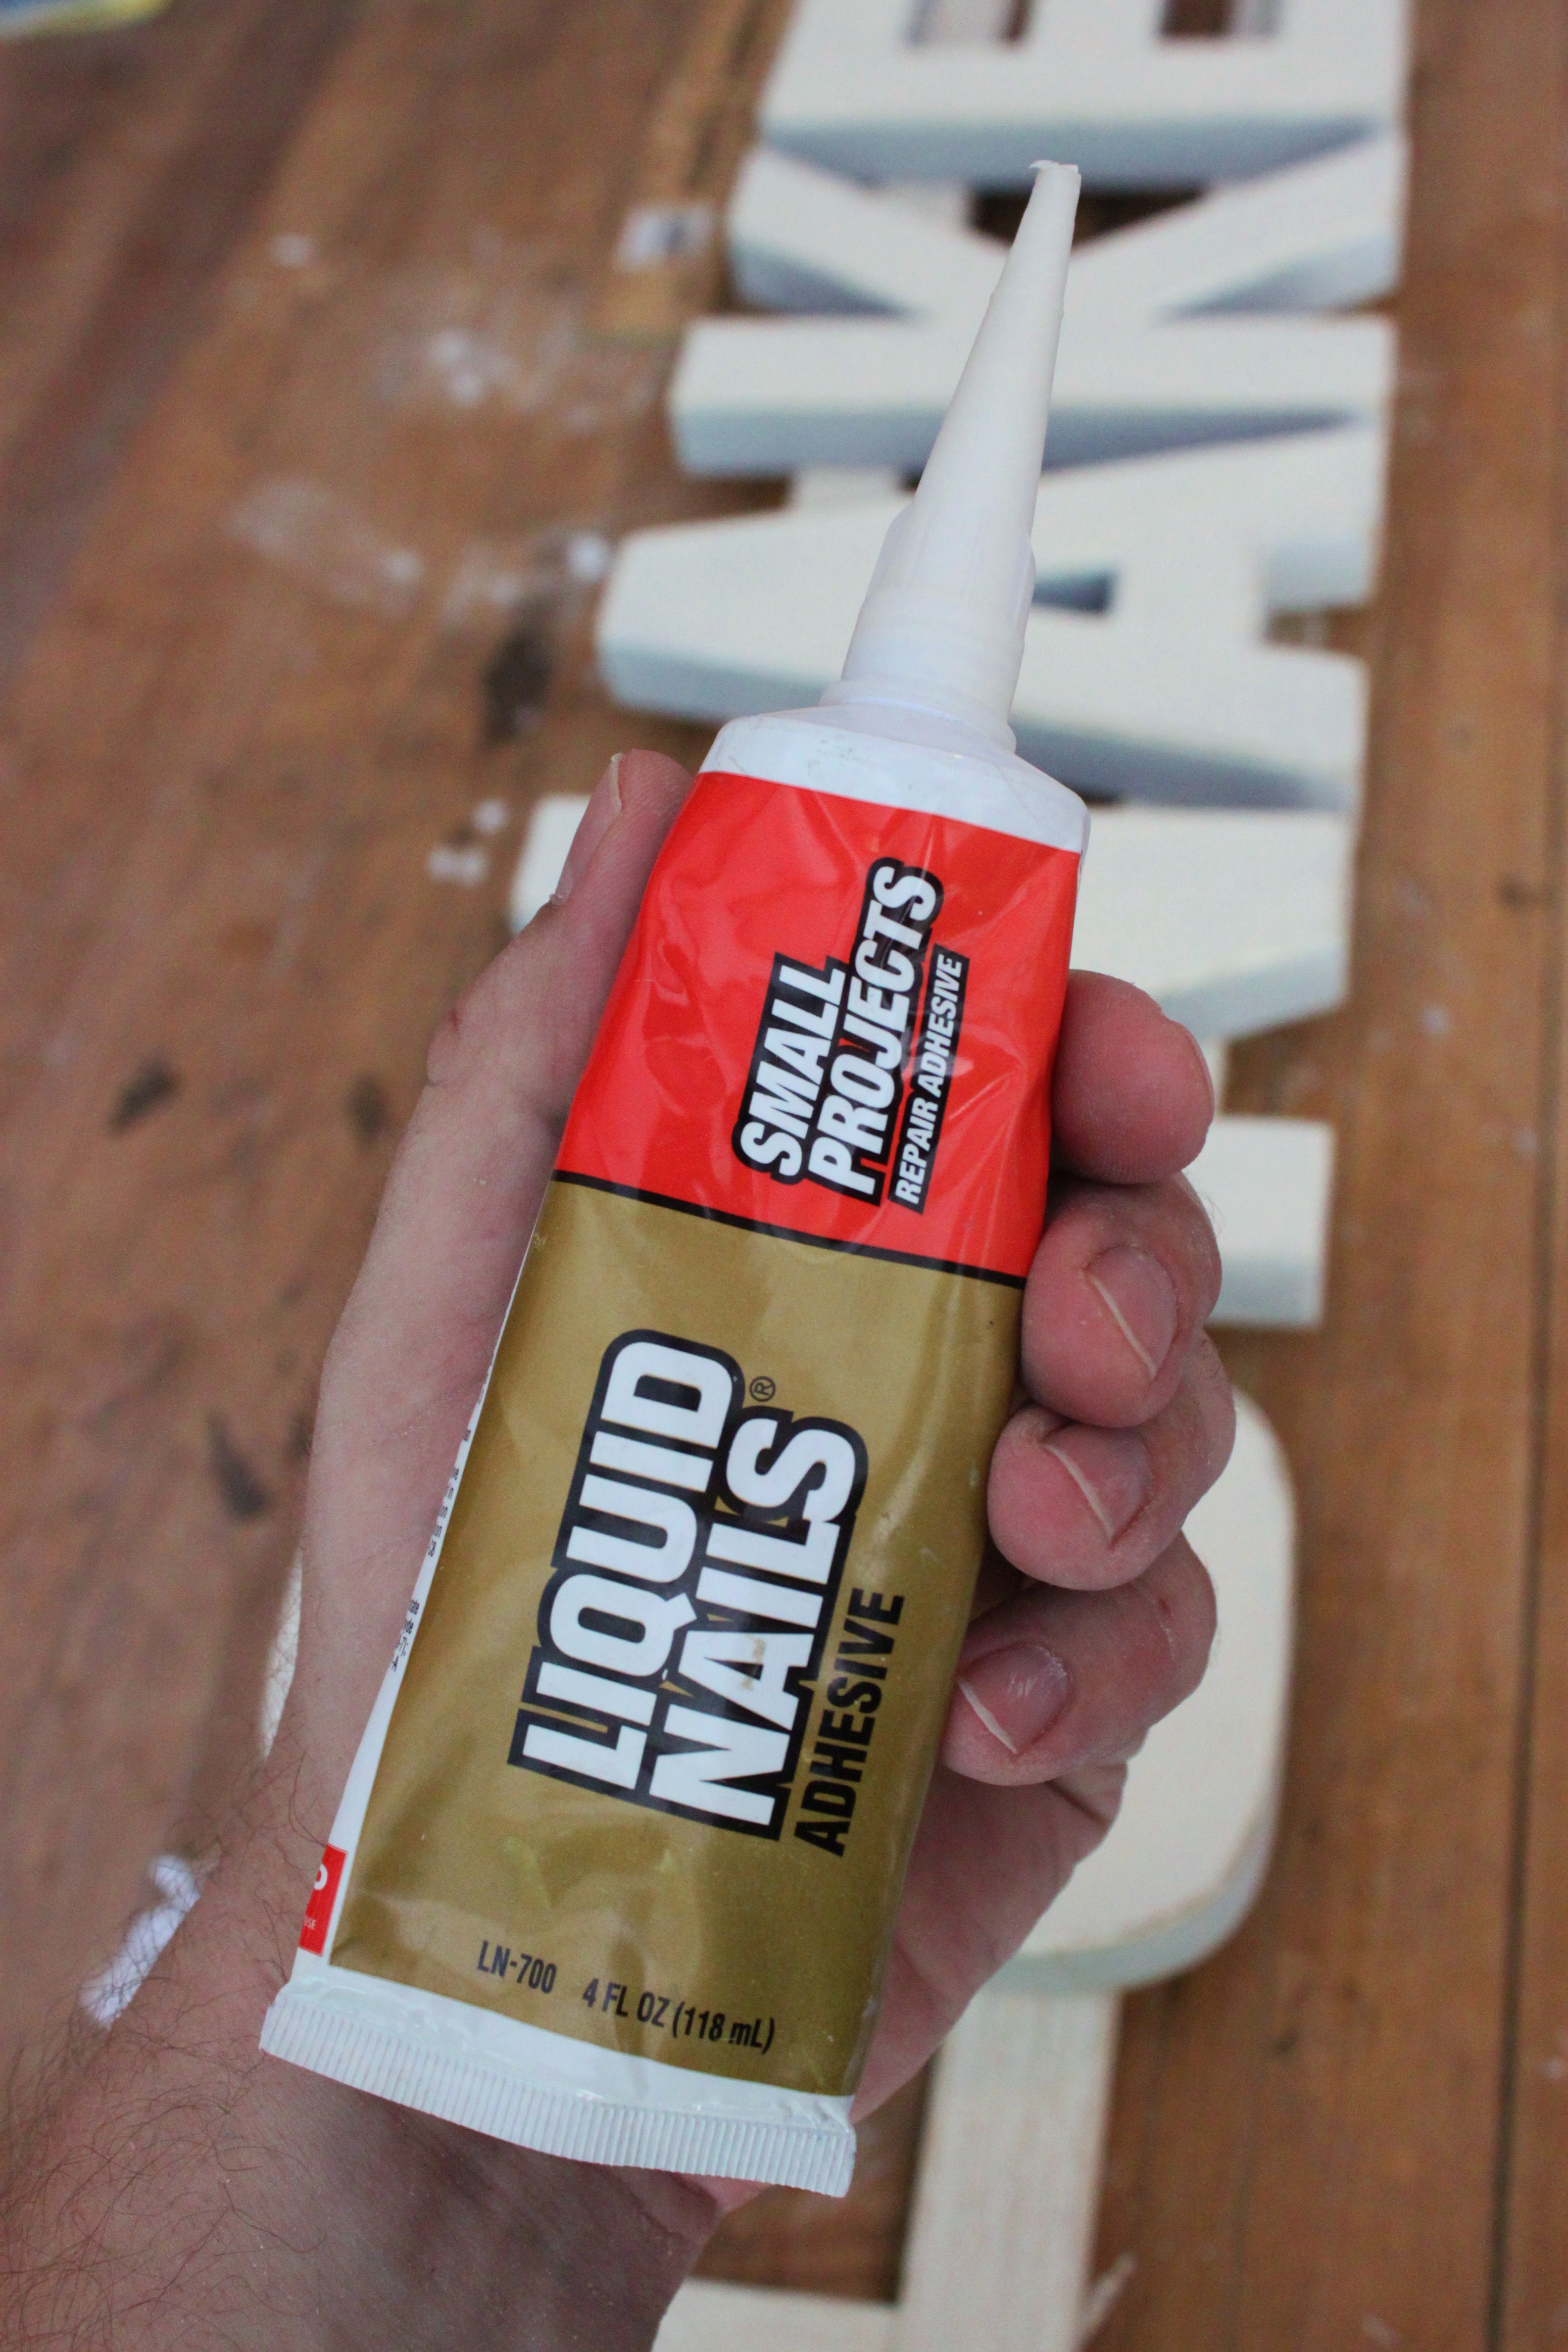
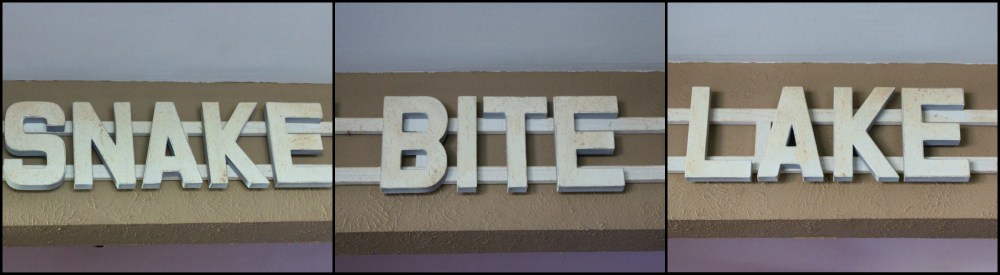
I attached my letters to the arrow with Liquid Nails for Small Projects. Love that stuff.

Liquid Nails for Small Projects

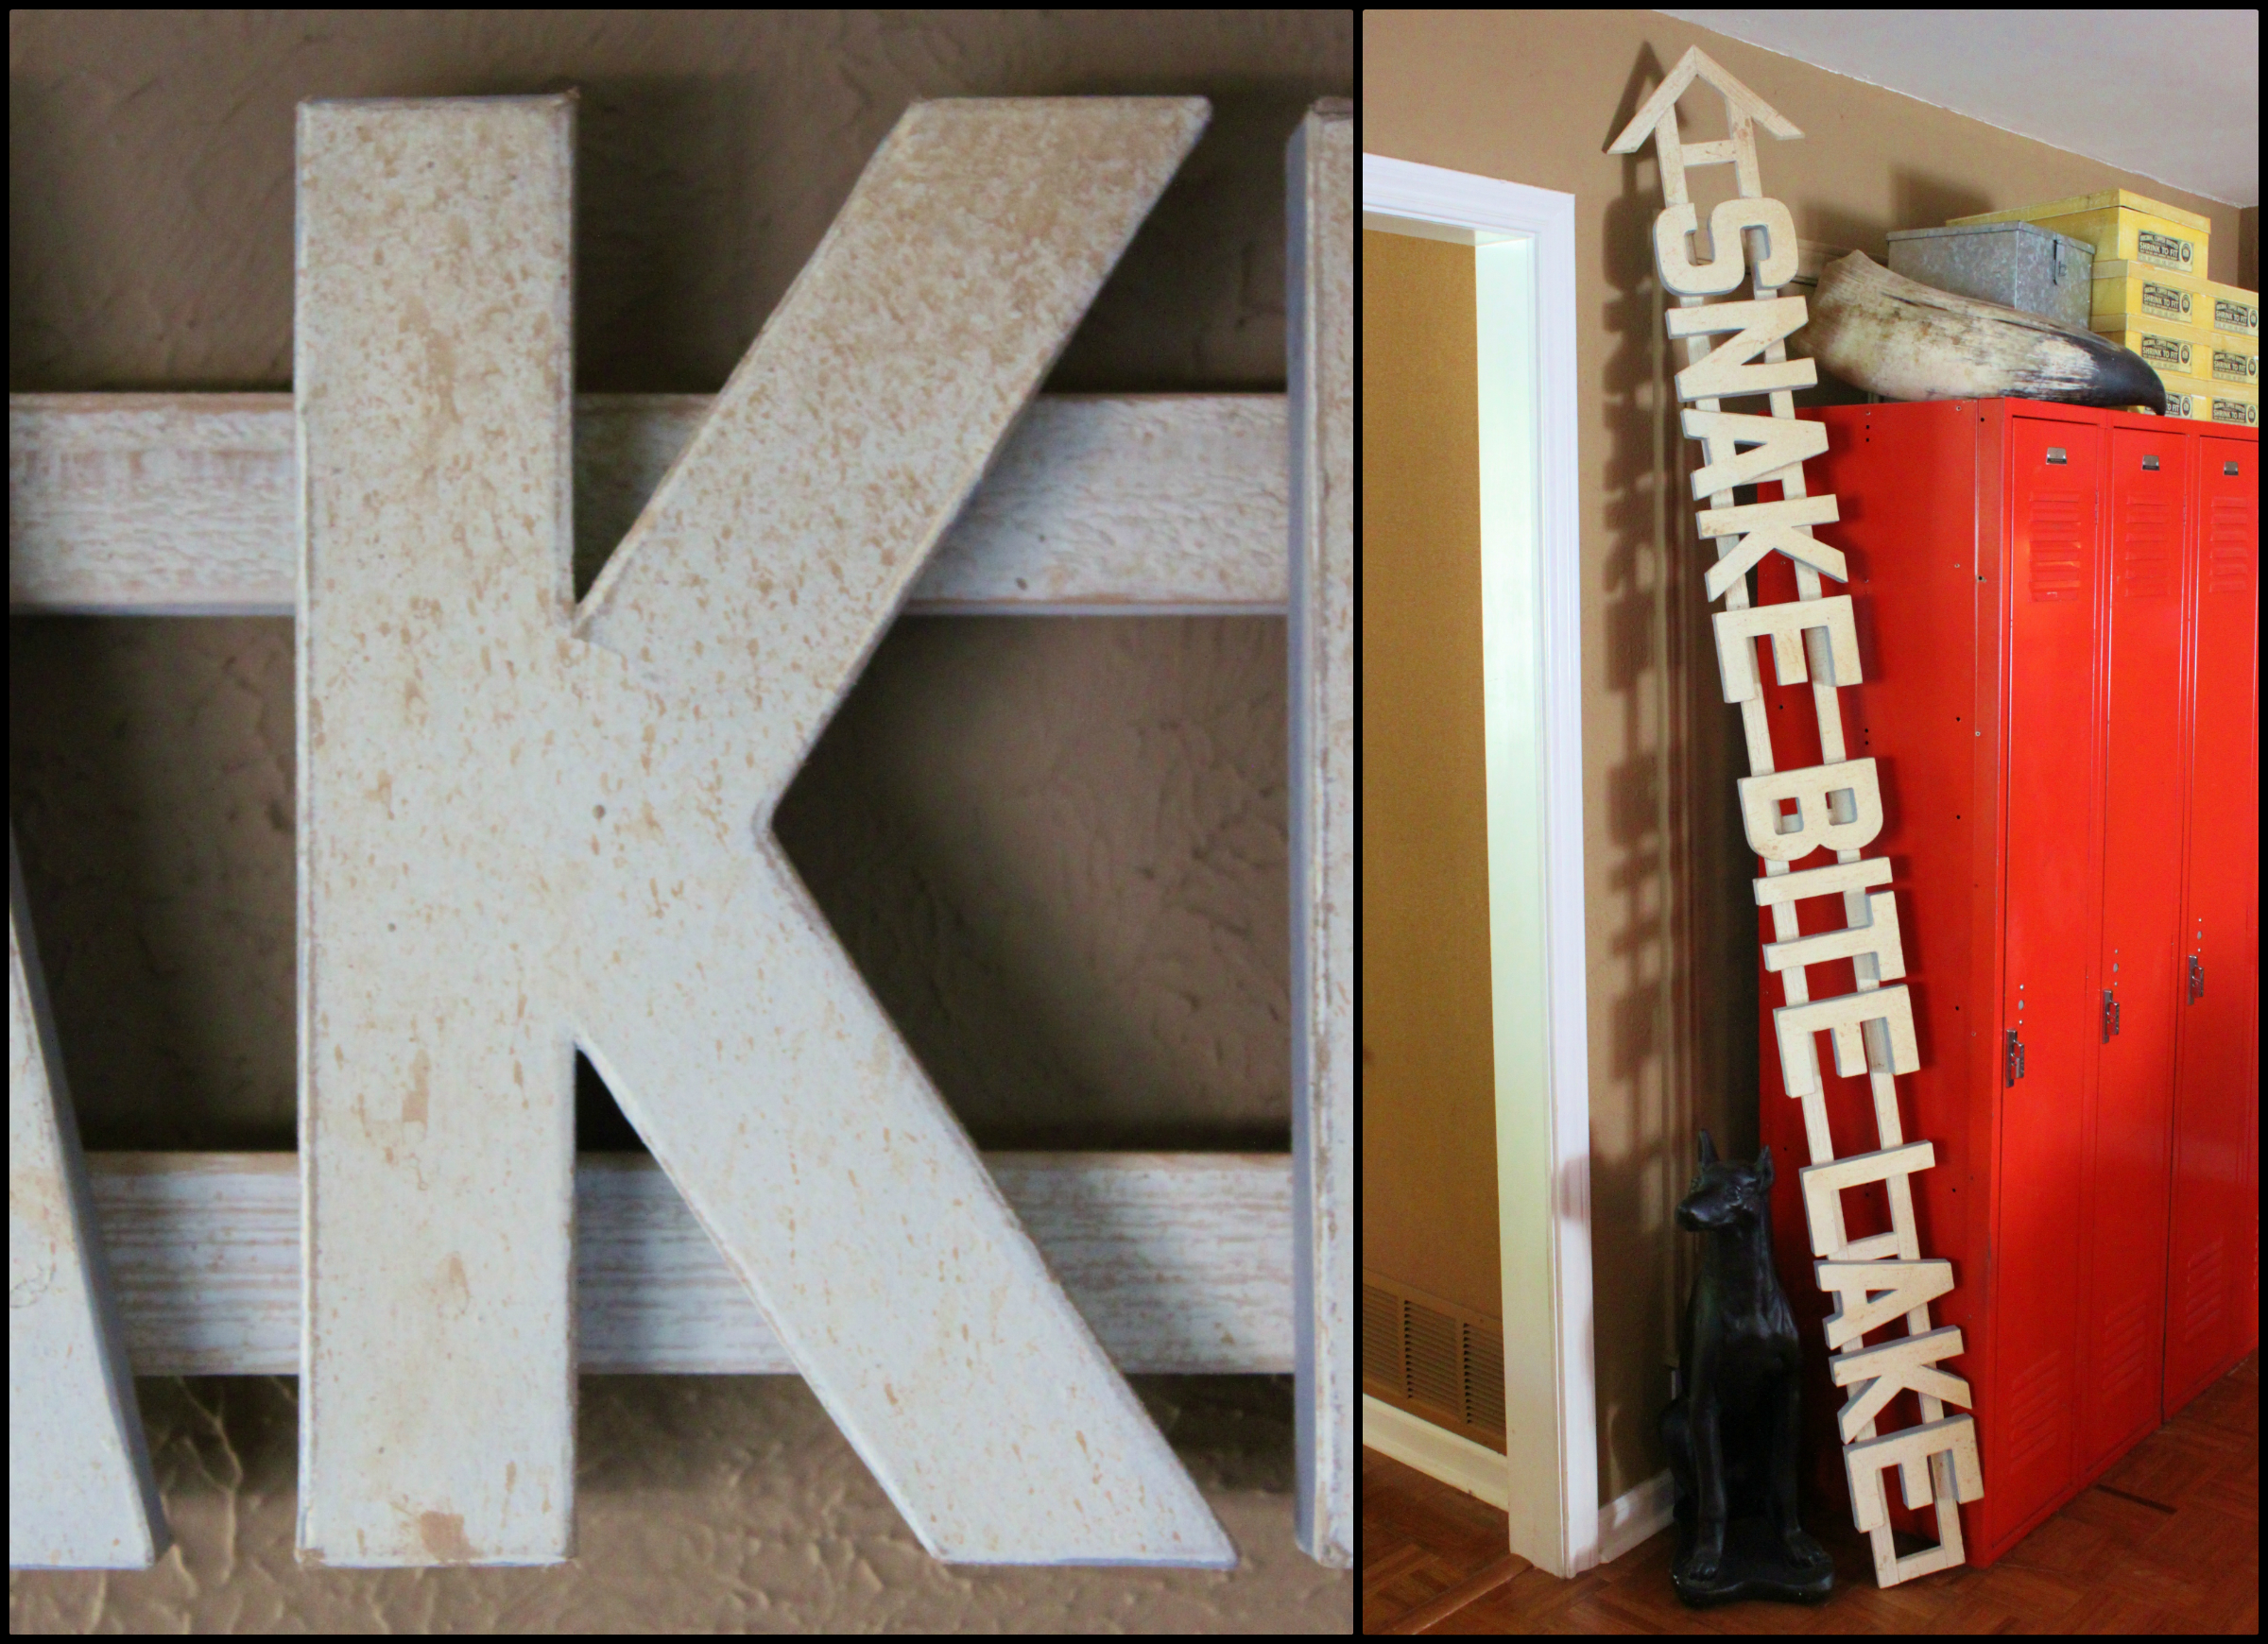
OK, Now to make my sign look just like it was hanging on the side of the road for a few years…..

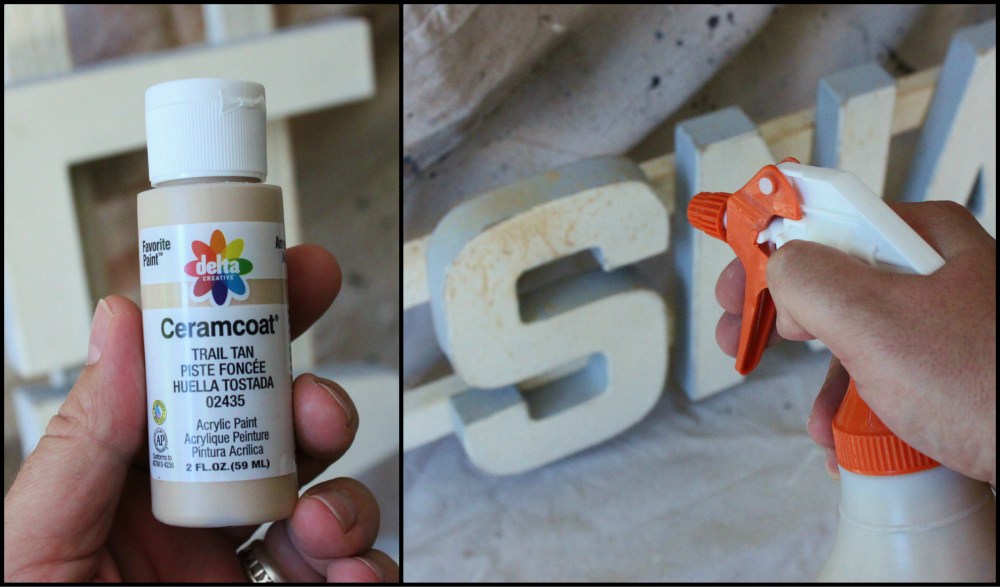
I mixed, yet one more color of craft paint, Trail Tan, with about a cup of warm water in a spray bottle. With my sign standing up right, I spritzed the entire top to simulate rain, or dust…or something like that.

Age the Sign with a Water Bottle Collage

Pretty simple,

How to Make a Vintage-ish Lake Sign from the Cavender Diary Boys

Snake Bite Lake Also Collage

Snake Bite Lake Collage

IMG_9859

So why “SNAKE BITE LAKE”?

CAMP CRYSTAL LAKE was my first thought.

And then BIG SNAKE LAKE, from the Simpsons. (Hint, Camp Krusty is located there)

SNAKE BITE LAKE just had a nice sound to it…..

Happy crafting.

Share this:

  • Click to share on Facebook (Opens in new window) Facebook
  • Click to share on LinkedIn (Opens in new window) LinkedIn
  • Click to share on X (Opens in new window) X
  • Click to share on Pinterest (Opens in new window) Pinterest
Like Loading...

Posts navigation

← Older Entries
Newer Entries →
  • The Cavender Boys

  • Buy My Book

    Check out the link below to get your copy of "DIY Industrial Pipe Furniture & Decor" by James Angus

    https://amzn.com/1612436064

  • Tags

    American Flag Apartment Therapy arts Backyard Bathroom Remodeling Beacon Blanket Big Tex Black Spray Paint Bloggers Can Lights Cedar Walls Christmas Christmas Decorating Christmas Ornaments Christmas Tree Crazy Mouse Ride Den Diane Keaton diy Doberman Earth Grout Edward Curtis Electrical Work Fletcher's Corny Dogs flower beds Frankoma pottery Front Yard Garage Garage Update Halloween Halloween Decorating happy halloween harley Harley Davidson home House Tour Houzz hudson bay blankets Ikea Ikea Borrby Lantern illustration july 4th Key West Trip Kitchen Remodel Living Room mantle Master Bathroom Master Bathroom Remodel Master Bedroom mercury ornaments merry christmas Modern Horizontal Fence Motherhood Paint Colors plumbing pipe Projects Ralph Lauren restoration hardware Russet Stain Shiny Brite Ornaments state fair of texas style Swiss Army Blanket Target technology Texas State Fair thanksgiving Thrift store Tile Backsplash travel vacation Vintage chair vintage christmas vintage ornaments Wood Wall
  • Recent Posts

    • Vacation ’24
    • Happy Halloween
    • Planes, Trains & the Occasional Uber
    • Family Secrets
    • Capitol T, and that Rhymes with P
  • Archives

    • June 2024
    • October 2023
    • June 2023
    • April 2023
    • July 2022
    • December 2021
    • July 2021
    • December 2020
    • October 2020
    • September 2020
    • August 2020
    • July 2020
    • June 2020
    • May 2020
    • April 2020
    • March 2020
    • February 2020
    • January 2020
    • December 2019
    • October 2019
    • April 2019
    • January 2019
    • December 2018
    • November 2018
    • October 2018
    • September 2018
    • June 2018
    • May 2018
    • April 2018
    • March 2018
    • January 2018
    • December 2017
    • October 2017
    • September 2017
    • August 2017
    • July 2017
    • June 2017
    • May 2017
    • April 2017
    • March 2017
    • February 2017
    • January 2017
    • December 2016
    • November 2016
    • October 2016
    • September 2016
    • August 2016
    • July 2016
    • June 2016
    • May 2016
    • April 2016
    • March 2016
    • February 2016
    • January 2016
    • December 2015
    • November 2015
    • October 2015
    • September 2015
    • August 2015
    • July 2015
    • June 2015
    • May 2015
    • April 2015
    • March 2015
    • February 2015
    • January 2015
    • December 2014
    • November 2014
    • October 2014
    • September 2014
    • August 2014
    • July 2014
    • June 2014
    • May 2014
    • April 2014
    • March 2014
    • February 2014
    • January 2014
    • December 2013
    • November 2013
    • October 2013
    • September 2013
    • August 2013
    • July 2013
    • June 2013
    • May 2013
    • April 2013
    • March 2013
    • February 2013
    • January 2013
    • December 2012
    • November 2012
    • October 2012
    • September 2012
    • August 2012
    • July 2012
    • June 2012
    • May 2012
    • April 2012
    • March 2012
    • February 2012
    • January 2012
    • December 2011
    • November 2011
    • October 2011
    • September 2011
    • August 2011
    • July 2011
    • June 2011
    • May 2011
    • April 2011
    • March 2011
    • February 2011
    • January 2011
    • November 2010
    • August 2010
    • June 2010
    • May 2010
    • April 2010
    • March 2010
    • February 2010
  • Enter your email address to follow this blog and receive notifications of new posts by email.

    Join 2,158 other subscribers
  • @CavenderDiary

    Tweets by CavenderDiary
  • The Cavender Diary

    The Cavender Diary
  • The Cavender Diary

    • RSS - Posts
    • RSS - Comments
  • Blogs Worth Watchin'

    • An Urban Cottage
    • Apartment Therapy
    • Beard and Pigtails
    • Brooklyn Limestone
    • Burlap & Denim
    • Camp Wandawega
    • Color Outside the Lines
    • Decorpad
    • Decorum DIYer
    • Den & Delve
    • Design Hazards
    • Domestic Daddy
    • Domestic Imperfection
    • Eclectically Vintage
    • Emily Henderson
    • Fourth Floor Walkup
    • Funky Junk Interiors
    • Handmade America
    • Heather Bullard
    • Houzz
    • I Heart Organizing
    • Japanese Trash
    • kara pasley designs
    • Manhattan-Nest
    • Merrypad
    • Nine Red
    • Our Humble Abode
    • Our Vintage Home Love
    • Pure Style Home
    • Red Bird Vintage Home
    • Roger & Chris
    • Sweetsuite
    • Tara Bradford Photography
    • The Brick House
    • The Inspired Room
    • The Lettered Cottage
    • The Recipe Grinder
    • Today's Nest
    • Vintage Revivals
    • West Eastern
    • Yellow Brick Home
    • Young House Love
  • Steal Our Style

    • American Photo Archive
    • Art's Not Dead
    • Barn Light Electric
    • Bauer Pottery
    • CB2
    • Decades Home
    • Design Within Reach
    • El Paso Saddle Blankets
    • Fiestaware
    • Jonathan Adler
    • Just Modern Decor
    • Lucky Stars Ranch
    • Pendleton
    • Pottery Barn
    • Ralph Lauren Home
    • Ranger Doug
    • Restoration Hardware
    • School House Electric & Supply Co.
    • Sonic Editions
    • The Curiosity Shoppe
    • The Land of Nod
    • Urban Outfitters
    • West Elm
    • Wisteria
Blog at WordPress.com.
THE CAVENDER DIARY
Blog at WordPress.com.
  • Subscribe Subscribed
    • THE CAVENDER DIARY
    • Join 1,063 other subscribers
    • Already have a WordPress.com account? Log in now.
    • THE CAVENDER DIARY
    • Subscribe Subscribed
    • Sign up
    • Log in
    • Report this content
    • View site in Reader
    • Manage subscriptions
    • Collapse this bar
 

Loading Comments...
 

    %d