THE CAVENDER DIARY

2 GROWN MEN vs a 40 YEAR OLD HOUSE

  • Home
  • Who Are We?
  • House Tour
  • To Do List
  • Projects
  • Recipes
  • Did Ya Know?
  • Books
  • Our Press

What Our Plumber Did…Round 1

Posted by James on April 28, 2015
Posted in: New Home. Tagged: Benjamin Franklin Plumber, Master Bathroom, Master Bathroom Remodel. 13 Comments

Before our plumber could do (or Access) anything…….Jamie had to remove the rotted shower floor.

Jamie Removing the Shower Floor Collage

Fun, Fun, Fun….

We settled on Benjamin Franklin Plumbers.

And just like the truck says, He was a “Punctual Plumber”.

Benjamin Franklin Truck in Front of the Cavender House

Our plumber, and the “Plumber’s Apprentice”, wasted no time getting under the bathroom.

(BTW, those Oakley sunglasses stayed exactly like that on top of his head the entire day. Even when he was crawling through the crawl-space)

Our Benjamin Franklin Plumber in the Bathroom Hole

That old cast-iron shower drain was the first to go.

Old Shower Drain

And now there is a beautiful PVC one it it’s place.

Old Shower Drain vs the New Shower Drain Collage

The water lines, and drain, for the sink were replaced and relocated.

The New Water Supply and Drain for the Master Bathroom Sink

I don’t know about y’all……but we think that this is a mighty beautiful toilet flange.

Mighty Beautiful.

Our Beautiful New Toliet Flange and Water Supply

Just moving the water lines for the shower has made the whole bathroom “feel” like it was supposed to all along.

Like a normal average real regular  correct bathroom.

New Shower Plumbing Collage

Way, More, Much Better…..all around.

And this is just the tip of that ol’ iceberg, Folks….

Stay Tuned

He still has 2 more visits…..

Share this:

  • Share on Facebook (Opens in new window) Facebook
  • Share on LinkedIn (Opens in new window) LinkedIn
  • Share on X (Opens in new window) X
  • Share on Pinterest (Opens in new window) Pinterest
Like Loading...

Another Arrow Head Ashtray

Posted by James on April 26, 2015
Posted in: New Home. Tagged: Frankoma Arrowhead, Frankoma Ashtray, Frankoma pottery. 14 Comments

……and neither of us even smokes.

When I saw this picture from Roger and Chris’s 160 year-old Victorian home tour…..

Roger and Chris's Stove Top in Sharon Springs with Frankoma Arrow Head Ashtray

….I knew that I needed one of those Frankoma arrow head ashtrays. (Like I need anything else)

I’ve written about my obsession with the now defunct Frankoma pottery company a few times.

Took a while of cruising eBay, but I scored one for myself…….pale green glaze, and cheap too.

Frankoma Arrow Head Ashtray

Now I finally have enough..

With that settled, let me introduce y’all to Roger and Chris, and the 160 year-old Victorian they refurbished in Sharon Springs, NY.

Roger and Chris's 160 Year Old Victorian with Pink Door

…and their pink Isetta too,

Roger and Chris's Living Room

Roger and Chris's Eclectic Kitchen

Roger and Chris's Dining Room Collage

Roger and Chris's Pantry

Peaceful MAster Bedroom

Blue Sofa in the Master Bedroom

Roger and Chris's Master Bathroom Collage

Roger and Chris's Master Bathroom

Buck Against that Pink Front Door

Isn’t that place just awesome?

Never in a million years would I think to paint a house black with a hot-pink door…….but it works. (Oooh, it looks like the house and trim are 2 different shades of black, but they’re really just flat vs semi-glass)

And the inside of the place?….Just the right amount of junk, and color, mid-century, and antique.

Swoon,

I’ve been following these boys since they lived in Austin a few years ago. Check out that house here. (I think that I might actually like it better)

Oh yeah, and follow their design adventures on their blog, RogerandChris.com.

Share this:

  • Share on Facebook (Opens in new window) Facebook
  • Share on LinkedIn (Opens in new window) LinkedIn
  • Share on X (Opens in new window) X
  • Share on Pinterest (Opens in new window) Pinterest
Like Loading...

Our “Plumber Do” List

Posted by James on April 23, 2015
Posted in: New Home. Tagged: Benjamin Franklin Plumber, Master Bathroom, Master Bathroom Remodel, Plumber. 6 Comments

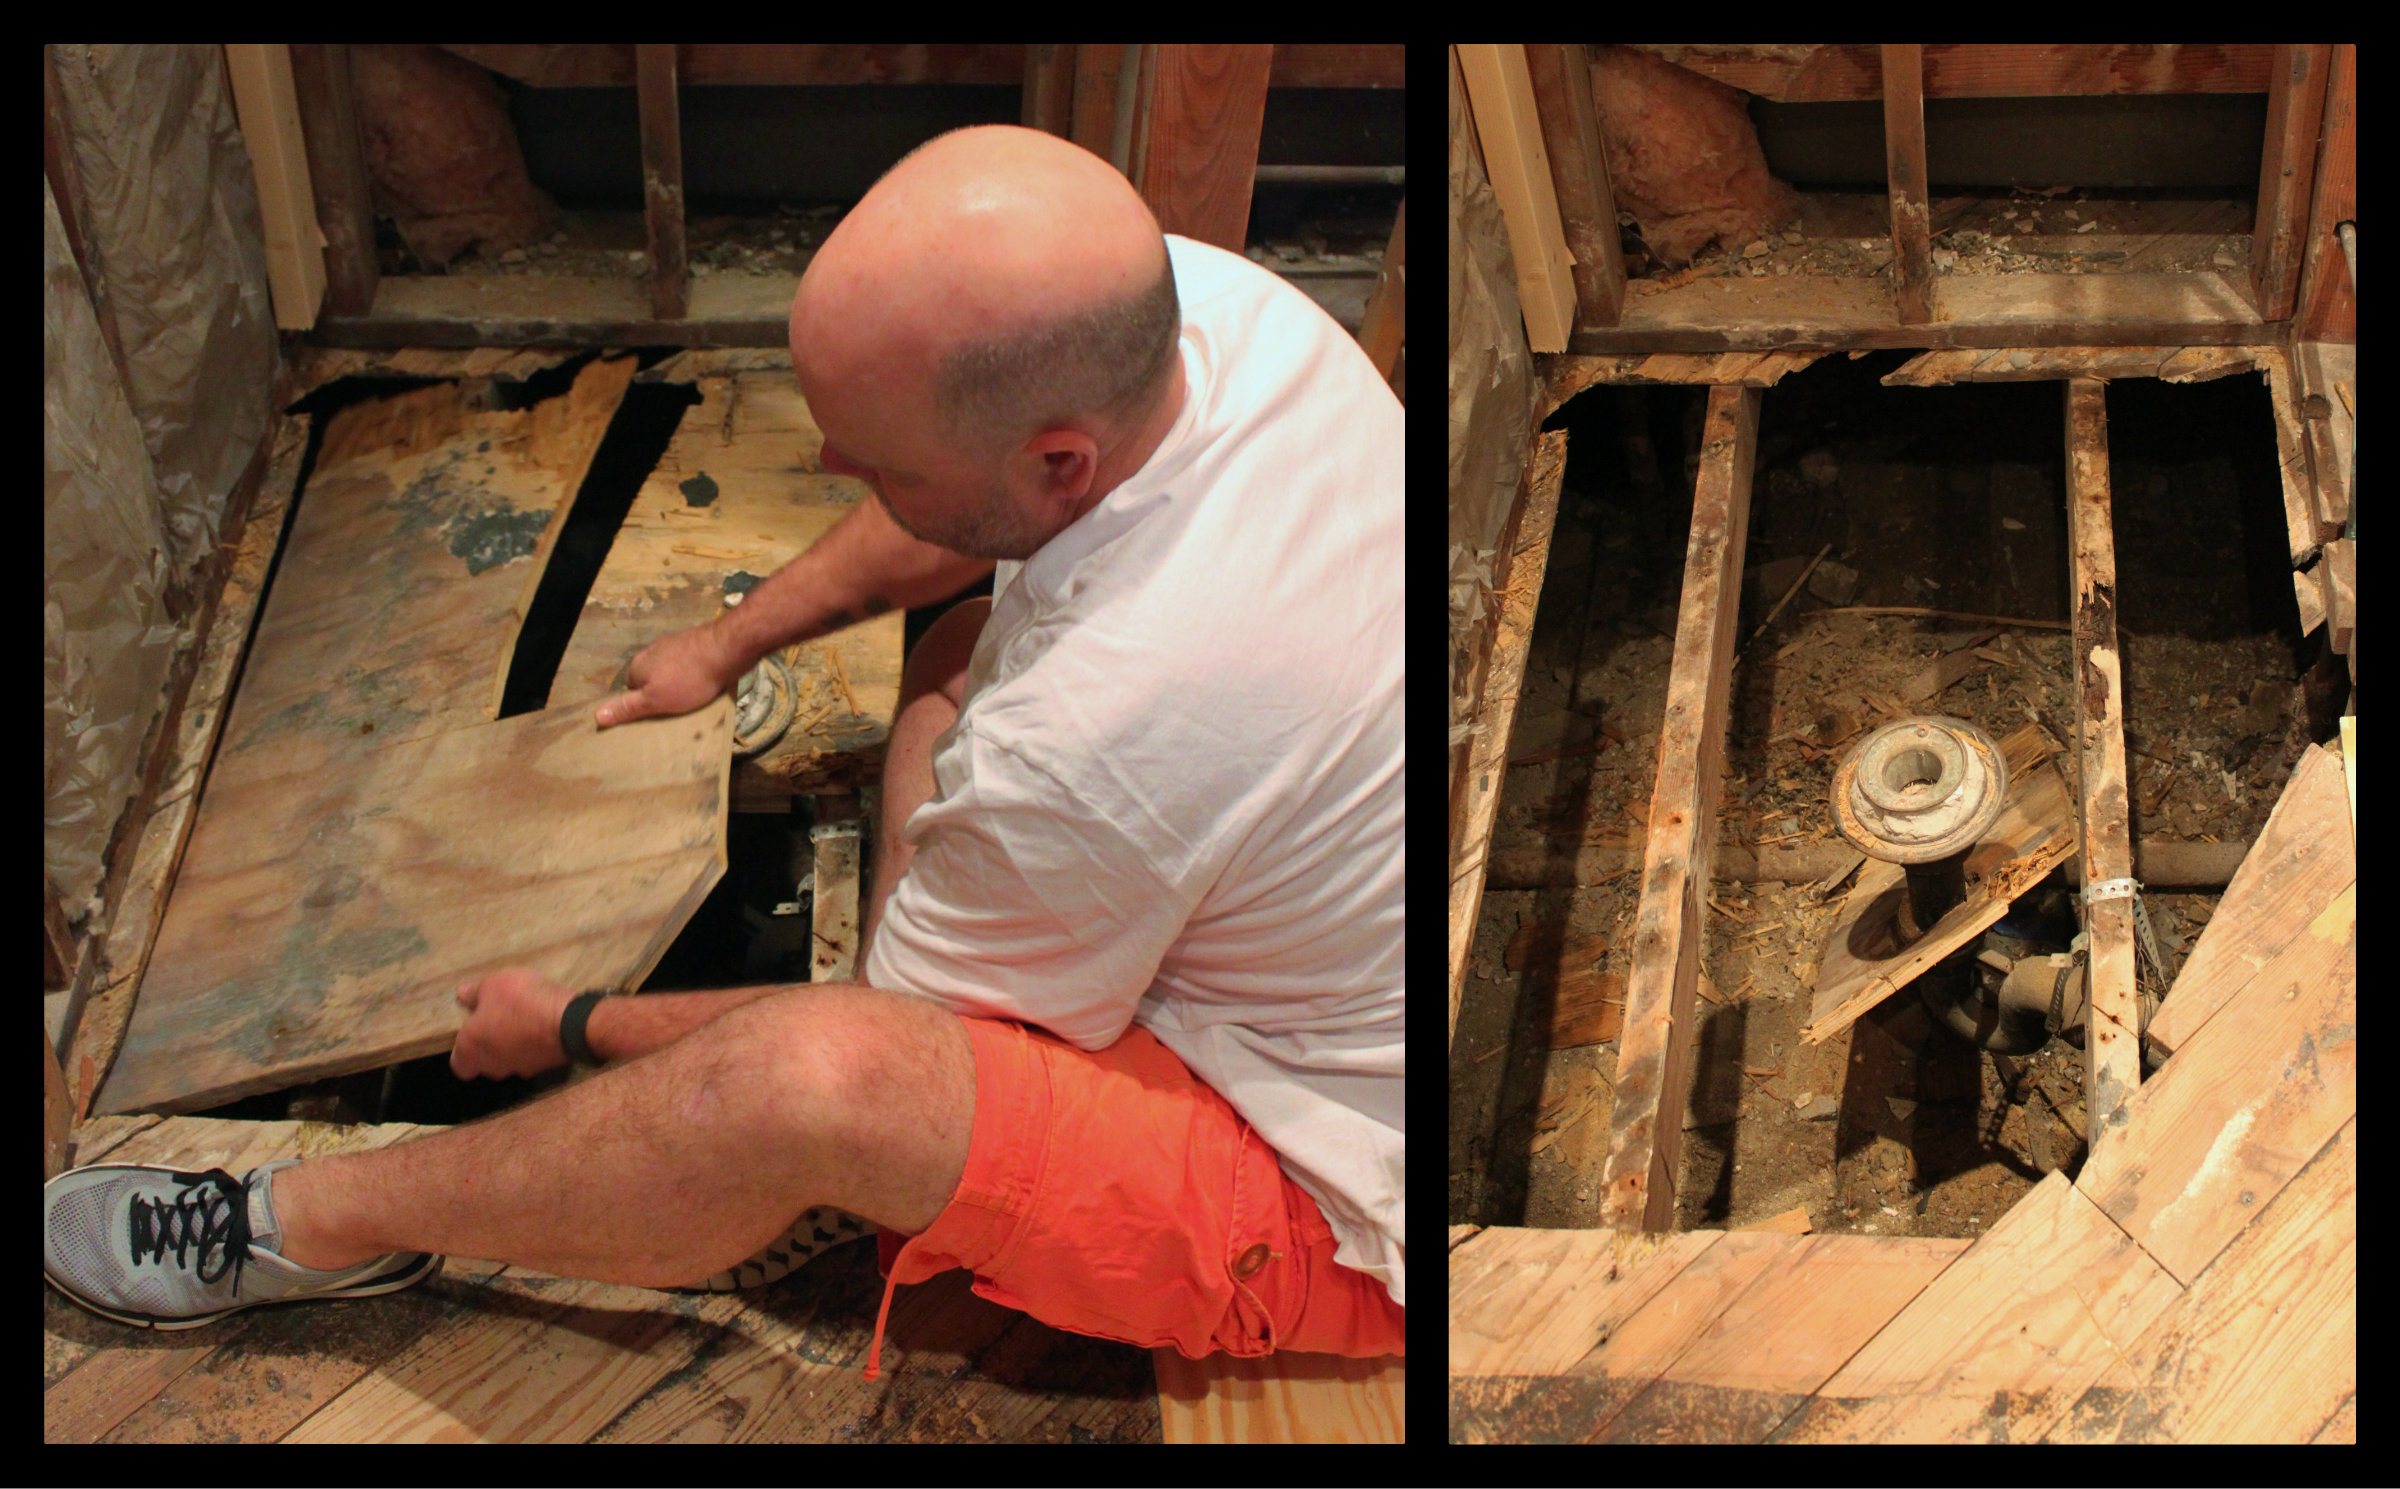
There’s only so much we can tackle by ourselves on a bathroom remodel.

Well……..Everything so far….except for the plumbing.

We found a professional plumber for that. (Probably a good idea)

Here’s our list for him:

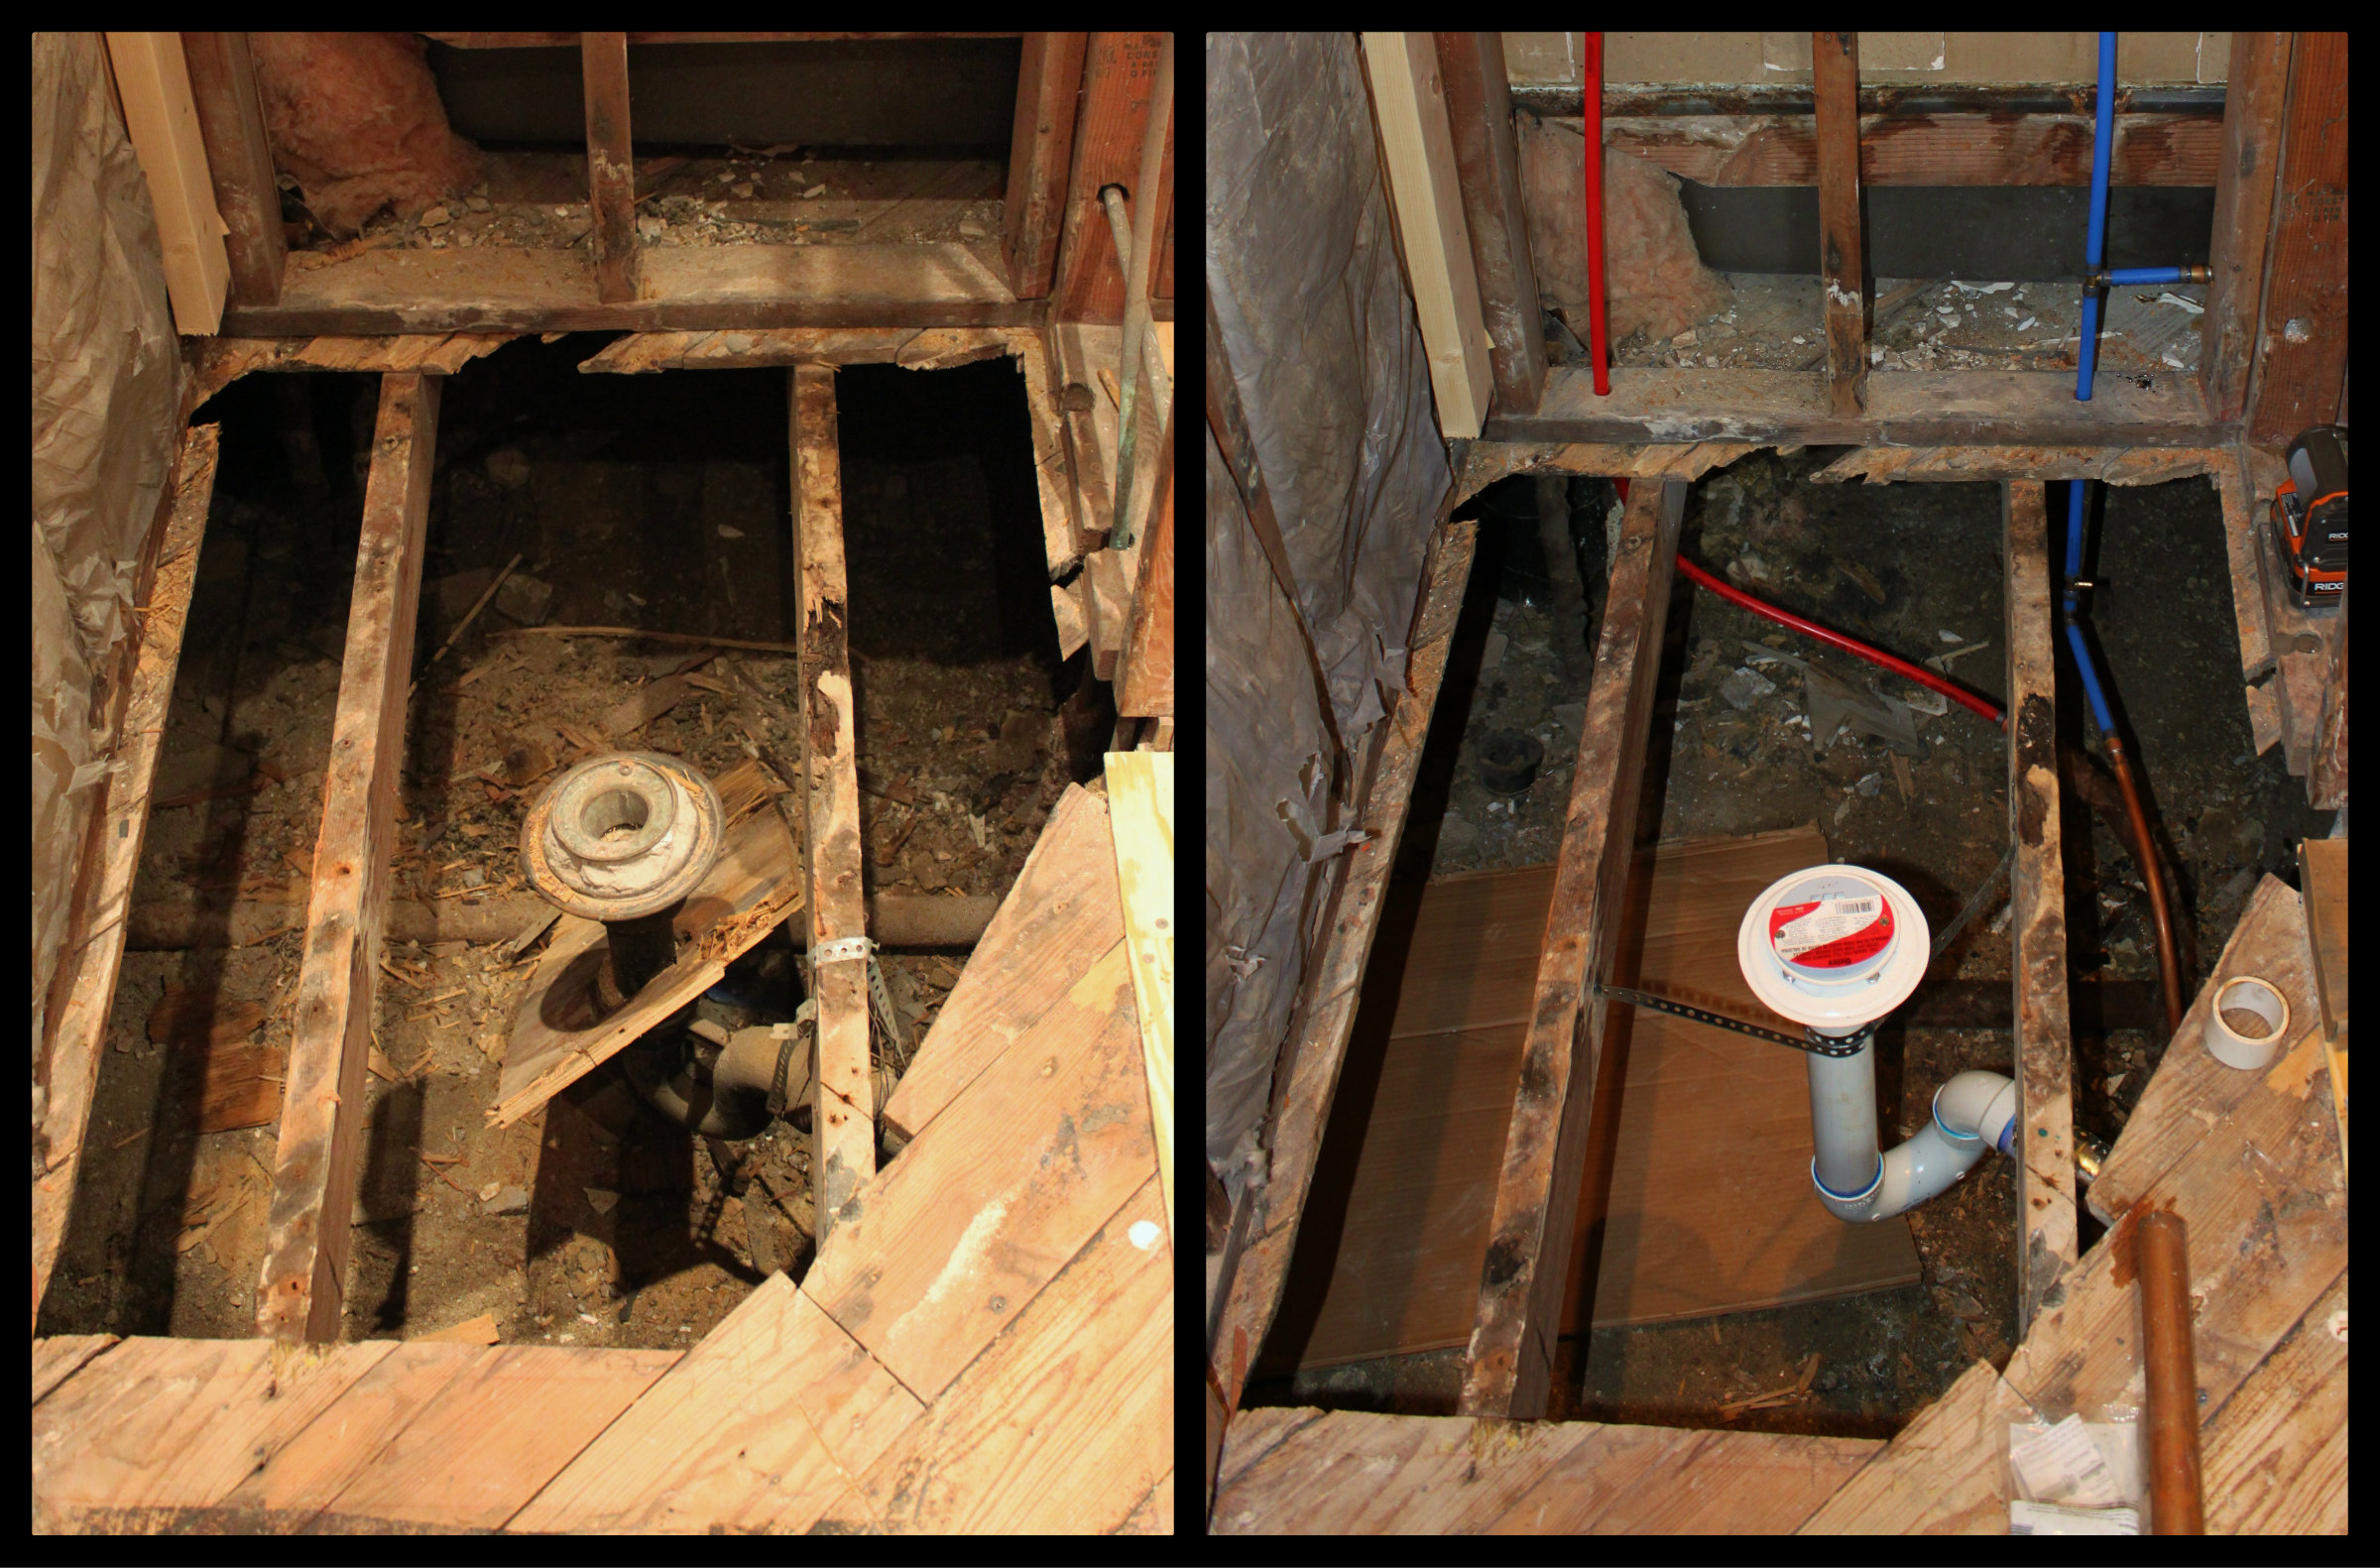
  • Move water lines for sink to the left of the stud about 14″
  • Move drain closer to the vent on the left
  • New wall will be 4″ thicker

Move the Sink Plumbing to Left

  • Move water lines for shower to center wall
  • Replace water line for toilet
  • Replace toilet flange and adjust for new floor height

Move the Shower Lines to other Wall and Replace Toilet Flange

  • Replace shower drain and center on floor

Replace the Shower Drain and Center the New One

  • Also, is this a good time to move the outdoor faucet to the side of the house? (Easy access when we remove the shower floor completely)

Old Outdoor Faucet Next to the Back Door

We WILL build a deck out there one day and this is problem numero uno. We can not have a faucet under the new deck.

Back to the bathroom….

  • We also need him to install a custom shower pan liner and all the new fixtures. We were looking forward to installing the toilet ourselves, but all the reviews online stated that it was tough to do……..so let’s just pay him to do that too.

Is that everything?

Nope, while he’s here…

  • how about changing the knobs in the other, currently working, shower? They are a little …….embarrassing.

The sad, Sad Shower Fixtures in the Hall Bathroom

Of course, Jamie wants him to bid out installing a tank-less water heater……

Sheeesh……..

Stay tuned…there’s more to come.

Share this:

  • Share on Facebook (Opens in new window) Facebook
  • Share on LinkedIn (Opens in new window) LinkedIn
  • Share on X (Opens in new window) X
  • Share on Pinterest (Opens in new window) Pinterest
Like Loading...

Carmen’s Jalapeno Creamed Corn

Posted by James on April 19, 2015
Posted in: New Home, Recipes. Tagged: Cream Cheese, Creamed Corn Recipe, pickled jalapenos, southern recipe. 12 Comments

I’ve known Carmen as one of our store’s best customers for about 12 years.

With her mandatory crested-blazer, jingling charm bracelet overflowing with Cartier charms, and blond hair piled high like a heaping dollop of gravity-defying whipped cream….she’s hard to miss. She commands a room with all the gentle enthusiasm of a longhorn stampede.

A few years ago, I had the good fortune to sit next to her at a dinner party. Her quick, syrupy southern wit had my side aching from laughing hard all night. Somewhere in the course of that evening, she shared this recipe with me….and I’ve been making it ever since.

You can tell it’s a great southern recipe because it contains a stick of butter, a can of something, and as many jalapenos as you can handle.

When a Texan woman shares a recipe like that with you….you better believe that it will be good.

And now I’m sharing it with y’all.

Here’s all it takes:

  • 1 Stick of Butter
  • 8 Ounce Brick of Cream Cheese
  • 2 Cans of White Shoe-peg Corn (Drained)
  • 8 Ounce Jar of Pickled Jalapenos

Melt the butter and cream cheese together in a small pan over medium heat, stirring constantly.

Melt the Butter and Crean Cheese Together

Once they’ve both melted and blended together.

Mix in the corn and heat it through….

White Shoepeg Corn Collage

Finely dice as many jalapenos as you can handle and add them too.

Make sure they’re crisp and not soft. The soft ones just fall apart.

Diced Jalapeno Collage

Now, how many is enough?

Pickled jalapenos aren’t quite a hot as you may think they are……and the cream cheese/butter cuts a lot of the heat. Carmen uses the whole 8 ounce jar.

Trust her, the more – the better. (I use the whole jar too)

 Mix in as Many Chopped Jalapenos as You Can Handle

Of course, you could just serve it like it is…..but this seems like such a “Steak House” side dish that I treat it like one. I pop a big heaping scoop into individual cast iron dishes and slide them under the broiler for about 4 minutes……

 Use Individual Cast Iron Dishes

……’till they’re lightly browned and bubbling.

Perfect side next to a grilled steak….and everybody gets their own dish.

Jalapeno Creamed Corn from the Cavender Diary Boys

I don’t make this often, it’s much too rich.

So I limit it only to the holidays.

…or days that end in “Y”.

Love ya Carmen!

(Thanks for the clogged arteries…….)

Share this:

  • Share on Facebook (Opens in new window) Facebook
  • Share on LinkedIn (Opens in new window) LinkedIn
  • Share on X (Opens in new window) X
  • Share on Pinterest (Opens in new window) Pinterest
Like Loading...

I Was in an Opera Once

Posted by James on April 17, 2015
Posted in: New Home. Tagged: Billy Budd, Dallas Opera, Dallas Opera Production of Billy Budd, professional opera. 9 Comments

It’s true,

Every now and again I like to imagine that my life is a sitcom. And sometimes, just occasionally mind you, I’ll step outside of my comfort zone and make a smallish life decision simply based on whether or not it would make for a good episode. 

I thought, “Why not do it? How many people can say they were in the cast of a professional opera?”

I’d watch that episode.

My roommate back then worked for the Dallas Opera. Because the show they were producing at the time was an entirely male cast, they were having a little trouble finding enough available men to fill the stage. I have to be honest, I’d only seen one opera before then and it was pretty dreadful. Maybe y’all have heard of it……De Valkyrie. It’s the Wagner opera with Brunhilda.

Still not familiar?

See if this jogs your memory…….It’s the one where Elmer Fudd has the “speawr and mawgic hewlmet” that Buggs Bunny, in drag with a horn-helmet with pig-tails and riding a ridiculously fat horse, tricks him into relinquishing. Fudd sings the ohhh-so-memorable chant,

“Kill the Wabbit! Kill the Wabbit!”

Ya know what? Here ya go…..

Ahhhhh, there it is. Now you know which opera I’m talking about. (I never claimed to have “high-brow” readers)

Anyway. If you’ve never seen an Opera before, I don’t recommend Wagner to start with. De Valkyrie is the second of 4 excruciatingly long operas based on the none-too-fascinating topic of Norse mythology. (Insert big eye roll) Also, It’s a bit like seeing the Empire Strikes Back……without ever seeing A New Hope or Return of the Jedi. But not even remotely as interesting. There’s a reason that Hitler played Wagner over the loudspeakers at concentration camps.

Back to my story,

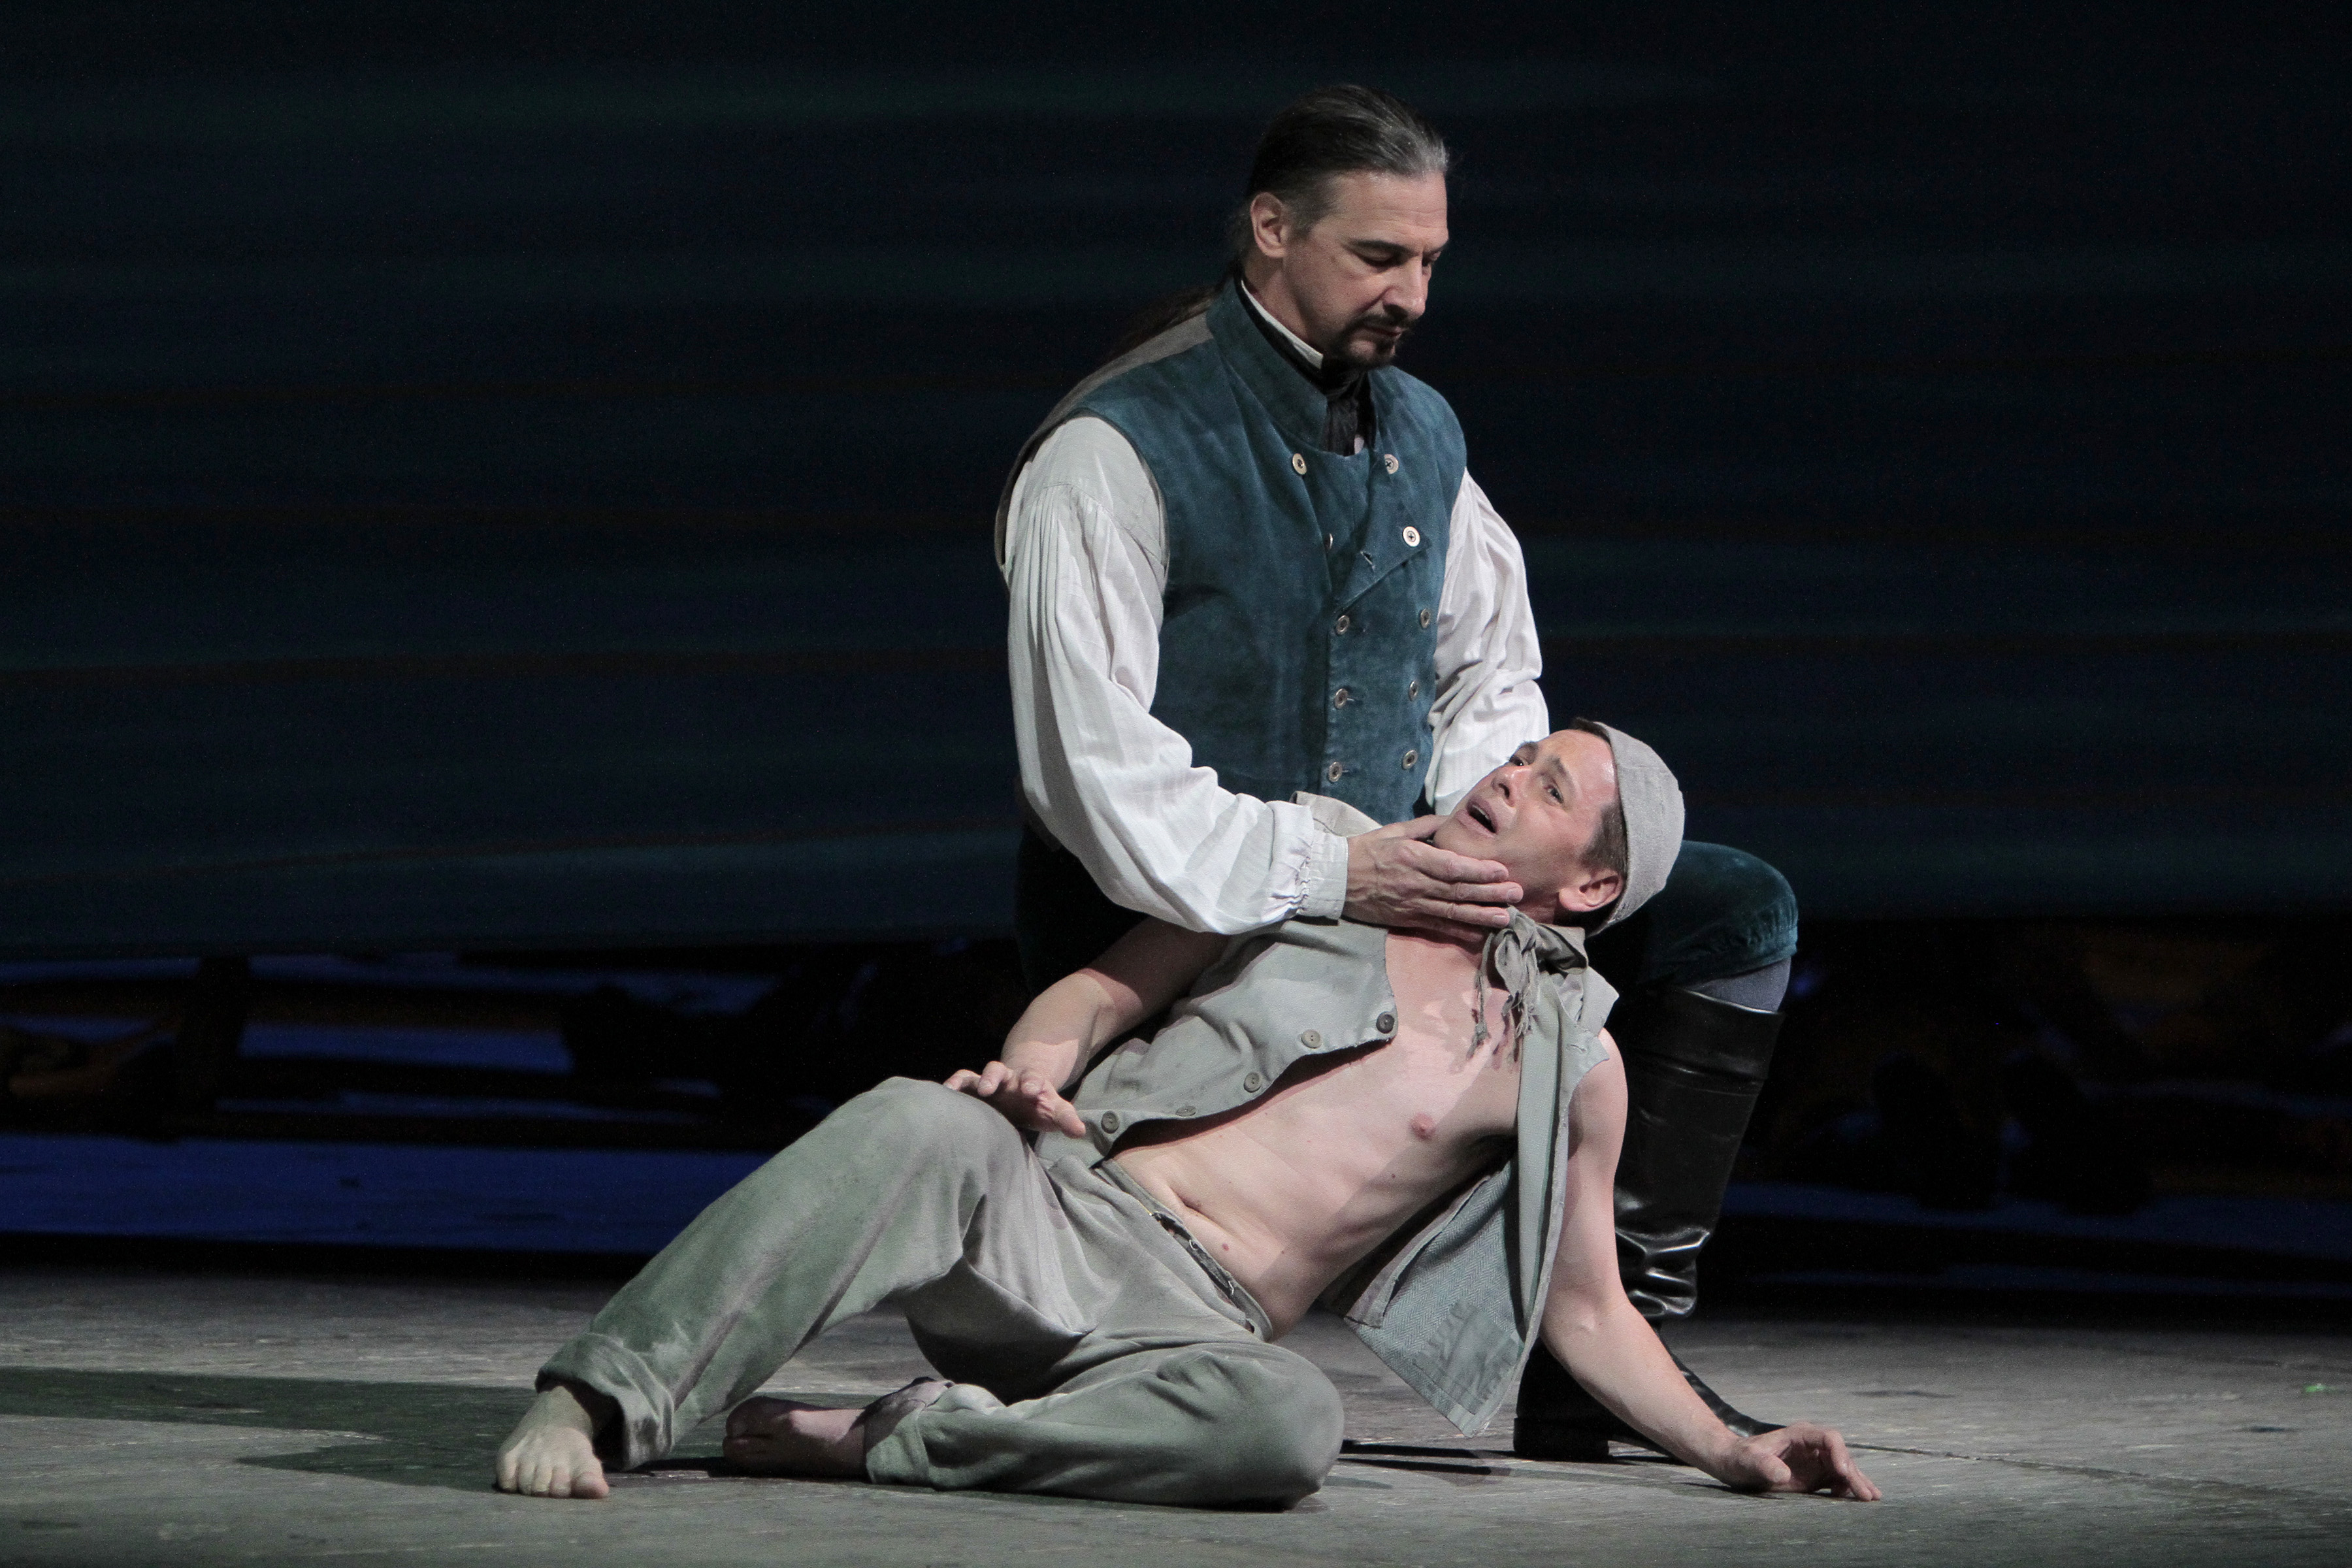
My opera was Billy Budd by Benjamin Britten. It’s based on the Herman Melville story about a young muscular sailor whose hanged after his homo-magnetism leads him to accidentally kill his Master at Arms with one punch.

I was to be a supernumerary……a “climber” they called it.

In the opera world, supernumeraries are non-speaking/non-singing roles. They mostly fill the stage in crowd scenes. I wasn’t supposed to sing, I’m hardly a trained professional opera singer…….but of course, I was singing anyway. Anyone who’s ever been in a car with me for more than 5 minutes knows that I was most certainly singing. I can’t control it. I think it might be a form of turrets. 

My costume was a pair of grey linen Capri pants and a belt. That’s was all. No shirt, no shoes, not even a jaunty sailor cap. Some of the other “climbers” we’re given head-wraps or gauntlets, but I wasn’t even that lucky. After about 10 of the guys cut their feet, we were given espadrilles to wear so we’d stop leaving bloody footprints on the stage……….but still no shirts. The wardrobe department assured me that it was more historically appropriate for me to be shirtless………but they had no comment about how historically accurate it was for 19th century sailors to wear espadrilles. So there I was, onstage for two-thirds of the production, shirtless and in karate shoes, nipples exposed to the world. When I wasn’t scrubbing the deck, climbing rope ladders, or carrying a spear….. I spent the rest of my stage-time crouching behind other dudes in crowd scenes hiding my “fondness for Tex-Mex” that was hanging over the waistband of my Capris…..

The scope of the production was beautiful. The music, the sets, the lighting……just beautiful.

If I wasn’t much of an opera fan before this experience….I certainly am now.

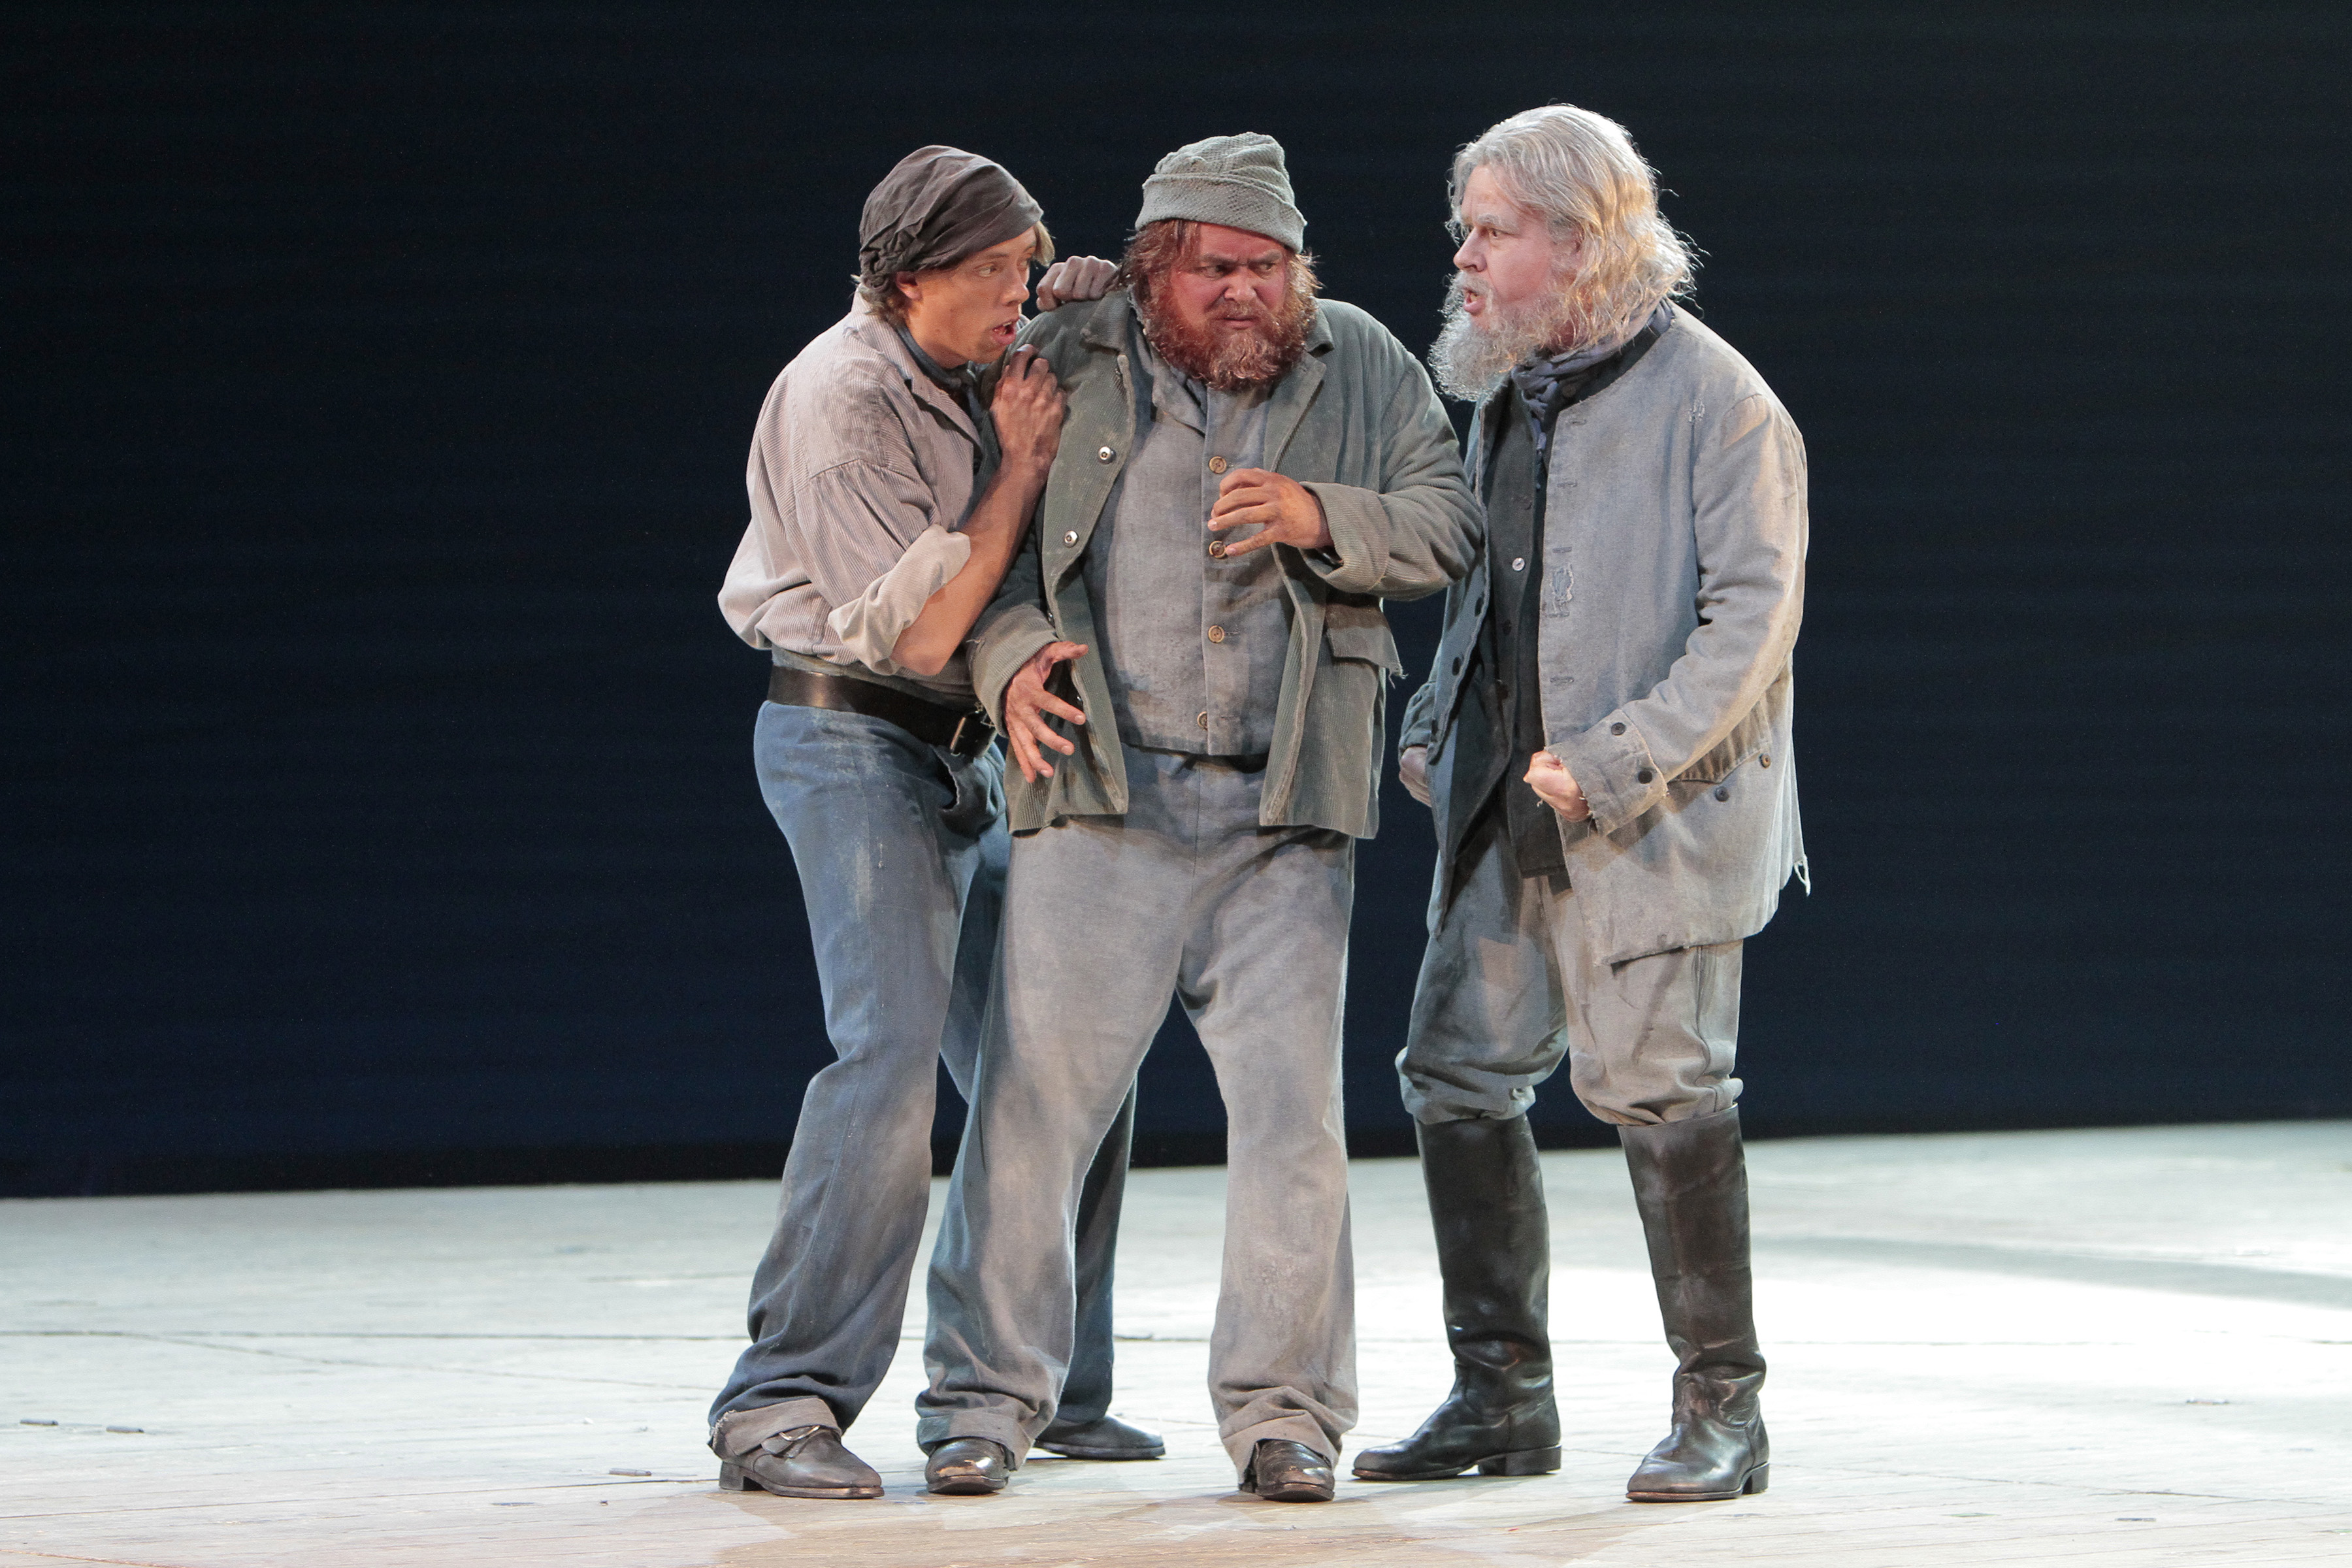
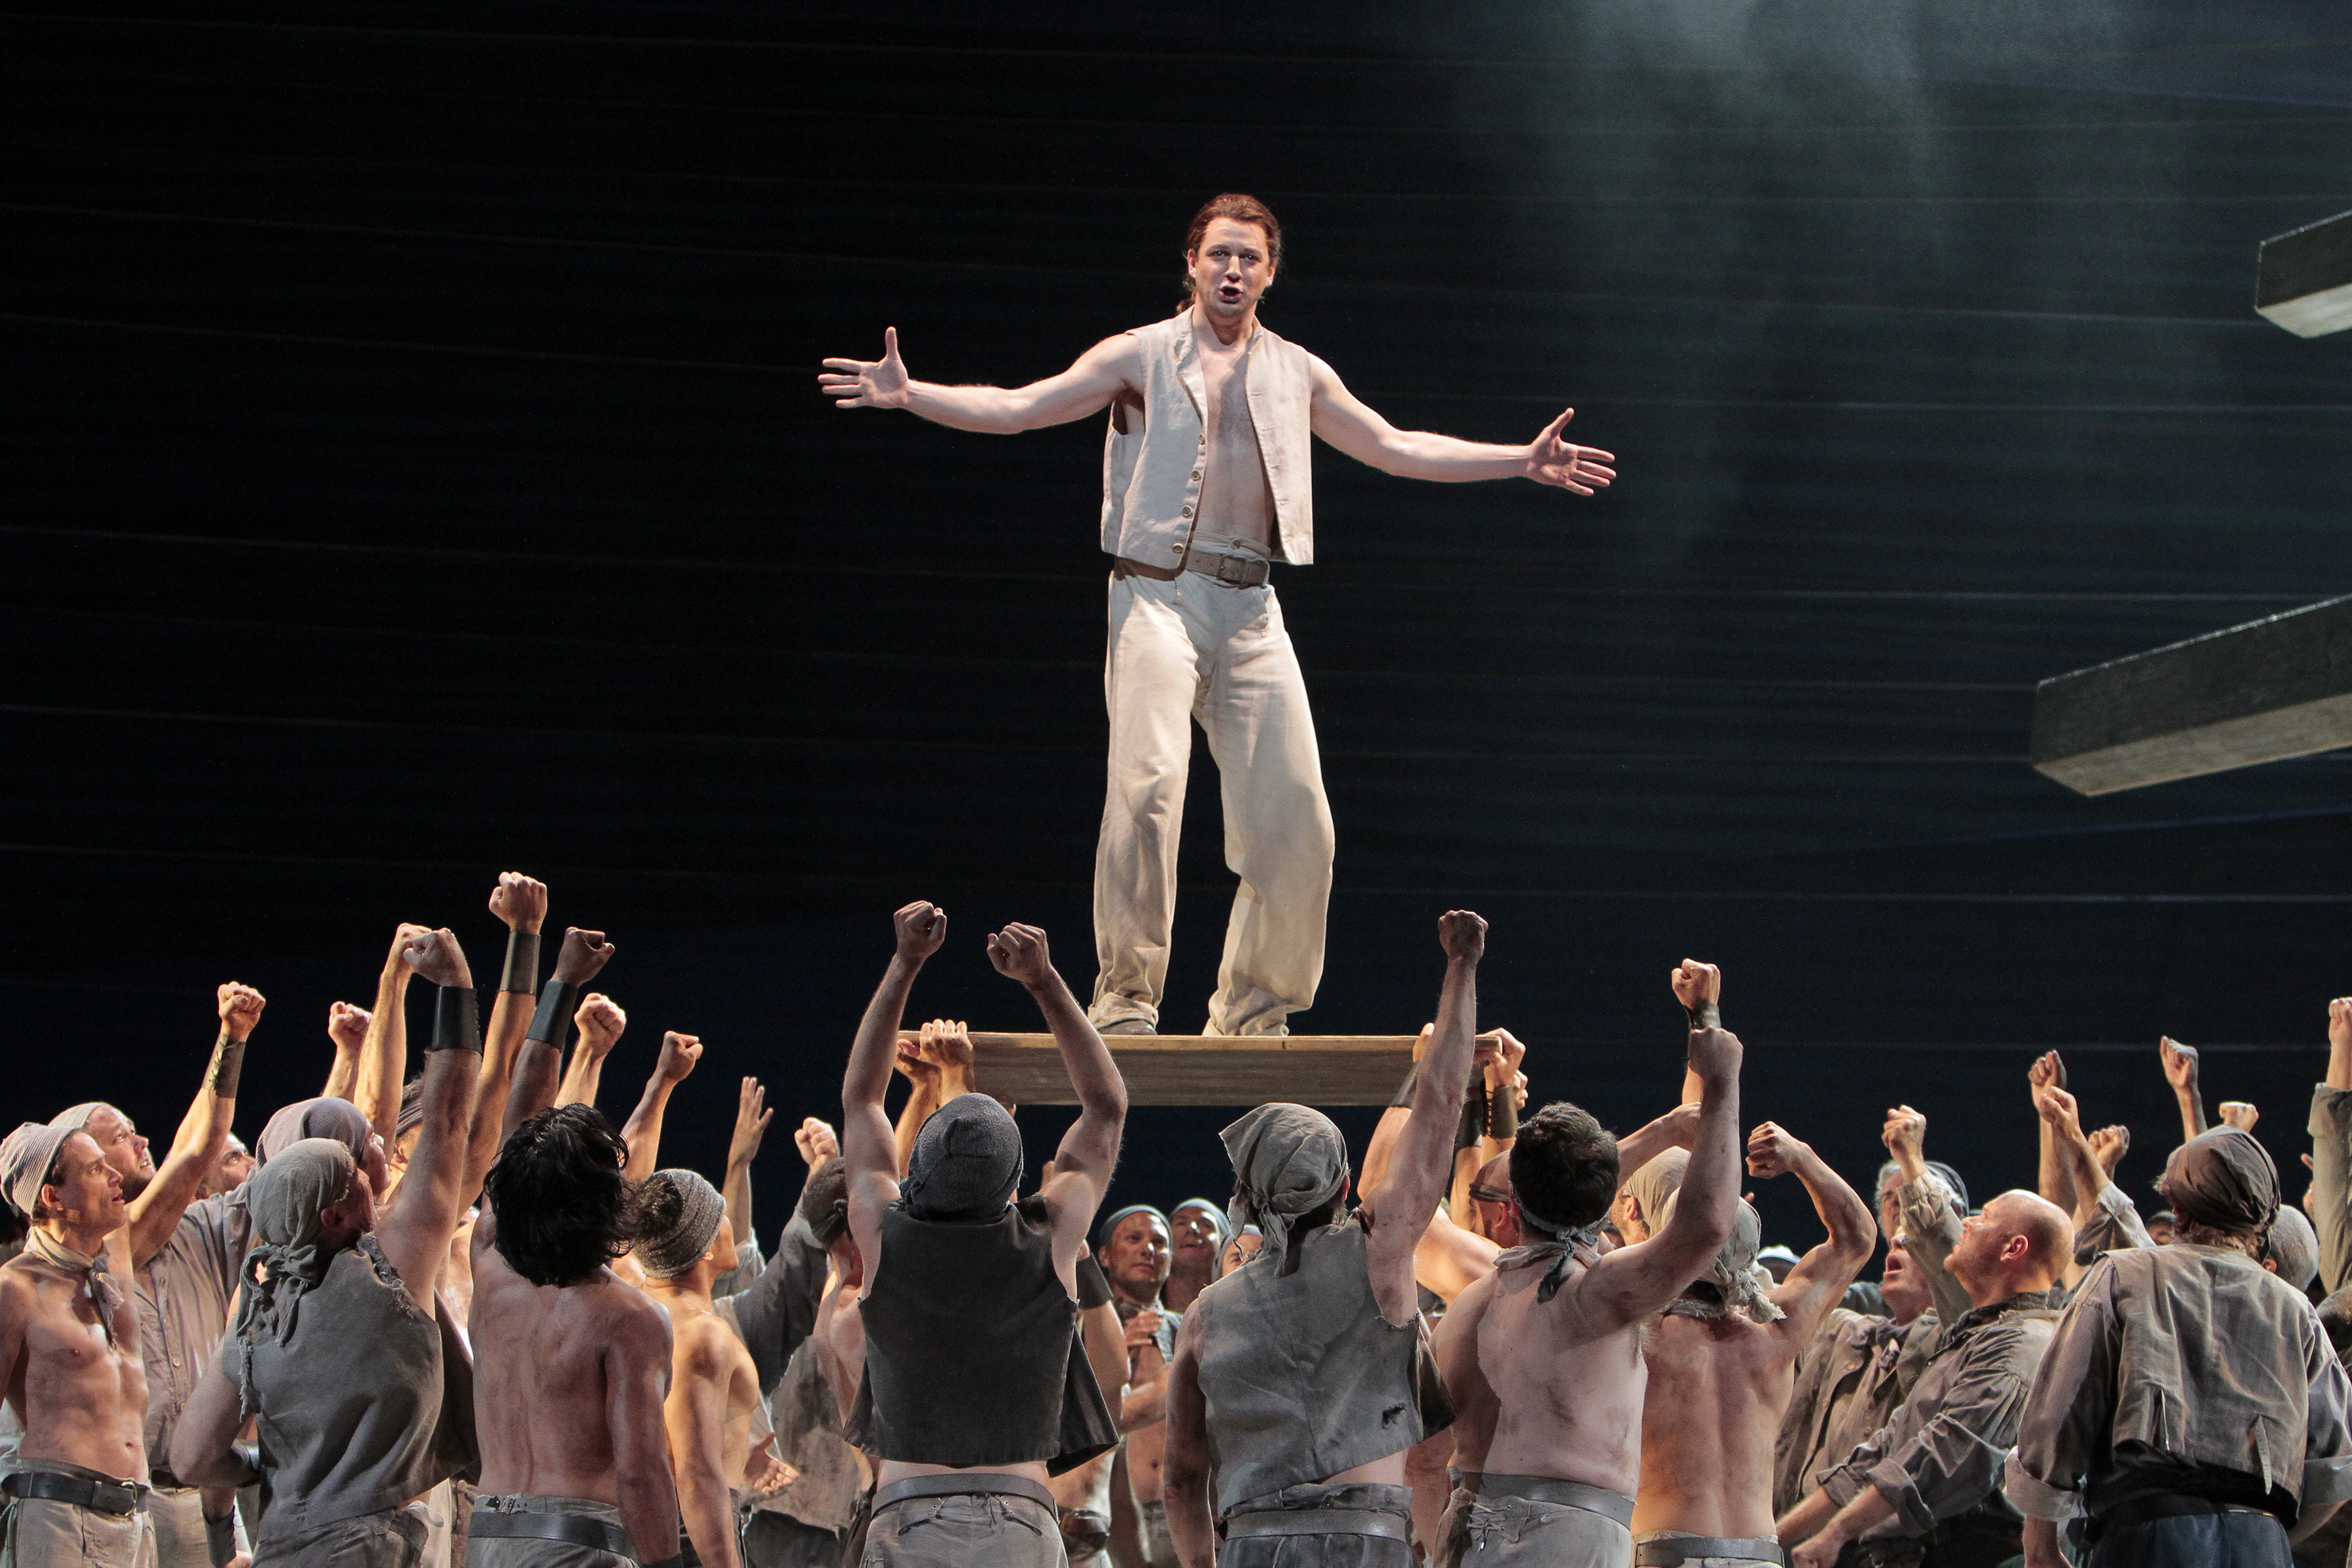
I found a few pictures from a recent production in Los Angeles. Pretty similar to the one I was in. (Notice the espadrilles on the extras)

Carmen Piano_Dress _September 12, 2013 -

Billy Budd _OT1 _February 16, 2014

Billy Budd _OT1 _February 16, 2014

Billy Budd _OT1 _February 16, 2014

Billy Budd _OT1 _February 16, 2014

Billy Budd _OT1 _February 16, 2014

Billy Budd _OT2 _February 16, 2014

Billy Budd _OT2 _February 16, 2014

Los Angeles Production of Billy Budd 8

It was quite a commitment. Every night from 7 to about 10 we rehearsed, 3 weeks at an unairconditioned rehearsal studio and then a week at the Fair Park theater on a hydraulic stage. The 3-hour show had 2 dress-rehearsals, and then 4 performances.

Some members of the Dallas Boys Choir were in the production too as cabin boys. Only they were being paid to sing. I think they were all about 10 to 12 years old. On the night of our final performance, at the end of the 5 weeks of work, we got our paychecks. The boys were thrilled to get checks for $150. Just thrilled.

Because I wasn’t a paid singer, and just a supernumerary, my check was only $120. 

Let me save you from doing the math on your own……that comes out to 80 cents an hour.

No joke.

It wasn’t about the money for me anyway.

I was just hoping that the whole experience would make for a good episode.

If I really was living in a TV show….

I think it would have been one of the highest rated episodes of my life.

Share this:

  • Share on Facebook (Opens in new window) Facebook
  • Share on LinkedIn (Opens in new window) LinkedIn
  • Share on X (Opens in new window) X
  • Share on Pinterest (Opens in new window) Pinterest
Like Loading...

What’s Our Overhead Look Like?

Posted by James on April 14, 2015
Posted in: New Home. Tagged: Master Bathroom, Master Bathroom Ceiling. 7 Comments

“Over our heads” in the master bathroom.

I’m talking about the ceiling.

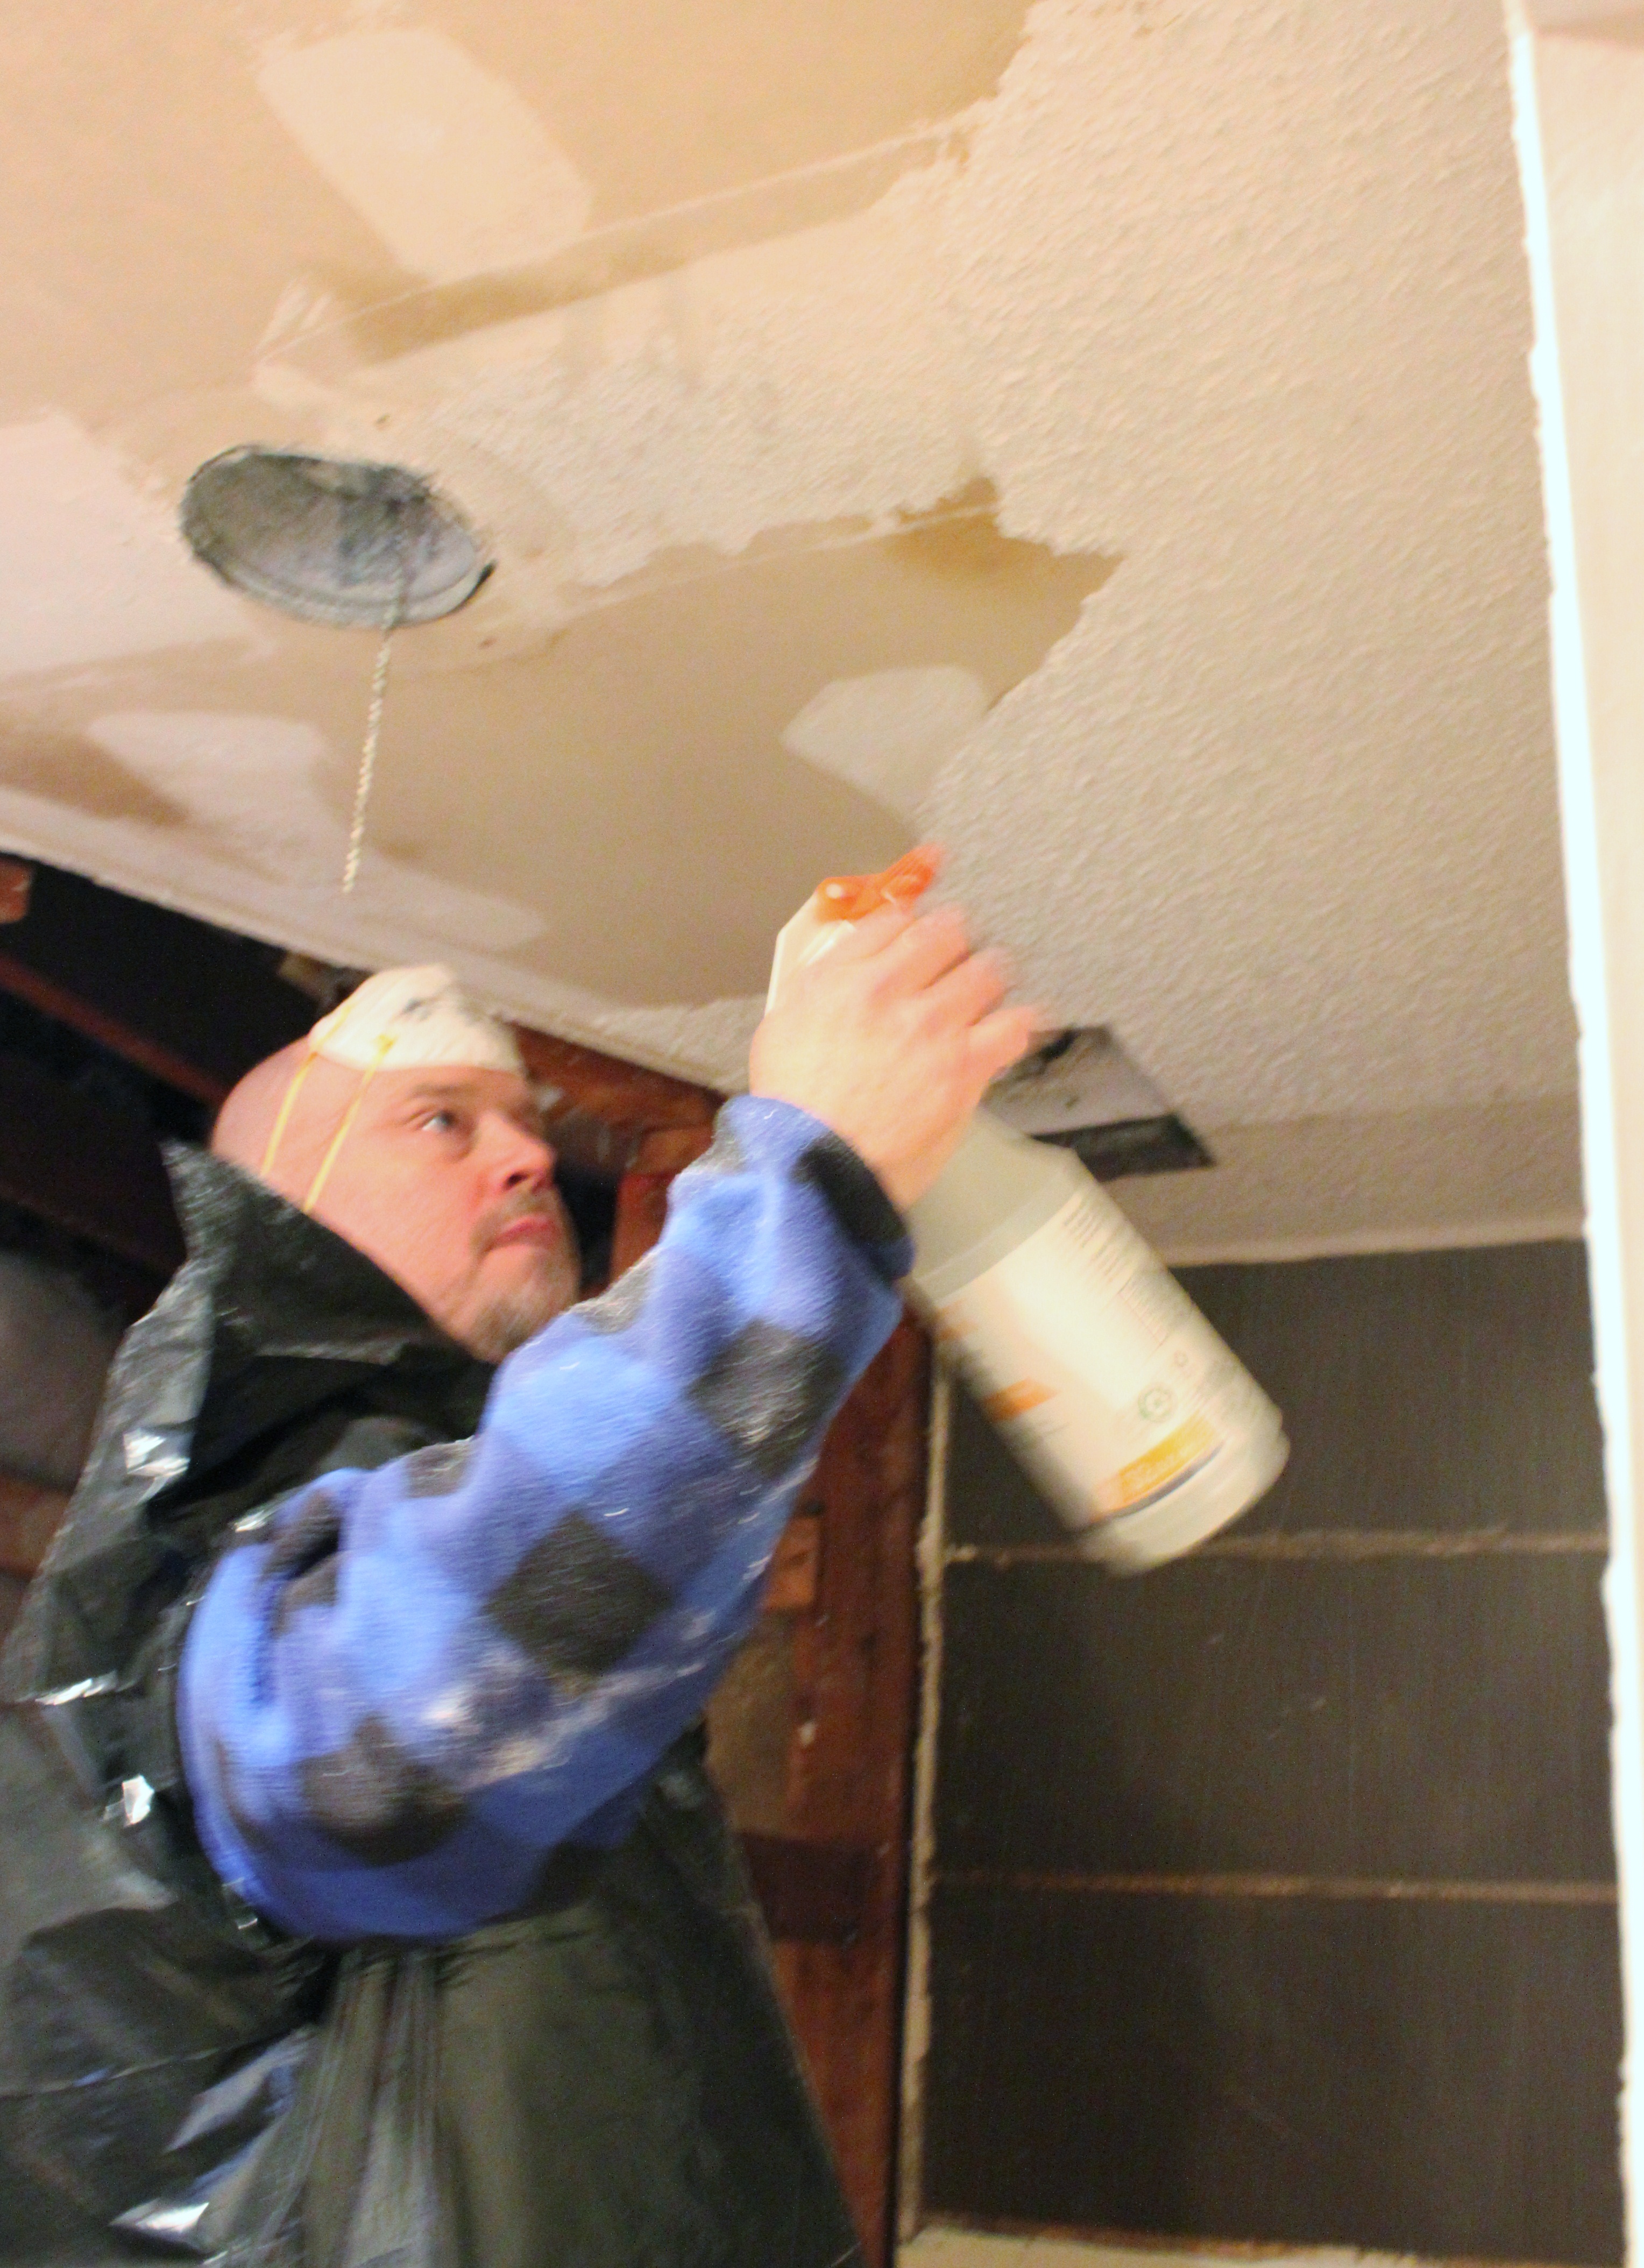
It used to look like this bumpy, rusty nastiness….

Popcorn Ceiling in the Master Bathroom

Anybody who willingly sprays “popcorn” on a ceiling should be shot on sight.

It took Jamie an hour to scrape all that crap off. True Cavender Diary fans will remember Jamie scrapping the popcorn off the master bedroom ceiling the first week we were in the house 5 years ago. He’s a pro at it by now, even made himself a stylish trash-bag-poncho.

Jamie Spraying the Popcorn off the MAster Bathroom Ceiling

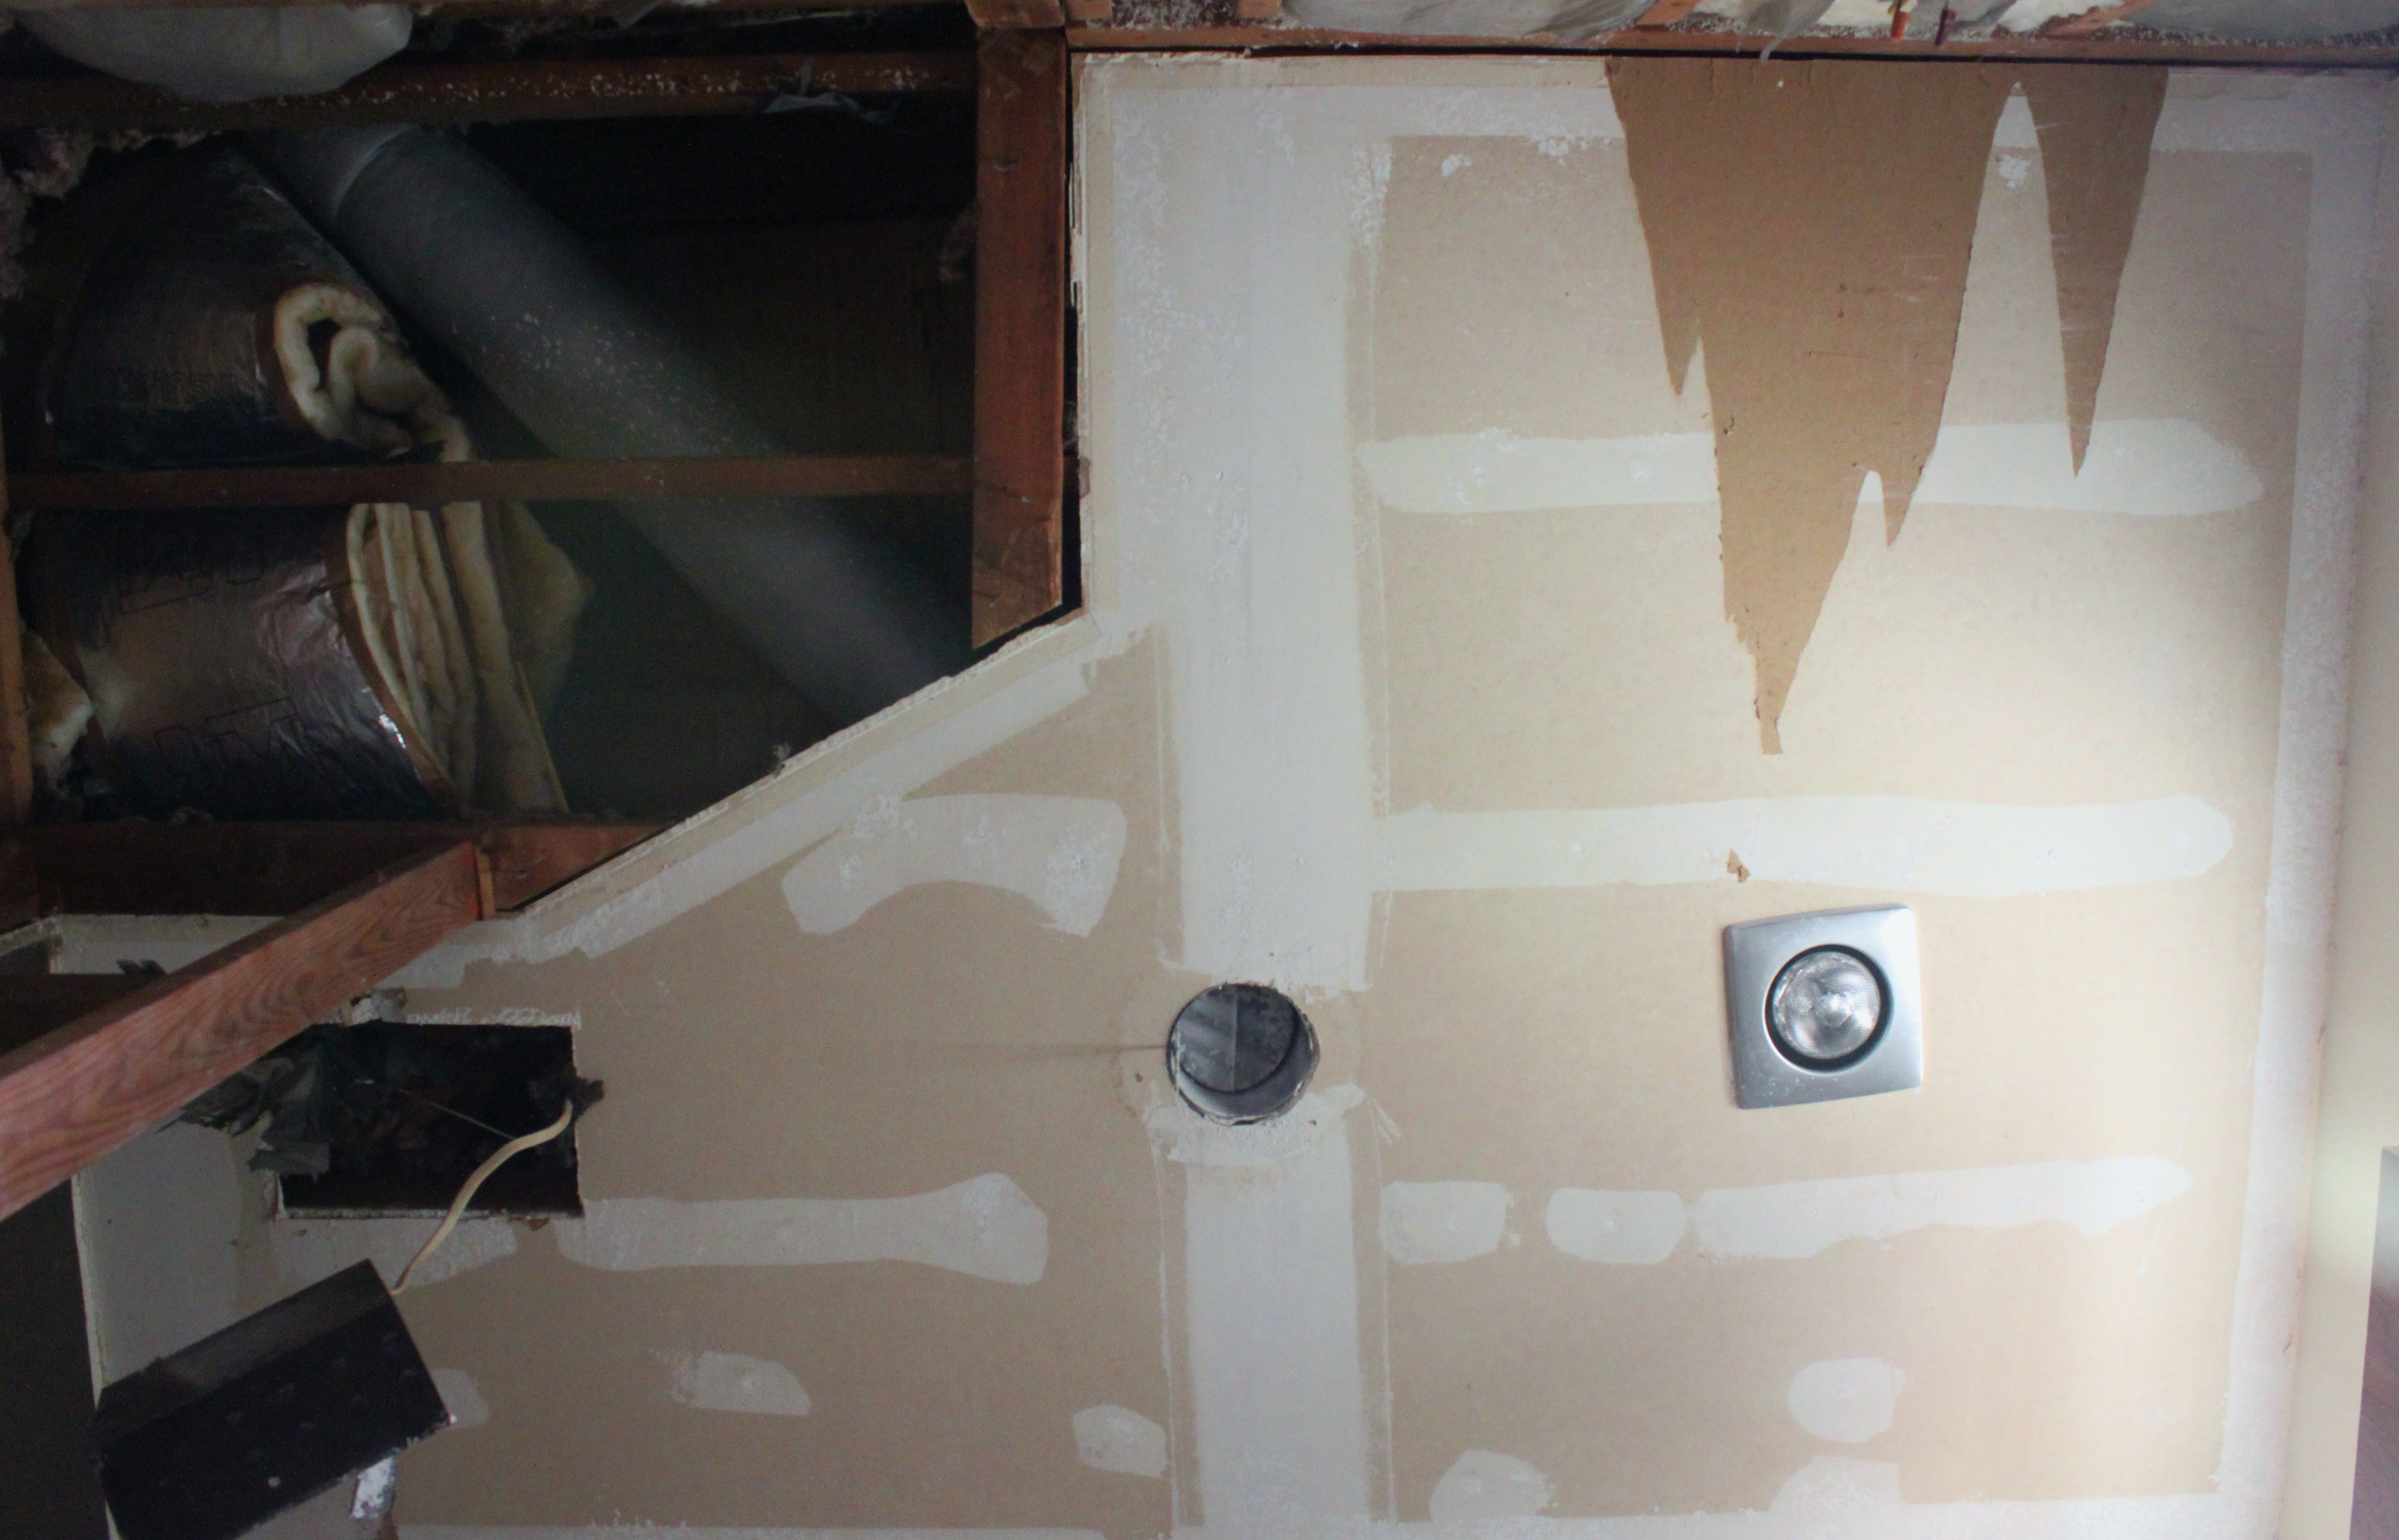
Lying on my back and looking up…this is the view after Jamie finished.

Master Bathroom Ceiling After Jamie Scrapped the Popcorn Off

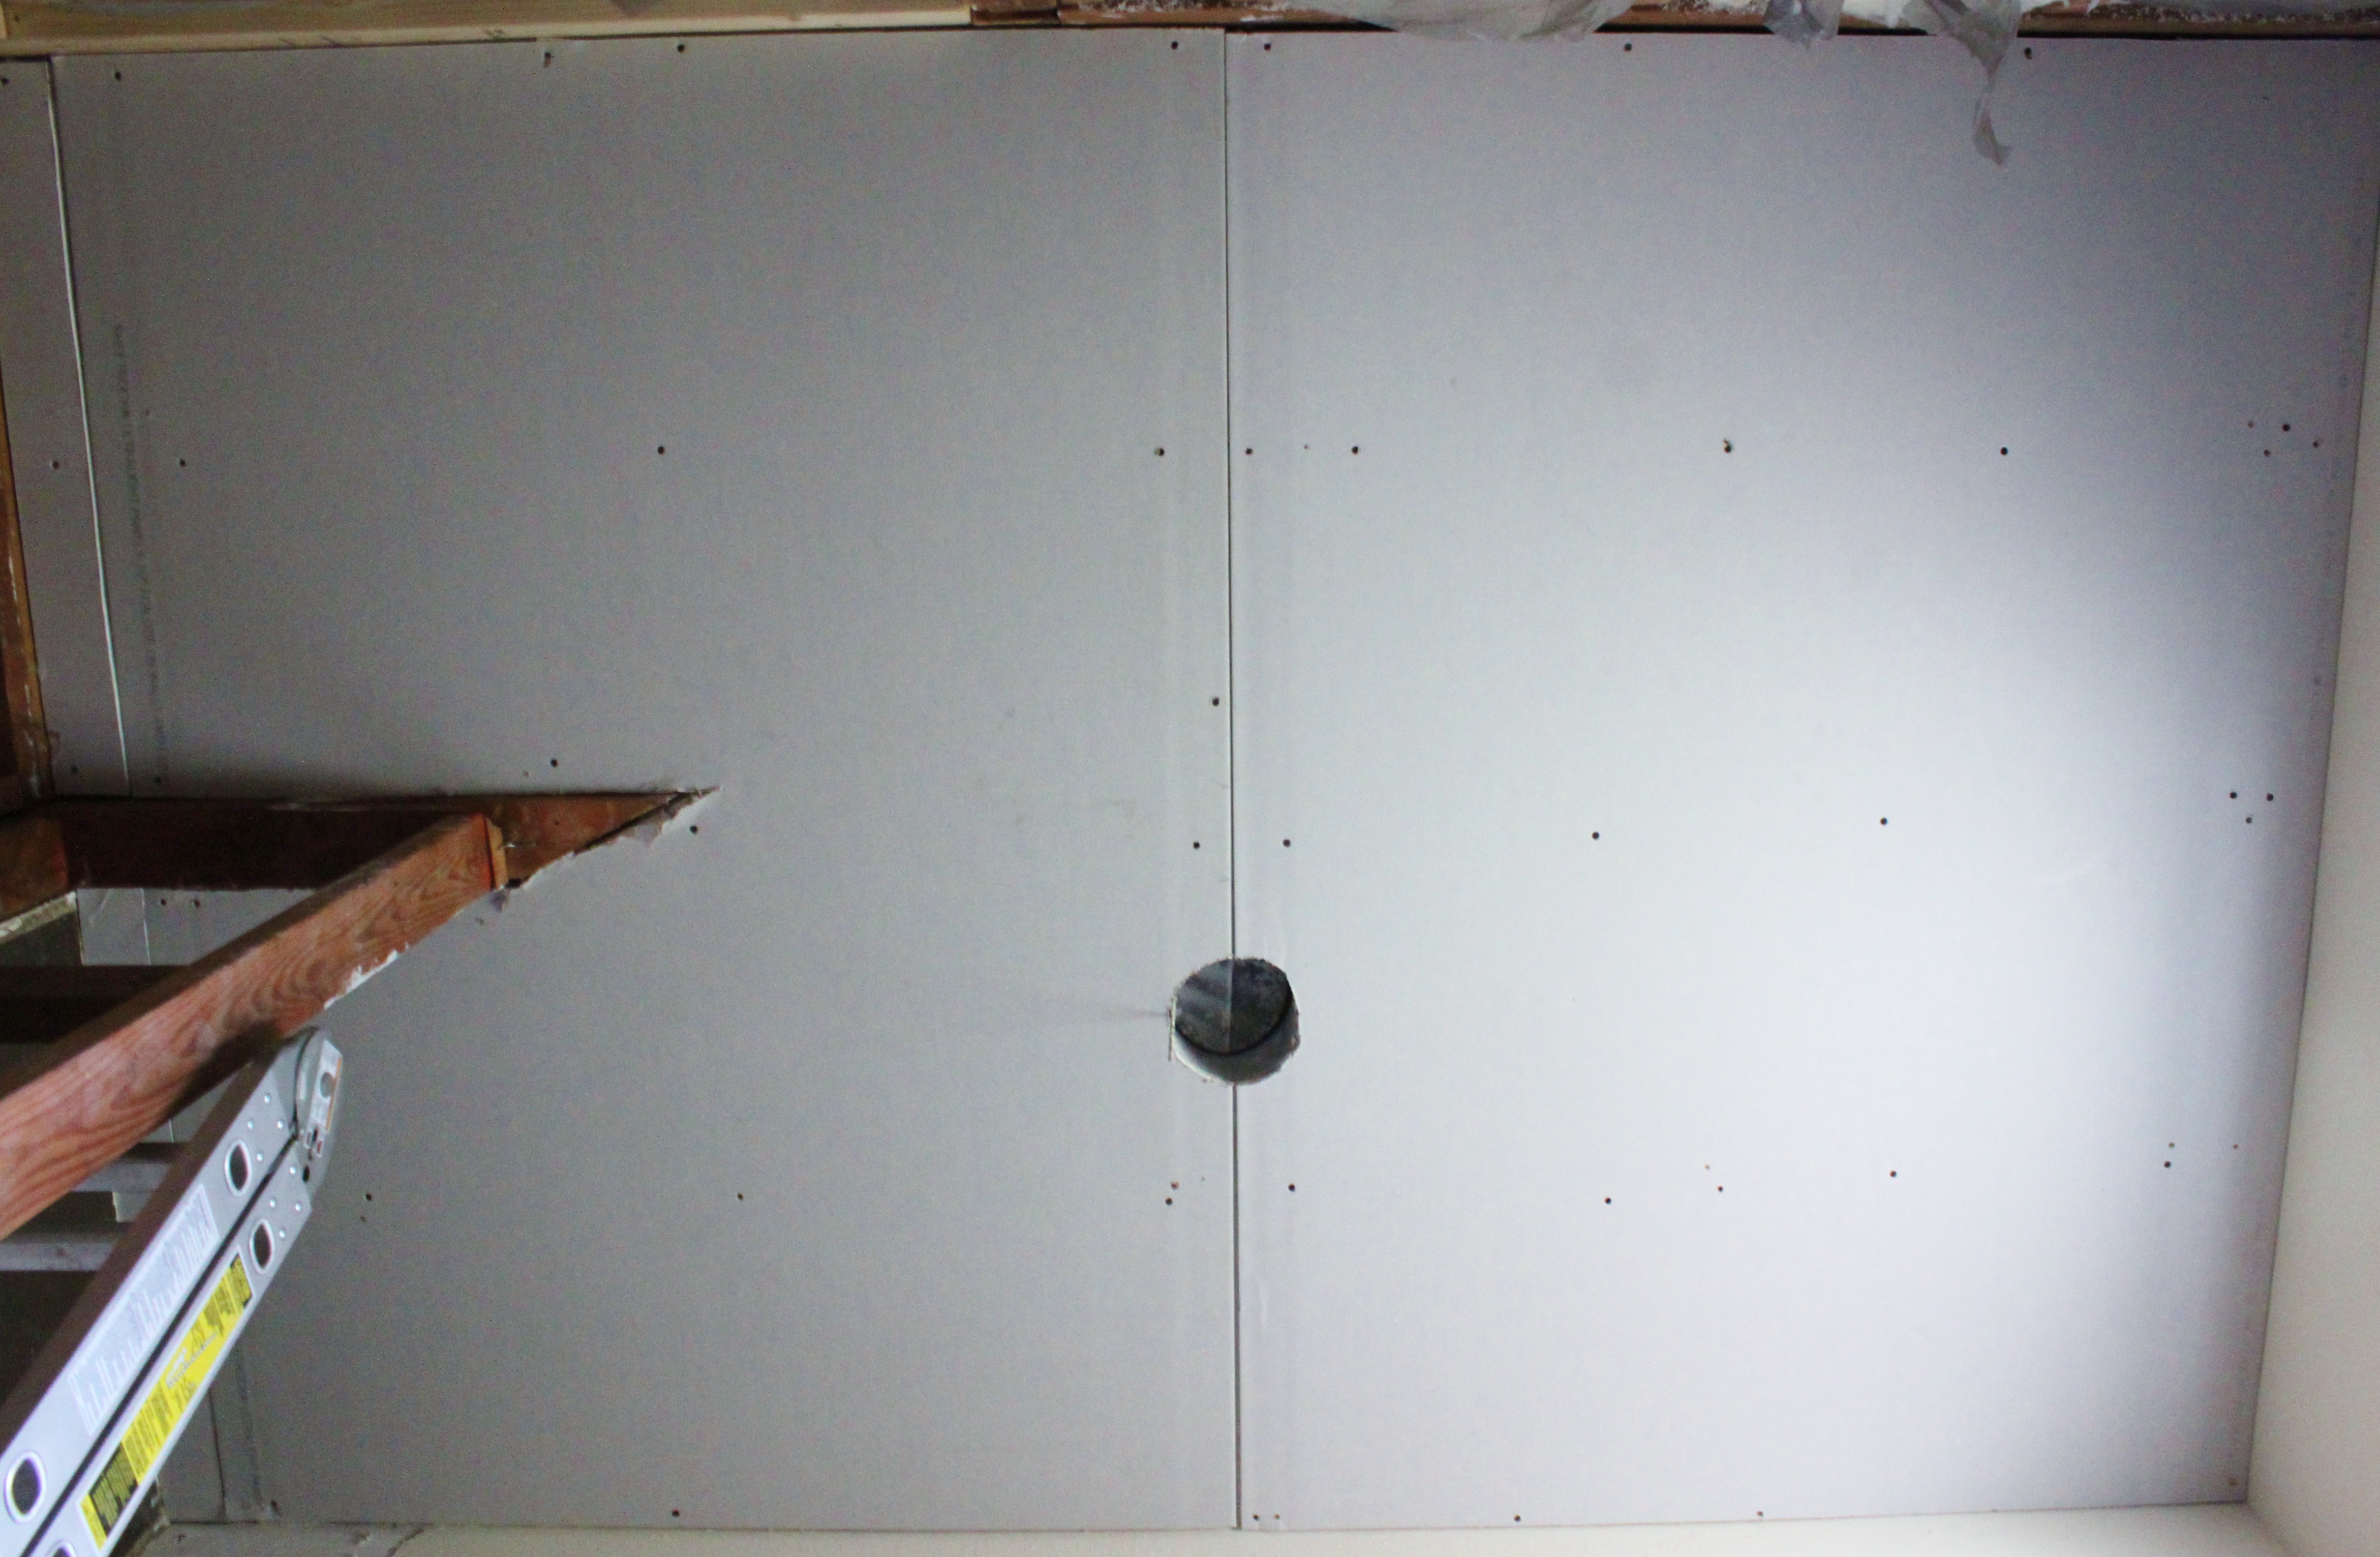
Since there were just too many holes, from the heat lamp, vent, fan…..and nothing over the shower, my brother Ben and I decided that the best plan of action was to just add a fresh layer of drywall over all the existing ceiling.

Sounds easy….

….took an act of God for one of us to hold a sheet of drywall over our head and the other to screw it into the cross beams. (Look at the far right and you’ll see all the holes from our failed attempts)

But we got it…….

Master Bathroom Ceiling with New Sheetrock Installed

Then the layers of mud and light sanding to make it all smooth. (I’m starting to see why people use popcorn spray now)

Master Bathroom Ceiling with Mud

Follower by 2 coats of latex primer…….

Master Bathroom Ceiling with Kilz Primer

Stunning. Am I right?

Next step….can lights.

…or is it paint?

Share this:

  • Share on Facebook (Opens in new window) Facebook
  • Share on LinkedIn (Opens in new window) LinkedIn
  • Share on X (Opens in new window) X
  • Share on Pinterest (Opens in new window) Pinterest
Like Loading...

Master Bathroom Progress…..I Assure You

Posted by James on April 11, 2015
Posted in: New Home. Tagged: drywall, Master Bathroom, Master Bathroom Remodel. 3 Comments

I know it’s been a while since a bathroom update on here……..over a month.

We didn’t want y’all to think that we’d forgotten that we were remodeling a bathroom. Trust me, we haven’t forgotten.

So much progress…..and so little documentation shared with you kind readers.

Let’s fix that right now, and start with the most boring part……..the walls.

After the tear-out, they looked like this….

Master Bath Full Wall after Demo

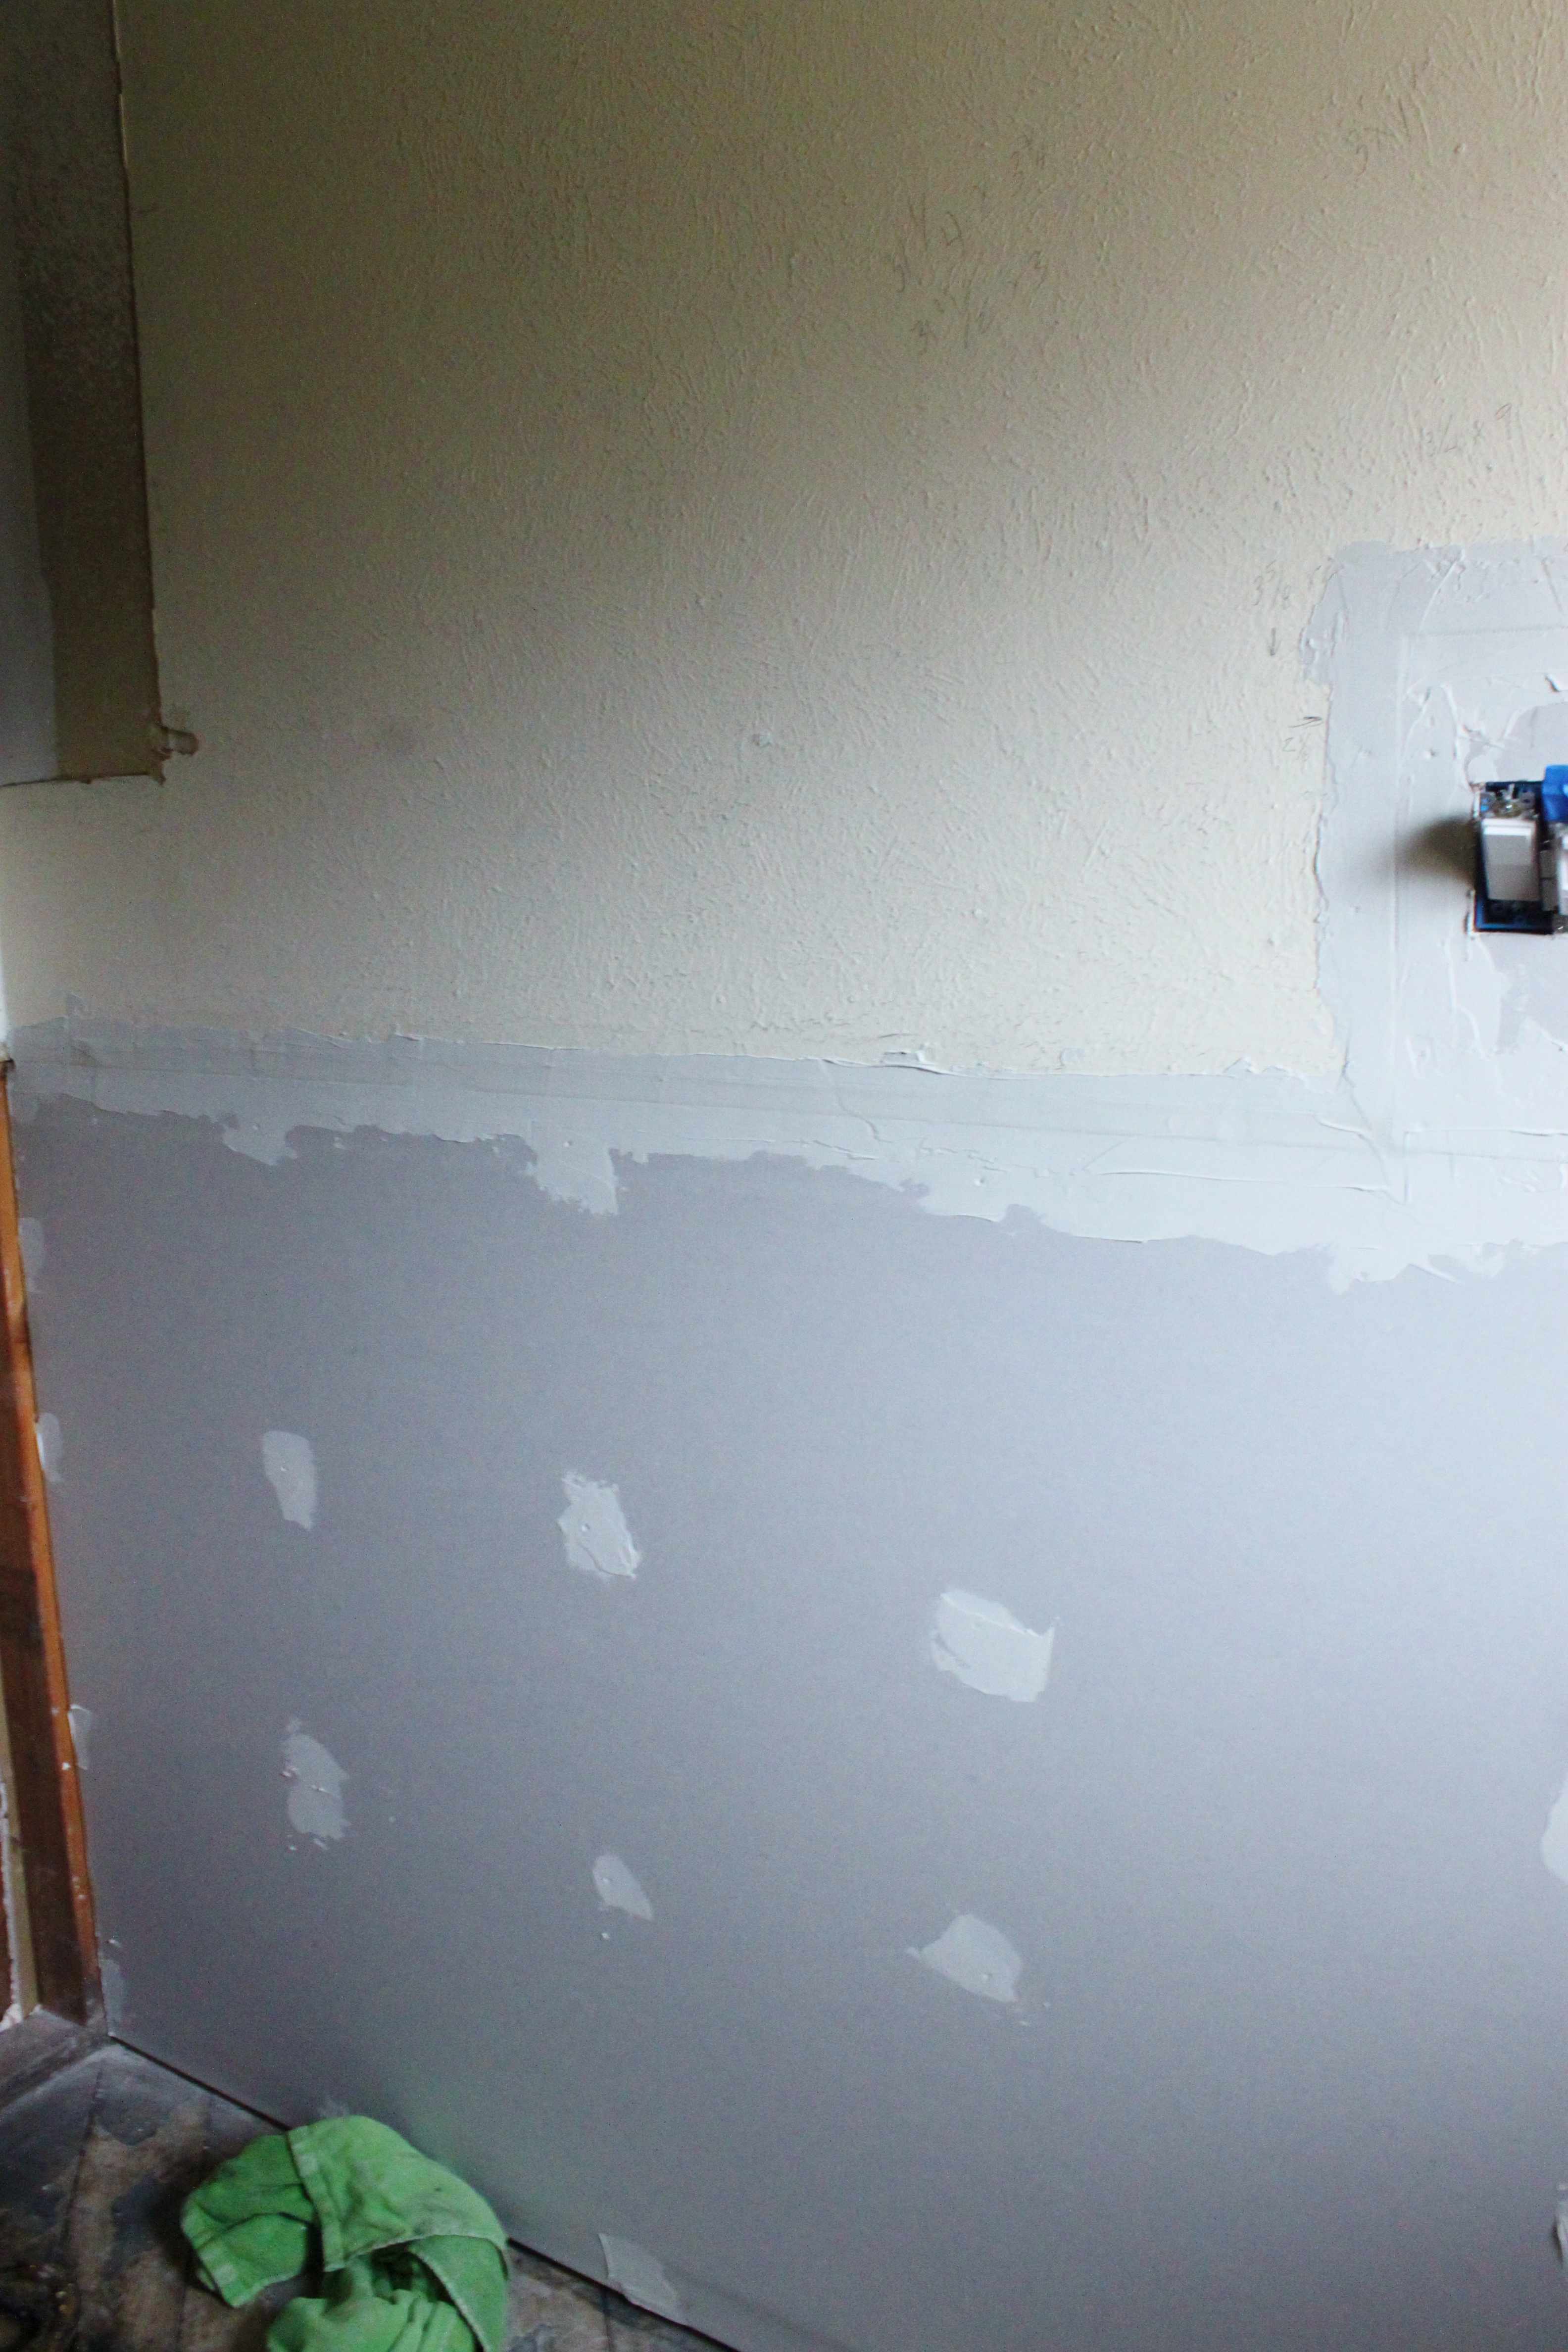
My brother Ben and I ran new electrical and hung drywall on all the walls that won’t get tile.

I didn’t get any pictures of newly-hung drywall because while I was at work Jamie surprised me and taped and bedded the whole room using mud and green mesh tape on the seams.

Green Mesh Tape Collage

Looks pretty good, don’t it?

Master Bath Full Wall With Plaster and Drywall

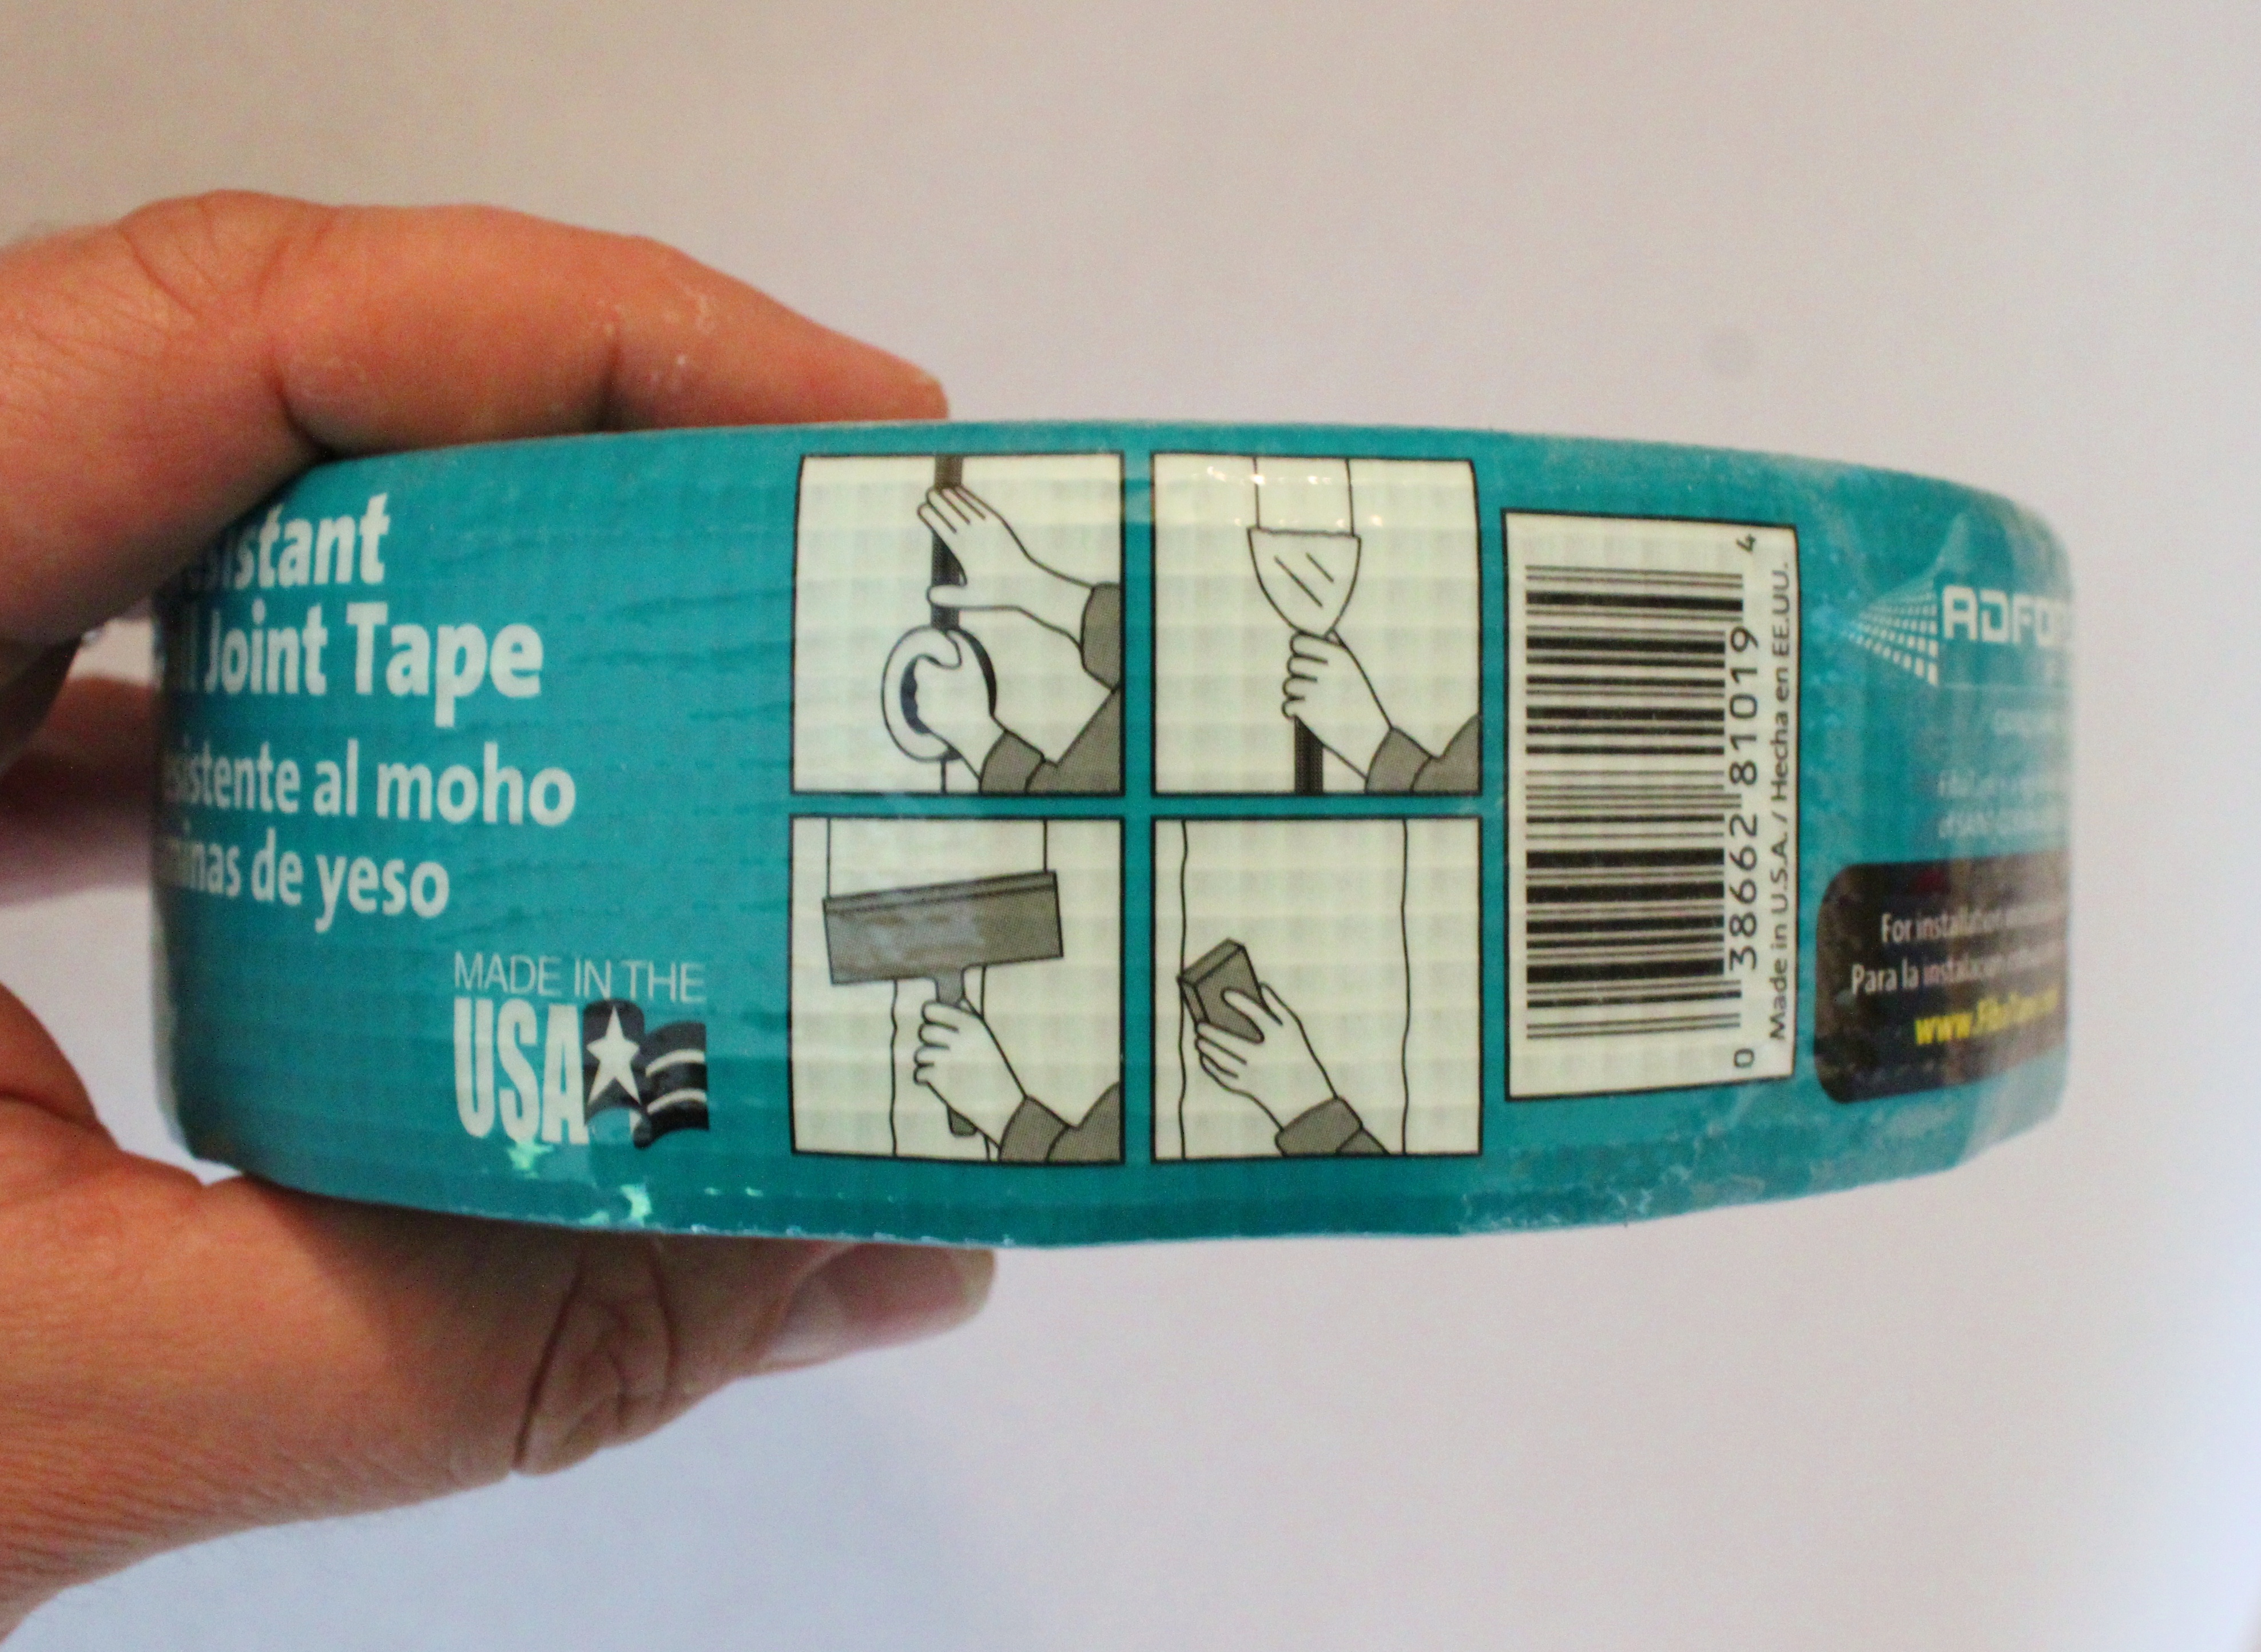
How did he know how to do it?

The directions are right on the label. Printed in hieroglyphics.

Instructions for Green Seam Tape

Then to smooth out the old wall, and add a small amount of texture to the new drywall, we added layer… upon layer….. upon layer of mud with a spatula.

Whenever you hear someone say “mud” – Joint Compound is what they really mean. Probably because it looks like, you know, ……mud.

Joint Compound Collage

After a week of “mudding” and sanding the walls and ceiling, we were left with this…..

Master Bath Full Wall with Layers of Plaster

The space heater is there to speed up the dry time in this humid month we’ve been having (and that small section on the left is unfinished so the plumber can replace the water line for the toilet.)

Told ya there isn’t anything too exciting to show.

We’ve actually come quite farther than this, but I have to start at the beginning.

Stay tuned for more…….

Share this:

  • Share on Facebook (Opens in new window) Facebook
  • Share on LinkedIn (Opens in new window) LinkedIn
  • Share on X (Opens in new window) X
  • Share on Pinterest (Opens in new window) Pinterest
Like Loading...

Happy Easter 2015

Posted by James on April 5, 2015
Posted in: New Home. Tagged: Happy Easter 2015. 9 Comments

Jelly Beans in Frame

HAPPY EASTER

Share this:

  • Share on Facebook (Opens in new window) Facebook
  • Share on LinkedIn (Opens in new window) LinkedIn
  • Share on X (Opens in new window) X
  • Share on Pinterest (Opens in new window) Pinterest
Like Loading...

An Airstream of His Own

Posted by James on April 4, 2015
Posted in: New Home. Tagged: Airstream Ambassador, Houzz, Jordan Menzel, Vintage Airstream. 4 Comments

Meet Jordan Menzel and the 1976 Airstream Ambassador Trailer that he now calls home.

AIRSTREAM

A Friend's Back Yard where the Airstream Now Lives

Here’s a great little video about how Jordan came to own this mammoth, and how he transformed it into a sleek, cool home.

Interior of Refurbished Airstream

Former Sofa in Refurbished Airstream

Vintage Airstream's Original Clock and Thermostat

Bed Area of Refurbished Airstream Trailer

Kitchen area of the Refurbished Airstream

Stove Top and Sink in Kitchen Area

Our Airstream Owner and His Adorable Daughter

(All Photos by Lucy Call)

Share this:

  • Share on Facebook (Opens in new window) Facebook
  • Share on LinkedIn (Opens in new window) LinkedIn
  • Share on X (Opens in new window) X
  • Share on Pinterest (Opens in new window) Pinterest
Like Loading...

Lamb Burgers

Posted by James on March 29, 2015
Posted in: New Home, Recipes. Tagged: Easy Dinner, Lamb Burgers. 5 Comments

We have a few fall-back meals that we both agree on.

They have to meet 3 criteria……

Quick, Easy and Delicious.

This one is my new favorite.

All the Ingredients for Lamb Burgers

Mix a pound of ground lamb with the following:

  • Small Diced Shallot
  • 3-4 Cloves Minced Garlic
  • 2 Tablespoons Chopped Italian Parsley
  • 2 Tablespoons Chopped Mint
  • 1 Teaspoon Sea Salt
  • 1 Teaspoon Ground Black Pepper
  • 1 Teaspoon Ground Cumin
  • 1 Teaspoon Ground Cayenne Pepper

Divide the lamb mixture into 4 equal parts and shape into patties.

The Formed Lamb Burger Patties

Grill for about 5-6 minutes per side…….’till they’re firm.

Our Lamb Burgers Cooking in the Grill

Slip them into a pita pocket and you’re ready to go.

Jamie likes his lamb burgers with a smear of hummus and crumbled feta. I prefer a fat slice of beefsteak tomato and home-made tzatziki.

Why yes, I’d be glad to tell y’all how to make tzatziki.

Peel 2 cucumbers and slice in half. Remove the seeds by scraping them out with a teaspoon.

Use a Teaspoon to Remove the Cucumber Seeds

 Use a cheese grater to grate the seeded cucumbers into a bowl.

Use a Cheese Grater to Finely Grate the Cucumber Pieces

Squeeze the liquid from the cucumber and toss. Mix the newly grated, dryer cucumber with the following:

  •  8 Ounce Plain Greek Yogurt
  • 2 Teaspoons of Sugar
  • 2 Tablespoons of Red Wine Vinegar
  • 1 Teaspoon Kosher Sea Salt
  • 2 Tablespoons Minced Italian Parsley
  • 1 Tablespoon Minced Mint
  • 1/2 Teaspoon Crushed Coriander Seed
  • 1/2 Teaspoon Cumin

Homemade Tzatziki for the Lamb Burgers

 Spoon that stuff over the lamb burgers and prepare for your life to change.

Lamb Burgers with Homemade Tzatziki from the Cavender Diary Boys

Lamb Burgers from the Cavender Boys Collage

(OOOOhhh, and the amber beer is a mandatory accompaniment)

As always,

You’re welcome.

Share this:

  • Share on Facebook (Opens in new window) Facebook
  • Share on LinkedIn (Opens in new window) LinkedIn
  • Share on X (Opens in new window) X
  • Share on Pinterest (Opens in new window) Pinterest
Like Loading...

Posts navigation

← Older Entries
Newer Entries →
  • The Cavender Boys

  • Buy My Book

    Check out the link below to get your copy of "DIY Industrial Pipe Furniture & Decor" by James Angus

    https://amzn.com/1612436064

  • Tags

    American Flag Apartment Therapy arts Backyard Bathroom Remodeling Beacon Blanket Big Tex Black Spray Paint Bloggers Can Lights Cedar Walls Christmas Christmas Decorating Christmas Ornaments Christmas Tree Crazy Mouse Ride Den Diane Keaton diy Doberman Earth Grout Edward Curtis Electrical Work Fletcher's Corny Dogs flower beds Frankoma pottery Front Yard Garage Garage Update Halloween Halloween Decorating happy halloween harley Harley Davidson home House Tour Houzz hudson bay blankets Ikea Ikea Borrby Lantern illustration july 4th Key West Trip Kitchen Remodel Living Room mantle Master Bathroom Master Bathroom Remodel Master Bedroom mercury ornaments merry christmas Modern Horizontal Fence Motherhood Paint Colors plumbing pipe Projects Ralph Lauren restoration hardware Russet Stain Shiny Brite Ornaments state fair of texas style Swiss Army Blanket Target technology Texas State Fair thanksgiving Thrift store Tile Backsplash travel vacation Vintage chair vintage christmas vintage ornaments Wood Wall
  • Recent Posts

    • Vacation ’24
    • Happy Halloween
    • Planes, Trains & the Occasional Uber
    • Family Secrets
    • Capitol T, and that Rhymes with P
  • Archives

    • June 2024
    • October 2023
    • June 2023
    • April 2023
    • July 2022
    • December 2021
    • July 2021
    • December 2020
    • October 2020
    • September 2020
    • August 2020
    • July 2020
    • June 2020
    • May 2020
    • April 2020
    • March 2020
    • February 2020
    • January 2020
    • December 2019
    • October 2019
    • April 2019
    • January 2019
    • December 2018
    • November 2018
    • October 2018
    • September 2018
    • June 2018
    • May 2018
    • April 2018
    • March 2018
    • January 2018
    • December 2017
    • October 2017
    • September 2017
    • August 2017
    • July 2017
    • June 2017
    • May 2017
    • April 2017
    • March 2017
    • February 2017
    • January 2017
    • December 2016
    • November 2016
    • October 2016
    • September 2016
    • August 2016
    • July 2016
    • June 2016
    • May 2016
    • April 2016
    • March 2016
    • February 2016
    • January 2016
    • December 2015
    • November 2015
    • October 2015
    • September 2015
    • August 2015
    • July 2015
    • June 2015
    • May 2015
    • April 2015
    • March 2015
    • February 2015
    • January 2015
    • December 2014
    • November 2014
    • October 2014
    • September 2014
    • August 2014
    • July 2014
    • June 2014
    • May 2014
    • April 2014
    • March 2014
    • February 2014
    • January 2014
    • December 2013
    • November 2013
    • October 2013
    • September 2013
    • August 2013
    • July 2013
    • June 2013
    • May 2013
    • April 2013
    • March 2013
    • February 2013
    • January 2013
    • December 2012
    • November 2012
    • October 2012
    • September 2012
    • August 2012
    • July 2012
    • June 2012
    • May 2012
    • April 2012
    • March 2012
    • February 2012
    • January 2012
    • December 2011
    • November 2011
    • October 2011
    • September 2011
    • August 2011
    • July 2011
    • June 2011
    • May 2011
    • April 2011
    • March 2011
    • February 2011
    • January 2011
    • November 2010
    • August 2010
    • June 2010
    • May 2010
    • April 2010
    • March 2010
    • February 2010
  • Enter your email address to follow this blog and receive notifications of new posts by email.

    Join 2,158 other subscribers
  • @CavenderDiary

    Tweets by CavenderDiary
  • The Cavender Diary

    The Cavender Diary
  • The Cavender Diary

    • RSS - Posts
    • RSS - Comments
  • Blogs Worth Watchin'

    • An Urban Cottage
    • Apartment Therapy
    • Beard and Pigtails
    • Brooklyn Limestone
    • Burlap & Denim
    • Camp Wandawega
    • Color Outside the Lines
    • Decorpad
    • Decorum DIYer
    • Den & Delve
    • Design Hazards
    • Domestic Daddy
    • Domestic Imperfection
    • Eclectically Vintage
    • Emily Henderson
    • Fourth Floor Walkup
    • Funky Junk Interiors
    • Handmade America
    • Heather Bullard
    • Houzz
    • I Heart Organizing
    • Japanese Trash
    • kara pasley designs
    • Manhattan-Nest
    • Merrypad
    • Nine Red
    • Our Humble Abode
    • Our Vintage Home Love
    • Pure Style Home
    • Red Bird Vintage Home
    • Roger & Chris
    • Sweetsuite
    • Tara Bradford Photography
    • The Brick House
    • The Inspired Room
    • The Lettered Cottage
    • The Recipe Grinder
    • Today's Nest
    • Vintage Revivals
    • West Eastern
    • Yellow Brick Home
    • Young House Love
  • Steal Our Style

    • American Photo Archive
    • Art's Not Dead
    • Barn Light Electric
    • Bauer Pottery
    • CB2
    • Decades Home
    • Design Within Reach
    • El Paso Saddle Blankets
    • Fiestaware
    • Jonathan Adler
    • Just Modern Decor
    • Lucky Stars Ranch
    • Pendleton
    • Pottery Barn
    • Ralph Lauren Home
    • Ranger Doug
    • Restoration Hardware
    • School House Electric & Supply Co.
    • Sonic Editions
    • The Curiosity Shoppe
    • The Land of Nod
    • Urban Outfitters
    • West Elm
    • Wisteria
Blog at WordPress.com.
THE CAVENDER DIARY
Blog at WordPress.com.
  • Subscribe Subscribed
    • THE CAVENDER DIARY
    • Join 1,063 other subscribers
    • Already have a WordPress.com account? Log in now.
    • THE CAVENDER DIARY
    • Subscribe Subscribed
    • Sign up
    • Log in
    • Report this content
    • View site in Reader
    • Manage subscriptions
    • Collapse this bar
 

Loading Comments...
 

    %d