THE CAVENDER DIARY

2 GROWN MEN vs a 40 YEAR OLD HOUSE

  • Home
  • Who Are We?
  • House Tour
  • To Do List
  • Projects
  • Recipes
  • Did Ya Know?
  • Books
  • Our Press

The Red-Neck Riviera

Posted by James on May 26, 2014
Posted in: New Home. Tagged: 30A, Alys Beach, Alys Beach Fountain, Cape San Blas, Florida panhandle, Florida Vacation, Rosemary Beach, Seaside Florida, St. Joseph Peninsula State Park, The Pecks. 10 Comments

“I don’t see it” I said, combing a map of the state near Miami.

“It’s a little further North.” Kylie says.

“HHmmmm, like Boca Raton-North?”

“No,” she says “Look closer to Mississippi.”

“Kylie, Florida isn’t next to Mississippi.” but oohhh there it was, towards Mississippi. In the Panhandle.

That’s where she was taking us? I thought people only went to the Florida panhandle to identify the body of a missing daughter……..not to vacation.

And then she said the words, “It’s the Redneck Riviera.”

Was that supposed to sell it? She is a professional travel agent, and hasn’t steered us wrong on all our other trips. What the hell? We’re in for this one too.

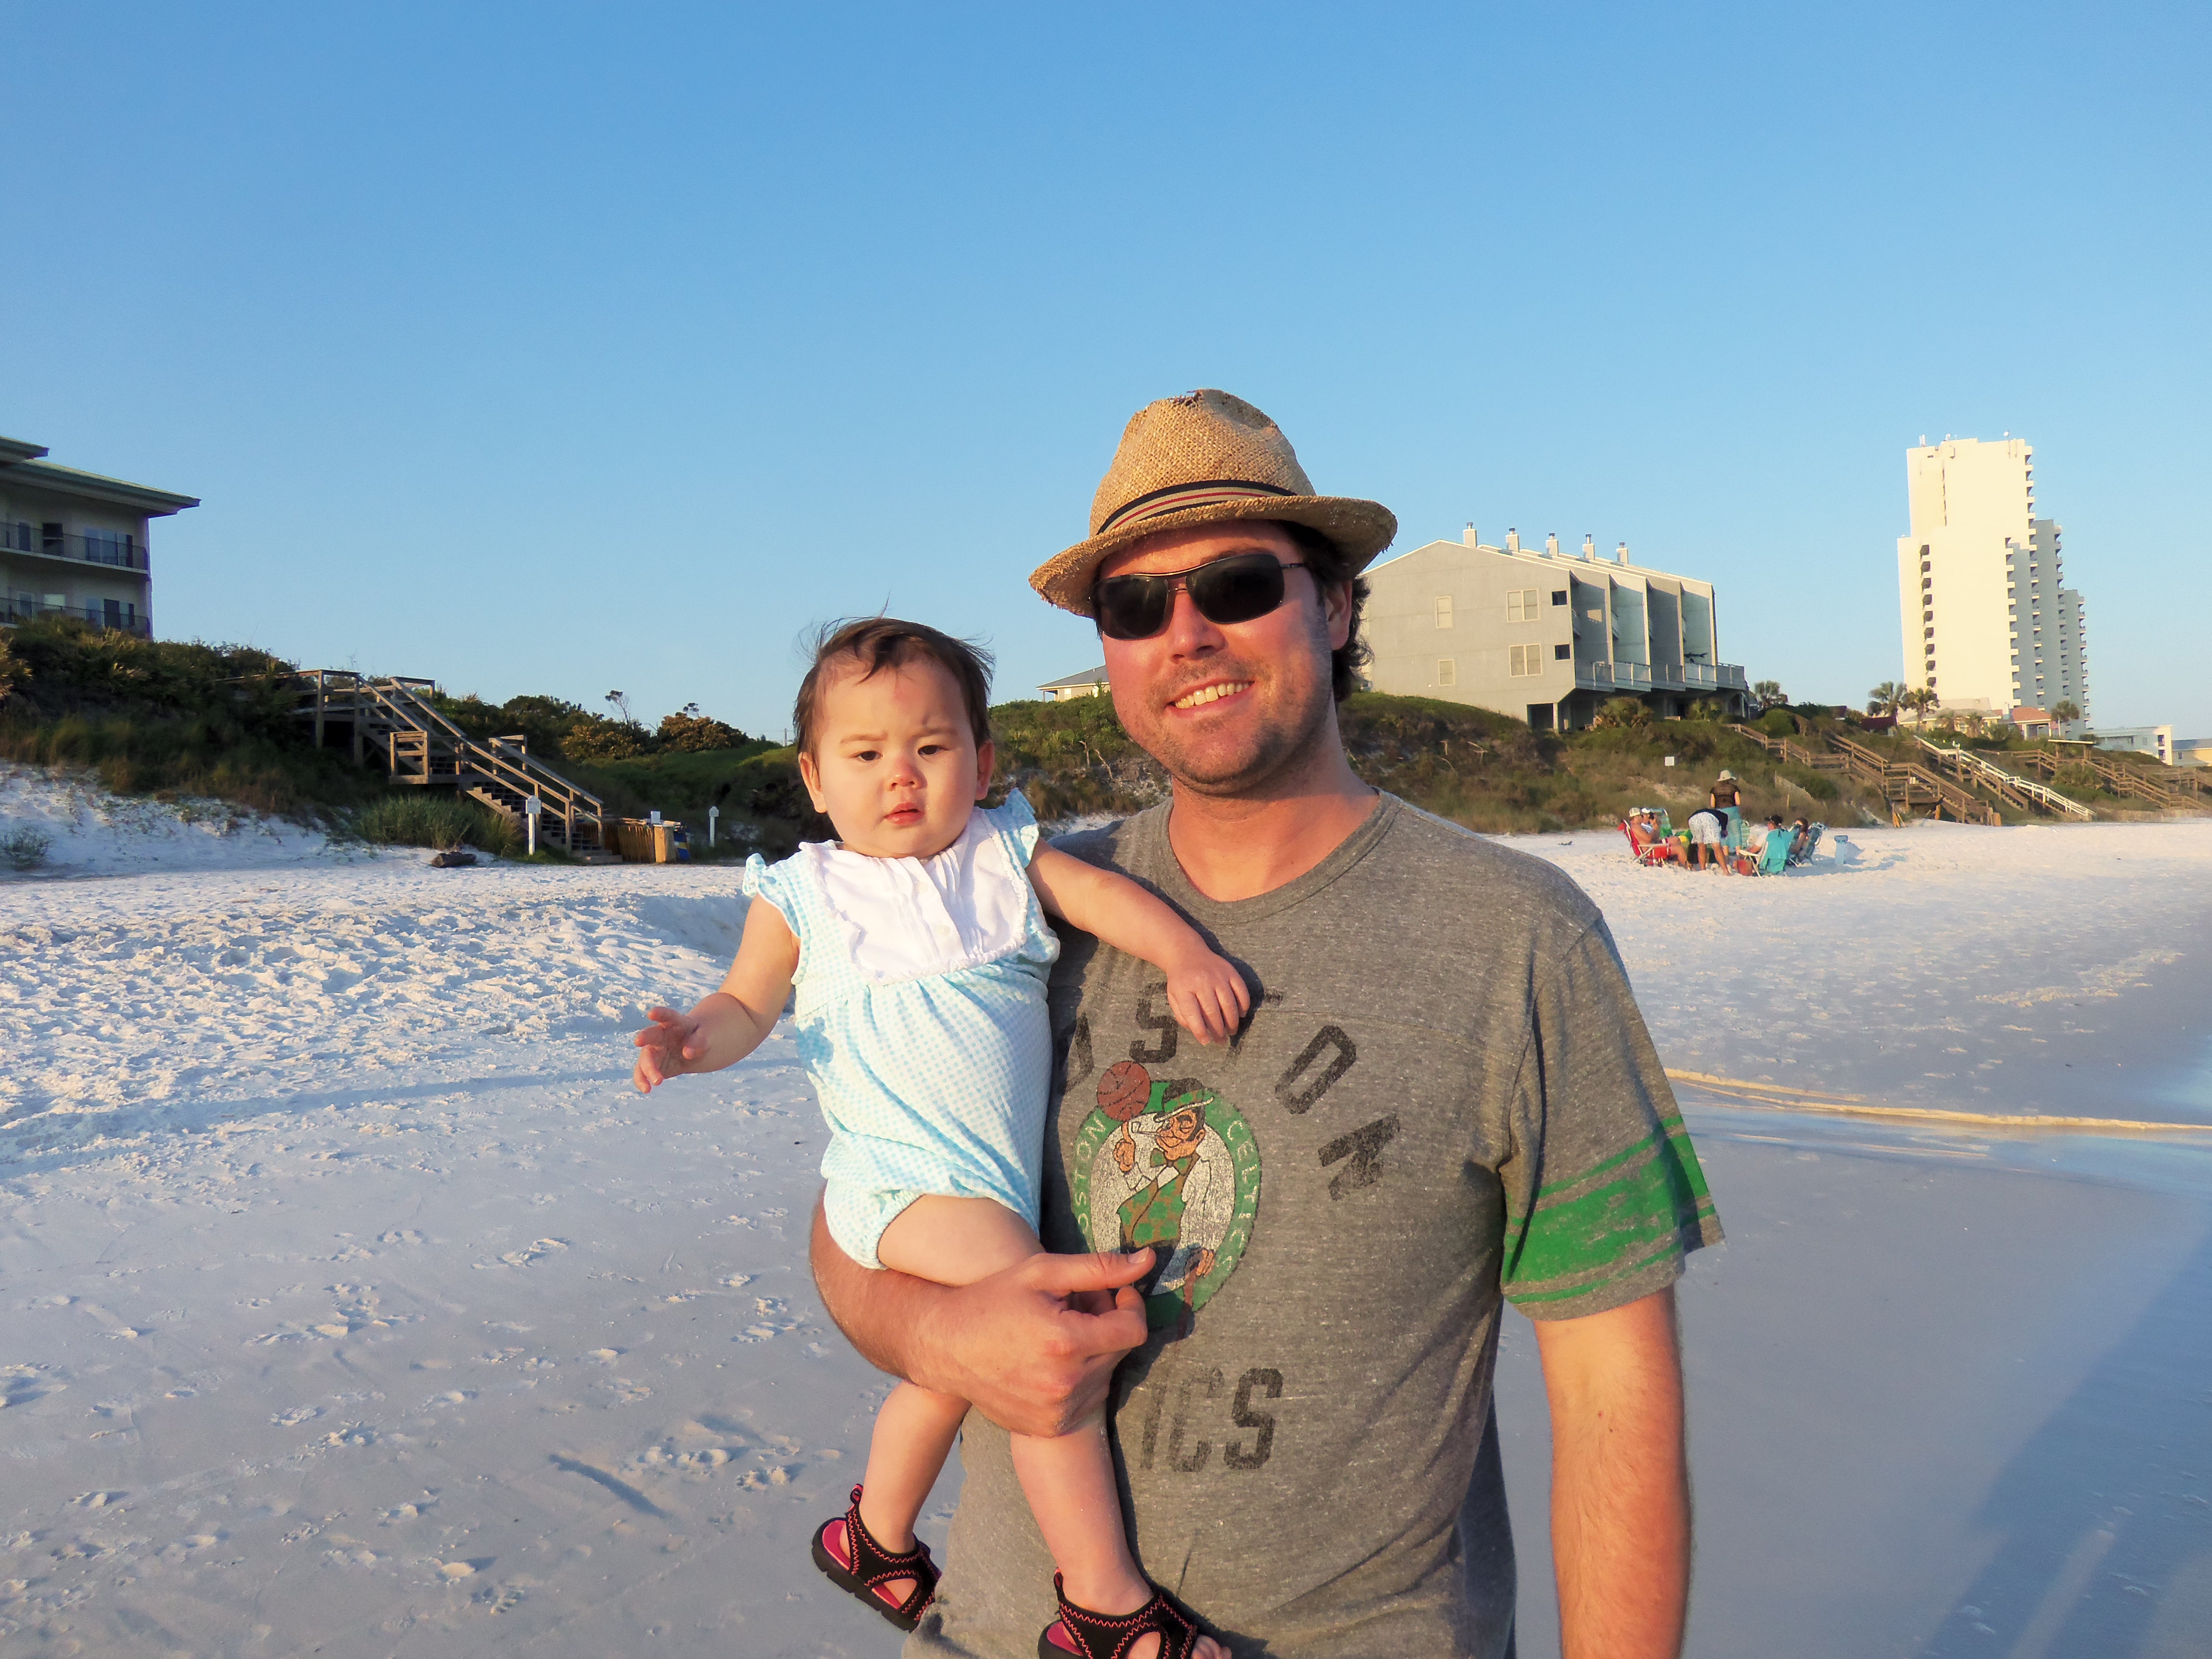
So we packed our swimsuits and sun glasses and joined the Peck family for a week in a condo on the Redneck Riviera. Y’all might remember that we took a Caribbean cruise with them just 2 years ago, but on this trip there was a new Peck joining us.
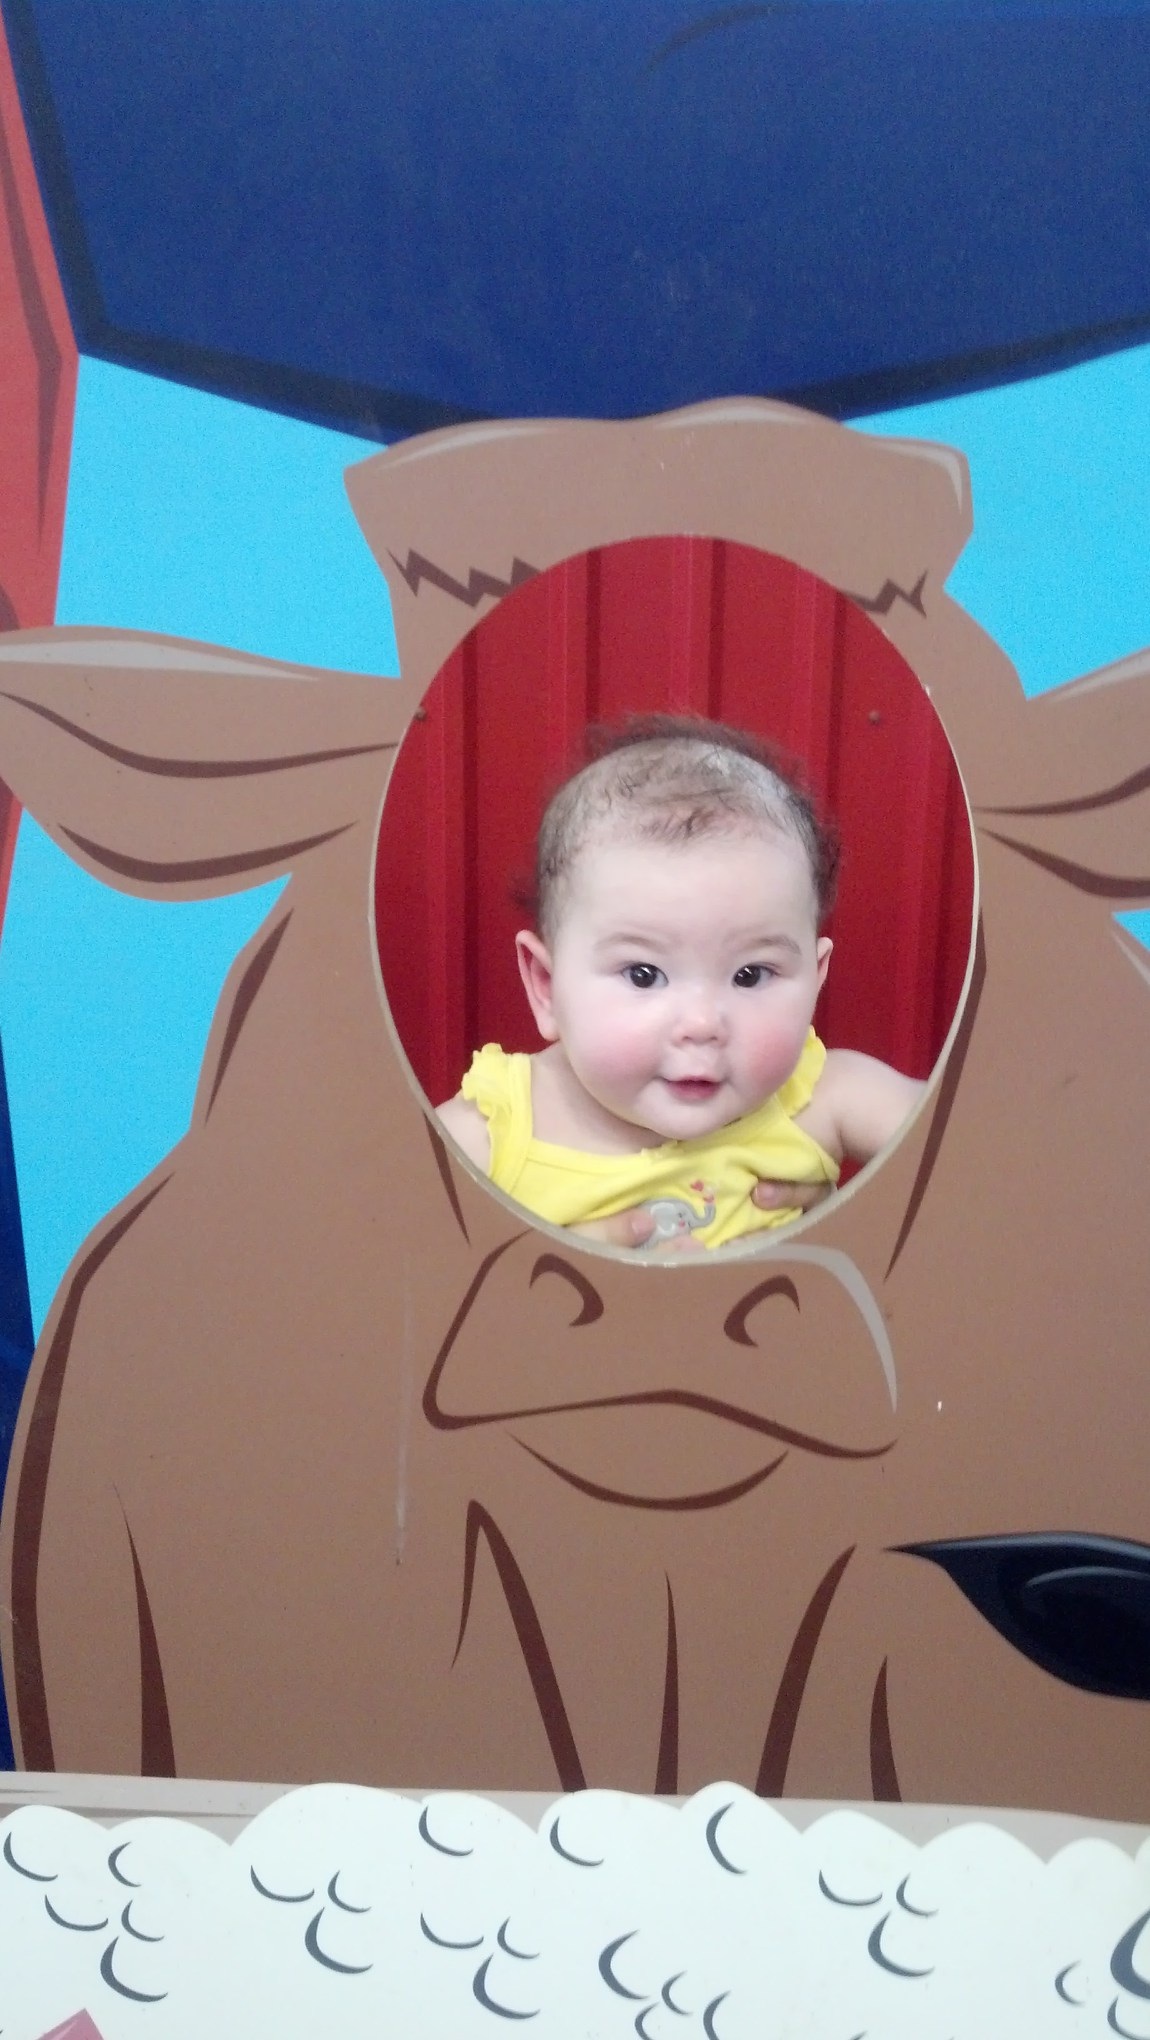
Baby Madeleine….

Madeleine Styling in her Gunkle's Raybans

There are several beach communities that run along highway 30A, nestled against the white sand beaches of the Gulf of Mexico.

We stayed in beautiful Seaside where The Truman Show was filmed.

The community motto is…..

Seaside's Motto is A Simple, Beautiful Life

The Family Von Peck in Beautiful Seaside, Florida

How charming is the Seaside post office?

The Post Office in Seaside

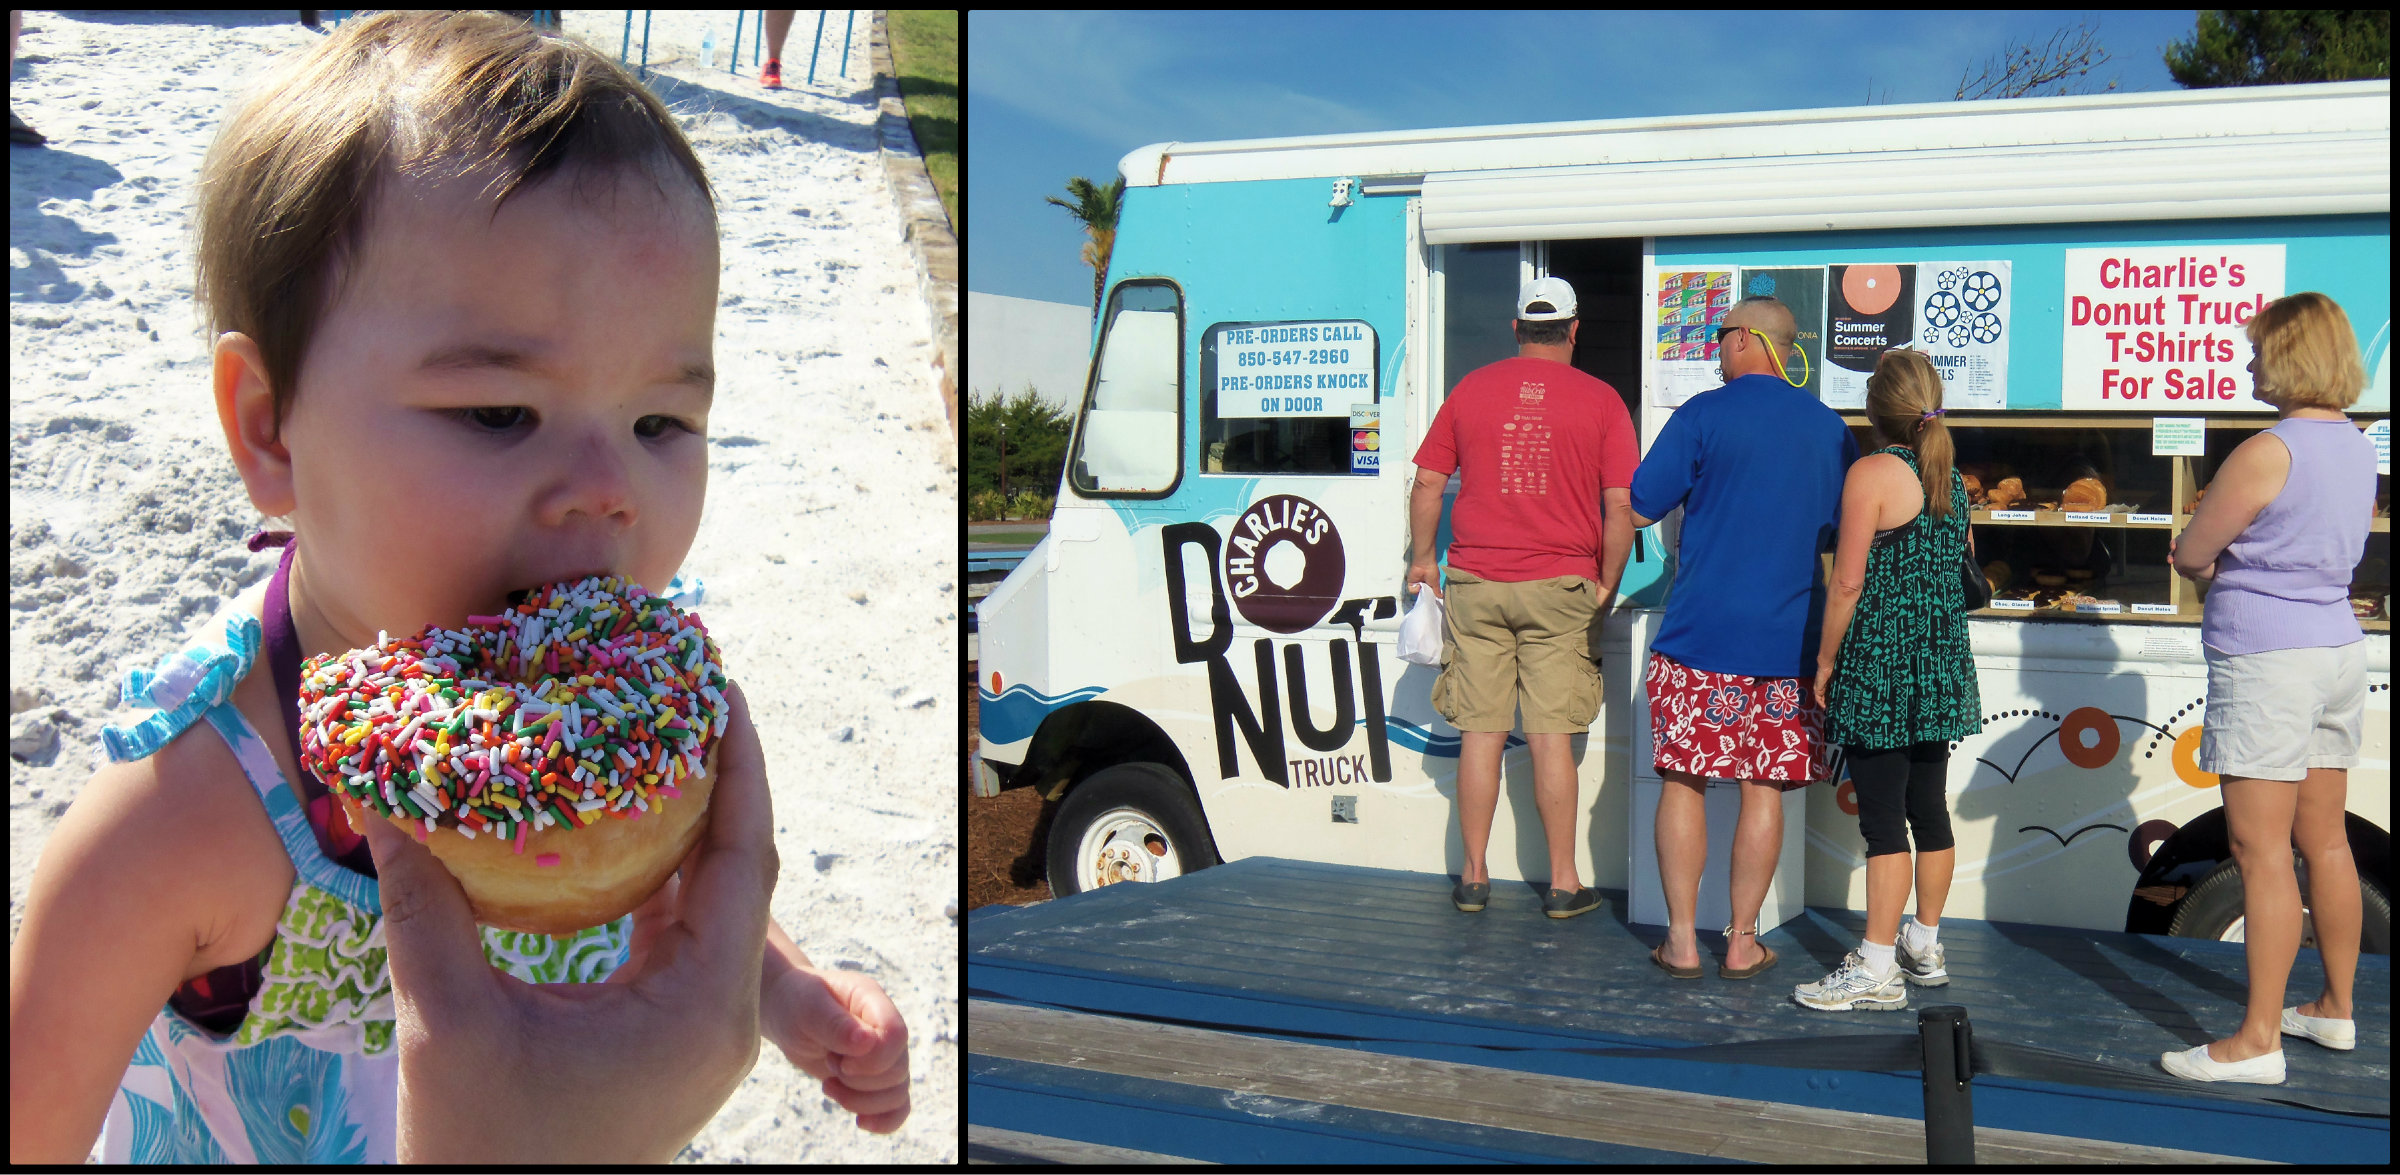
Food trucks line 30A…..

Wild Bill's Beach Dogs Collage

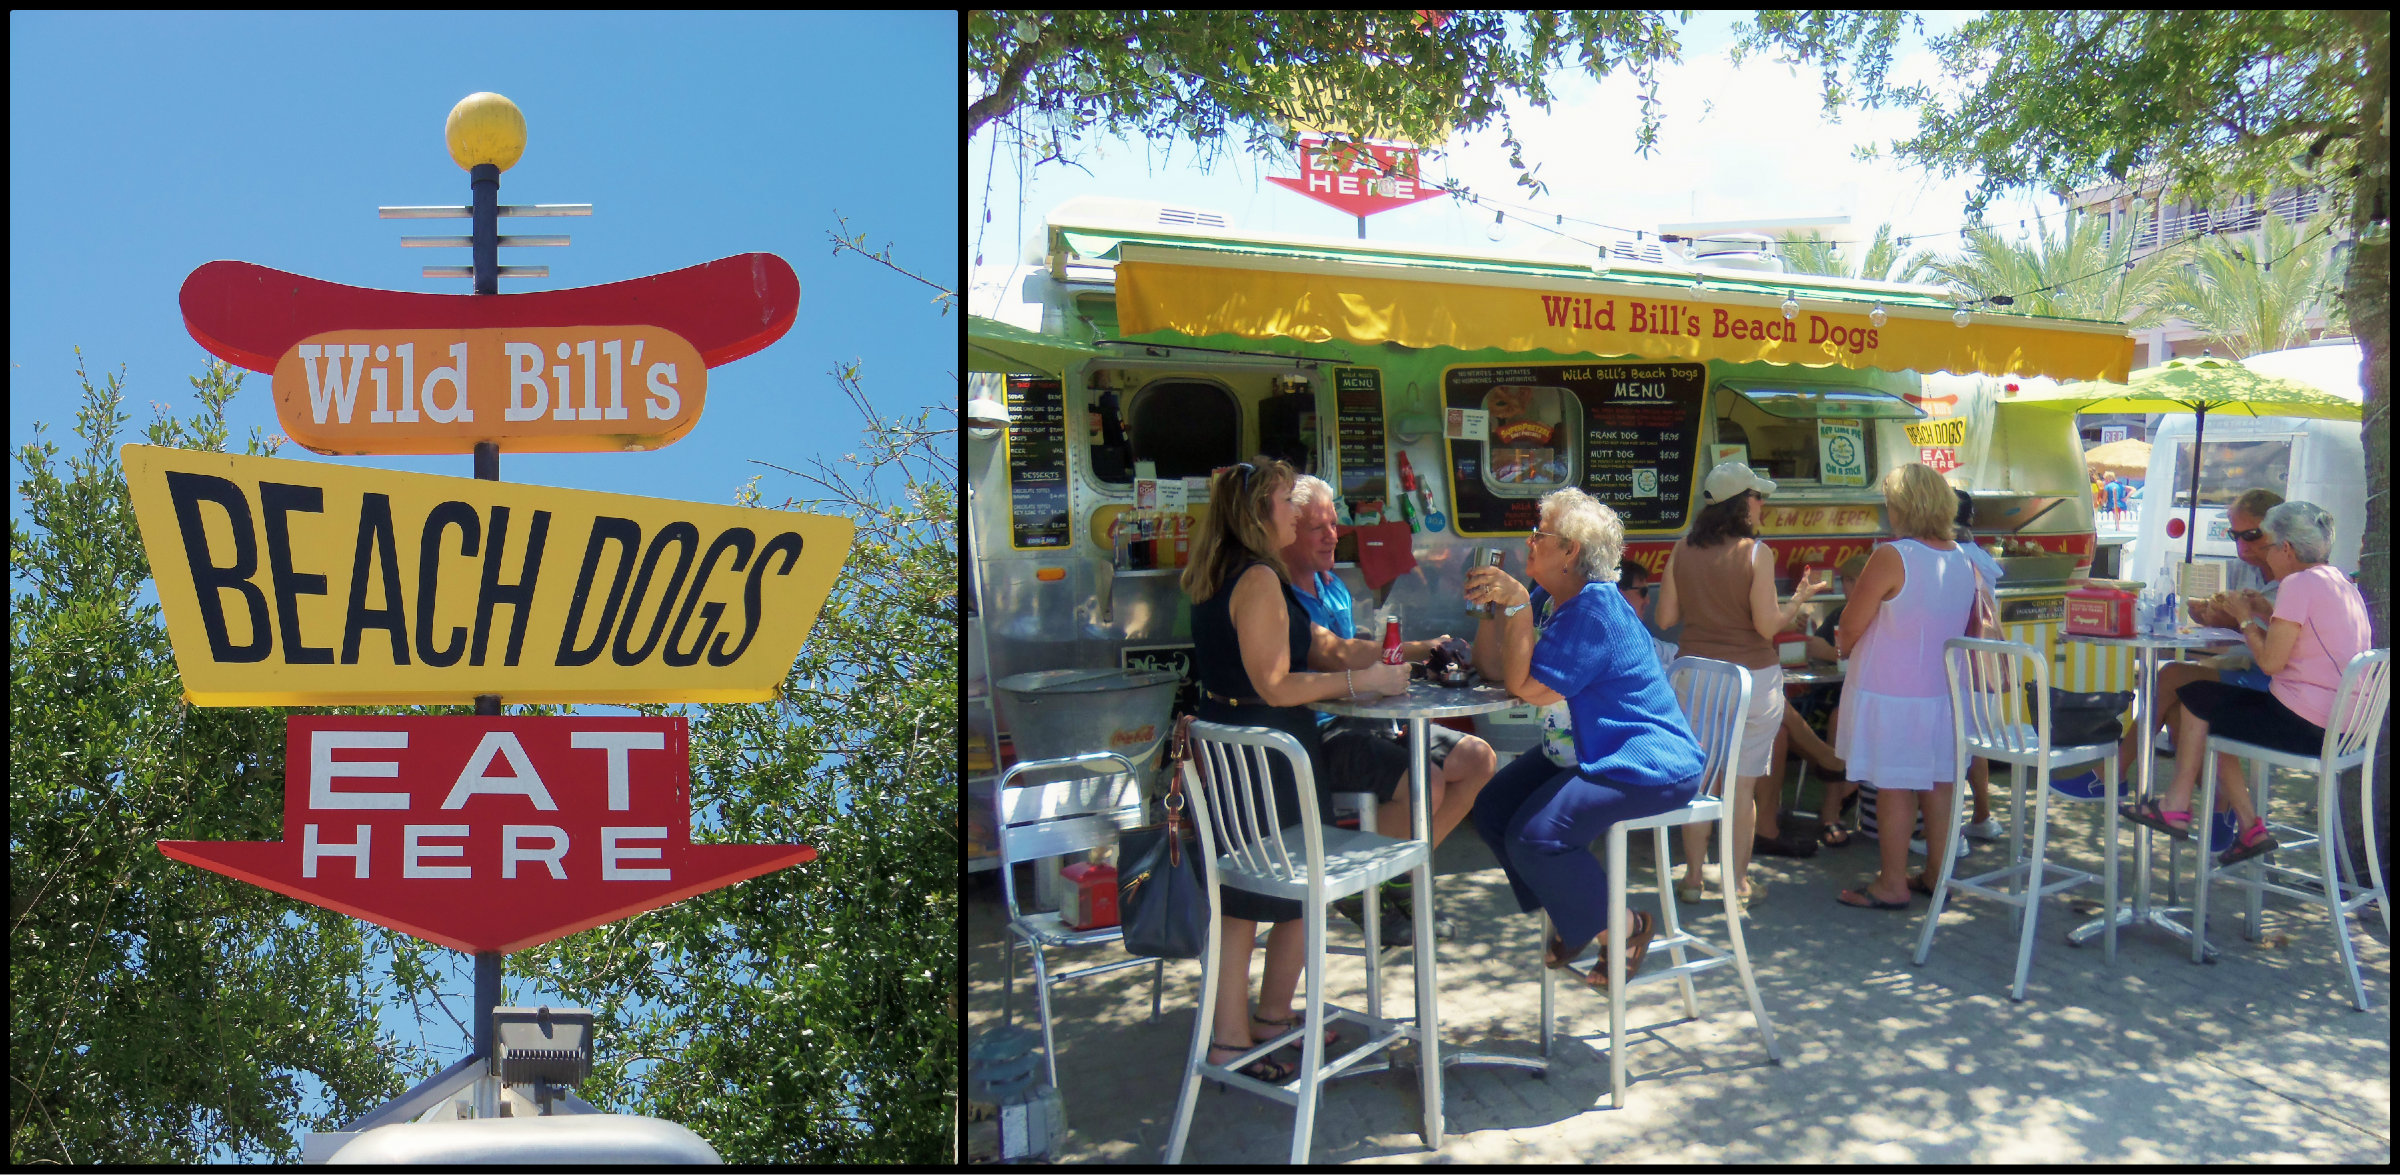
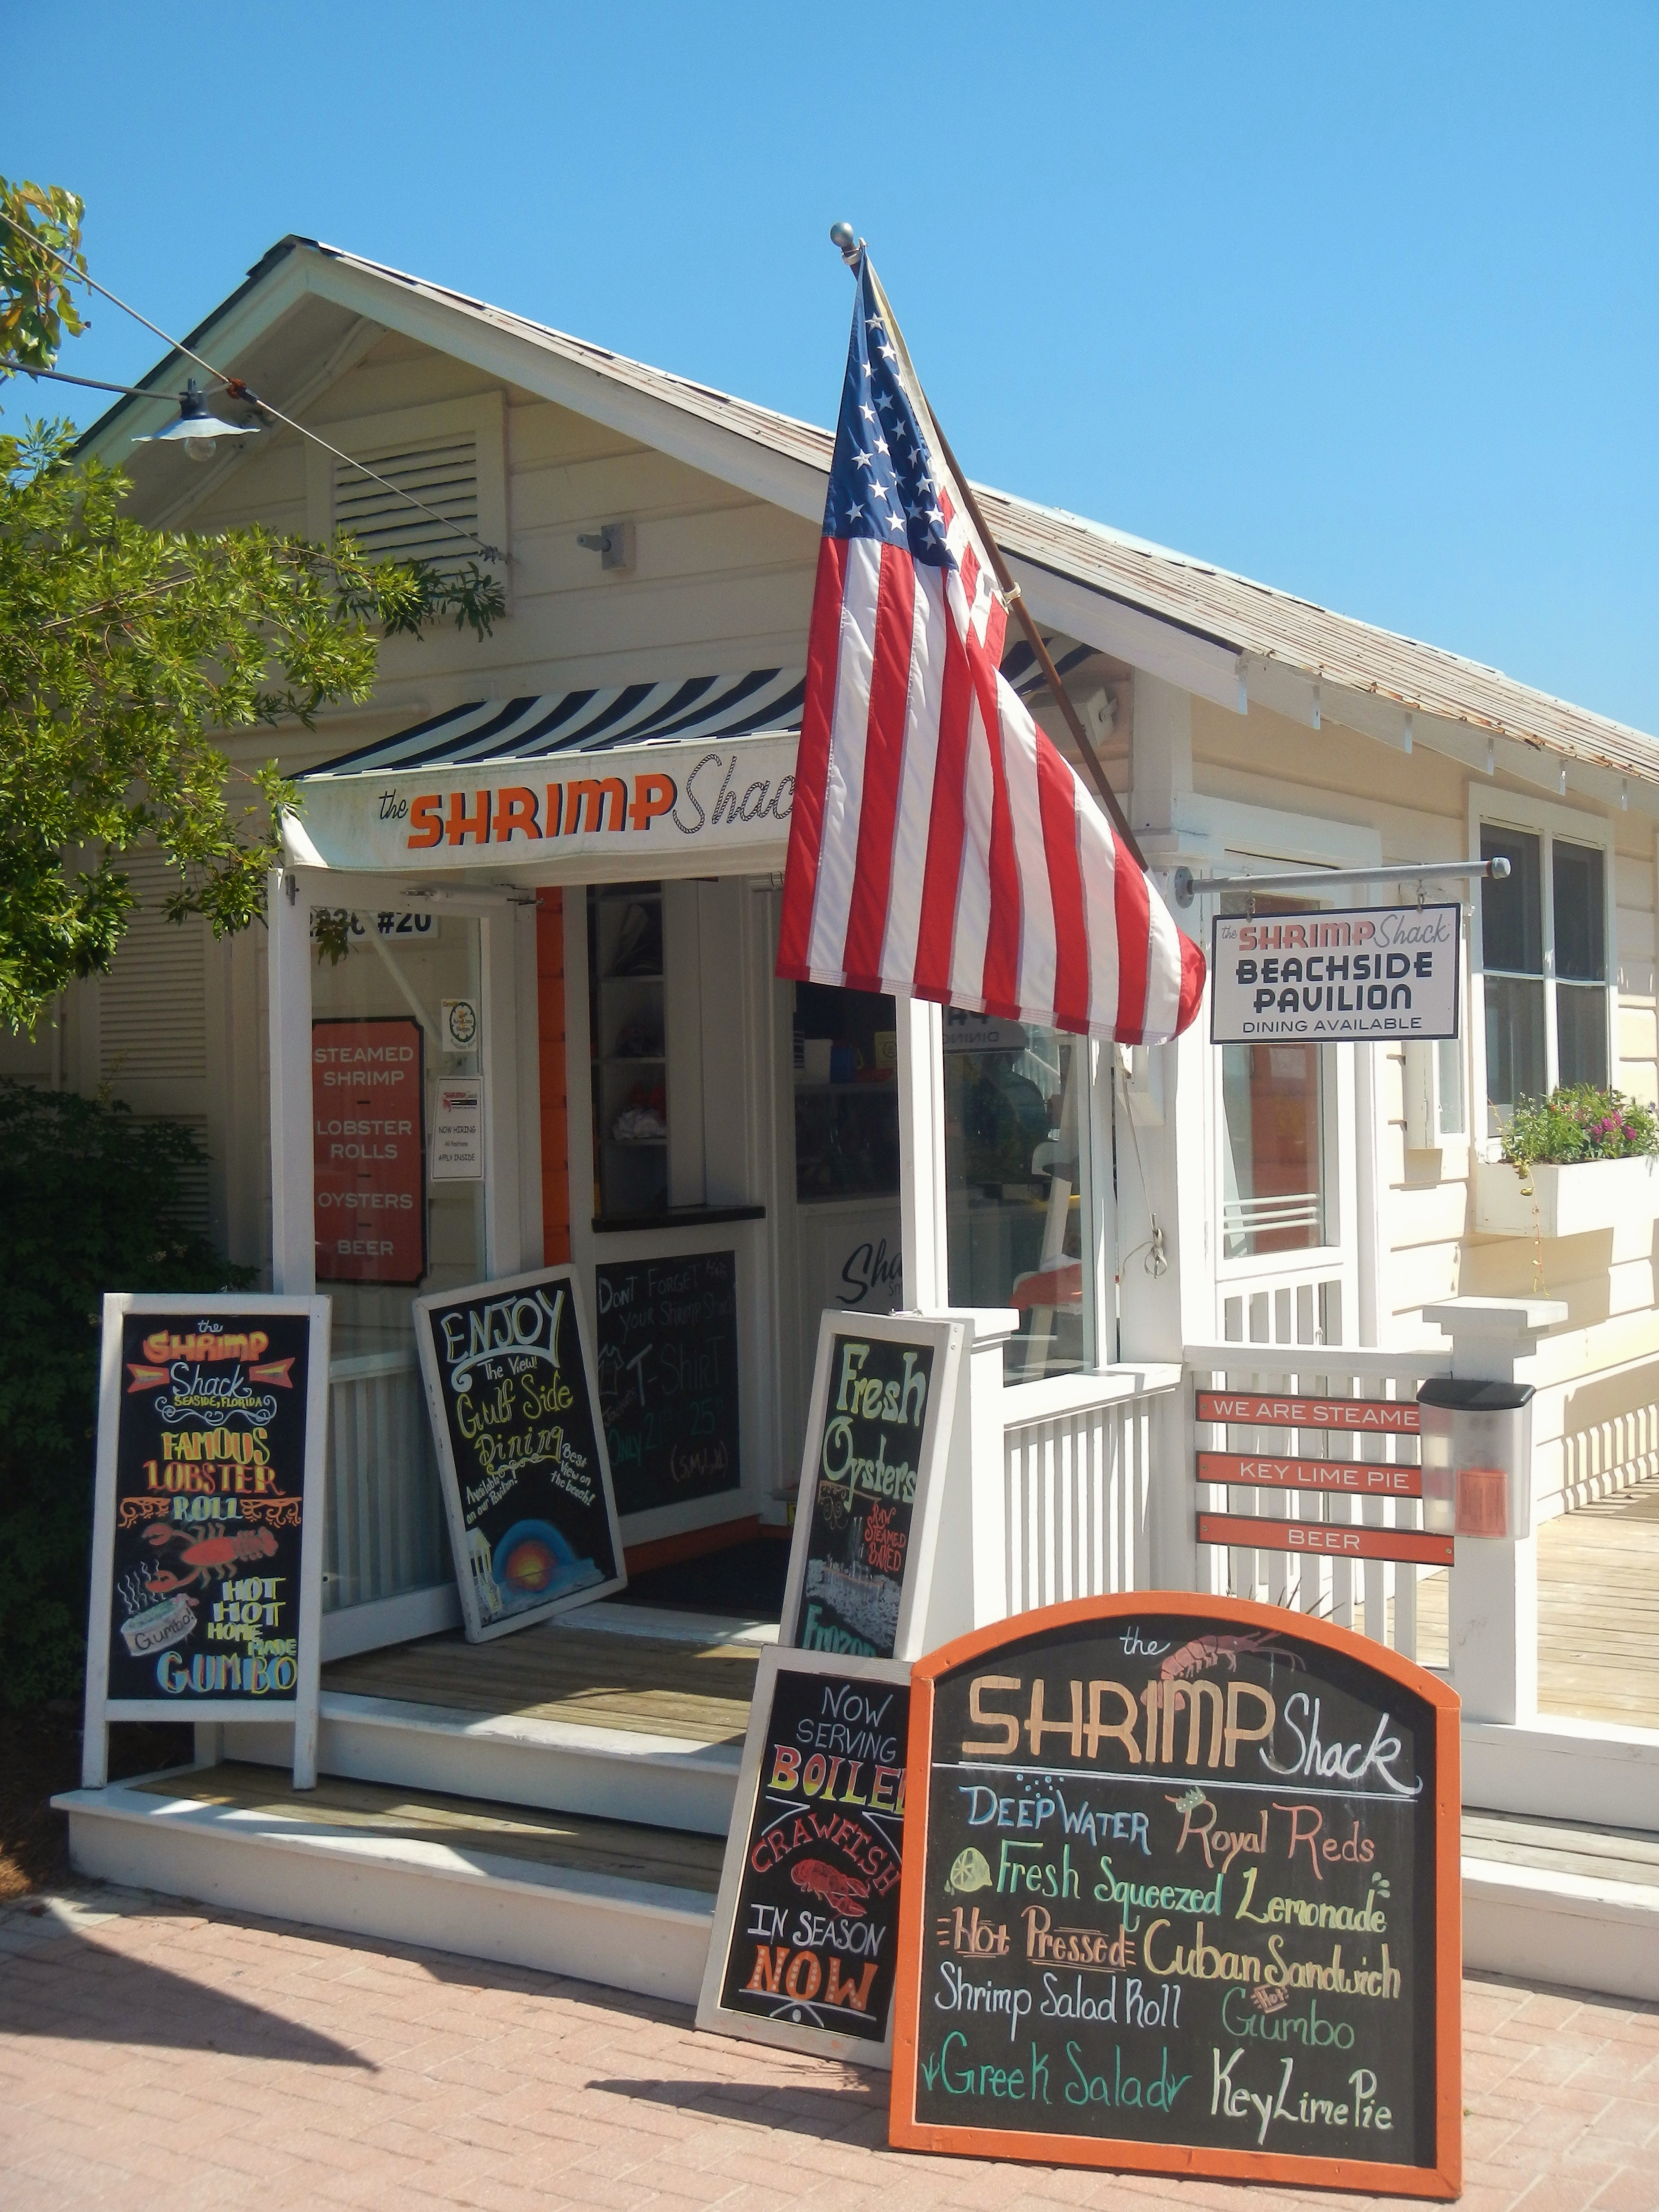
Taco stands and shrimp shacks line the beaches……

The Shrimp Shack in Seaside

The Shrimp Shack Beachside Pavilion in Seaside

This amazing tower is the beach access from the center of Seaside.

Looking Straight Up Into the Seaside Pyramid

Seaside Beach Entrance Pyramid Collage

A few miles down 30A is Alys Beach. Home of Charlie’s Donut Truck……

Charlie's Donut Truck Collage 1

Charlie's Donut Truck Collage 2

Fonville press….

Fonville Press at Alys Beach

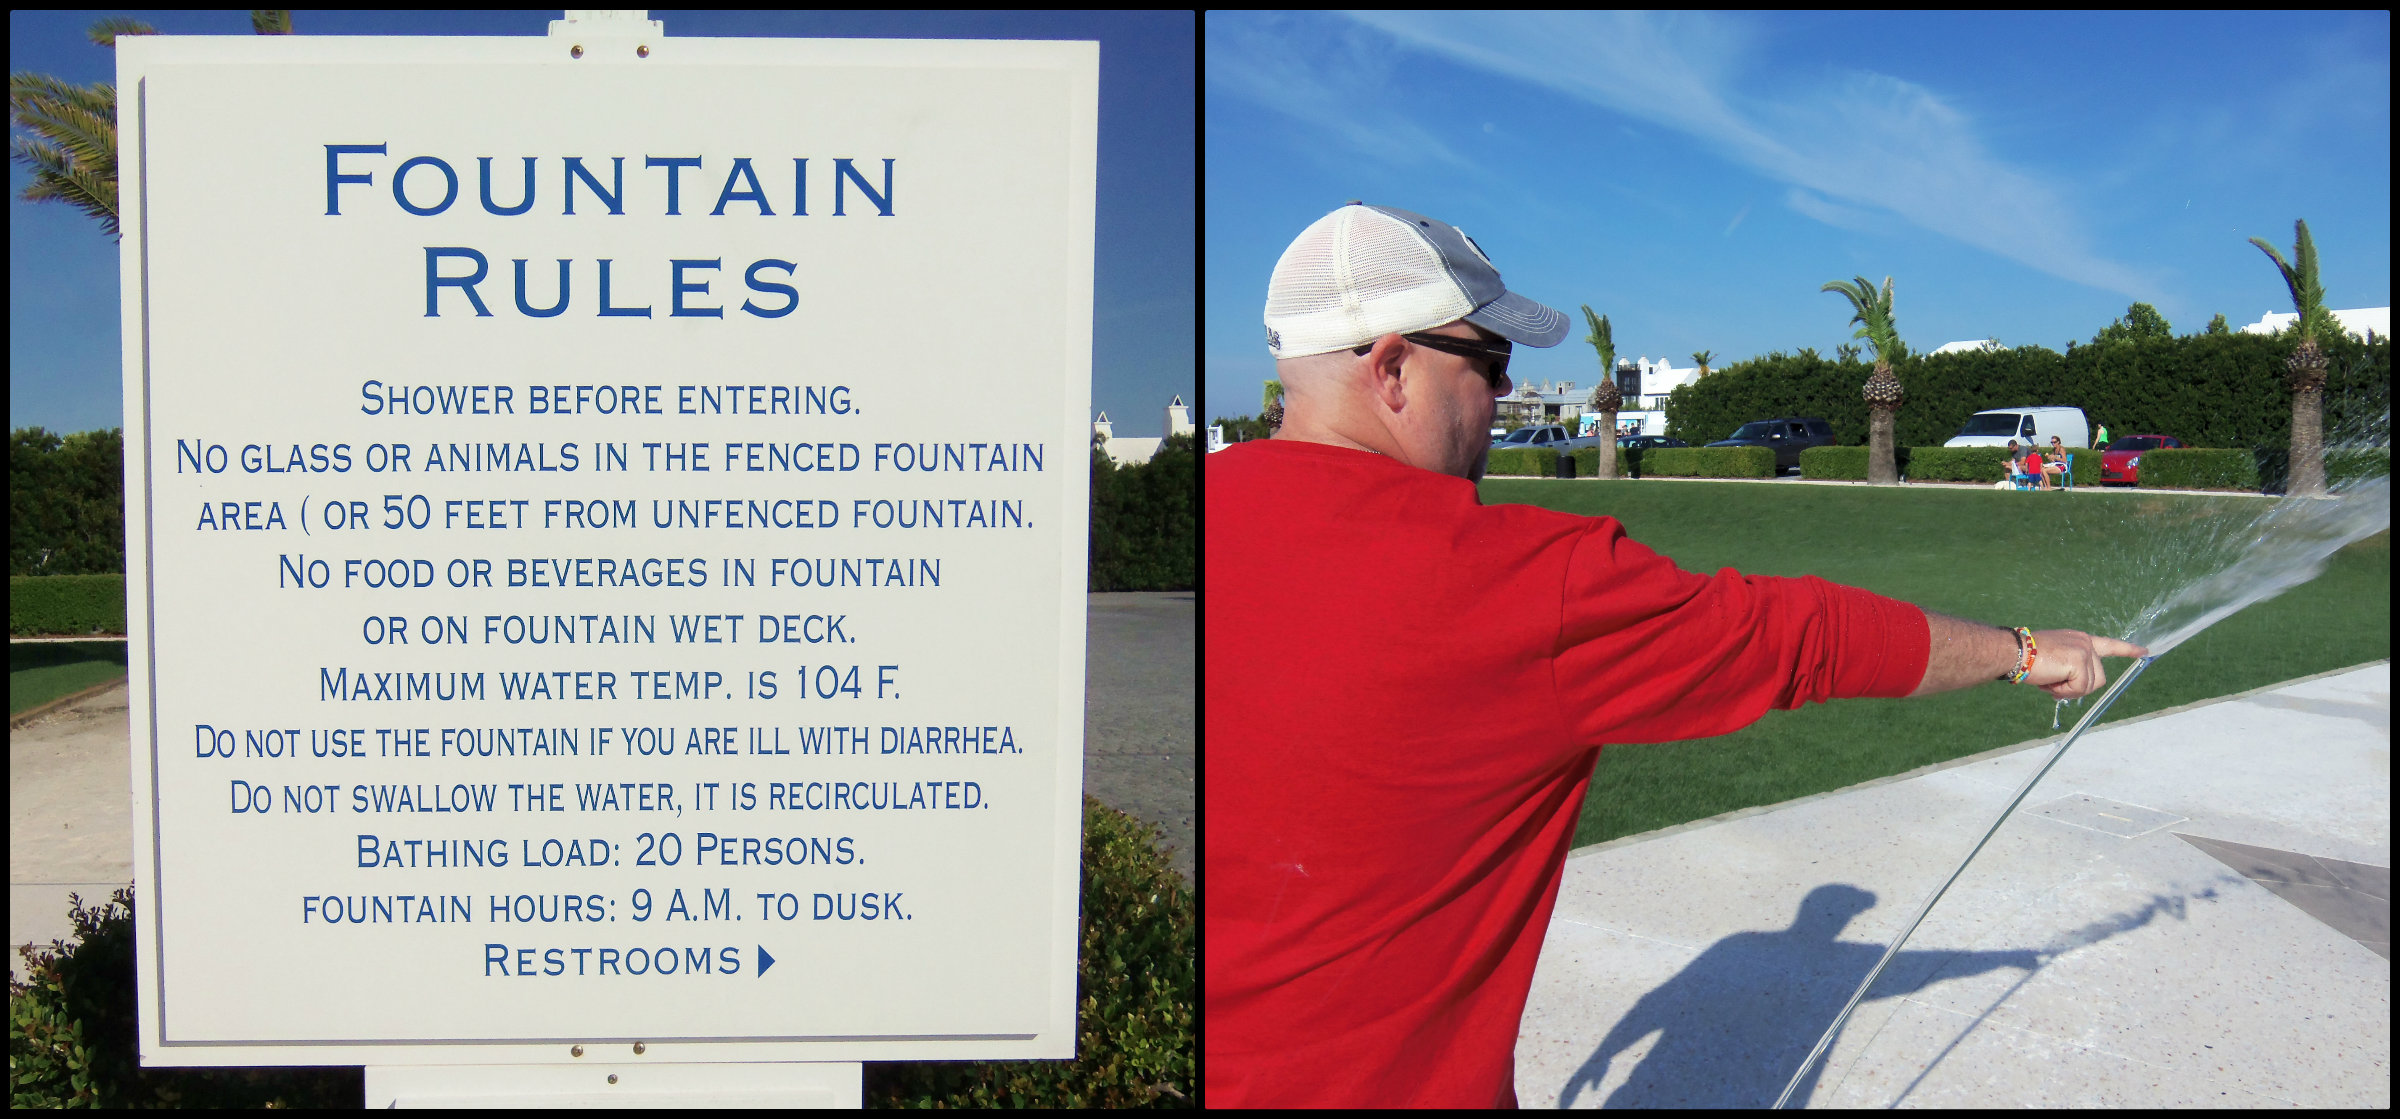
and a fountain with some pretty disgusting rules…..

Gert and Baby Madeleine Playing in the Alys Beach Fountain

Jamie and the Alys Beach Fountain Rules Collage

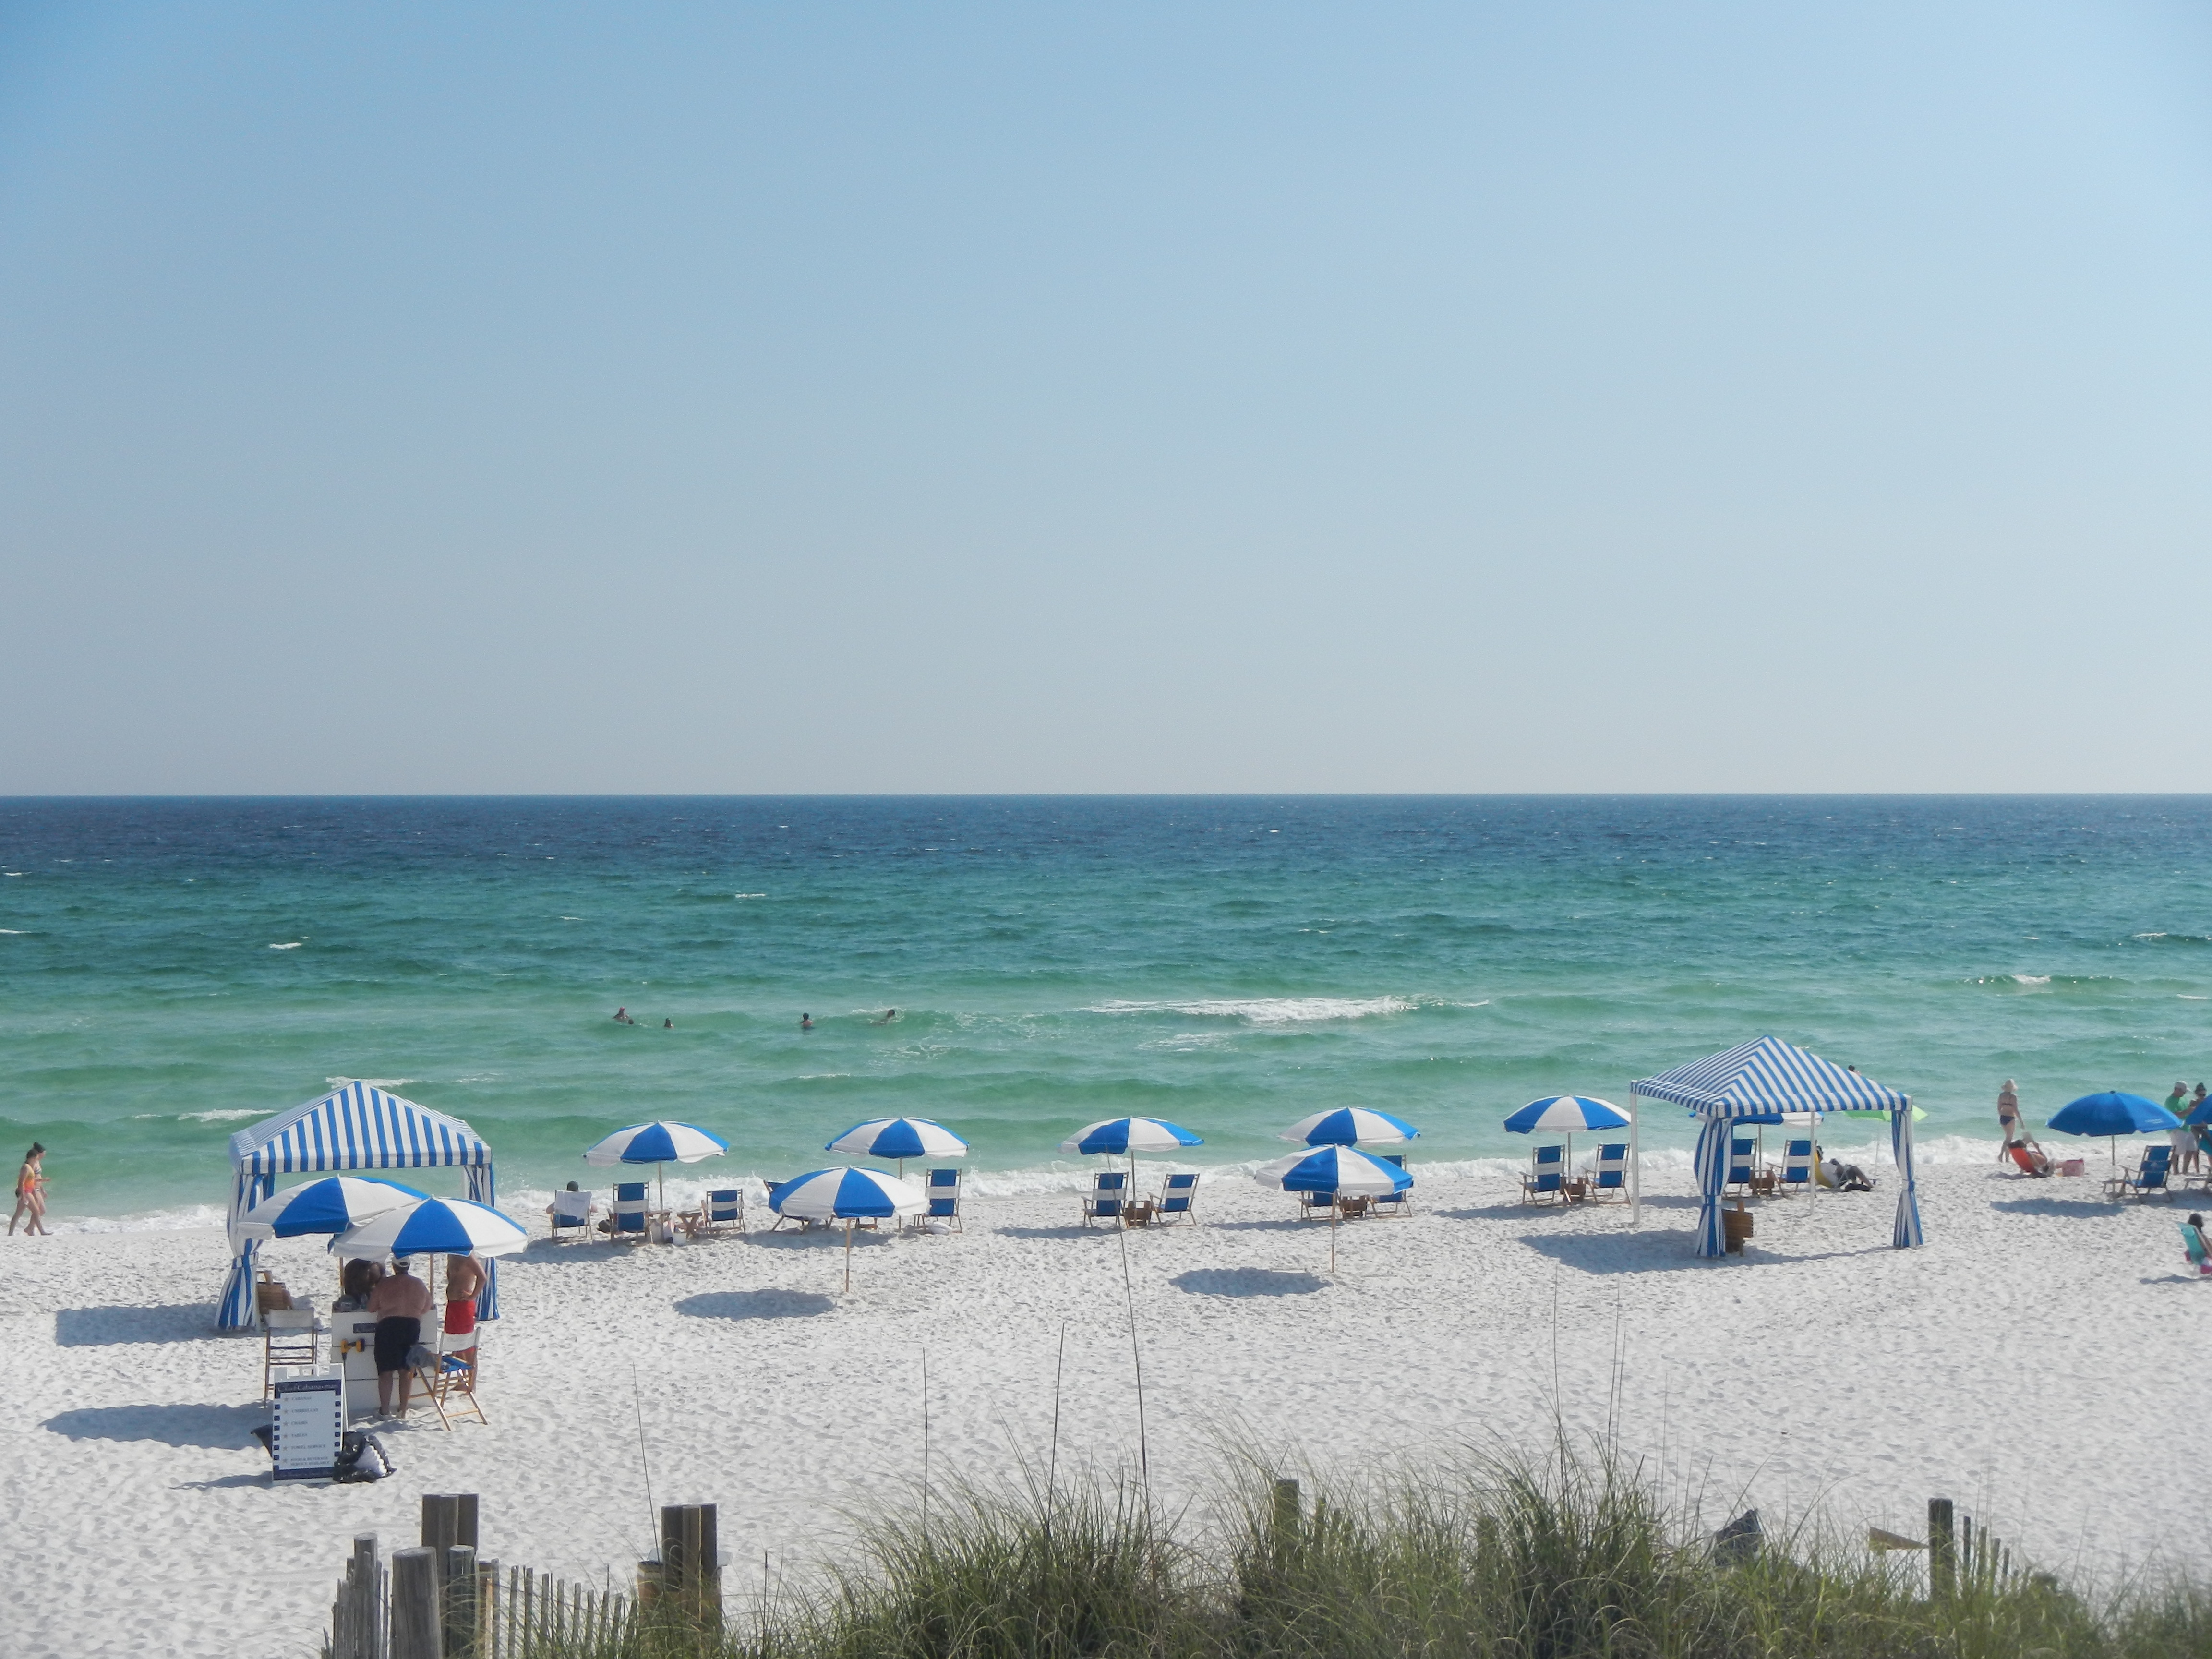
Did I mention how spectacular the white sand beaches were?

The White Sand Beaches at Seaside Florida

Gert and Madeleine on the Seaside Beach

Sand Castle Collage

Kylie and her Sand Dollar that I Found

Kylie and Madeleine on the Seaside Beach Collage

Daddy and Daughter Shadows on the Beach

Since we had a rental car, we took a day trip to Cape San Blas and the St. Joseph Peninsula State Park…..about an hour and a half away. Well worth the drive.

James and Jamie on the Dunes at Cape San Blass

Cape San Blas Collage 1

100_4942

Cape San Blas Collage 2

James Fet on the Beach of Cape San Blas

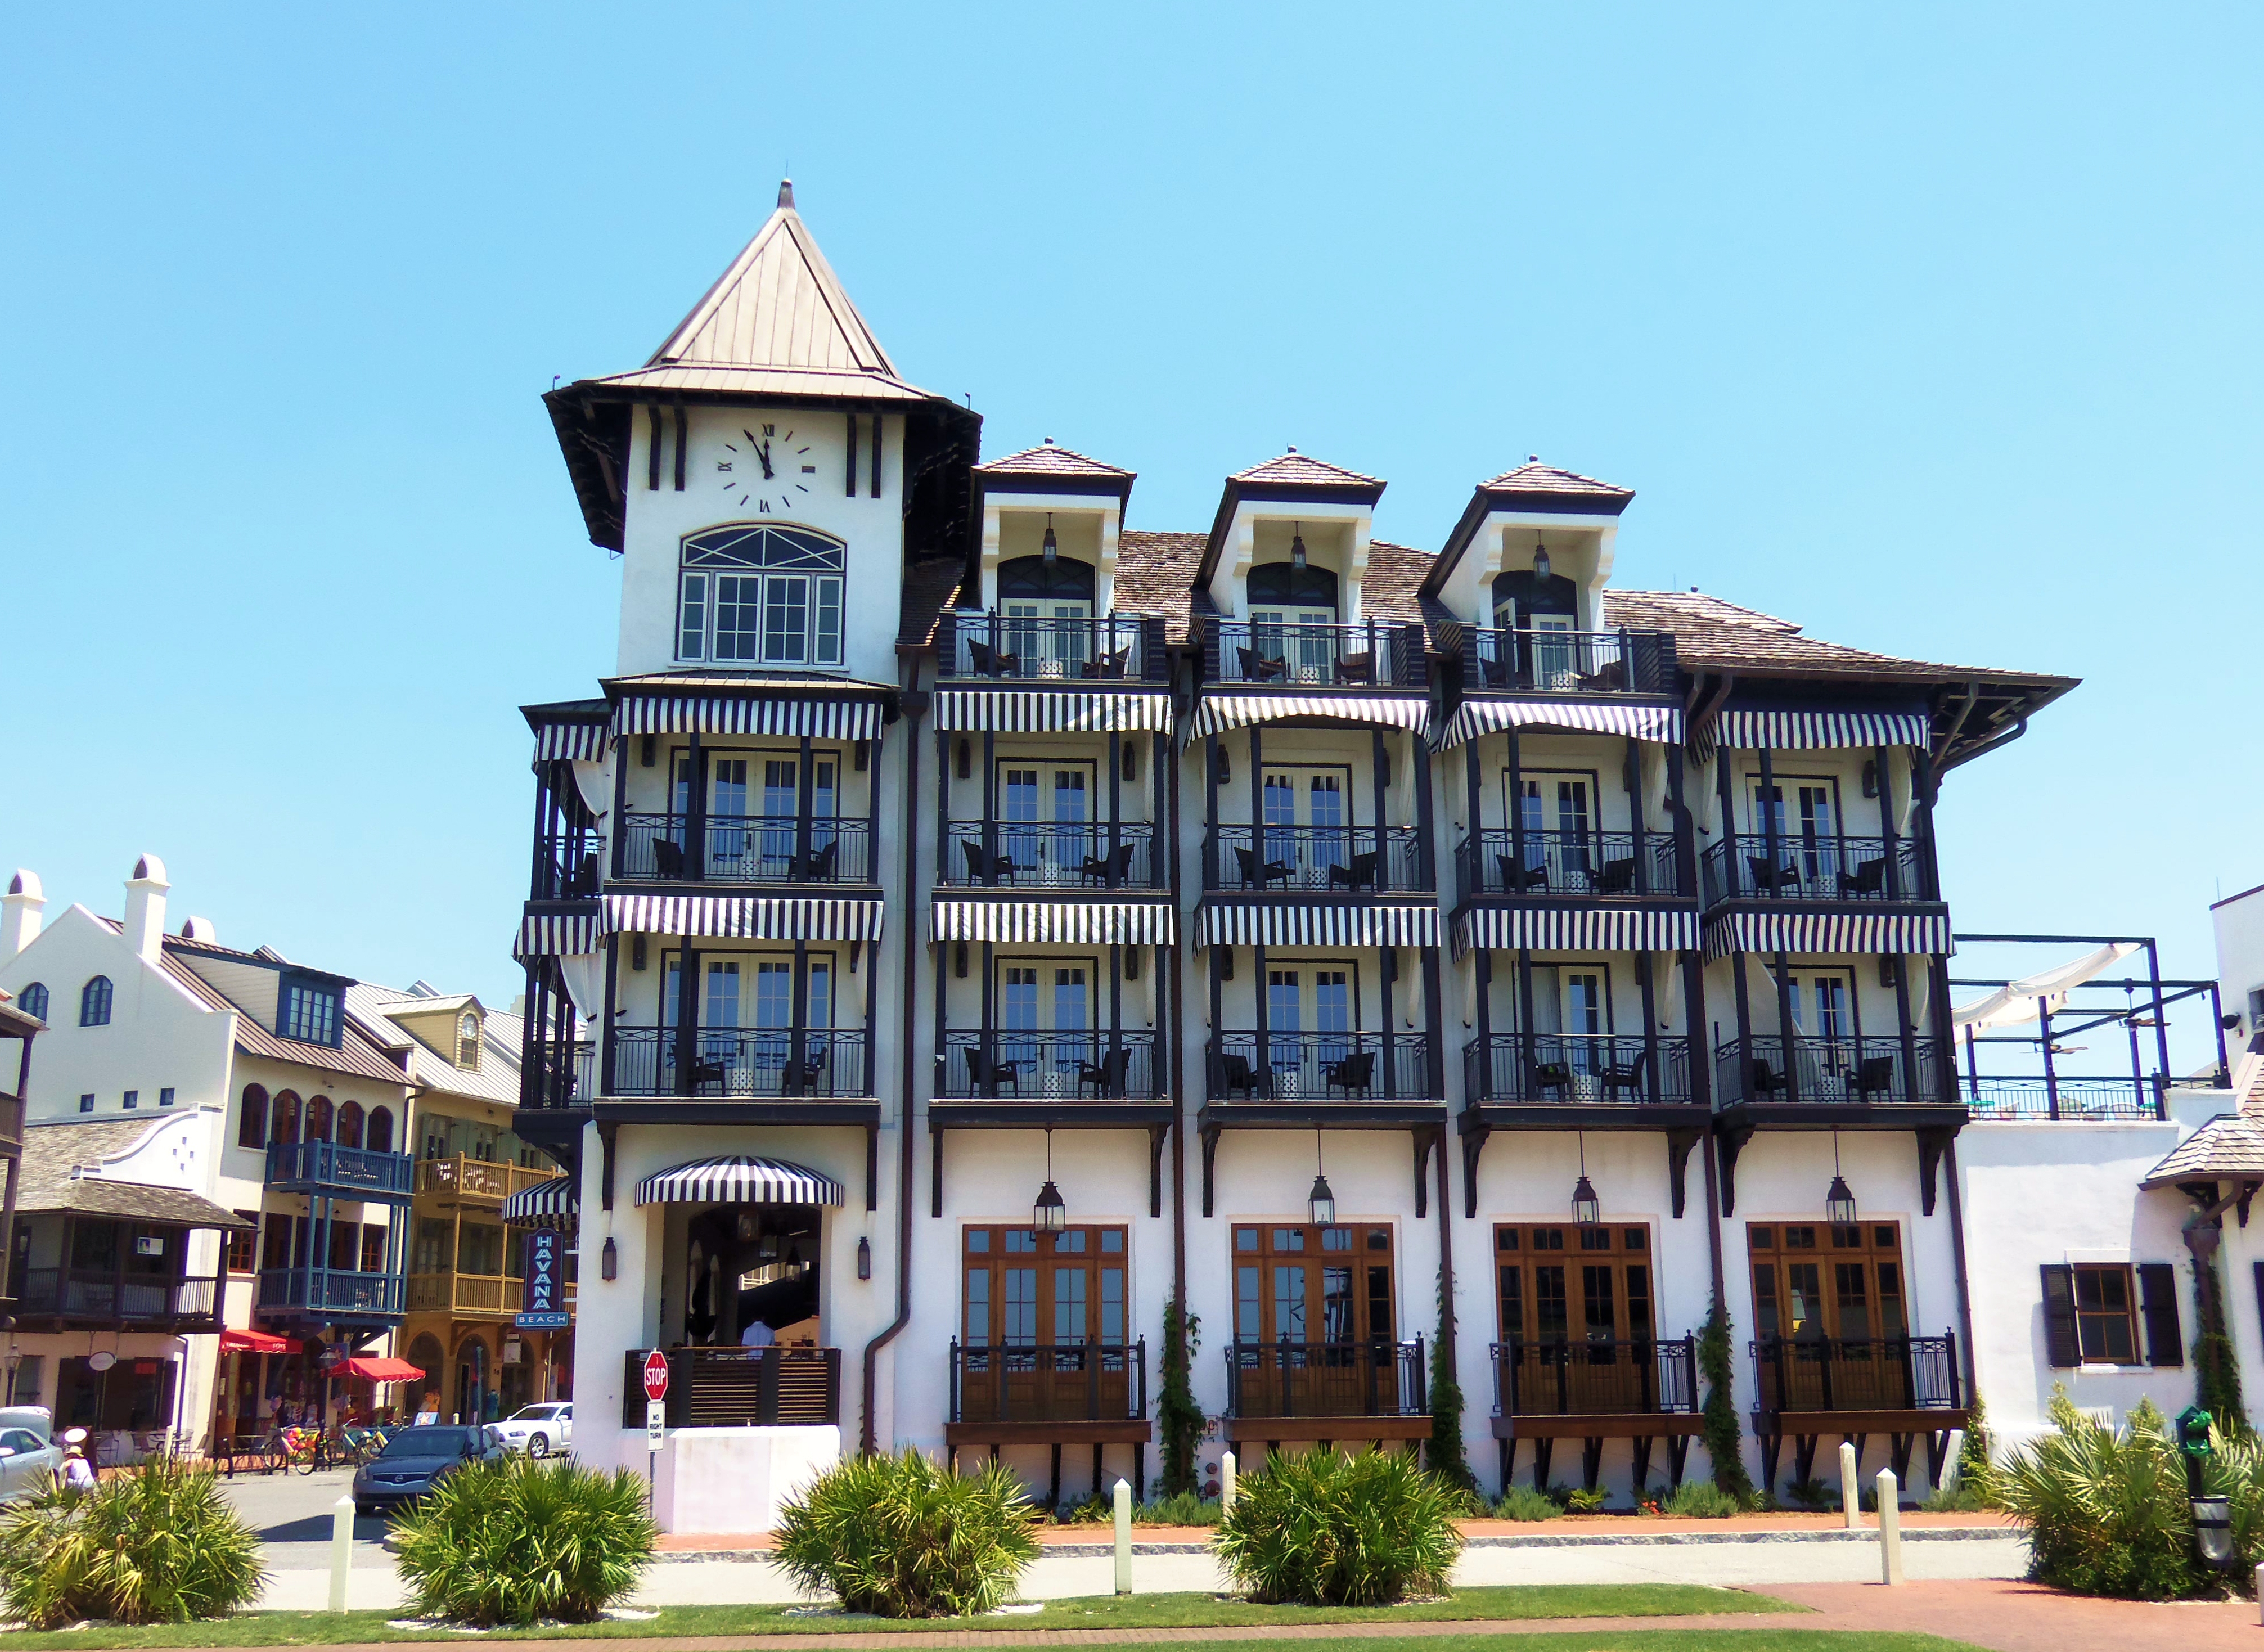
Jamie and I rented Vespas one day and jetted down 30A to Rosemary Beach.

James on the White Vespa

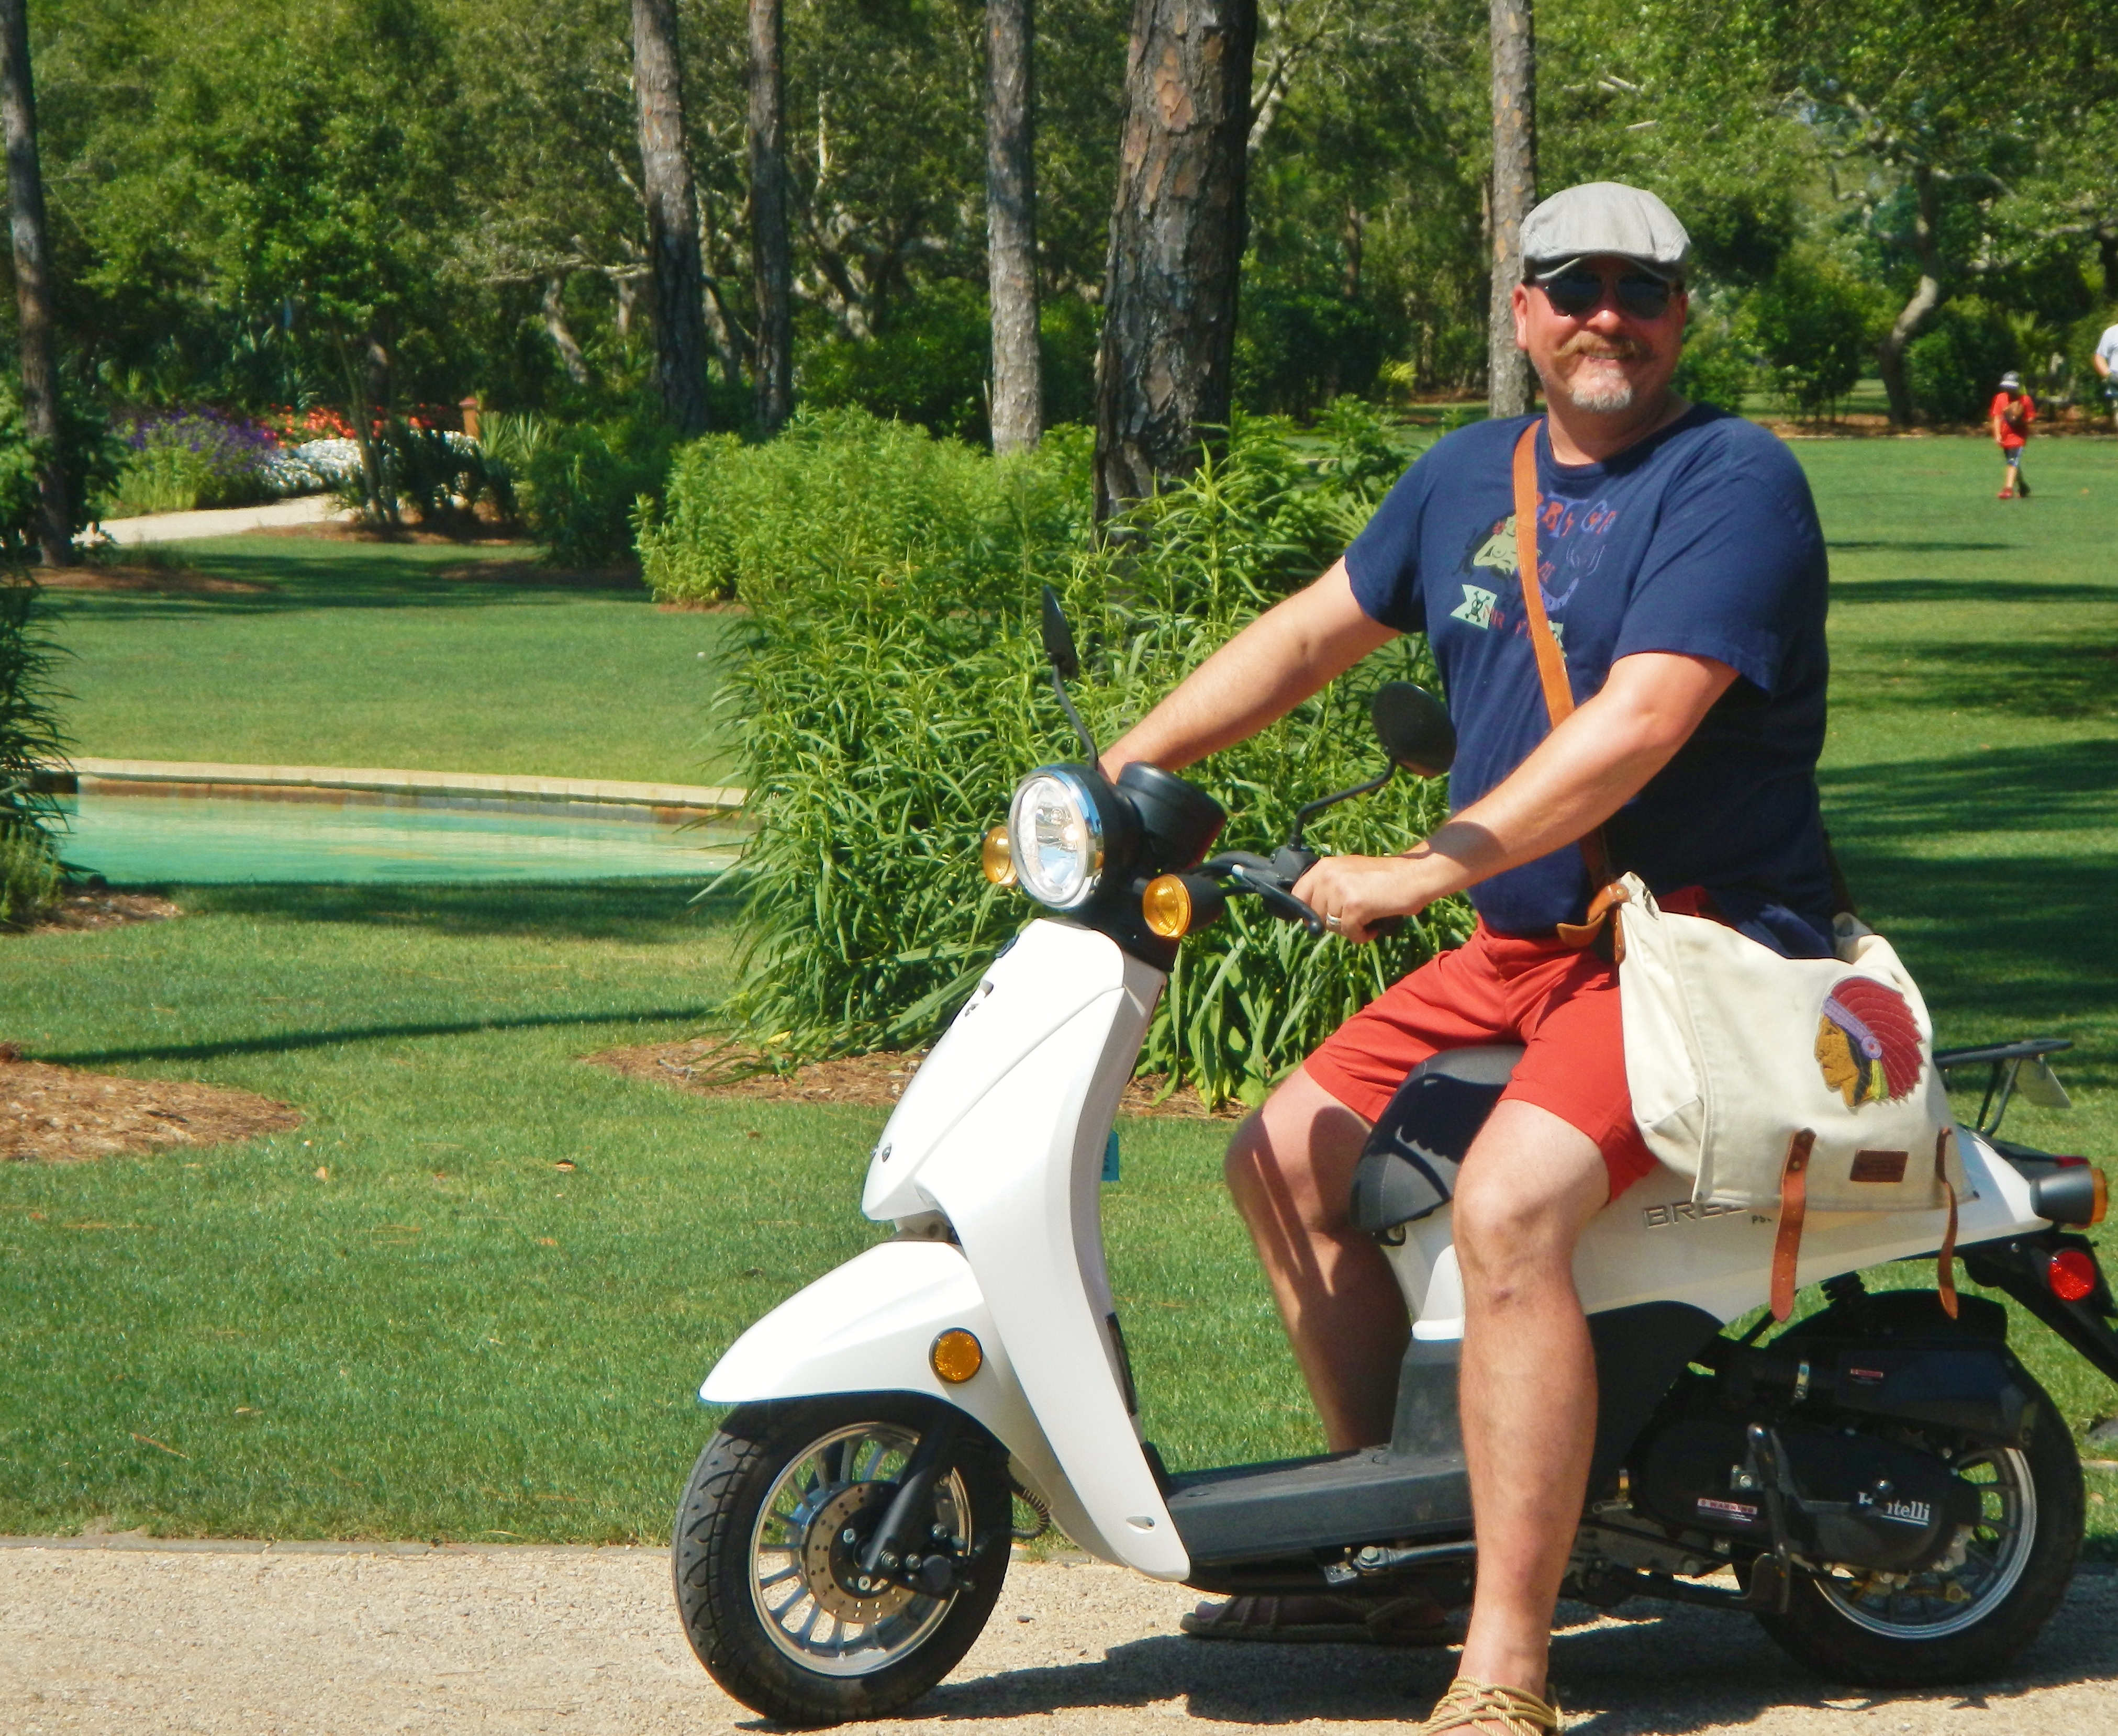
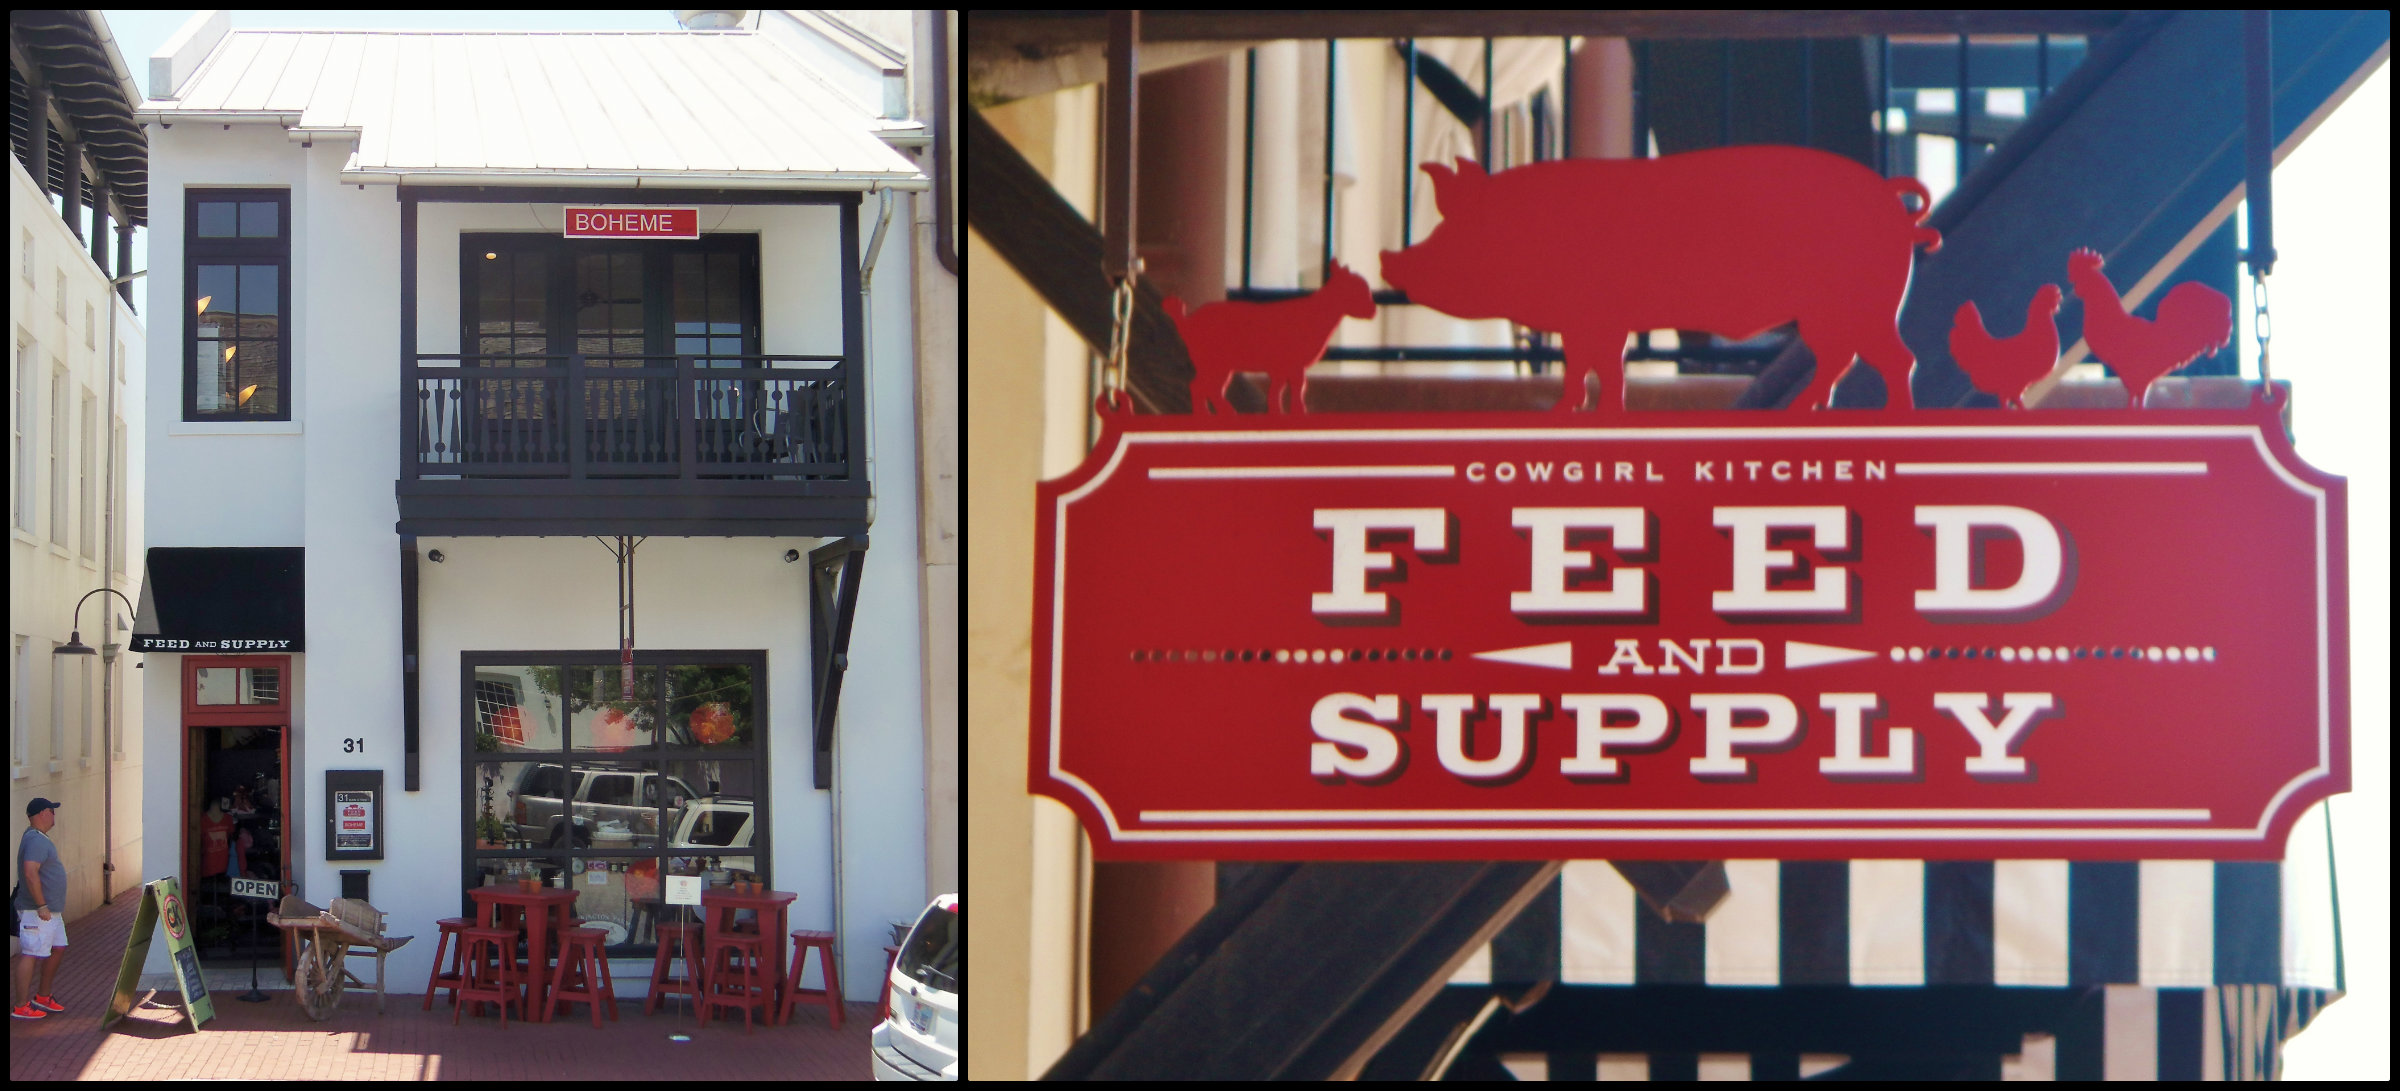
Rosemary Beach feels more like a European village than a Florida beaching community……

The Inn at Rosemary Beach

Cowgirl Kitchen Feed Store Collage

One of the Condos on Rosemary Beach

Rosemary Beach Town Hall Collage

Jamie in front of the Rosemary Beach Fountain

Movies on the lawn. How charming is that?

Movies on the Lawn at Rosemary Beach

The week went by way faster than we expected it to……and all too soon it was time to head back to Dallas.

The Pecks Walking Down the Walkway

Only one thing left to do…..

Check the baby to make sure she would fit in the overhead storage compartment on the plane.

Making Sure the Baby Would Fit in the Overhead Compartment


Share this:

  • Share on Facebook (Opens in new window) Facebook
  • Share on LinkedIn (Opens in new window) LinkedIn
  • Share on X (Opens in new window) X
  • Share on Pinterest (Opens in new window) Pinterest
Like Loading...

“House Wine of the South”

Posted by James on May 22, 2014
Posted in: New Home, Recipes. Tagged: Deep Eddy Sweet Tea Flavored Vodka, Deep Eddy Vodka, Lemoncello, Spiked Ice Tea. 8 Comments

Jamie and I celebrated 7 years together last month with a – typical  for us – meal of tacos, chicken fried steak and tamales.

We went to Stampede 66.

Delicious, just delicious. It was our first time there, and I guarantee we’ll be back.

The best part of the meal? I’d say that it was the prickly pear margaritas made table-side. But if you ask Jamie, he’d say it was the iced tea.

Sure, iced tea is welcoming and refreshing on a hot Texas day. But Stampede 66 serves no ordinary iced tea.

Theirs has a kick. It’s more of an Adults Only iced beverage.

Made with Red Bull, Lemoncello and……(the most important ingredient here) Deep Eddy Sweet Tea Flavored Vodka; that’s brewed right in Texas.

Deep Eddy Vodkas are handmade in Austin, Texas in a tiny distillery by Clayton Christopher, the creator of Sweet Leaf Tea Beverages, and Chad Auler, the creator of Savvy Vodka. Using only local, natural ingredients, like real tea leaves and Texas honey, the pair set out to create a superior beverage.

Deep Eddy Sweet Tea Flavored Vodka

We think that they did just that.

Traditionally, lemoncello is a bright liquor made from the zest of Femminello St. Teresa lemons. The lemon zest is steeped in rectified spirit, like high-proof vodka, until the oil is released. The resulting yellow liquid is then mixed with simple syrup and water to achieve the desired strength.

Pallini Lemoncello Liquor

Enough teasing already, here’s our version of Stampede 66’s recipe;

Spiked Texas Iced Tea Collage

In a chilled mason jar filled with Sonic ice, trust us on this – Sonic ice, pour the following things;

  • 5-6 Ounces of Sugar Free Red Bull
  • 2 Ounces of Deep Eddy Sweet Tea Flavored Vodka
  • 1 Ounce of Lemoncello

Stir a little. Garnish with a lemon slice…and enjoy.

Spiked Texas Iced Tea

Iced Tea, meet Booze,

Looks like iced tea…..tastes like heaven.

You’re sooooooo very welcome,

Share this:

  • Share on Facebook (Opens in new window) Facebook
  • Share on LinkedIn (Opens in new window) LinkedIn
  • Share on X (Opens in new window) X
  • Share on Pinterest (Opens in new window) Pinterest
Like Loading...

A Fire Screen is Just a Fire Screen

Posted by James on May 18, 2014
Posted in: New Home. Tagged: Black Spray Paint, fire screen, restoration hardware. 17 Comments

The worst part about having a Restoration Hardware credit card is that as soon as you pay the darn thing off, they send a $75 gift card good for your next purchase.

Don’t know if y’all shop at Restoration Hardware very often…but there’s not much they offer for only 75 bones.

Soap, maybe.

It does, however, take a small chunk off a slightly larger purchase.

Like this slightly industrial looking Rivet Hearth Flat Panel fire screen.

Restoration Hardware Rivet Hearth Flat Panel Fire Screen

See where I’m going with this?

This old fire screen is one of the last things we still have that belonged to the Cavender House’s previous design-challenged owner. Robert

Not that there’s anything wrong with it…….

Firescreen That Came with the House

Now, thanks to the high-pressure sales people at Restoration Hardware….we have this.

New Restoration Hardware Firescreen

Does it look to y’all anything like it does in the RH catalog picture? Scroll back up if you have to.

No….no, it doesn’t

It looks like it was spray-painted flat silver……..WTH?

No worries, I have a plan. Love to spray things black. It’s almost a hobby for me.

I have some Rust-oleum “high heat” flat black spray paint.

Rustoleum High Heat Spray Paint

Of course I do. We used it on the last fire screen already.

But just to keep that thing from looking like it was simply sprayed black this time instead of silver, I took some fine grit sandpaper to the edges…….just a little.

Take a bit of Fine Sand Paper to the Edges and Bolts

To let some of that silver show through.

Now, it looks more like it was supposed to,

New Restoration Hardware Fire Screen on Hearth

That light sanding gives the screen just enough depth.

Just a Light Sanding Brings out some Depth in the Metal

Black Painted Brick Fireplace with New Restoration Hardware Fire Screen

Way, More, Much Better.

After all, we want guests notice the blazing fire……..and not the silly screen.

Share this:

  • Share on Facebook (Opens in new window) Facebook
  • Share on LinkedIn (Opens in new window) LinkedIn
  • Share on X (Opens in new window) X
  • Share on Pinterest (Opens in new window) Pinterest
Like Loading...

Give a Girl a Gnome Book

Posted by James on May 14, 2014
Posted in: Did Ya Know?, New Home. Tagged: Gnomes, Madeleine, The Gnome Book, Wil Huygen. 8 Comments

Can y’all believe that we are still milking posts from that baby’s birthday party a few weeks ago?

Well, we are.

We had to give little Madeleine a gift worthy of a woodland themed first birthday.

Like the Gnome Book that was my absolute favorite as a child…

The Gnome Book

I devoured every inch of this book when I was a kid, so much so that it literally fell apart,

It did.

This is my second copy,

and, as y’all can see…….my new one is a little worn well-loved too.

For more than 35 years this beautifully illustrated book has brought joy and wonder to readers of all ages.

This delightful Dutch book was first published in Holland in 1976, and translated for the English-speaking market in 1977. It was an immediate hit. (It’s a little know fact that it was Martha Stewart’s husband, Andy, who was the publisher responsible for bringing the book to American audiences.) Writer Wil Huygen and illustrator Rien Poortvliet perfectly document the gnome population living in Holland at the time. They cover all areas of gnome culture: architecture, education, courtship, medicine, industry, and even relationships with other mythical creatures.

I can’t emphasize enough just how much artistry went into every corner of this book. But it isn’t just the illustrations, the attention to detail in imagining this complete world of wood gnomes is absolutely heart warming.

See for yourselves……

Illustration of Typical Gnome Stregnth - 7 Times That of a Man

When I was a boy, I made an exact replica of this house out of cardboard and balsa wood scaled to the gnome Christmas ornaments we had. (Still have those ornaments, BTW)

Illustration of a Typical Gnome House

Details of a Typical Gnome House

Illustration of a Typical Gnome Diet

Illustration of Typical Gnome Craftsmanship

Illustration of a Gnome Communicating with a Boar

Order one for yourself, or someone special, today.

There’s a deluxe edition that was released in 2011 to commemorate the 35th anniversary of the book….but its iconic cover has been replaced with single, laughing, pointing gnome.

I prefer the original….

Find that version here.

Yes, we realize that Madeleine is only a year old ……… and this book may be a bit advanced for her right now. But one day she will be old enough to discover this book……

…..and will no doubt, love it as much as I do.

I’m pretty sure that y’all will too.

Share this:

  • Share on Facebook (Opens in new window) Facebook
  • Share on LinkedIn (Opens in new window) LinkedIn
  • Share on X (Opens in new window) X
  • Share on Pinterest (Opens in new window) Pinterest
Like Loading...

Isn’t This How Nature Works?

Posted by James on May 11, 2014
Posted in: New Home. Tagged: flower beds, Flower Seeds, Marigold seeds. Leave a comment

Remember those Marigold seeds we planted in a Dixie cup?

That was one of my favorite activities in grade school.

I never knew that there were so many seeds to choose from.

Just look at all the variety at our Home Depot.

Seed Display At Home Depot

Why not grab a few and see what they do in our flower beds? Plenty of empty space since we lost most of the old plants this winter.

Here’s what we ended up with:

  • Indian Blankets
  • Mexican Sunflowers
  • Marti Gras Coreopsis
  • Dwarf Marigolds

(notice they are all shades of orange/red)

Assorted Flower Seeds We Started With

Indian Blankets grow on the side of the Texas highways, and Marigolds seed themselves every time we plant them….so these should do just great on their own in our flower beds.

If not……we wasted a few dollars. And about 1/2 an hour.

Jamie picked up these large popsicle sticks at the dollar store.

Large Popcycle Sticks from the Dollar Store

I just used a Sharpie (God bless a Sharpie) to label each one so someone (not me) knows that these little sprouts aren’t weeds.

I also put the height they grow to, so we know where to plant them in the beds – Taller plants towards the back; and smaller ones right up front.

Write the Flower Name on Each Stick

The propper way to start seeds is in seed cups in a greenhouse. But we roll a differently at the Cavender house and didn’t want to exert too much effort.

So we just dropped them in the beds.

Most of the seeds need to be about an inch below the surface. I just used a wooden spoon to poke holes in our soil/sand/pea gravel mixture.

Use a Wooden Spoon to Poke Holes in the Ground

James Planting in the Flower Beds

Some of the seeds are pretty tiny. The Coreopsis seeds looked like little black specks.

Luckily the Marigold seeds are visible with the naked eye….and look exactly as I remember them.

Carefully Pour Out the Flower Seeds

I dropped a few in each hole….and covered them up.

Drop a Seed or Two in Each Hole

The popsicle sticks temporarily mark where these little guys should start sprouting from. I’ll pull them up when the plants are established.

Us the Popcycle Stick Tags to remember What You Planted

Let’s give this a few weeks of rain and sun, and see where we are….

Fingers crossed……

Share this:

  • Share on Facebook (Opens in new window) Facebook
  • Share on LinkedIn (Opens in new window) LinkedIn
  • Share on X (Opens in new window) X
  • Share on Pinterest (Opens in new window) Pinterest
Like Loading...

Thank You, Fred Harvey

Posted by James on May 8, 2014
Posted in: Did Ya Know?, New Home. Tagged: Fred Harvey, Fred Harvey Pins, gift shops, Harvey Houses. 9 Comments

Fred Harvey was a visionary.

Fred Harvey

When the westward expansion of the United States began, customers traveling by railroad had few options for meals along the way. Their only options were usually rancid meat, cold beans, and stale coffee. Fred Harvey, then working as a freight agent for the Chicago, Burlington and Quincy Railroad, had a vision of high quality, large portioned meals served by lovely young uniformed ladies along the rail lines. In 1878, a handshake agreement with the Atchison, Topeka and Santa Fe Railway contracted Harvey to build 3 eating houses along the line on an experimental basis. Those 3 restaurants quickly expanded to hotels, dining cars, and gift shops.

This old Fred Harvey postcard shows the locations of Harvey Houses along the railways.

Fred Harvey Stop Locations on a Vintage Postcard

Harvey had accidentally created the first restaurant chain in the U.S.

The Harvey Houses offered diners meals on fine china with Irish linens. Their portions were considered very sumptuous for the time; for example, pies were cut into fourths, not sixths. It is rumored that on his deathbed, Harvey imparted this business advice to his sons, “Don’t cut the ham too thin, boys.”

Harvey implemented a policy of only employing a young female serving staff. He sought “young women, 18 to 30 years of age, of good character, attractive and intelligent” to serve in his restaurants. The girls were paid $17.50 a month, plus meals, room, and tips. A very generous offer at the time.

The girls had to abide by strict standards of appearance. No make up was allowed, and their hair was to remain pulled back in a net and tied with a regulation white ribbon. The girl’s uniform was a heavily starched black and white number that hung no less than 8 inches from the floor, with “Elsie” collars, black stockings, and black shoes.

These “Harvey Girls” were widely regarded as bringing high standards of civility and dining to a region considered at the time to be “the Wild West.”

Just look how …glamorous?….these young ladies look.

Anna and the Other Harvey Girls

One of Harvey’s best legacies was in his gift shops.

Native Americans were already bartering with each other using handmade turquoise/sterling jewelry as collateral. Pieces left unclaimed were considered “old pawn” and available to trade again.

It was Harvey that took it a step forward and supplied the Native smiths with sheet metal, and pre-cut pre-polished turquoise to produce trinket pin jewelry to sell to tourists in his gift shops.

Most of this jewelry may, or may not, have been made by Native Americans in an assembly line style. But it didn’t matter. The tourists ate it up, and soon the gift shops were selling earings, bracelets, rings, brooches, money clips, and other trinkets as quickly as the tourists could buy them. These pieces, usually just stamped with native symbols in the repoussage style, although cheaply made, are still highly collected today.

They are considered “Harvey Era” if they were made about 1900 to about 1955.

I have several of these Harvey Era pins, most of which live on the collars of jackets….like these.

Fred Harvey Pins Collage

Harvey’s company became the leader in promoting tourism in the American Southwest.

After diggin’ around in my hoard, I found that I had a few old Fred Harvey postcards too,

but, of course I do…….

A Navajo Medicine Man Fred Harvey Postcard

Navajo Mother and Papoose Fred Harvey Post Card

Elle of Ganado Fred Harvey Postcard

At his death, Harvey had 47 Harvey House restaurants, 15 hotels, and 30 dining cars.

It was Fred Harvey and his vision that drew hundreds of thousands of American tourists to the southwest.

Despite the decline of passenger train usage in the United States in the later part of the 20th century, because of the popularity of cars, the company still survived and prospered by marketing its services to the motoring public.

The Harvey Company was purchased by the Amfac Corporation in 1968,

……and they continue to sell trinkets, postcards and souvenirs, as well as offer hot meals on real china, to southwest visitors.

Share this:

  • Share on Facebook (Opens in new window) Facebook
  • Share on LinkedIn (Opens in new window) LinkedIn
  • Share on X (Opens in new window) X
  • Share on Pinterest (Opens in new window) Pinterest
Like Loading...

Rhubarb Margaritas? Yepp.

Posted by James on May 5, 2014
Posted in: New Home, Recipes. Tagged: Cinco de Mayo Recipes, Rhubarb Margaritas. 4 Comments

Rhubarb Margaritas from the Cavender Boys

My grandmother grew rhubarb in her garden.

I always thought of it as a summer vegetable, but thanks to greenhouse production I grabbed some from the grocer the other day.

Chopped Fresh and Ripe Rhubarb for Making Simple Syrup

Rhubarb’s an odd cross between celery and strawberries. Only the red stalk is edible, the leaves are toxic. I can’t remember what my grandmother made with it – maybe one of my family members will – but I do remember that my grandfather used to make rhubarb wine.

So rhubarb margaritas seems right in line with the family history.

You need to start with a simple syrup…..which is exactly as it sounds, simple.

To make the simple syrup, bring 2 cups of water and 1 cup of sugar to a boil in a medium sauce pan stirring constantly with a wooden spoon.

Make the Simple Syrup with 2 Cups of Water and 1 Cup of Sugar

Once the sugar mixture reaches a boil, add about a cup and a half of diced rhubarb pieces. I threw in a few lemon slices too.

Add About a Cup of Chopped Rhubarb to Sugar-Water Mixture

Continue to stir until the fruit starts to fall apart. Use a slotted spoon to remove as much of the rhubarb as you can. But not everything, a few chunks are ok.

Continue stirring on high heat until the water starts to evaporate and the syrup thickens. It won’t take long.

Continue Stirring Until Syrup Thickens

When it’s thick enough to coat the wooden spoon, remove it from the heat and let it cool completely.

Ladies and gentleman, you just made a cup of rhubarb simple syrup. (Or you just watched me make it, anyway)

This will last in the ‘fridge in a Mason jar for a few weeks, and y’all can pour it over vanilla ice cream, or pound cake. Mix a spoon-full with a glass of champagne….OR use it for the most delicious margaritas.

About a Cup of Rhubarb Simple Syrup in Mason Jar

I think you know where ours is headed.

Juice a couple limes……

Juicing Fresh Limes by Hand

And dip the rim of a glass in the lime juice, then push the glass into pink margarita salt ……

Rub the Rim with a Lime and Drop in Pink Margarita Salt

In a blender, combine, on top of 3 cups of ice:

Fill a Blender with 3 Cups of Ice

  • 6 Ounces White Tequila (We use Patron)
  • 4 Ounces Orange Liquor (We use Patron Citron)
  • The Juice of 2 Limes
  • 4 Ounces of Rhubarb Simple Syrup

Pulse once, then pour into the rimmed glasses and garnish with limes and mint.

Rhubarb Margaritas from the Cavender Boys

Makes about 2. One for you and one for a friend. Because no one should drink margaritas alone.

Ohhhh, and Happy Cinco de Mayo!

Enjoy the margarita.

Share this:

  • Share on Facebook (Opens in new window) Facebook
  • Share on LinkedIn (Opens in new window) LinkedIn
  • Share on X (Opens in new window) X
  • Share on Pinterest (Opens in new window) Pinterest
Like Loading...

New Kidz on the “Splash” Block

Posted by James on May 3, 2014
Posted in: New Home. Tagged: Concrete Splash Box, splash blocks. 19 Comments

You know how sometimes something seems so simple? And it just isn’t?

For over 4 years I have wanted to add concrete rainwater “thingys” under the downspouts from our gutters…..Currently the water just pours out onto unattractive hunks of concrete.

No idea what to call them….splash box/splash blocks…..whatever they are, we need them.

A beautiful Saturday morning seemed like the perfect time to do something about this. So off to “Gay Church”….or the Home Depot, as most people call it.

Just gasp at the crap that Home Depot is passing off as splash blocks…….

Home Depot Crappy Option for Splash Block

What the hell are those?

PLASTIC is what those are. The first big rain and those things will be in our neighbor’s yard.

Ditto for Lowe’s, and Ace Hardware. Same Crap. Didn’t they still make them in concrete?

So we headed home and Googled Concrete Splash Block.

They closest purchasable ones we could find were all the way in Ft Worth…..but no address was listed. (Why on earth would they want people just Stopping By their business?)

OOOhh, and contrary to popular belief, Dallas and Ft Worth are NOT the same city. In fact, they are about 40 minutes apart.

The phone was answered with a, groggy “Hello”. Not the “Thank you for calling Blah-Blah-Blah Concrete, this is Carl,” like I was expecting.

Carl, I’m just guessing here because he never did tell me his name, suggested that I call Senox. They’re located closer to Dallas – Carrollton anyway – but probably not open on the weekends.

I Googled Senox, and dialed the number …… the phone just rang,…… and rang,…… and rang. Nope, not open on the weekends, and who could run a business with NO answering machine?

Concrete manufacturing people apparently.

I tried another concrete business, the guy on the end of that phone number didn’t sell them but thought that Spectra might. But they were only open 2 Saturdays a month. (50% chance of someone being there)

No Spectra on Google…….but there was a Spectrum. Gave them a call……no answer. (50% chance of someone NOT being there as well) At least Spectrum invested in an answering machine.

I gave up.

Now it was Jamie’s turn.

He Googled Gutter Supply, and dialed the first business listed. ABC Supply.

Supply of what? we weren’t sure.

They didn’t have any splash blocks in stock, but suggested that he try their other Dallas location.

Good news, the other Dallas location of ABC Supply has some in stock AND was open on Saturday…..but only for another 35 minutes. (It was 10:25 in the morning)

Unfortunately, the other “Dallas” location was also really in “Garland”……..about 20 miles away.

Could we do it? Could we make the 20 mile drive in about half an hour?

After a stop for gas and Red Bulls (AND a turn-around back home because we left in such a hurry that the motion sensor on our alarm was still active……..and a Doberman was running loose in the house) we made it to ABC Supply in Dallas/Garland.  With 5 minutes to shop.

Look what they had………..

Pallet full of Concret Splash Blocks at ABC Supply in Garland Texas

Pallets full of concrete splash blocks.

FULL, I tell you.

It felt like we’d found the Arc of the Covenant.

“We’ll take 3,

No 4,

No 5.”

At 4 bucks each, 2 bucks cheaper than the Home Depot plastic thingy, “We will defiantly take 5”

Now we have gone from this ugliness…..

Downspout from the Gutters Pouring out onto Unatractive Hunks of Concrete

To this loveliness……

Beautiful New Concrete Spash Block Under the Downspout

We even stopped by our stone supply place for a few big rocks to hide more of that ugliness.

This is a big win for us, BIG WIN…and we’ll take it.

(BTW, we know that they are backwards, but since most of them are on inclines…..it seems to keep the rushing water from eroding the yard)

Happy Saturday, everyone.


Share this:

  • Share on Facebook (Opens in new window) Facebook
  • Share on LinkedIn (Opens in new window) LinkedIn
  • Share on X (Opens in new window) X
  • Share on Pinterest (Opens in new window) Pinterest
Like Loading...

Tomato Can Orchid

Posted by James on April 25, 2014
Posted in: New Home. Tagged: Keeping Grocery Store Orchids, orchids, Tomato Can. 6 Comments

Remember when orchids were rare?

……and expensive?

Now every grocery store in America has them. Luckily for all you kind readers, I have a few secrets to make them look like they came from a high-end, fancy floral shop.

“Sort of”

Phalaenopsis are the most popular orchids and come in almost every color under the rainbow. White are the norm……I prefer yellow.

2 Stemed Potted yellow Phalo Orchid

Always choose a plant with firm flowers, and a few buds that haven’t opened yet.

Always Choose an Orchid with Plenty of Unopened Blooms

Nabbed this beauty at Brumley Gardens here in Oak Cliff.

Pretty good price for a two-stemer.

Best Thing About This Orchid is the Price

Start by removing the plant from the store pot, and running it under cool water to throughly wet the roots.

Orchids like to be moist, but not sitting in water.

Before Potting Always Throughly Wet Your Orchid Plant

I then slide the plastic pot into a clean tomato can. I love the way the graphic label matches the flower colors.

Love the whole irreverence of the can too. Use whatever you have; Chinese take-out boxes, baskets, trophies, even paint cans. Anything works for orchids.

Slide the Plastic Pot into a Clean Tomato Can

These little clips are the bane of my existence, functional….but oooh so ugly.

Pull them off quickly….and discard.

Take These Little Clips Off

I also remove the overly dyed green bamboo and replace it with something fresher……like tan bamboo.

I have been known to use chop stix…or even number 2 pencils. You know, when I’m feeling whimsical.

Replace the Bamboo with Something More Interesting

I loosely tie the orchid stem to the bamboo with jute twine. Loosely…VERY loosly, you don’t want to choke the poor guy.

Use Just Twine To Loosely Attach Your Stems to the Bamboo

As a finishing touch, I cover the roots with wet moss. Run the moss under water, squeeze out the excess, and wrap it around the base of the plant….tucking it in.

Cover the Roots With Wet Moss

Here’s a great floral shop secret:

Gently push the flower petals outward. This makes the orchid flowers look…….happier. Careful not to tear the flower.

Gentley Push the Petals to Pop Forward

Now my orchid is ready to go in a nice sunny spot, but not direct sun.

Tomato Can Orchid on the Shelves in the Living Room

Tomato Can Orchids Collage

Way, More, Much Better than the way it arrived at the house……

Maybe once a week, I’ll pop the plant out of the can and run it through water again….moist, but not sitting in water.

You’re welcome……

Share this:

  • Share on Facebook (Opens in new window) Facebook
  • Share on LinkedIn (Opens in new window) LinkedIn
  • Share on X (Opens in new window) X
  • Share on Pinterest (Opens in new window) Pinterest
Like Loading...

Your Face Goes Here – Gnome Edition

Posted by James on April 22, 2014
Posted in: New Home, Projects. Tagged: Face in the Hole, Gnome Cutout, Woodland Theme Birthday Party. 4 Comments

OK,

Not really sure what exactly to call these painted murals with face holes.

Ben in Key West 2012

Gert and Kylie at the State Fair 2011

Baby Maddie in Cow Head

I Googled……and, (clears throat)…..”Face in the Hole” came up a lot.

For some reason that……just……doesn’t…..sound……classy?

So, let’s go with, “Your Face Goes Here”.

I found this whimsical gnome image online…….

Gnome Cut Out

Just the “Woodland Party” inspiration we were looking for.

I started by priming a sheet of 1/2 thick plywood.

I Primed a Sheet of Plywood With Killz Primer

Jamie took the picture that I found, and projected it onto the primed plywood. (Finally making a good use of that FAME soundtrack CD)

Use Fame Soundtrack CD to Level off the Projector

See?

The Projected Image on my Primed Plywood Sheet

All’s I had to do is trace the image with a pencil.

I Just Used a Pencil to Outline my Gnome and Animals

Pretty simple,

Sketched Gnome and Woodland Animals on the Primed Plywood

Close-Up of the Sketched Gnome on the Primed Plywood

I thought about just making it a big square…but convinced myself to cut the shape out with a jig-saw. After all, I had to cut the hole for the faces to go anyway.

Use the Jigsaw with a Fine Blade to Scroll the Plywood

We matched up the colors in the original with acrylic craft paint…and started the hours and hours and hours of painting. Didn’t know just how long it would take……and it took a while, a looong while.

James Painting the Gnome with Acrylic Craft Paint

Touching up the Gnome Cut-Out with Craft Paint

Here’s my progress over a few nights,

Gnome Hole Cut-Out Collage

I mounted  2X4’s as braces and hid them with Boston ferns so no one would trip.

Then took pictures of everyone ………putting their face in the hole.

Birthday Girl and the Gnome

Jamie and Teagan Gnome Collage

Lili in the Gnome Head

Gus Lili and James Gnome Collage

Ivan and Gert Gnome Collage

The Gnome Family Poses for a Picture

I know….cute, cute, cute.

Share this:

  • Share on Facebook (Opens in new window) Facebook
  • Share on LinkedIn (Opens in new window) LinkedIn
  • Share on X (Opens in new window) X
  • Share on Pinterest (Opens in new window) Pinterest
Like Loading...

Posts navigation

← Older Entries
Newer Entries →
  • The Cavender Boys

  • Buy My Book

    Check out the link below to get your copy of "DIY Industrial Pipe Furniture & Decor" by James Angus

    https://amzn.com/1612436064

  • Tags

    American Flag Apartment Therapy arts Backyard Bathroom Remodeling Beacon Blanket Big Tex Black Spray Paint Bloggers Can Lights Cedar Walls Christmas Christmas Decorating Christmas Ornaments Christmas Tree Crazy Mouse Ride Den Diane Keaton diy Doberman Earth Grout Edward Curtis Electrical Work Fletcher's Corny Dogs flower beds Frankoma pottery Front Yard Garage Garage Update Halloween Halloween Decorating happy halloween harley Harley Davidson home House Tour Houzz hudson bay blankets Ikea Ikea Borrby Lantern illustration july 4th Key West Trip Kitchen Remodel Living Room mantle Master Bathroom Master Bathroom Remodel Master Bedroom mercury ornaments merry christmas Modern Horizontal Fence Motherhood Paint Colors plumbing pipe Projects Ralph Lauren restoration hardware Russet Stain Shiny Brite Ornaments state fair of texas style Swiss Army Blanket Target technology Texas State Fair thanksgiving Thrift store Tile Backsplash travel vacation Vintage chair vintage christmas vintage ornaments Wood Wall
  • Recent Posts

    • Vacation ’24
    • Happy Halloween
    • Planes, Trains & the Occasional Uber
    • Family Secrets
    • Capitol T, and that Rhymes with P
  • Archives

    • June 2024
    • October 2023
    • June 2023
    • April 2023
    • July 2022
    • December 2021
    • July 2021
    • December 2020
    • October 2020
    • September 2020
    • August 2020
    • July 2020
    • June 2020
    • May 2020
    • April 2020
    • March 2020
    • February 2020
    • January 2020
    • December 2019
    • October 2019
    • April 2019
    • January 2019
    • December 2018
    • November 2018
    • October 2018
    • September 2018
    • June 2018
    • May 2018
    • April 2018
    • March 2018
    • January 2018
    • December 2017
    • October 2017
    • September 2017
    • August 2017
    • July 2017
    • June 2017
    • May 2017
    • April 2017
    • March 2017
    • February 2017
    • January 2017
    • December 2016
    • November 2016
    • October 2016
    • September 2016
    • August 2016
    • July 2016
    • June 2016
    • May 2016
    • April 2016
    • March 2016
    • February 2016
    • January 2016
    • December 2015
    • November 2015
    • October 2015
    • September 2015
    • August 2015
    • July 2015
    • June 2015
    • May 2015
    • April 2015
    • March 2015
    • February 2015
    • January 2015
    • December 2014
    • November 2014
    • October 2014
    • September 2014
    • August 2014
    • July 2014
    • June 2014
    • May 2014
    • April 2014
    • March 2014
    • February 2014
    • January 2014
    • December 2013
    • November 2013
    • October 2013
    • September 2013
    • August 2013
    • July 2013
    • June 2013
    • May 2013
    • April 2013
    • March 2013
    • February 2013
    • January 2013
    • December 2012
    • November 2012
    • October 2012
    • September 2012
    • August 2012
    • July 2012
    • June 2012
    • May 2012
    • April 2012
    • March 2012
    • February 2012
    • January 2012
    • December 2011
    • November 2011
    • October 2011
    • September 2011
    • August 2011
    • July 2011
    • June 2011
    • May 2011
    • April 2011
    • March 2011
    • February 2011
    • January 2011
    • November 2010
    • August 2010
    • June 2010
    • May 2010
    • April 2010
    • March 2010
    • February 2010
  • Enter your email address to follow this blog and receive notifications of new posts by email.

    Join 2,158 other subscribers
  • @CavenderDiary

    Tweets by CavenderDiary
  • The Cavender Diary

    The Cavender Diary
  • The Cavender Diary

    • RSS - Posts
    • RSS - Comments
  • Blogs Worth Watchin'

    • An Urban Cottage
    • Apartment Therapy
    • Beard and Pigtails
    • Brooklyn Limestone
    • Burlap & Denim
    • Camp Wandawega
    • Color Outside the Lines
    • Decorpad
    • Decorum DIYer
    • Den & Delve
    • Design Hazards
    • Domestic Daddy
    • Domestic Imperfection
    • Eclectically Vintage
    • Emily Henderson
    • Fourth Floor Walkup
    • Funky Junk Interiors
    • Handmade America
    • Heather Bullard
    • Houzz
    • I Heart Organizing
    • Japanese Trash
    • kara pasley designs
    • Manhattan-Nest
    • Merrypad
    • Nine Red
    • Our Humble Abode
    • Our Vintage Home Love
    • Pure Style Home
    • Red Bird Vintage Home
    • Roger & Chris
    • Sweetsuite
    • Tara Bradford Photography
    • The Brick House
    • The Inspired Room
    • The Lettered Cottage
    • The Recipe Grinder
    • Today's Nest
    • Vintage Revivals
    • West Eastern
    • Yellow Brick Home
    • Young House Love
  • Steal Our Style

    • American Photo Archive
    • Art's Not Dead
    • Barn Light Electric
    • Bauer Pottery
    • CB2
    • Decades Home
    • Design Within Reach
    • El Paso Saddle Blankets
    • Fiestaware
    • Jonathan Adler
    • Just Modern Decor
    • Lucky Stars Ranch
    • Pendleton
    • Pottery Barn
    • Ralph Lauren Home
    • Ranger Doug
    • Restoration Hardware
    • School House Electric & Supply Co.
    • Sonic Editions
    • The Curiosity Shoppe
    • The Land of Nod
    • Urban Outfitters
    • West Elm
    • Wisteria
Blog at WordPress.com.
THE CAVENDER DIARY
Blog at WordPress.com.
  • Subscribe Subscribed
    • THE CAVENDER DIARY
    • Join 1,063 other subscribers
    • Already have a WordPress.com account? Log in now.
    • THE CAVENDER DIARY
    • Subscribe Subscribed
    • Sign up
    • Log in
    • Report this content
    • View site in Reader
    • Manage subscriptions
    • Collapse this bar
 

Loading Comments...
 

    %d