Beautiful color.
Indigo


I know that Pantone recently choose emerald-green as the “color of choice” for 2013.
but,
………..perhaps they will reconsider.

Beautiful color.
Indigo
I know that Pantone recently choose emerald-green as the “color of choice” for 2013.
but,
………..perhaps they will reconsider.

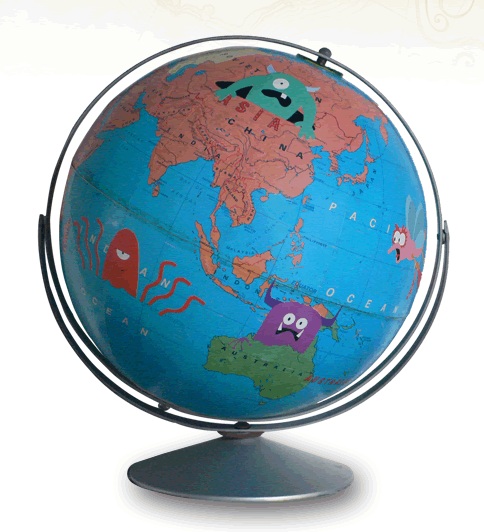
Y’all know what a vintage globe fanatic I am.
They are all over the house.
Well, recently I stumbled on this site ImagineNations.
Wendy Gold is the artist and creator behind this clever idea.
This young woman decopages over vintage globes to create unique pieces of art.
Like these monsters…..
Or all of these….

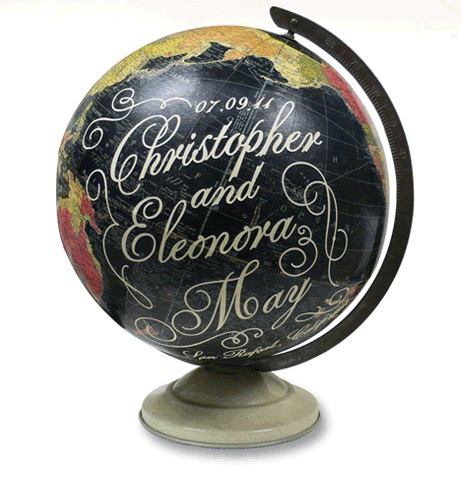
And because each one is custom-made from one of a kind globes…no 2 are ever completely alike.
She will even do personalized globes for special events..
I know what every one of y’all are thinking…..
and, yes…..we may be inspired to make something like these in the near future.
Last summer we painted a globe with chalkboard paint…..who know’s what we could do with a globe next,
Stay tuned…..
3 years ago today, Jamie and I got the keys to our new home.
What a fast 3 years. Seems like just yesterday that we were each packing our separate lives preparing to move to this simple house…..on Cavender street.
Only a couple of weeks before, Jamie started this blog to keep our Moms updated on the house purchase.
Neither of us ever dreamed that we’d have over 125,000 views on this site. (It was pretty boring in the beginning – please don’t look)
Jamie says that we shouldn’t think of the first 2 years of blogging, and this past year should count as our first official blog year.
I say that we had to work our B-hinds off just to be where we are today, and every bit of work counts. Every bit.
Wanna see some of that work we did? Of course you do! Let’s see. Projects. We must have completed some pretty amazing projects this past year.
Our kitchen remodel was a huge success. After declaring 2012 to be ” The year of the Bathroom Remodel“……..we tore up our kitchen. Go figure.
With pretty stunning results.
From this.
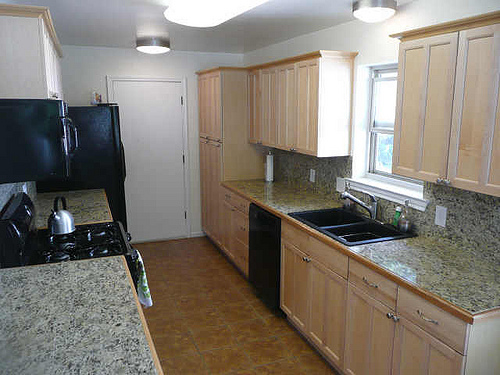
To this, Cavender Kitchen Update, in just 5 weeks…..doing almost all the labor ourselves, AND on weekends.
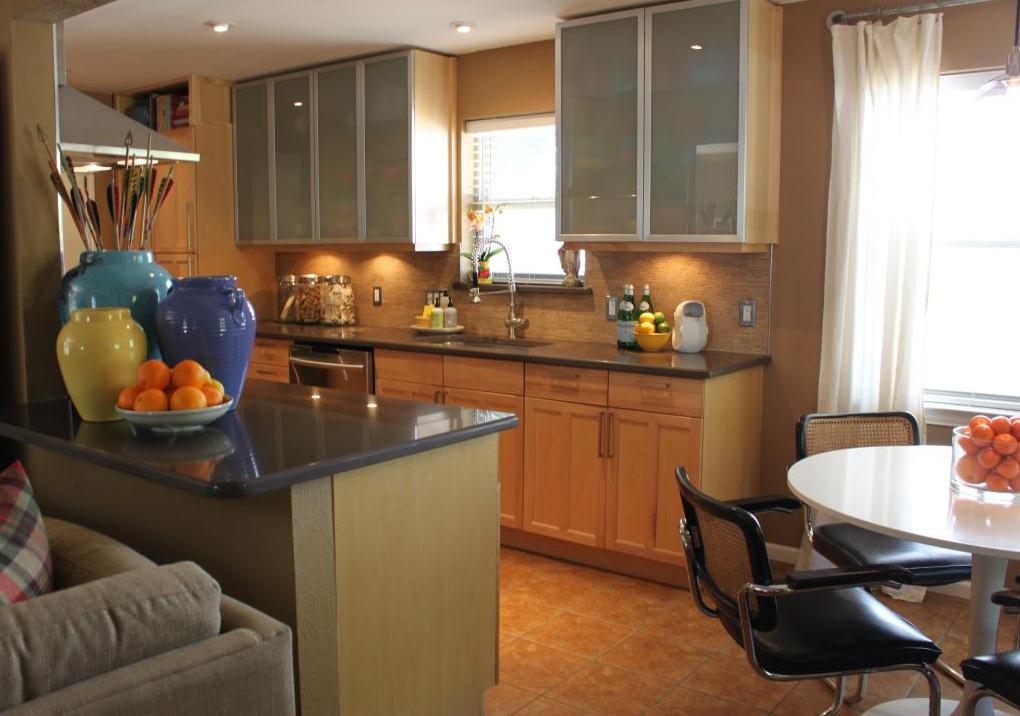
The brilliant editors at Apartment Therapy thought that it was pretty spectacular too, and shared it with all their readers.

Here are a couple of the projects we featured in our kitchen remodel.
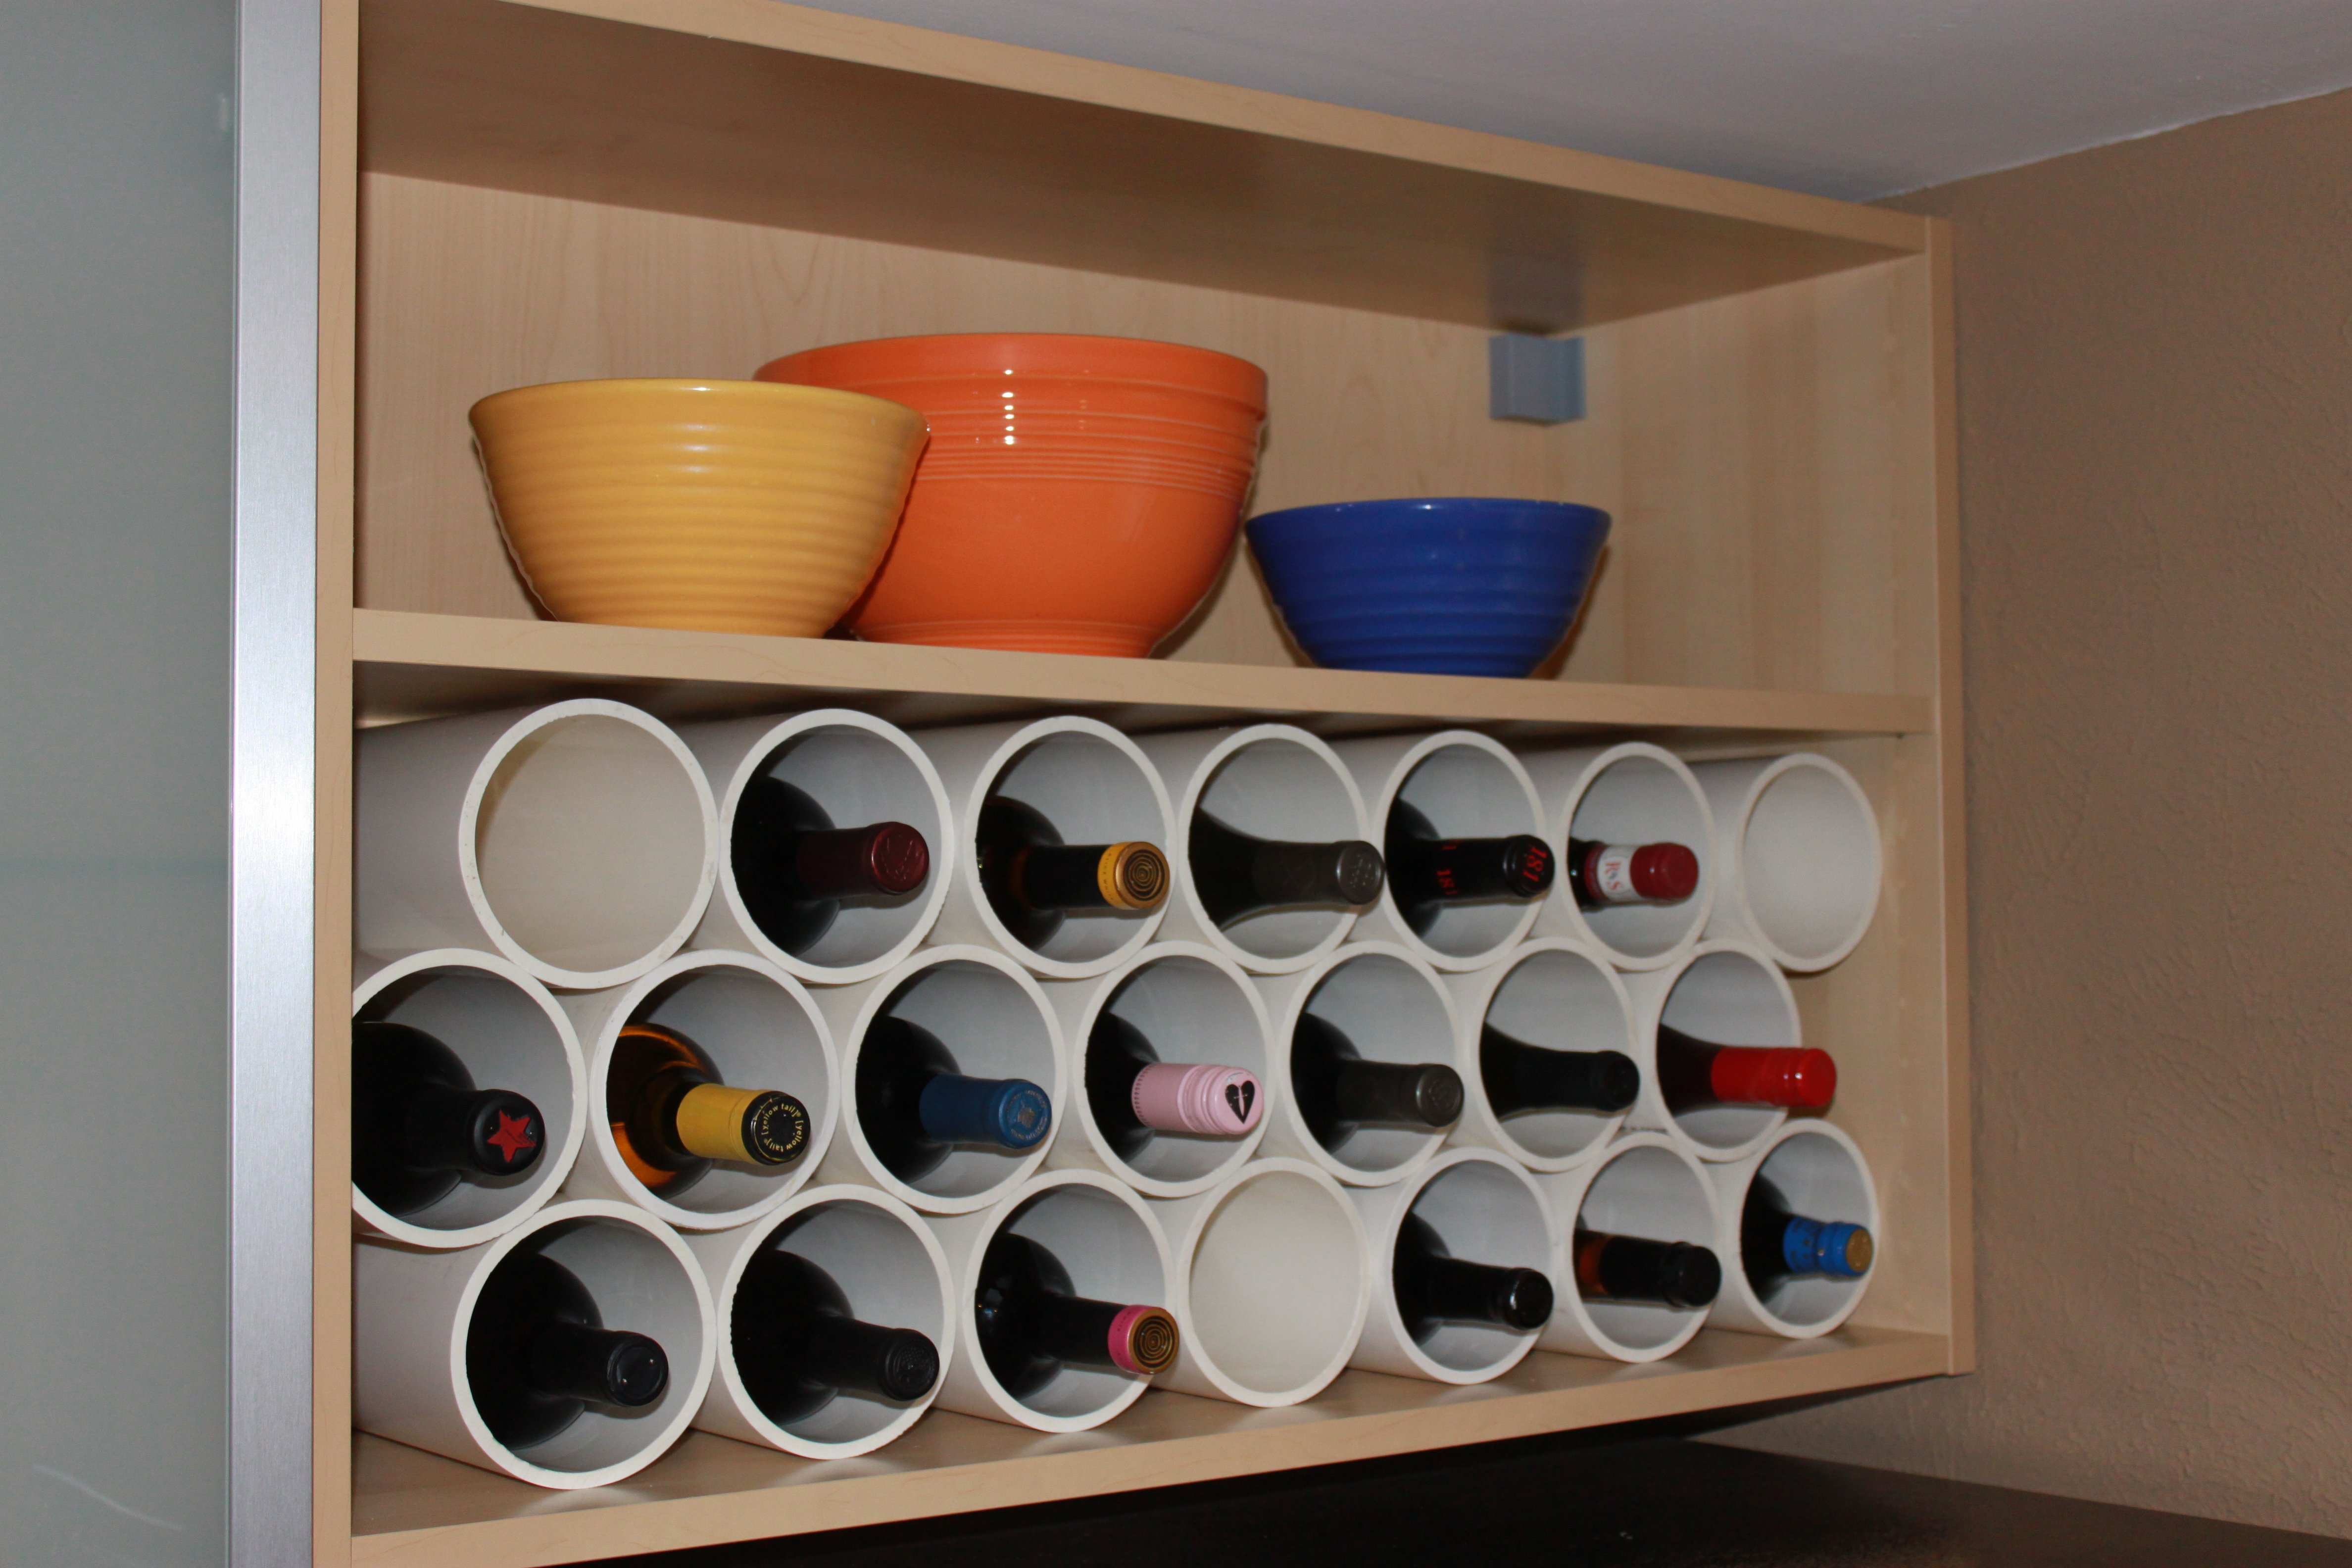
PVC pipe wine storage.
and an overly organized spice drawer.

Our kitchen wasn’t the only thing we tackled this year.
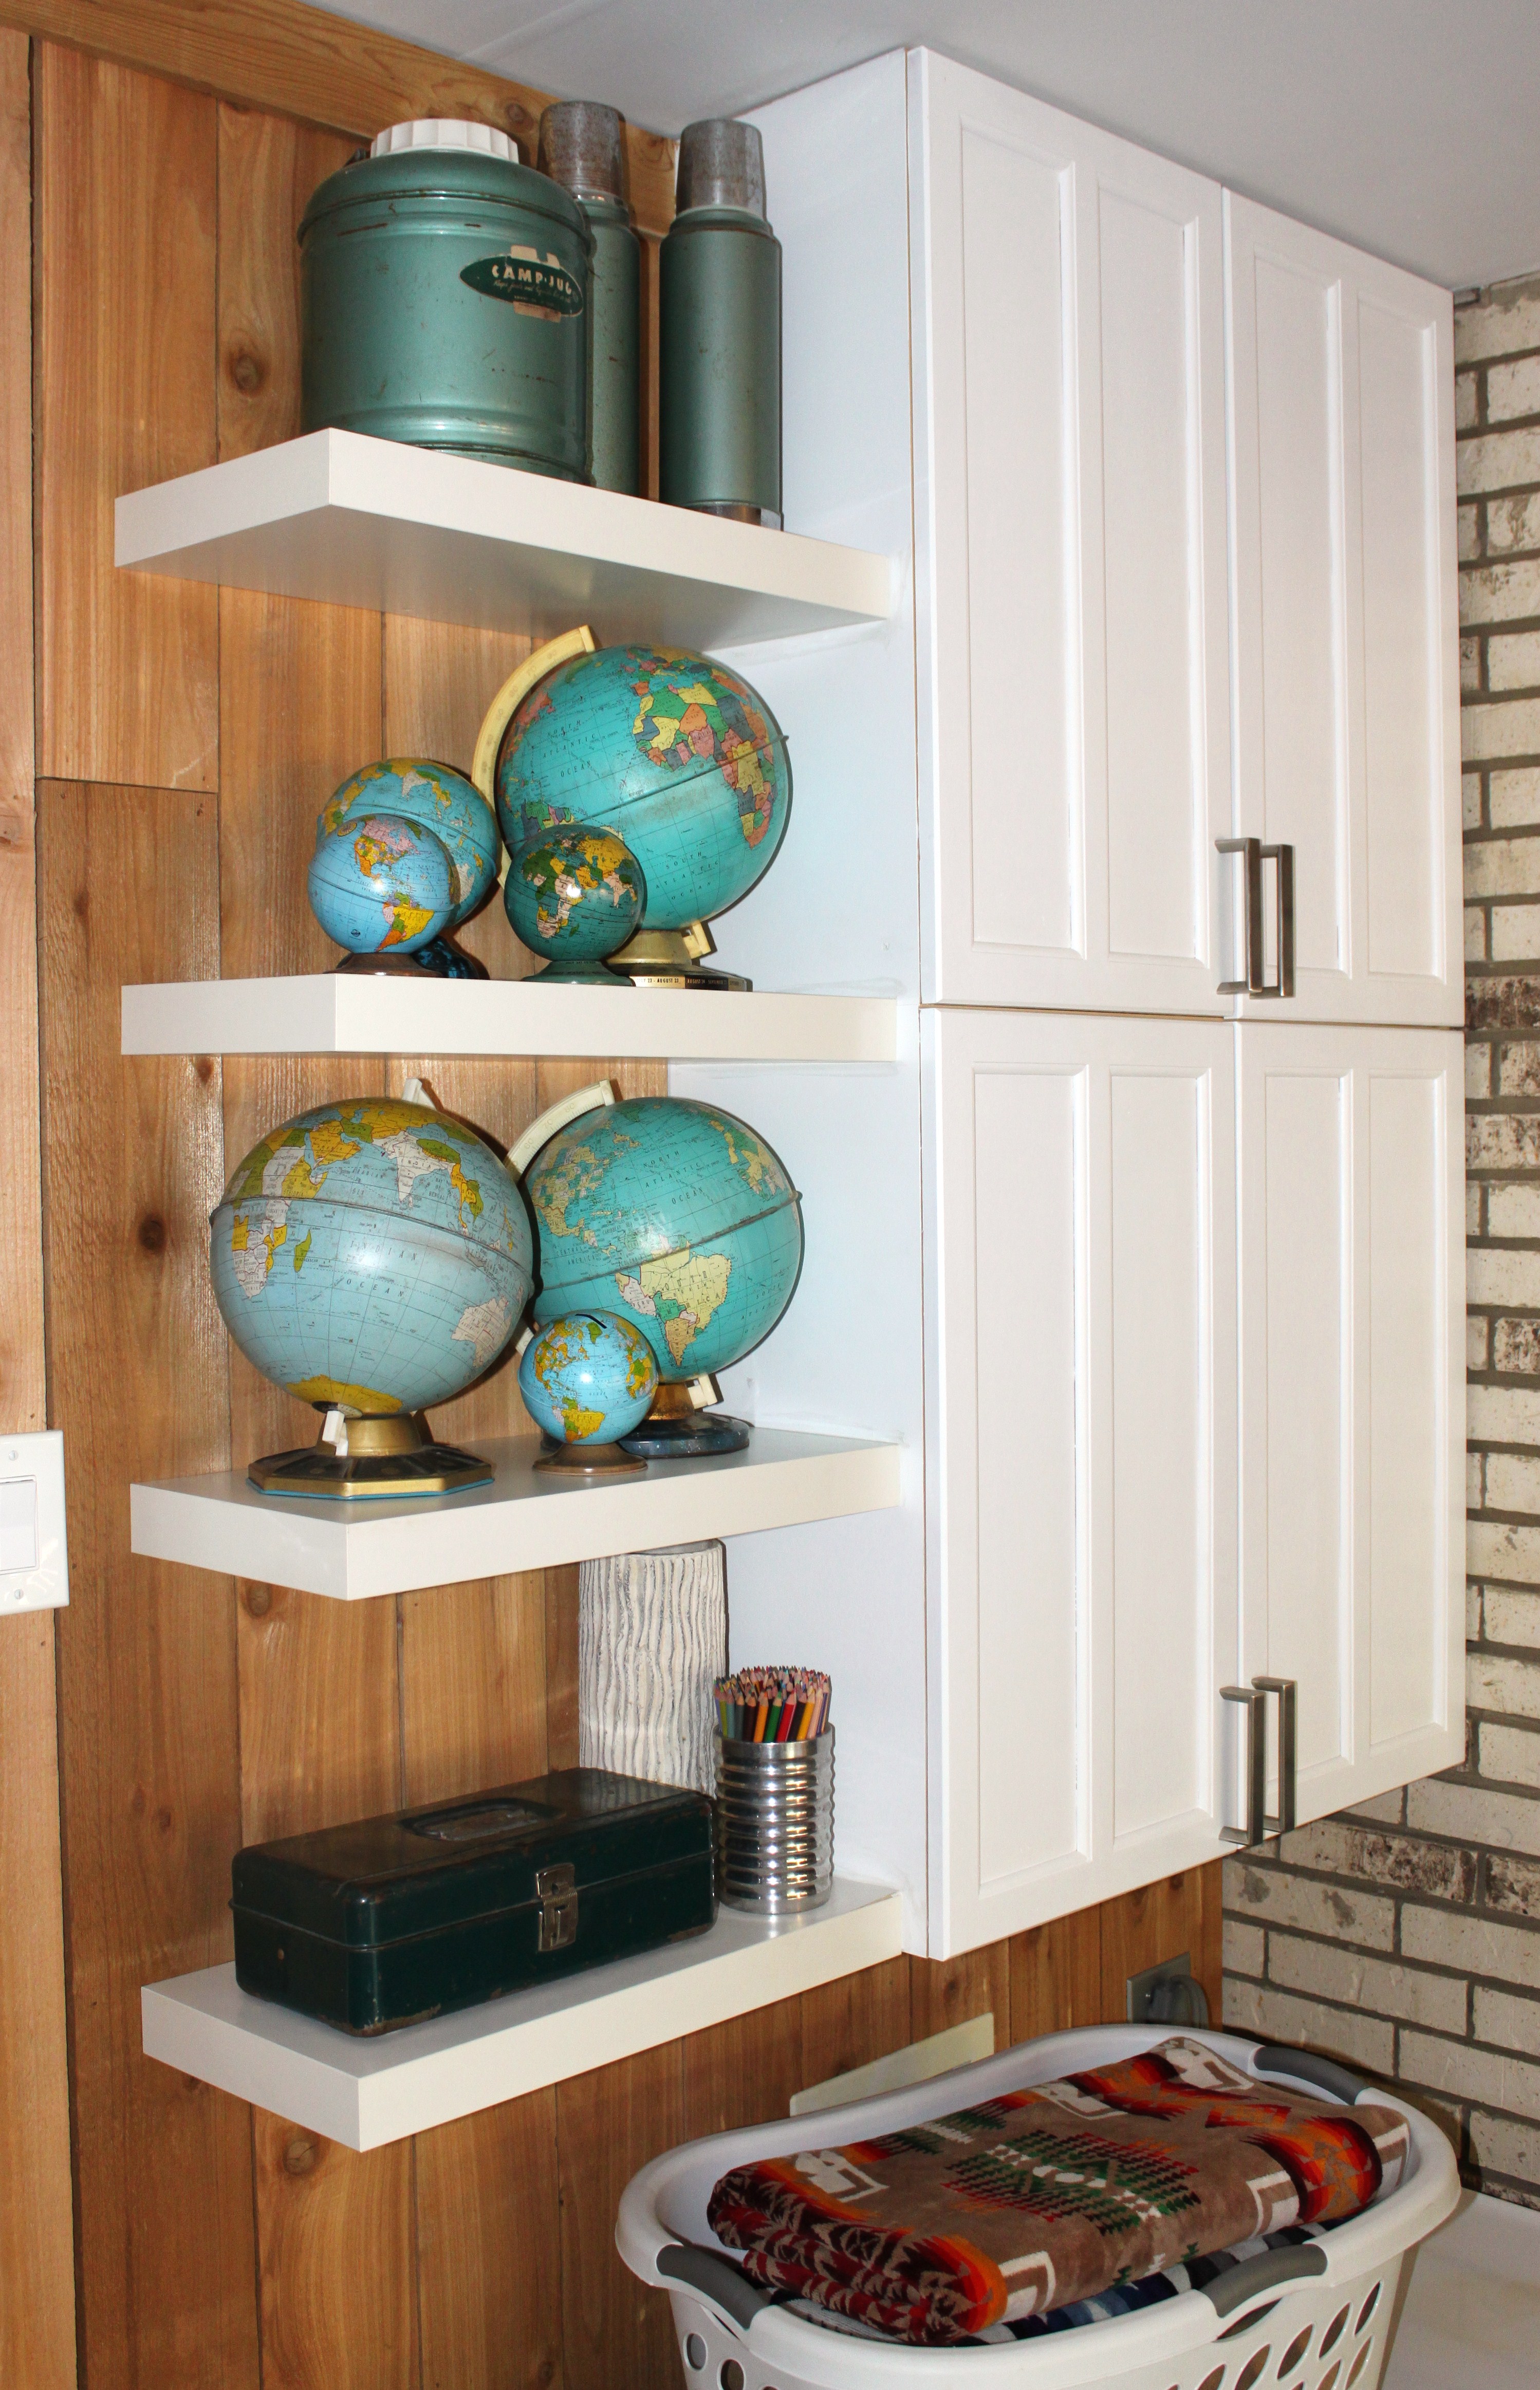
After removing the upper cabinets in the kitchen, they sat in the garage until we couldn’t take it anymore. But we couldn’t just hang them on the walls, first we had to float/paint the ceiling and clad the walls in cedar.
It’s easier to just show y’all…Garage Update

Yes, we still have a few more things to do in there…like hang factory pendants….but WOW! What a huge improvement.
We spend a lot of time out there, so good thing it is now one of our favorite rooms. Is it a room? We think so now.
Here are a few highlights from the garage as well,
Hacked Ikea shelving over the washer and dryer.
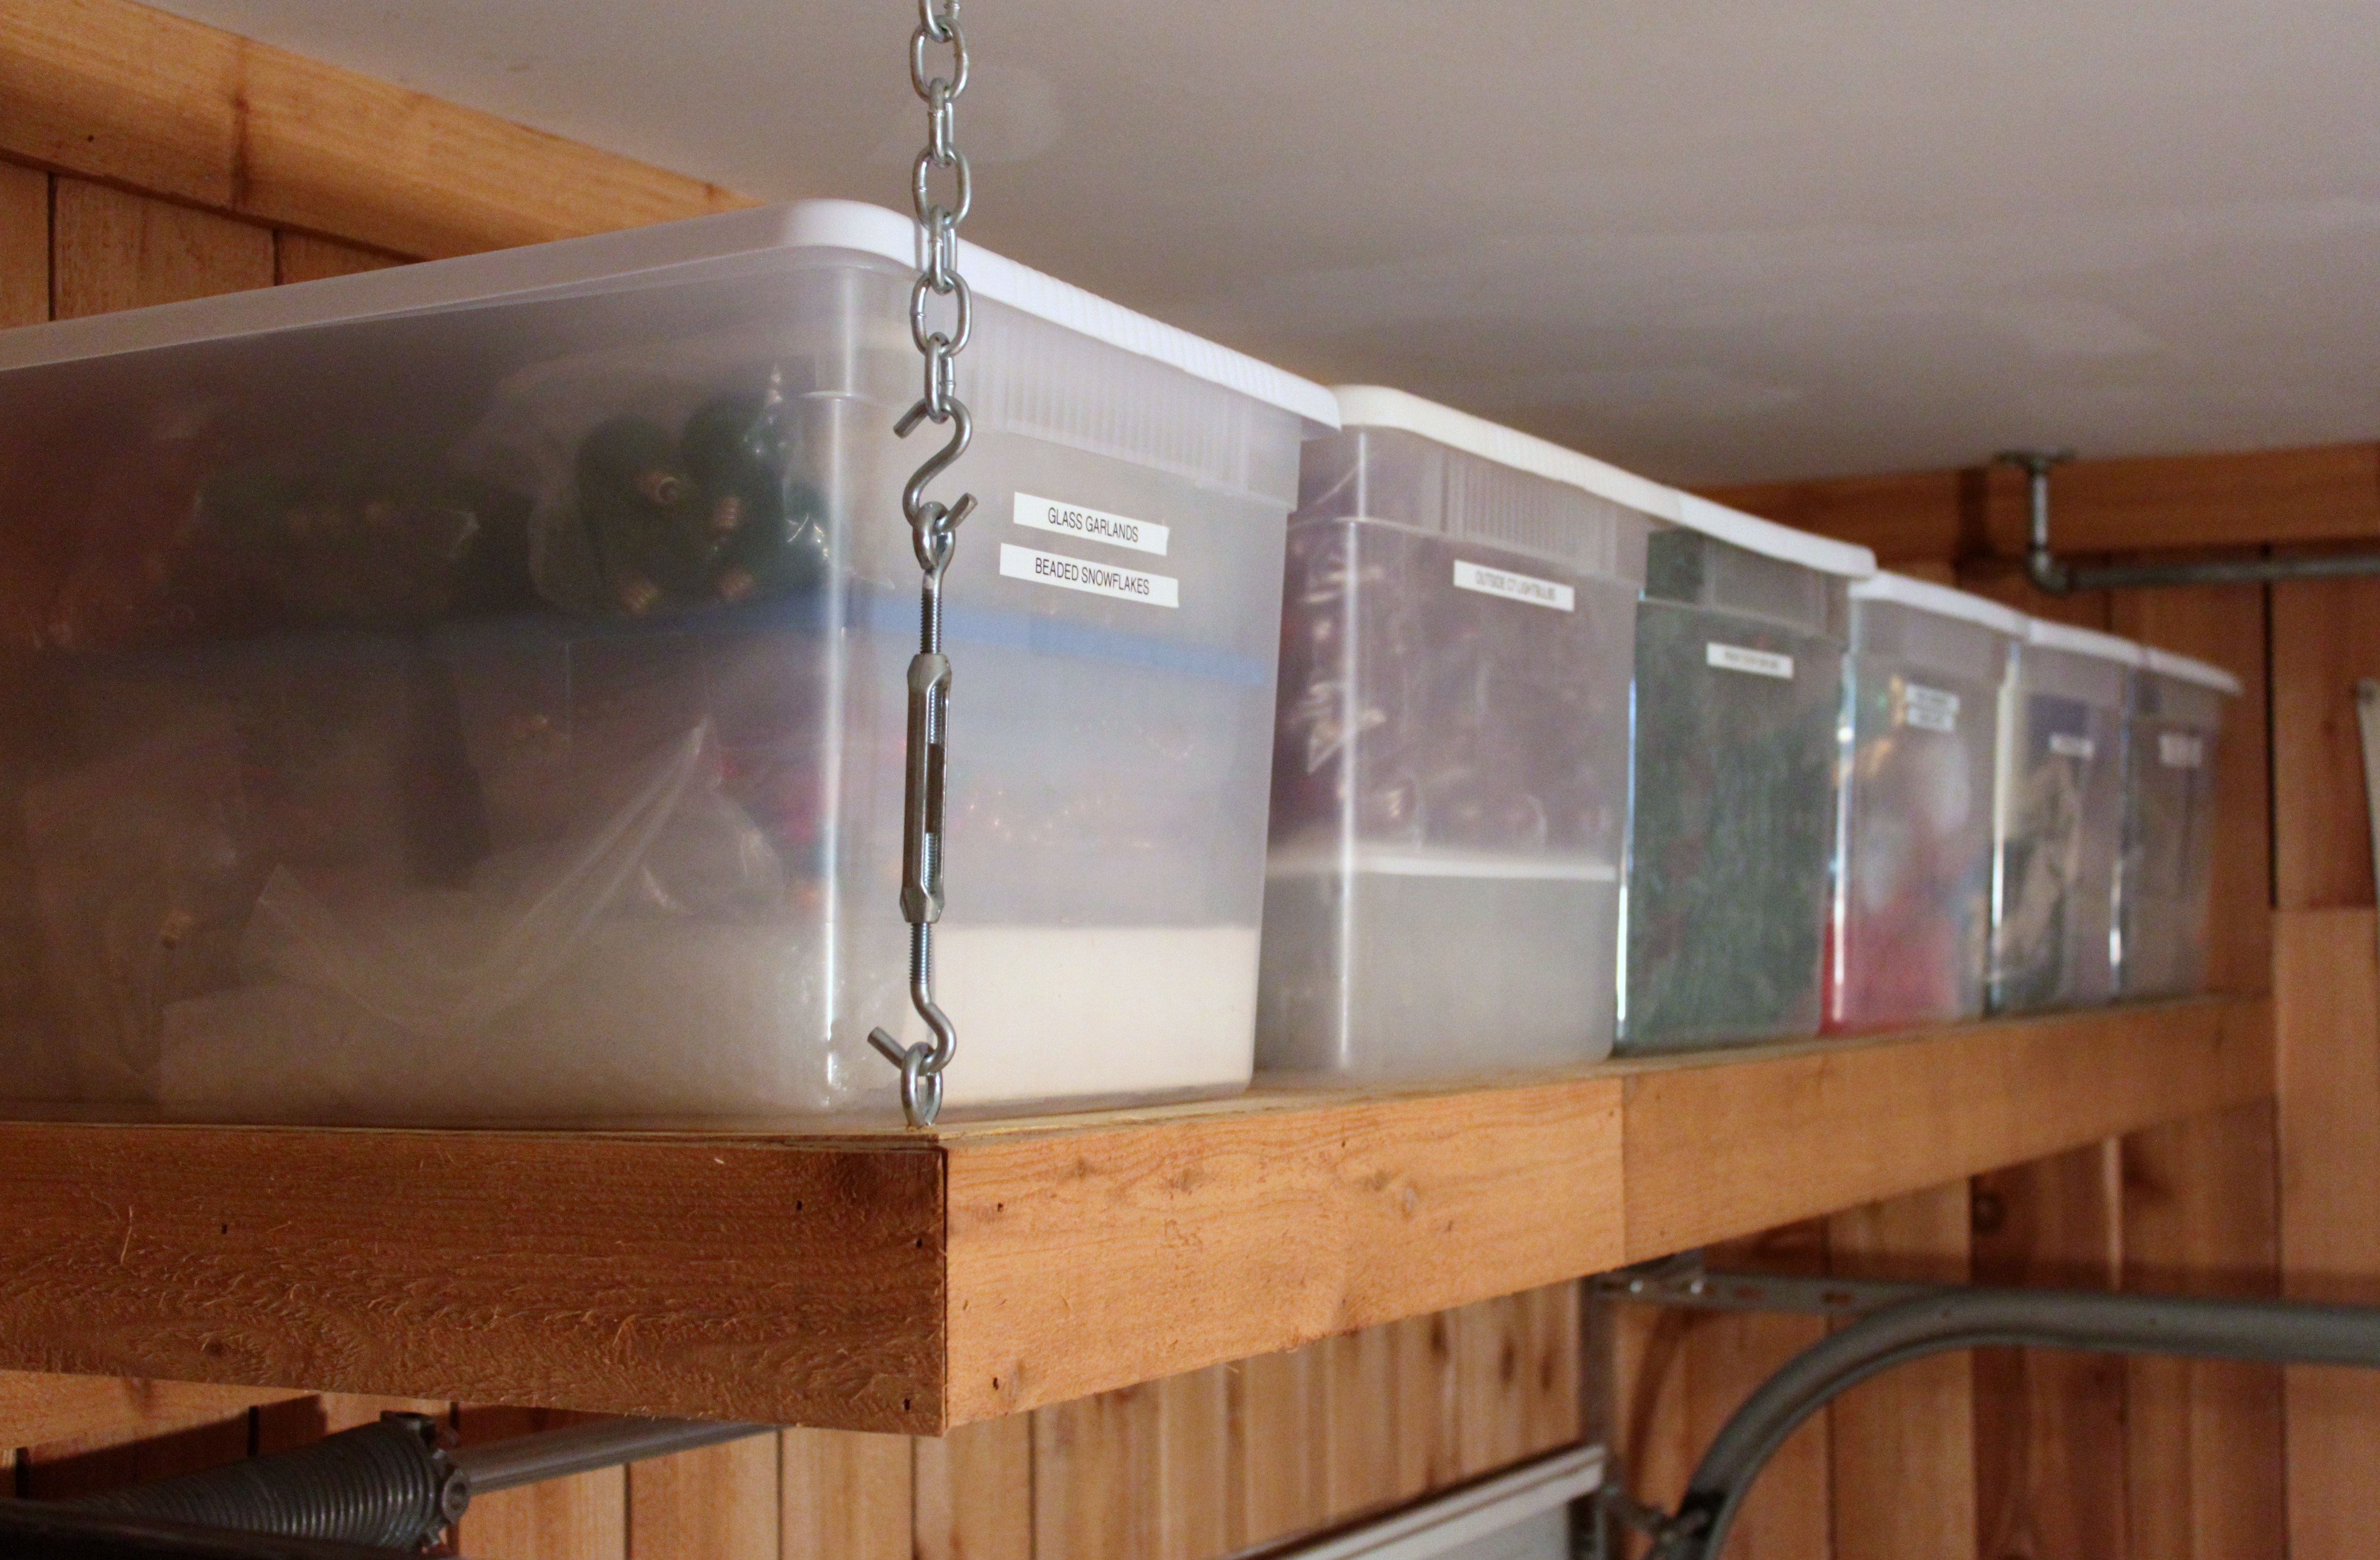
Hanging storage shelves over the garage door.
And a few tweaks to the old kitchen cabinets, like these shelves.

Our tool cart turned bar cart was pretty popular as well, making an appearance on a couple of sites – The Jochim’s and Japanese Trash

Our homemade Jackson Pollock pillows had pretty rave reviews too.
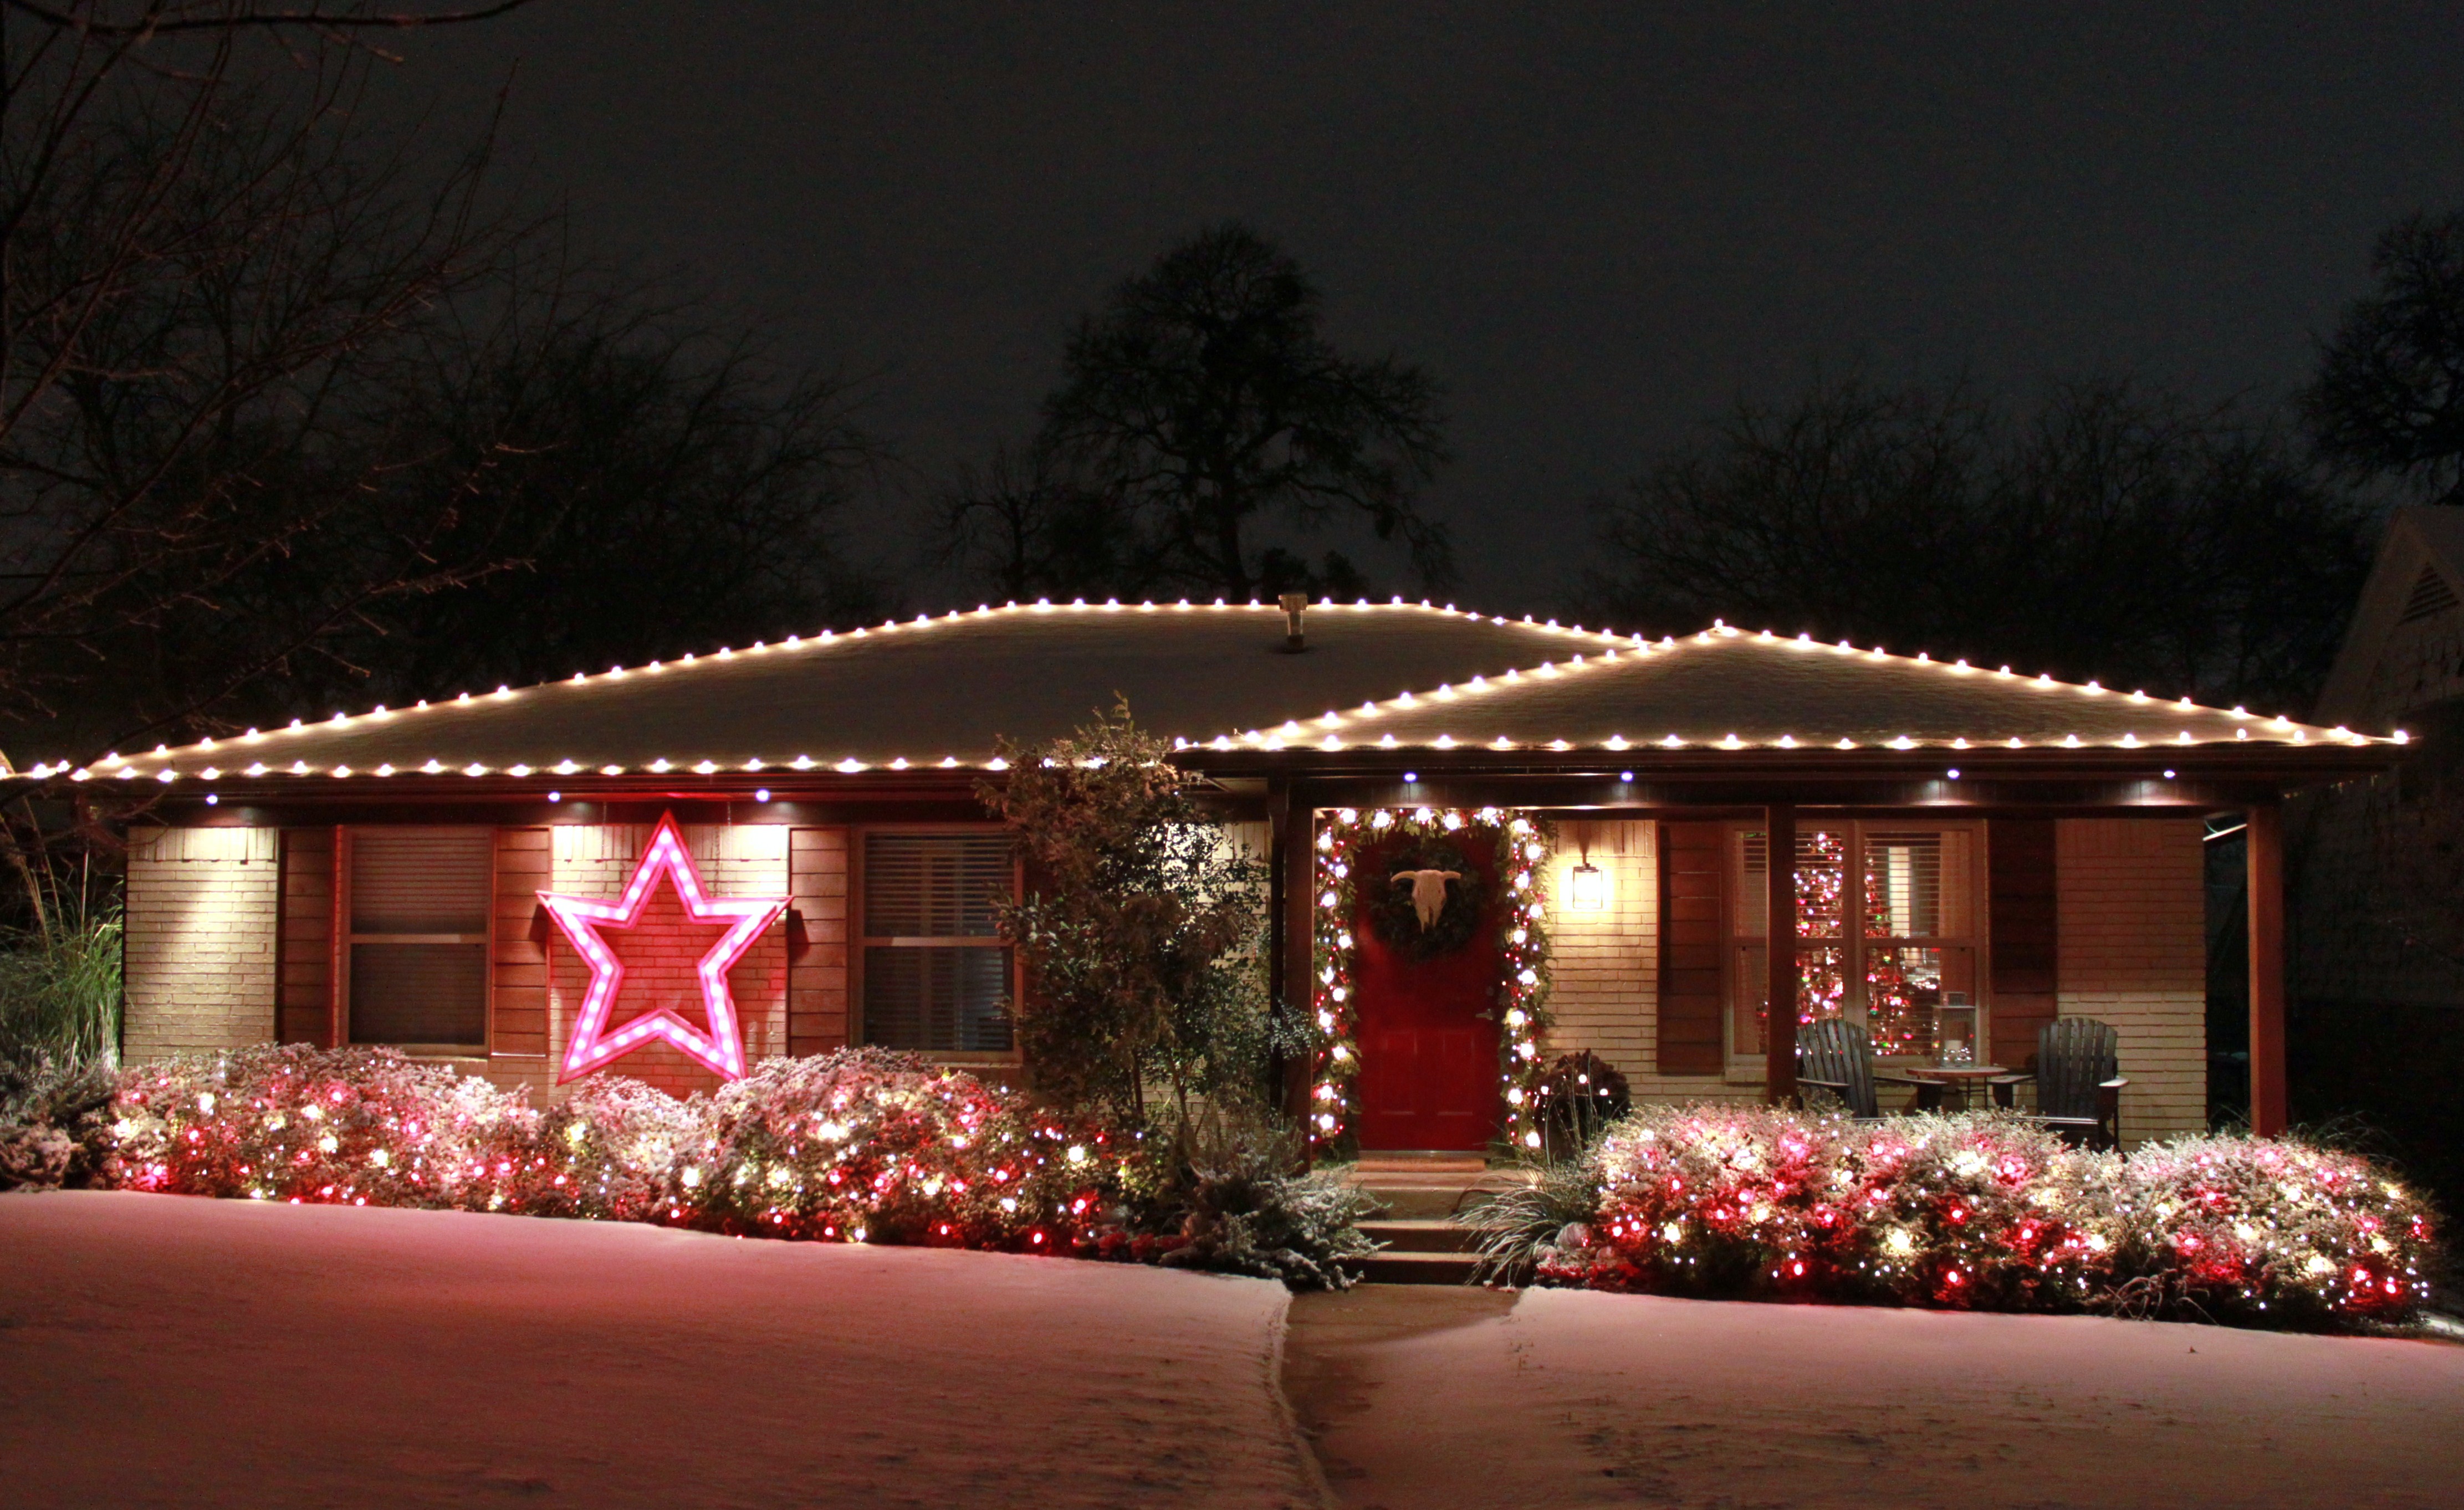
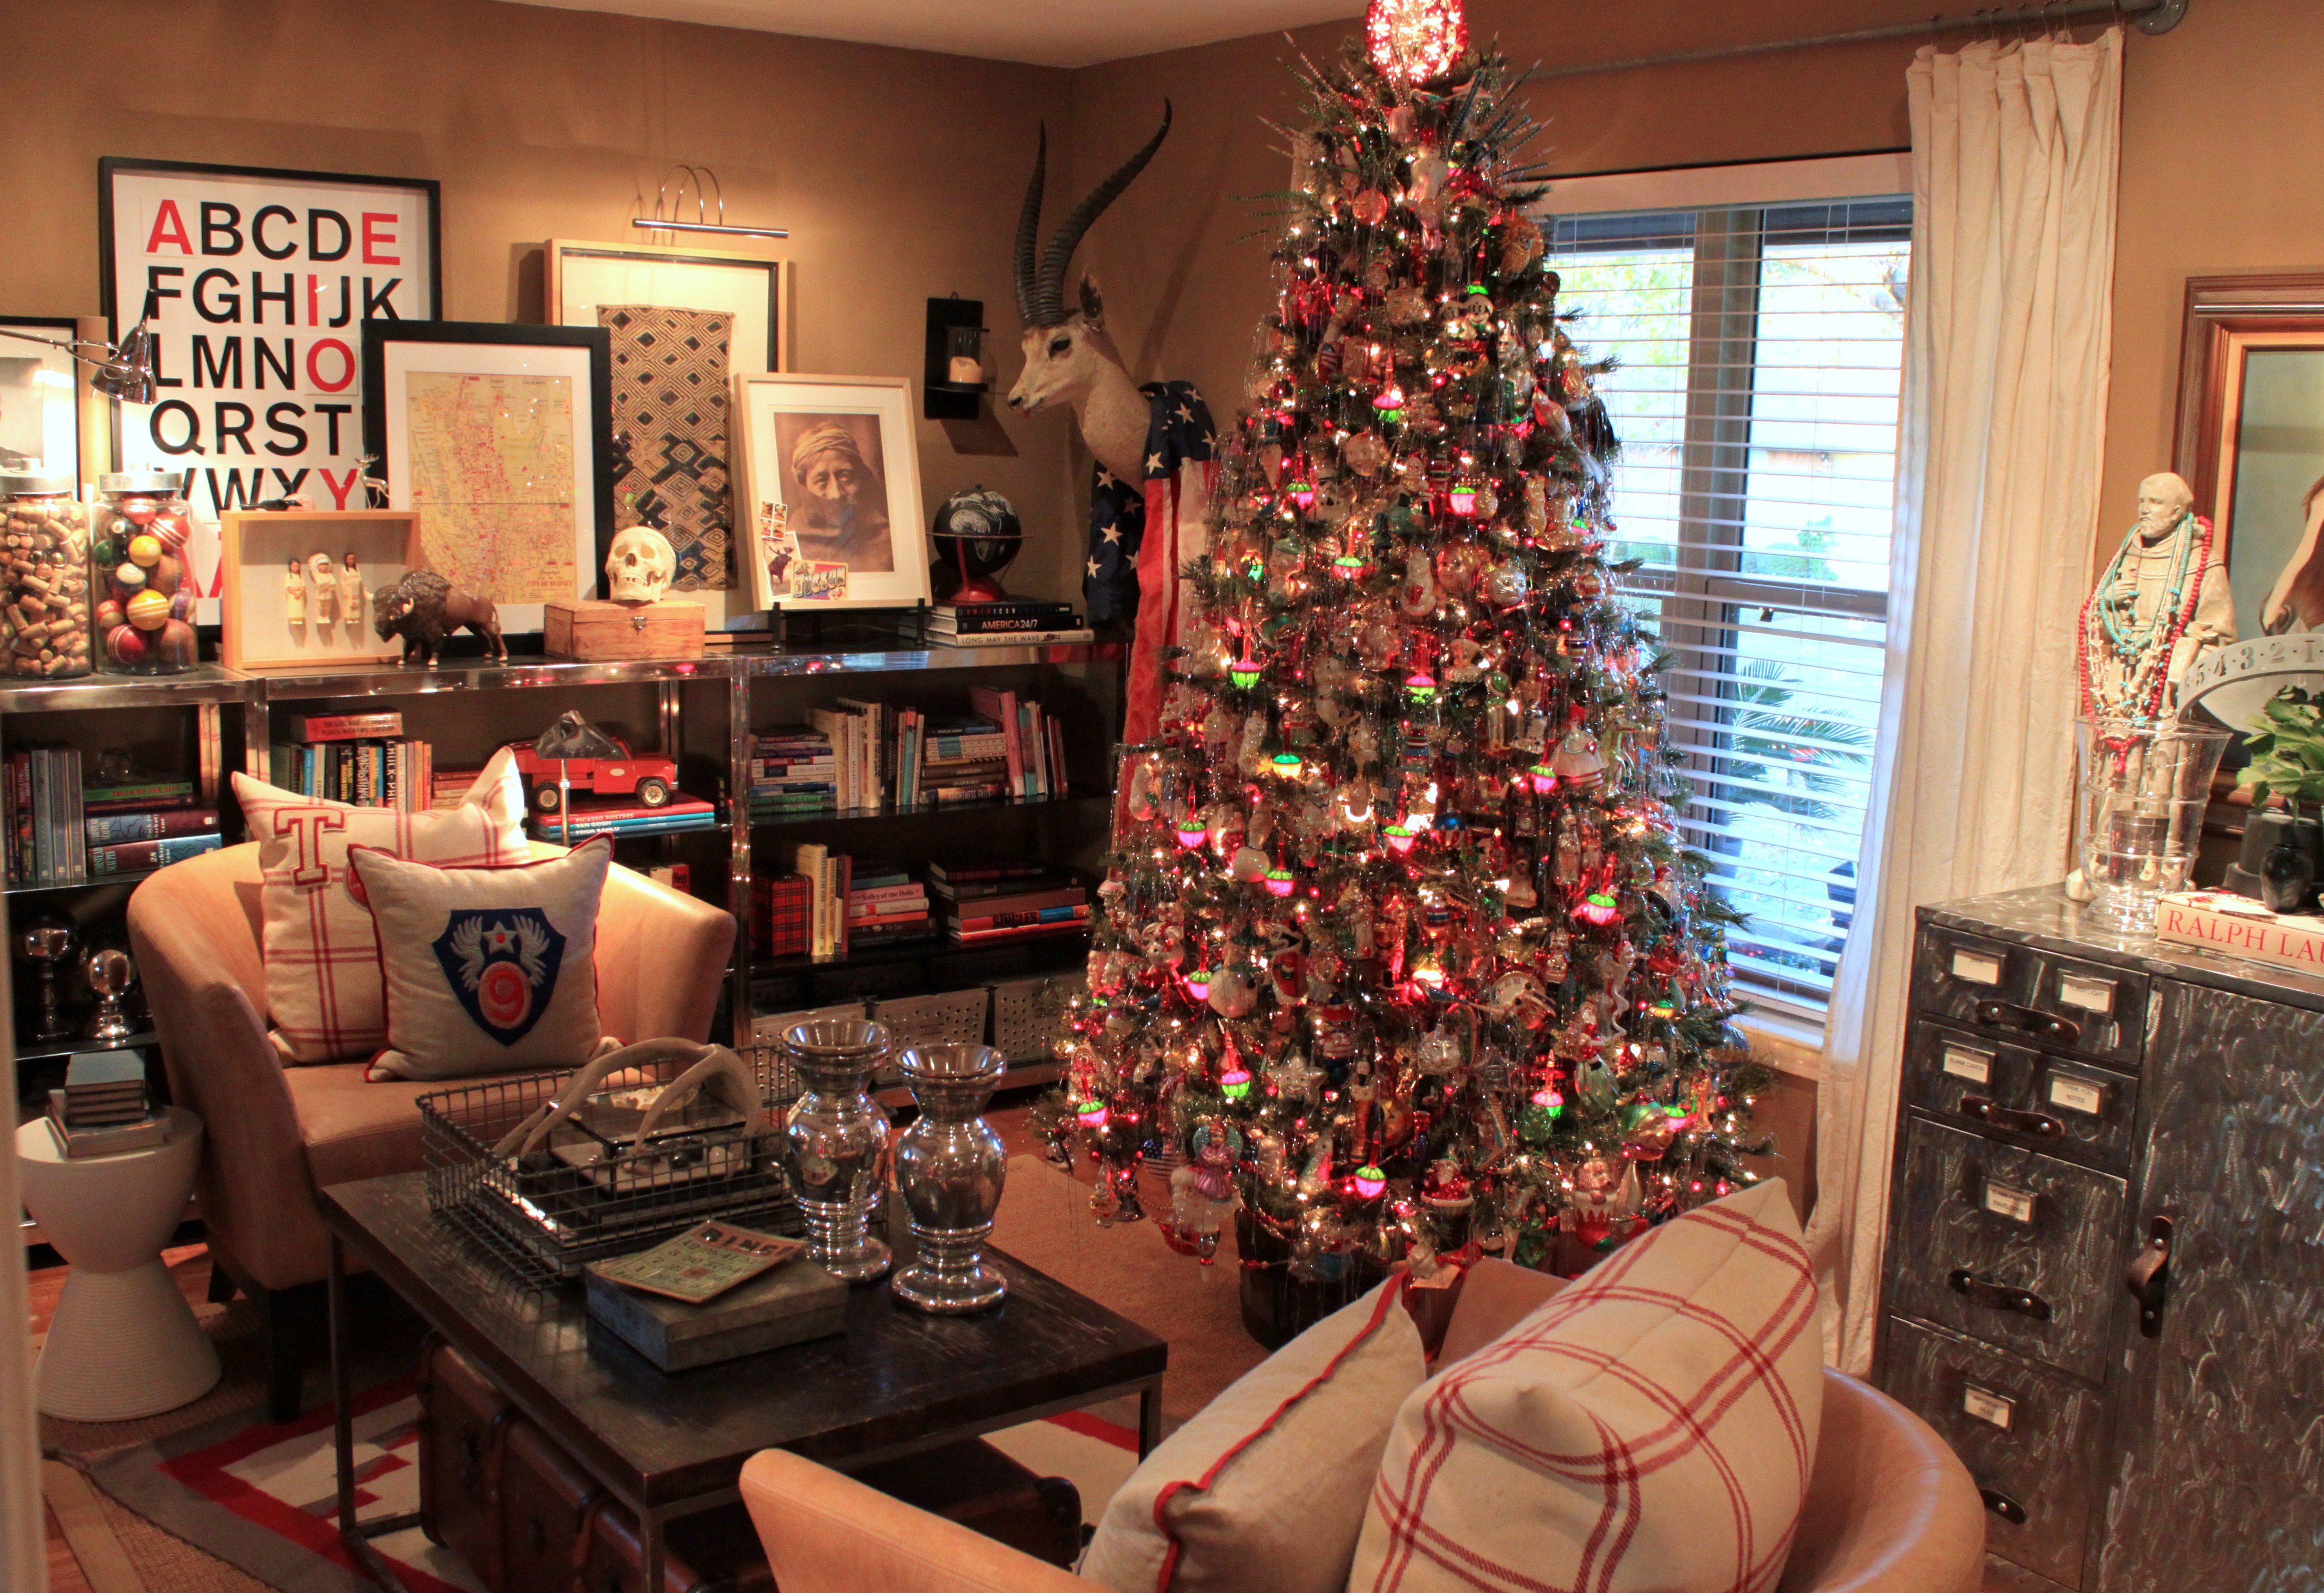
Christmas is our favorite time of year. SO we go a little overboard at the house. (Almost the Grizwolds, but not quite)


There were Christmas projects too. Like these pine needle sachets we made with tartan fabric scraps and all the pine needles we swept off the front porch. (Seriously, swept off the porch)

And the giant pallet wood star we fashioned together with scrap wood.

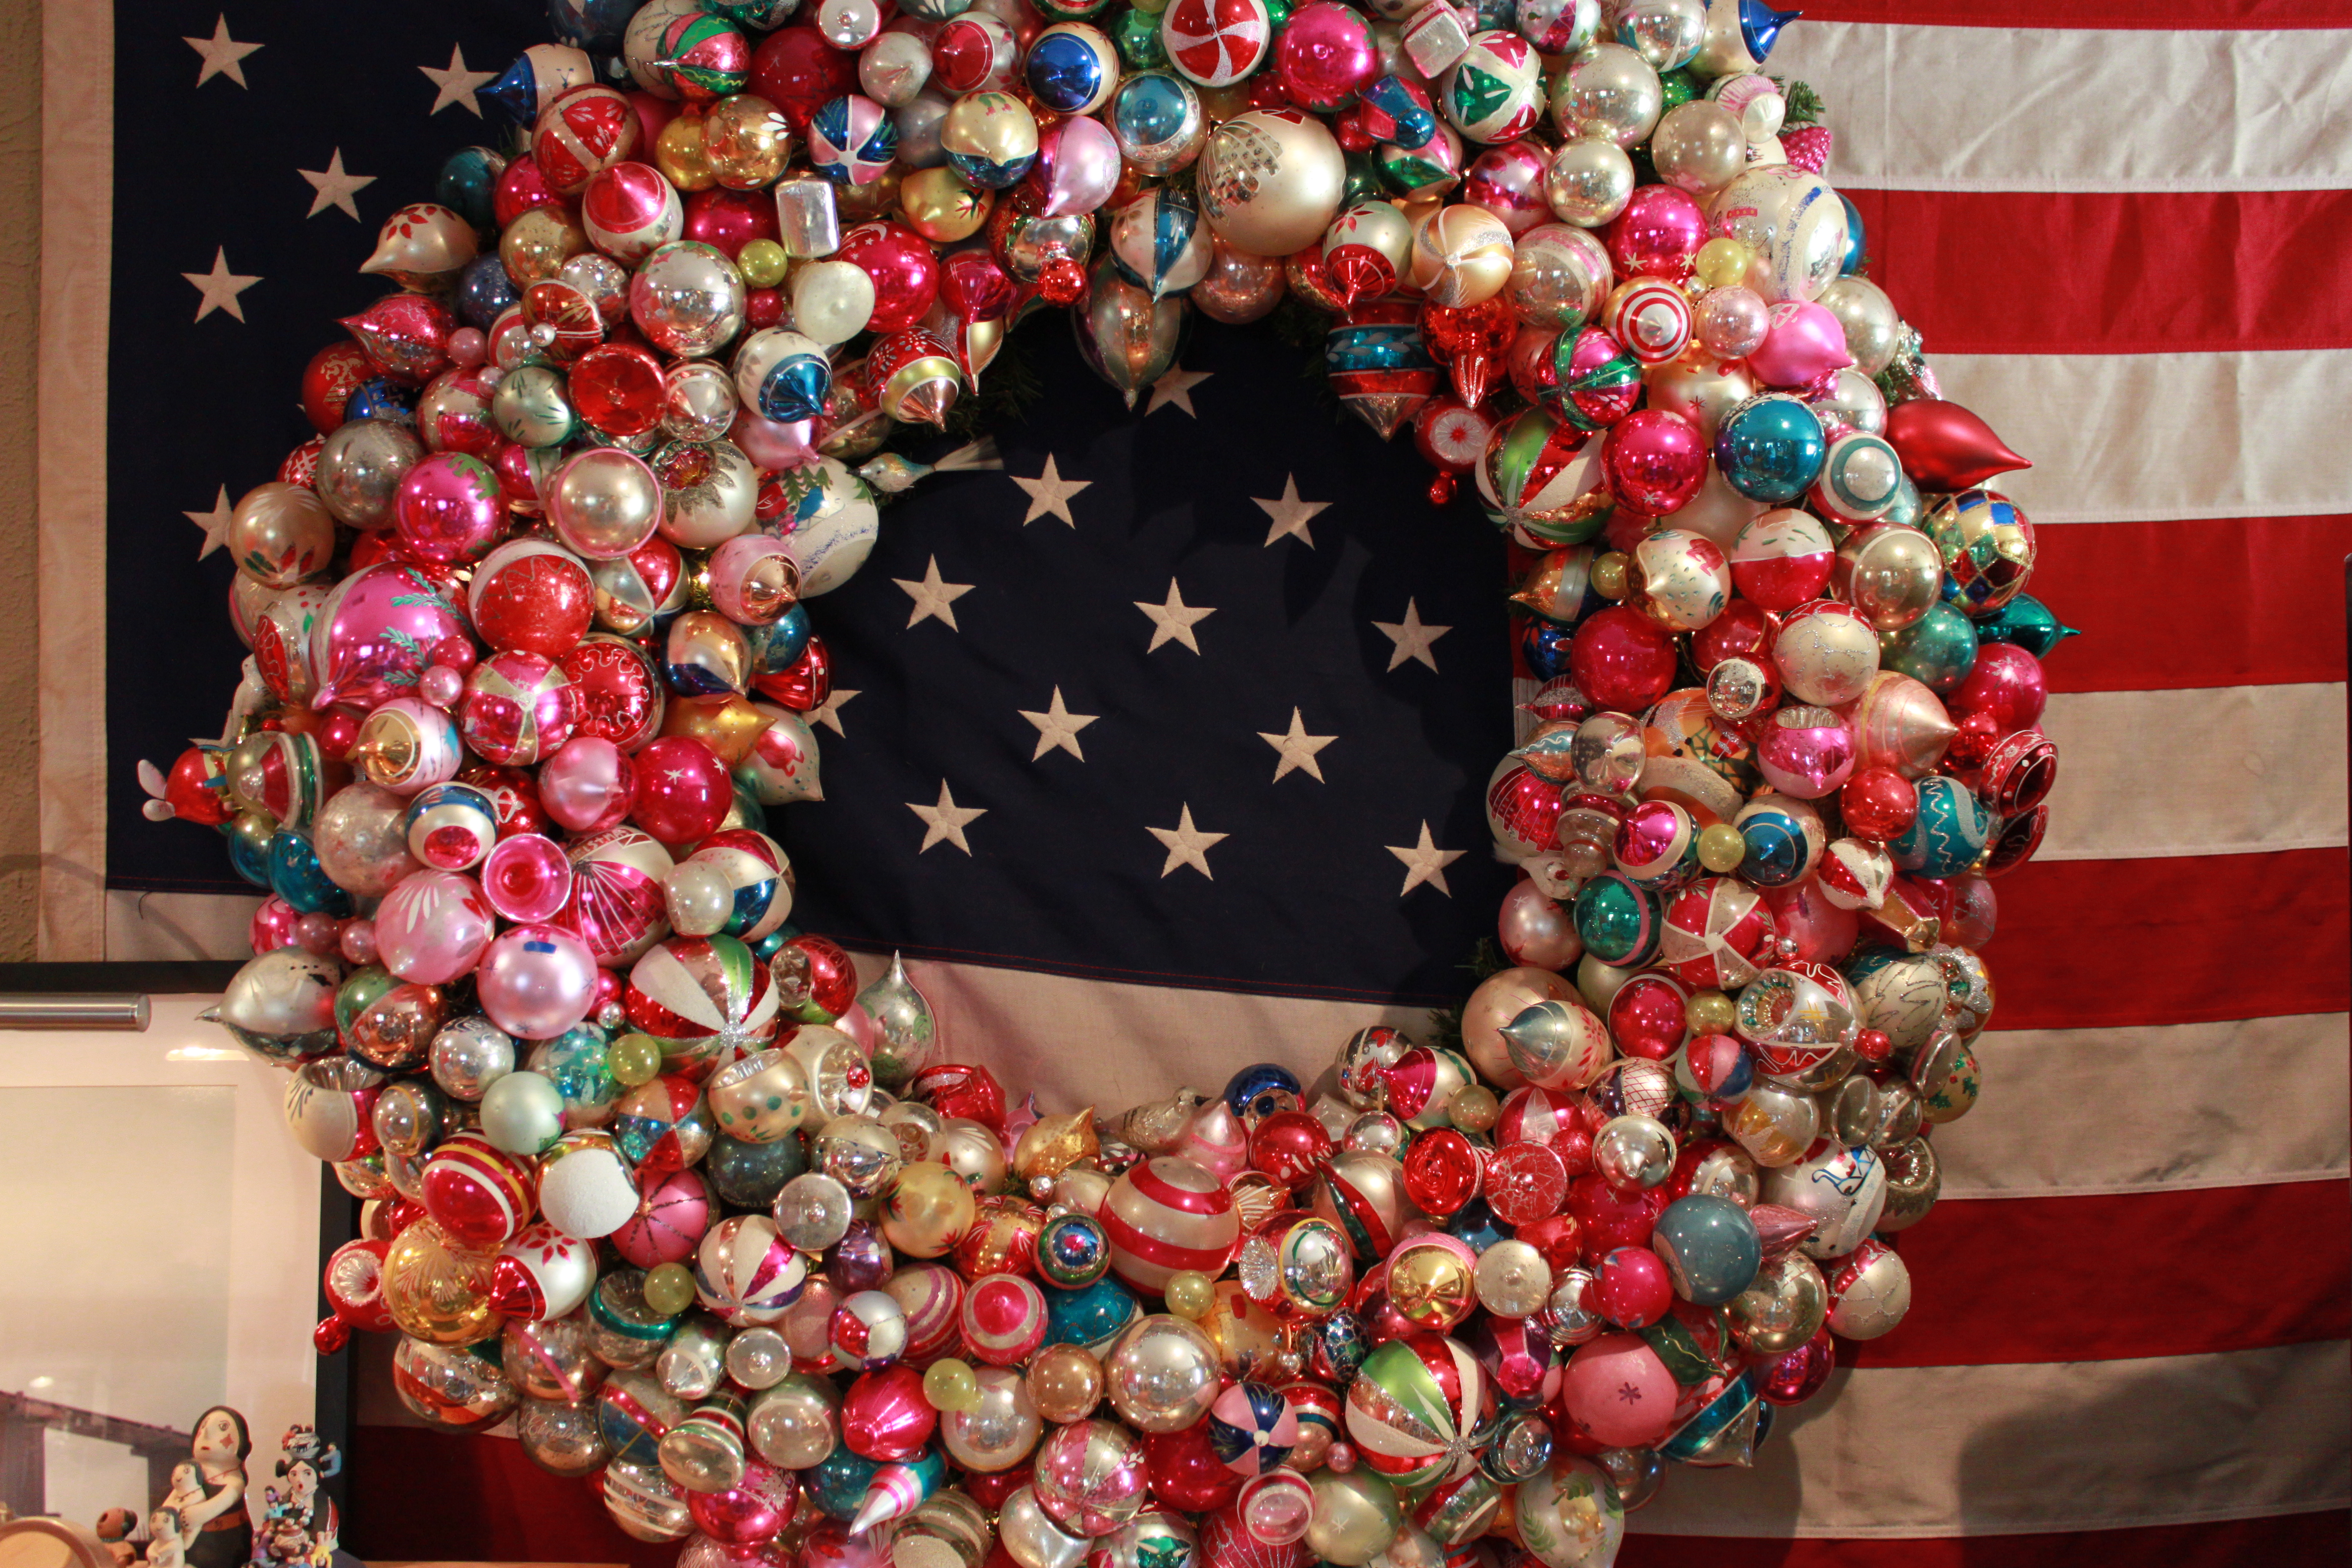
But the most popular thing we do every Christmas is the 4 foot vintage ornament wreath we assemble.
We were very lucky to have some major web exposure on some truly spectacular websites. Color Outside the Lines, kara pasley designs, and Burlap and Denim all featured our home and junky cluttered unique style.
Our biggest exposure though, was on HOUZZ.
Talk about web exposure…. here are a few blog figures that scare the hell out of us (and secretly thrill us too)…..
December 26 was our biggest volume day ever with over 3,400 site views. What a Christmas present.
On 3 days in August, we had more site traffic than our first 2 years combined.
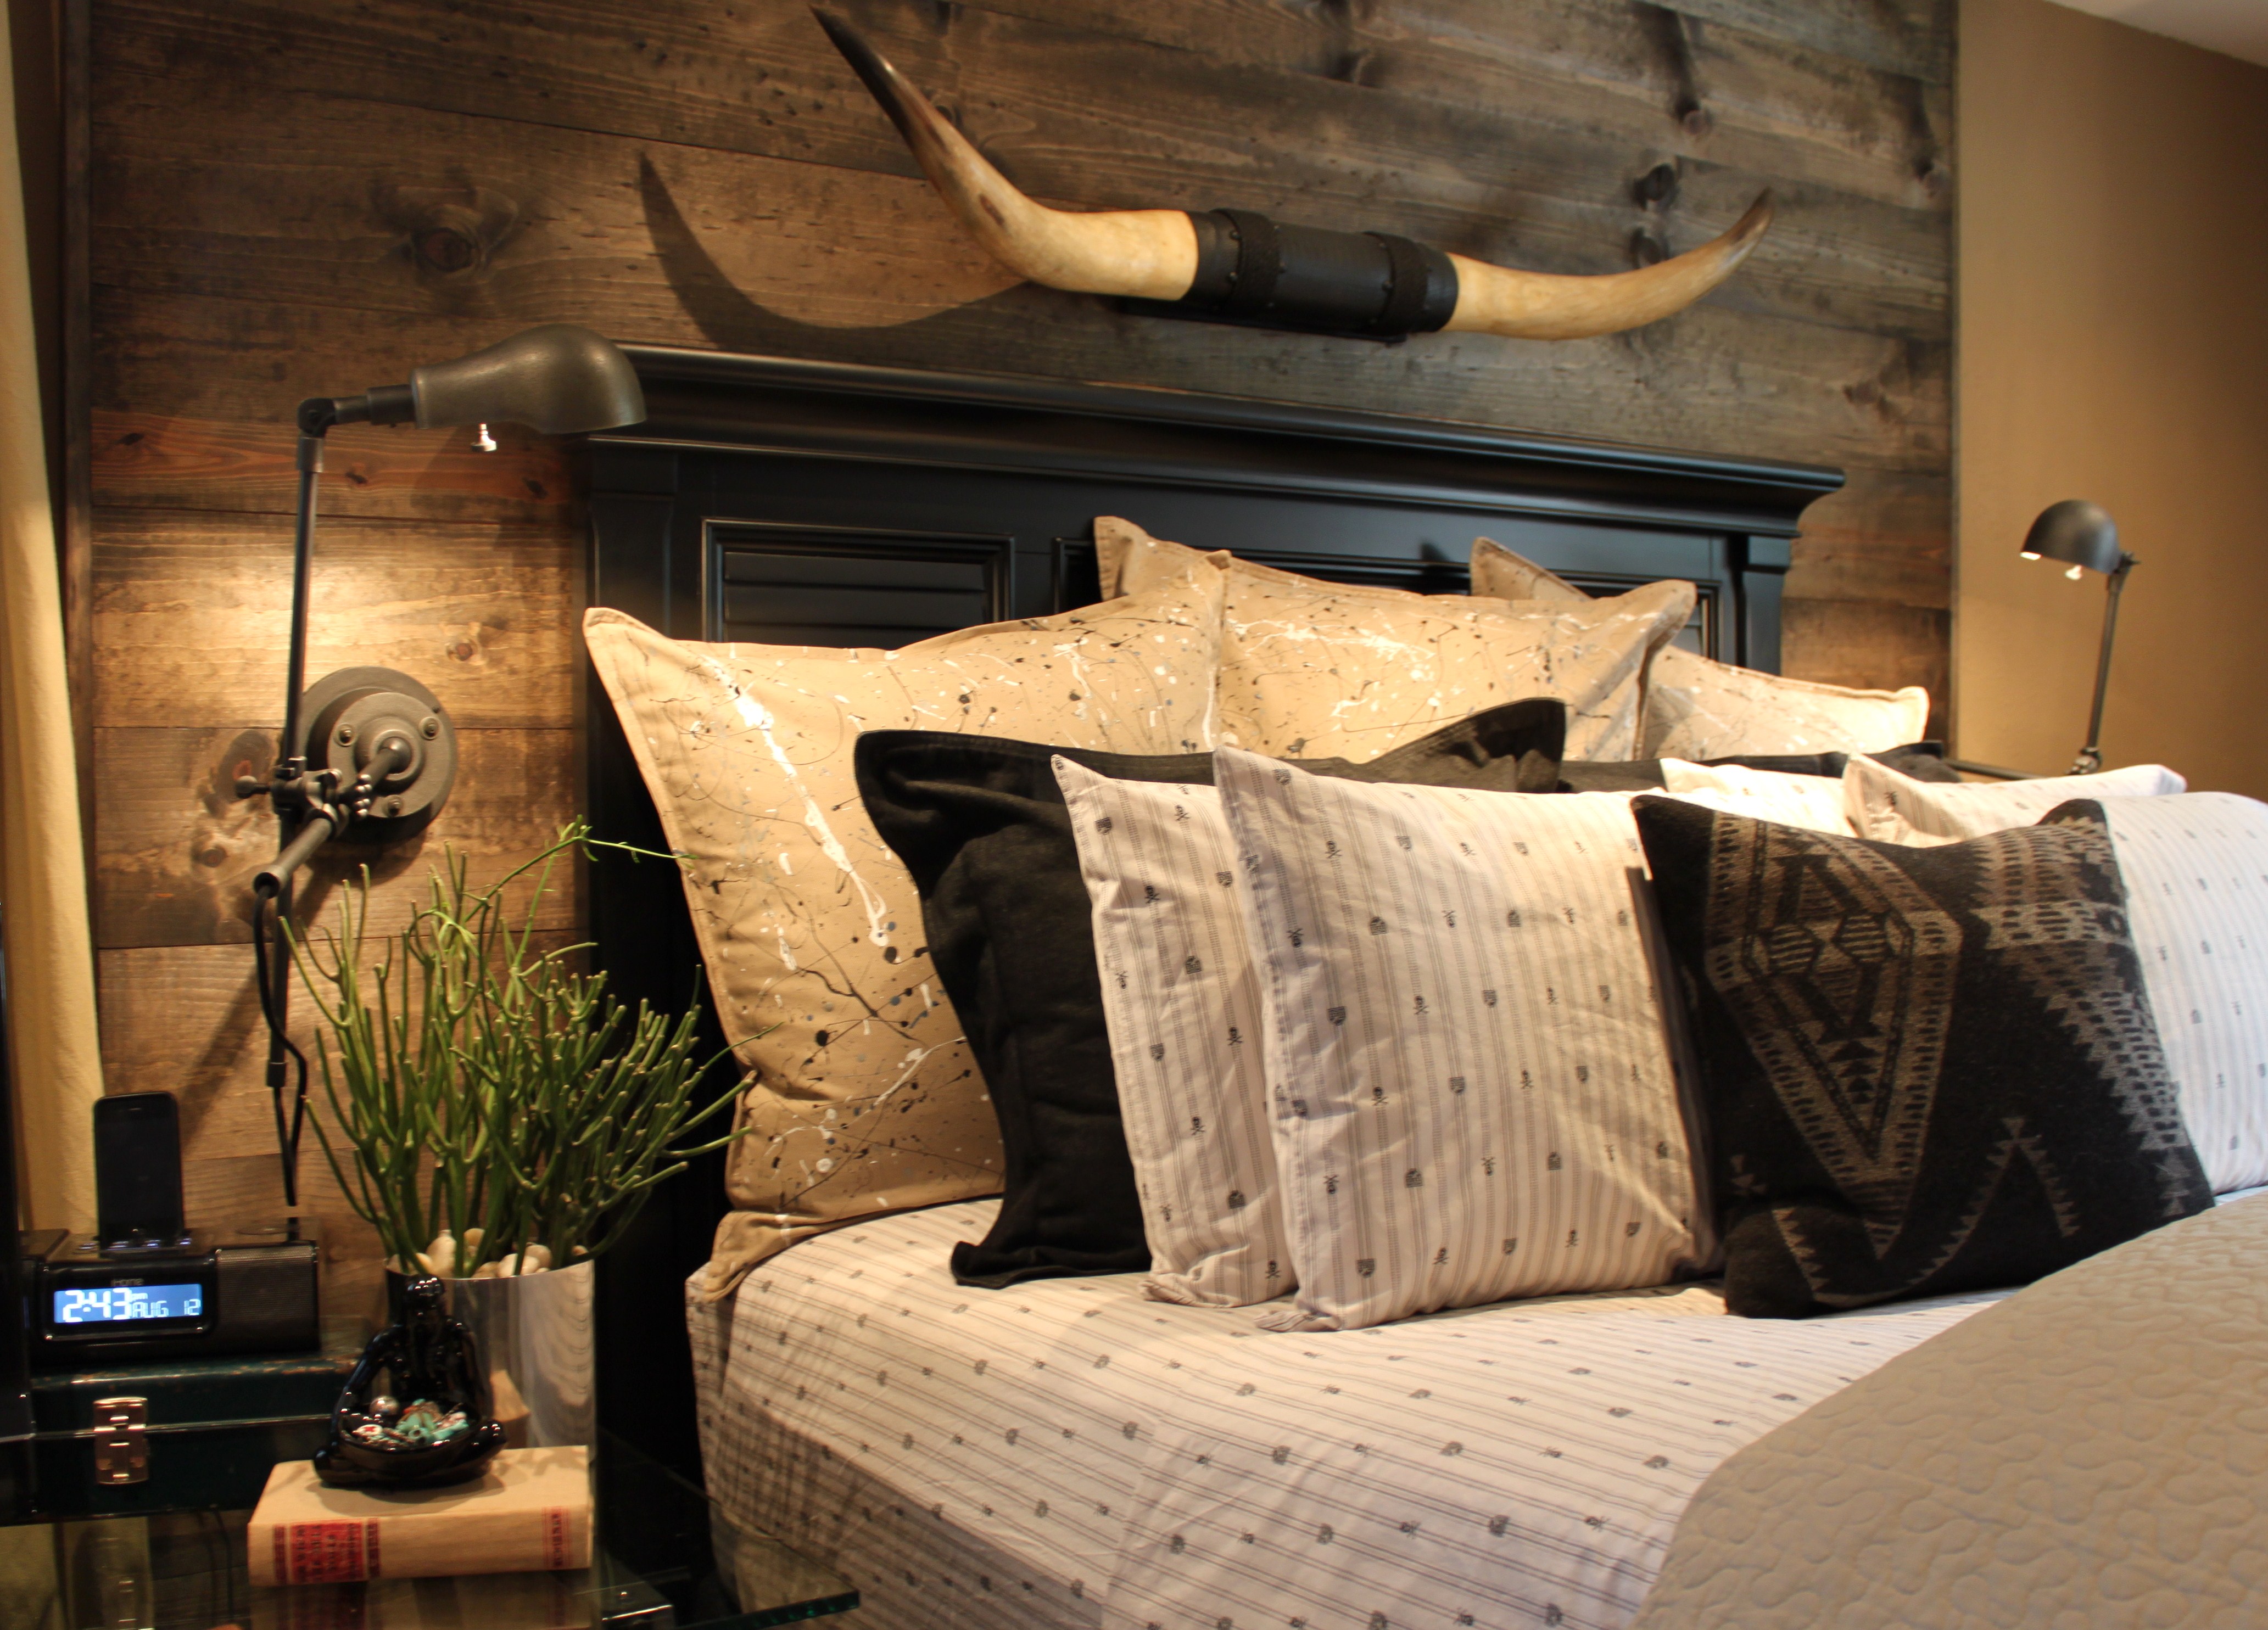
This picture of our master bedroom had been added to almost 6,000 idea books on HOUZZ.

And this picture of our wood headboard wall in the Master bedroom has been repined over 1,100 times on Pinterest, through ONE person, the last time I checked. (Which is almost daily)

We have had visitors from every part of the globe; Russia, the U.A.E., Indonesia, India, Costa Rica, Brazil, South Africa, Kenya, Argentina, Madagascar, Thailand, Australia, New Zealand, Japan and 118 other countries.
Our most popular post? That’s easy.
The one with liquor in it.
Our recipe for “Adult” Root Beer Floats.

(note to self: post more drink recipes)
So that about wraps up the year in review for the Cavender house and the Cavender Blog.
Don’t worry, we have an equally busy year planned this year too.
A tool shed, barn pendants in the garage, wall paper, more can lights, closet remodels, crown moulding, a little more landscaping, a NEW FRONT DOOR?…….. a BATHROOM?…..a DECK?….
My head is spinning just typing all this…….
Stay tuned, gentle reader…..
We’ve only just begun to work on this house.
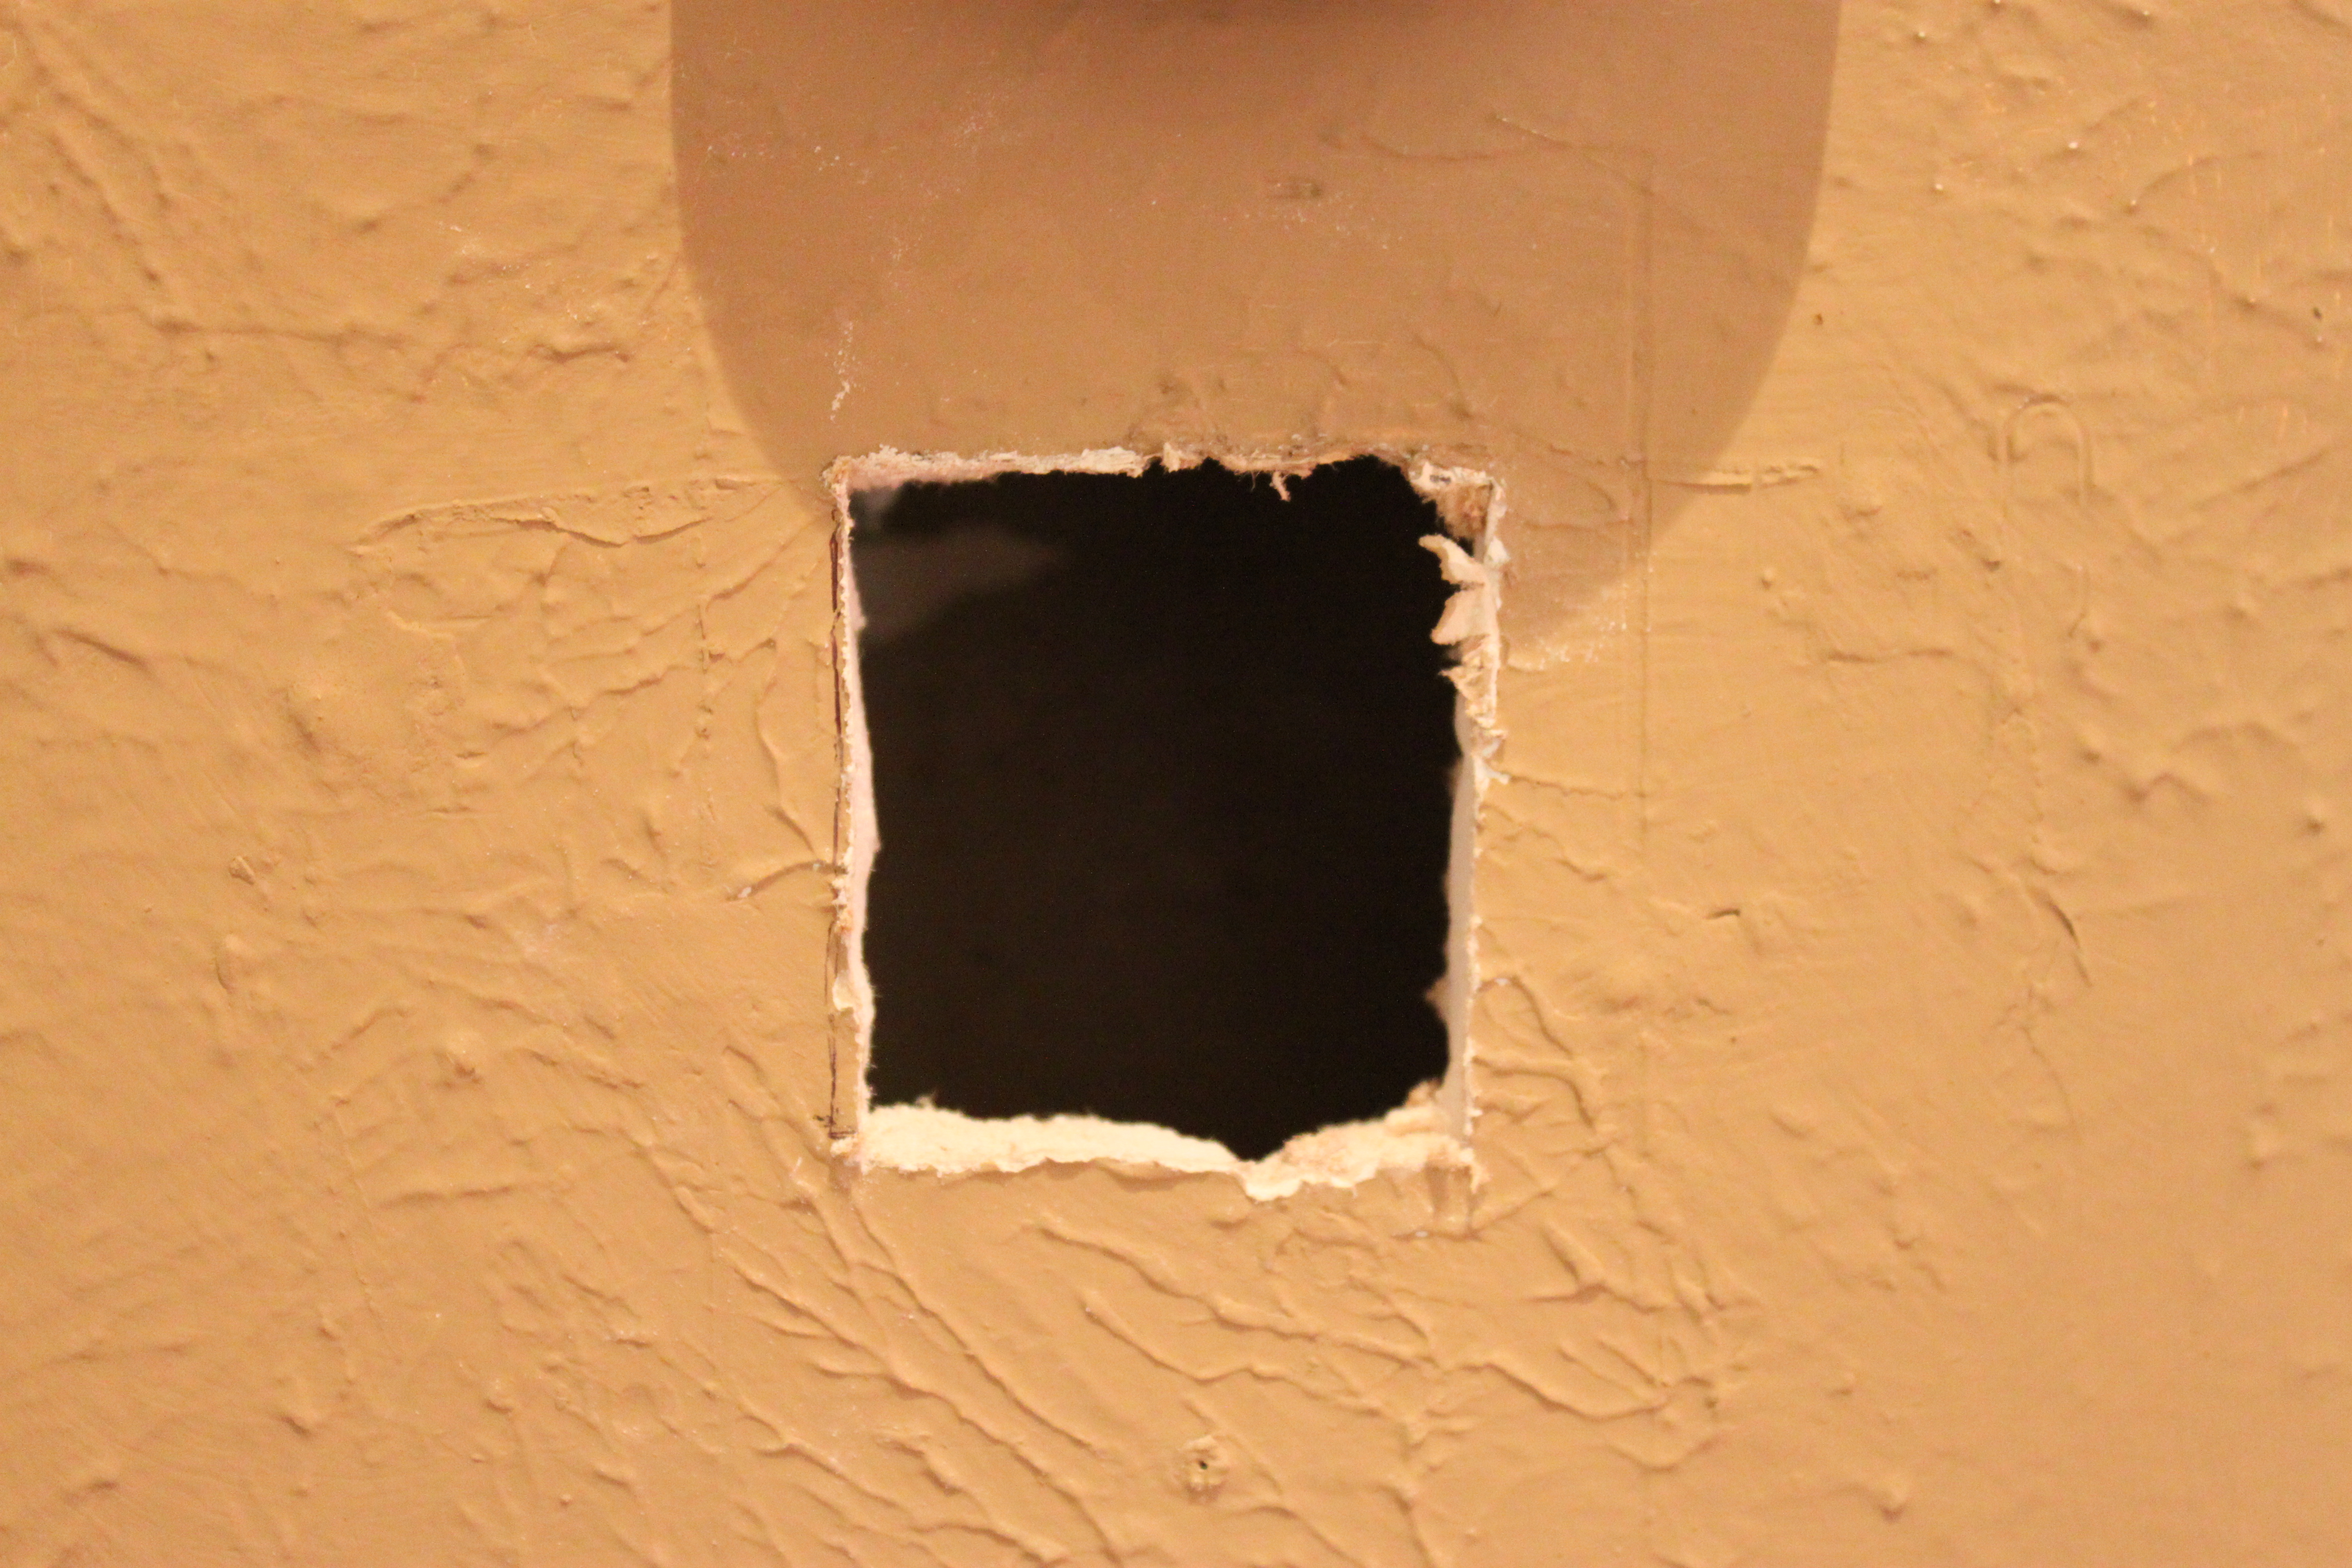
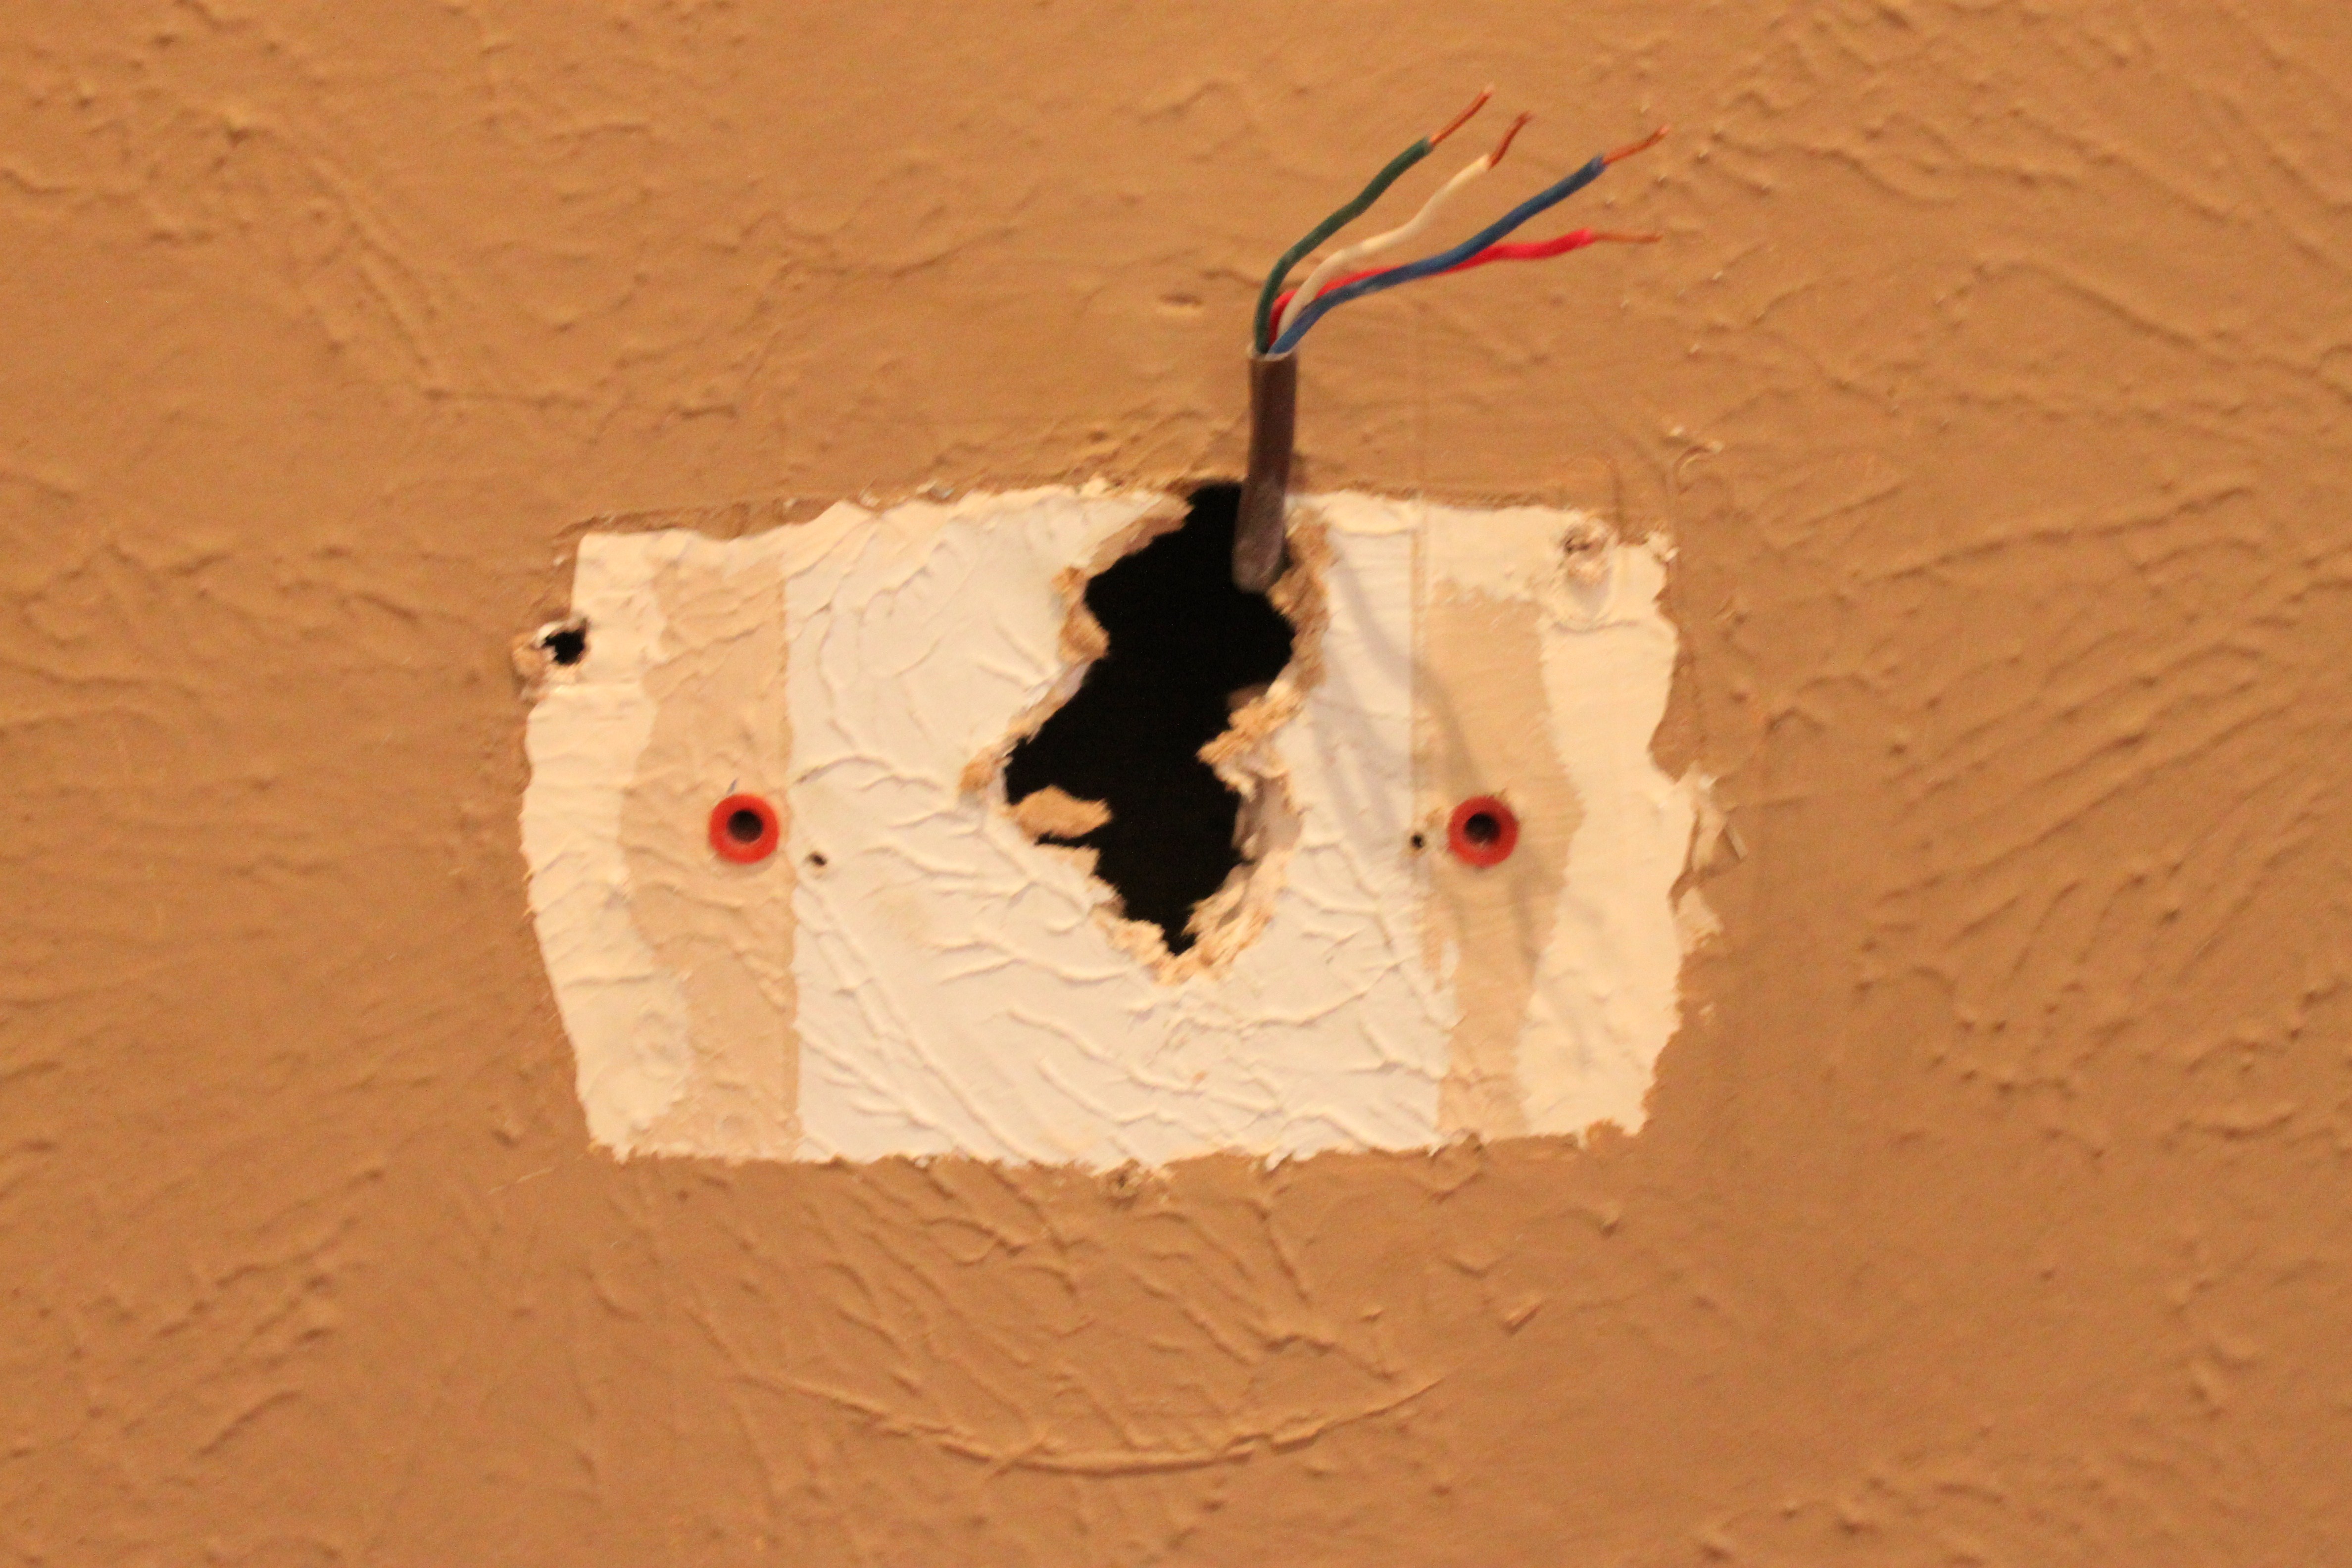
After Jamie upgraded the thermostat in the hall, we were left with a small reminder of the old one.
The gaping hole.
He had to move the device up on the wall because the “swiss cheese” like area where the old one had been didn’t look like it had the integrity for one more hole.
I started by making the hole a bigger, semi-perfect square with a serrated steak knife.

I left an opening that is just slightly over 2 inches square.
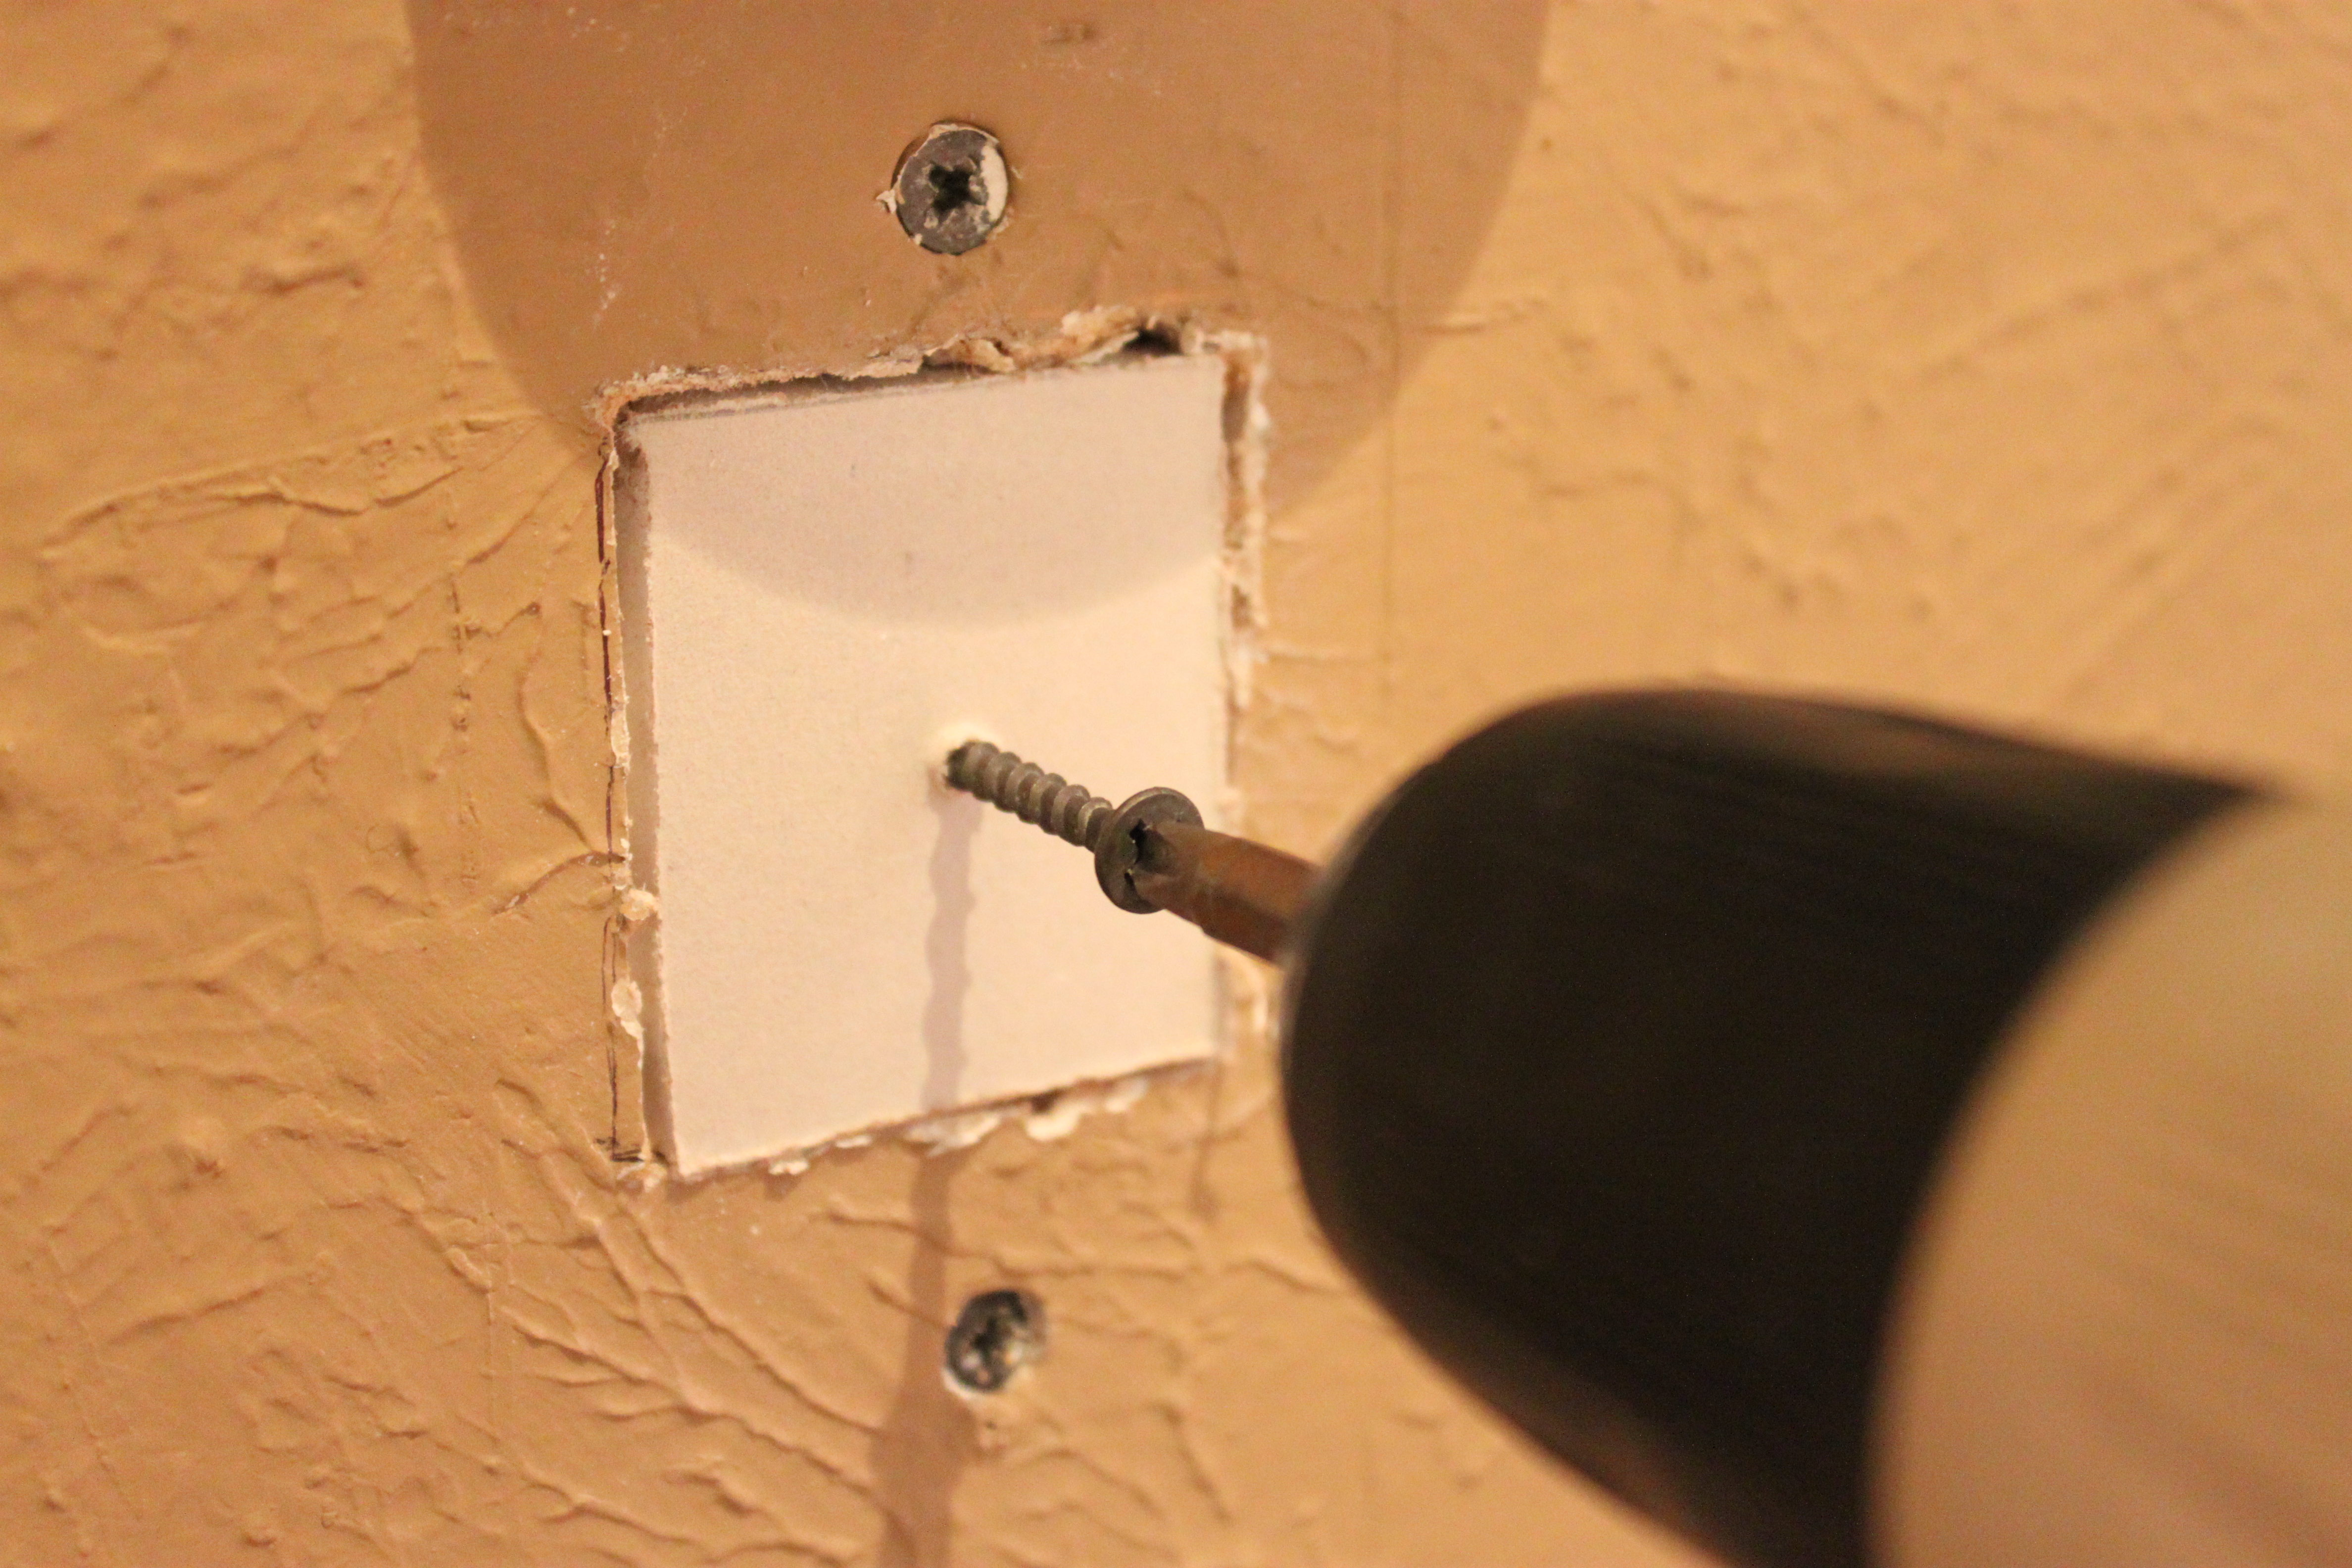
We had a small piece of drywall in the garage, so I cut a simple 2 inch square for my patch. Also with a steak knife…and we wonder why they are always so dull.

Here’s the trick to keeping it all in place. I used a scrap piece of cedar to mount behind the hole, inside the wall, and screw my drywall square into it.

With a drywall screw loosely in the cedar piece, a few inches near the top, I inserted it into the wall and used the screw to hold on to it and pull it close to the wall. Then I screwed more drywall screws at the top and bottom to hold my cedar scrap in place.
Cedar is pretty soft, so it’s easy to screw into. Make sure that the screws are sunk slightly into the drywall of the wall.

Then I screwed my patch piece into the cedar support…again making sure to sink the screw.
Pretty simple so far…..

A light spread of spackle with a putty knife will hide everything nicely….
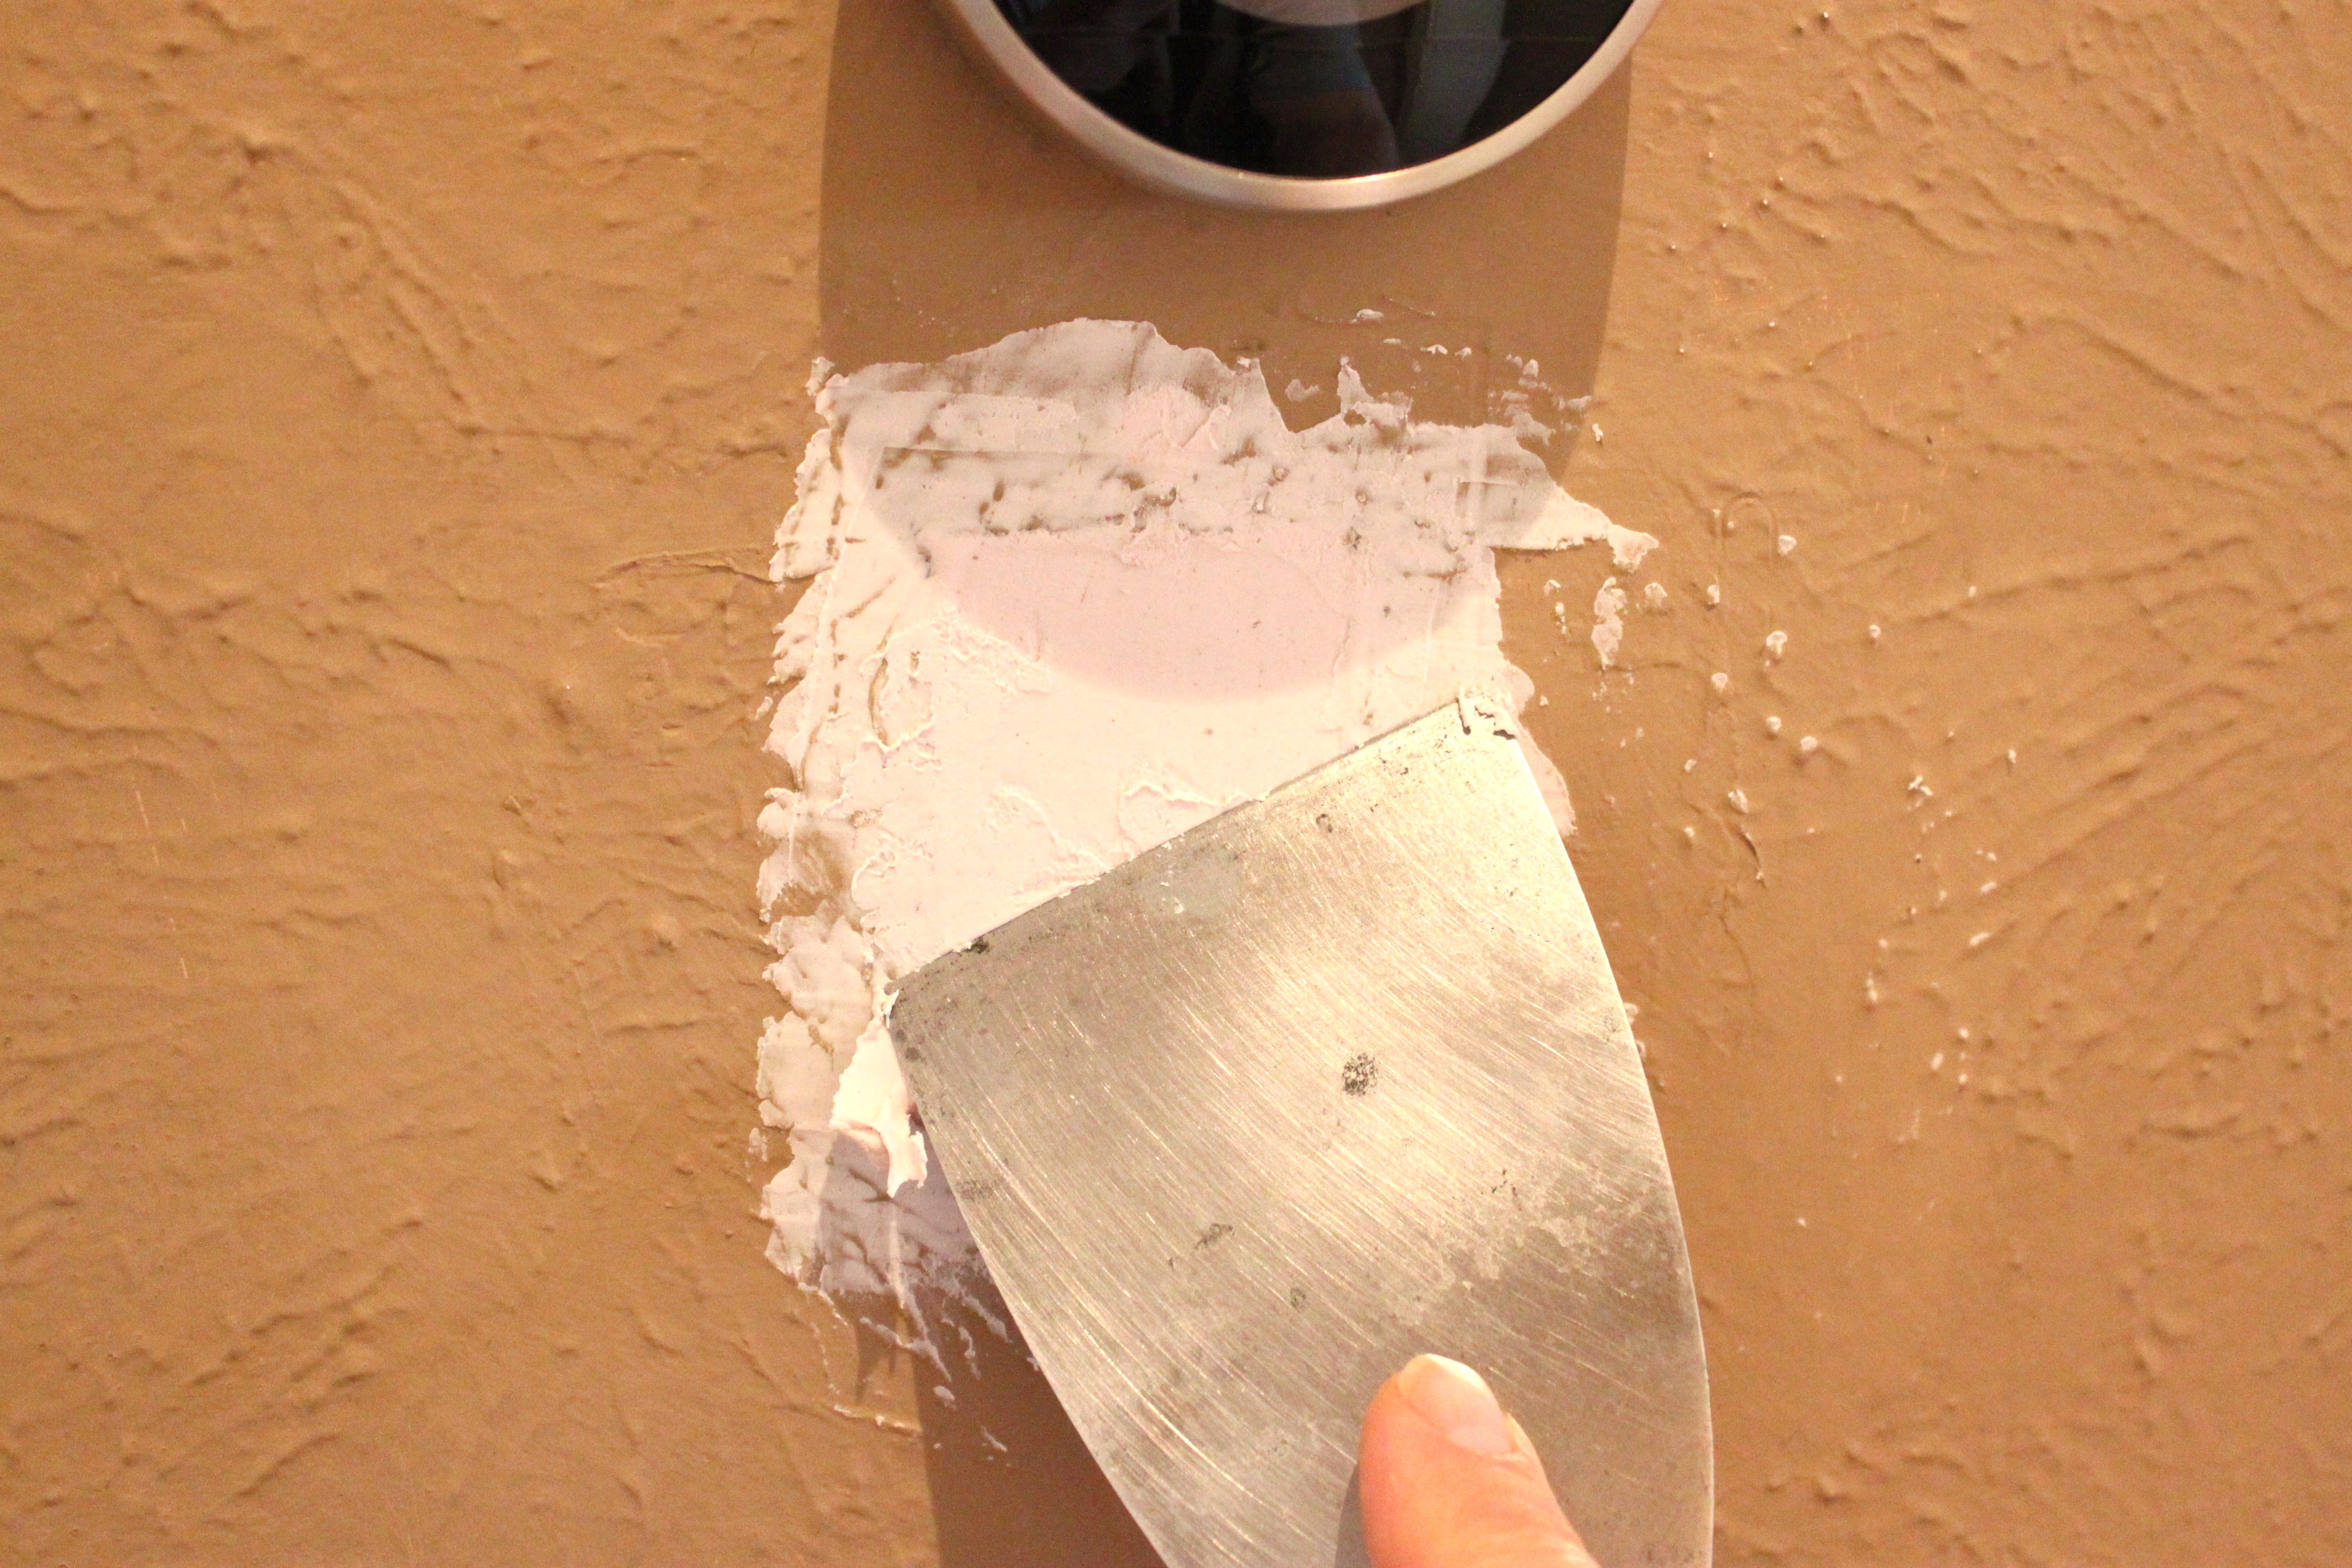
See?

Now for the second part of our illusion.
To match the “crow’s foot” wall texture, I use a moist sea sponge dipped in joint compound……….and just dab it on.
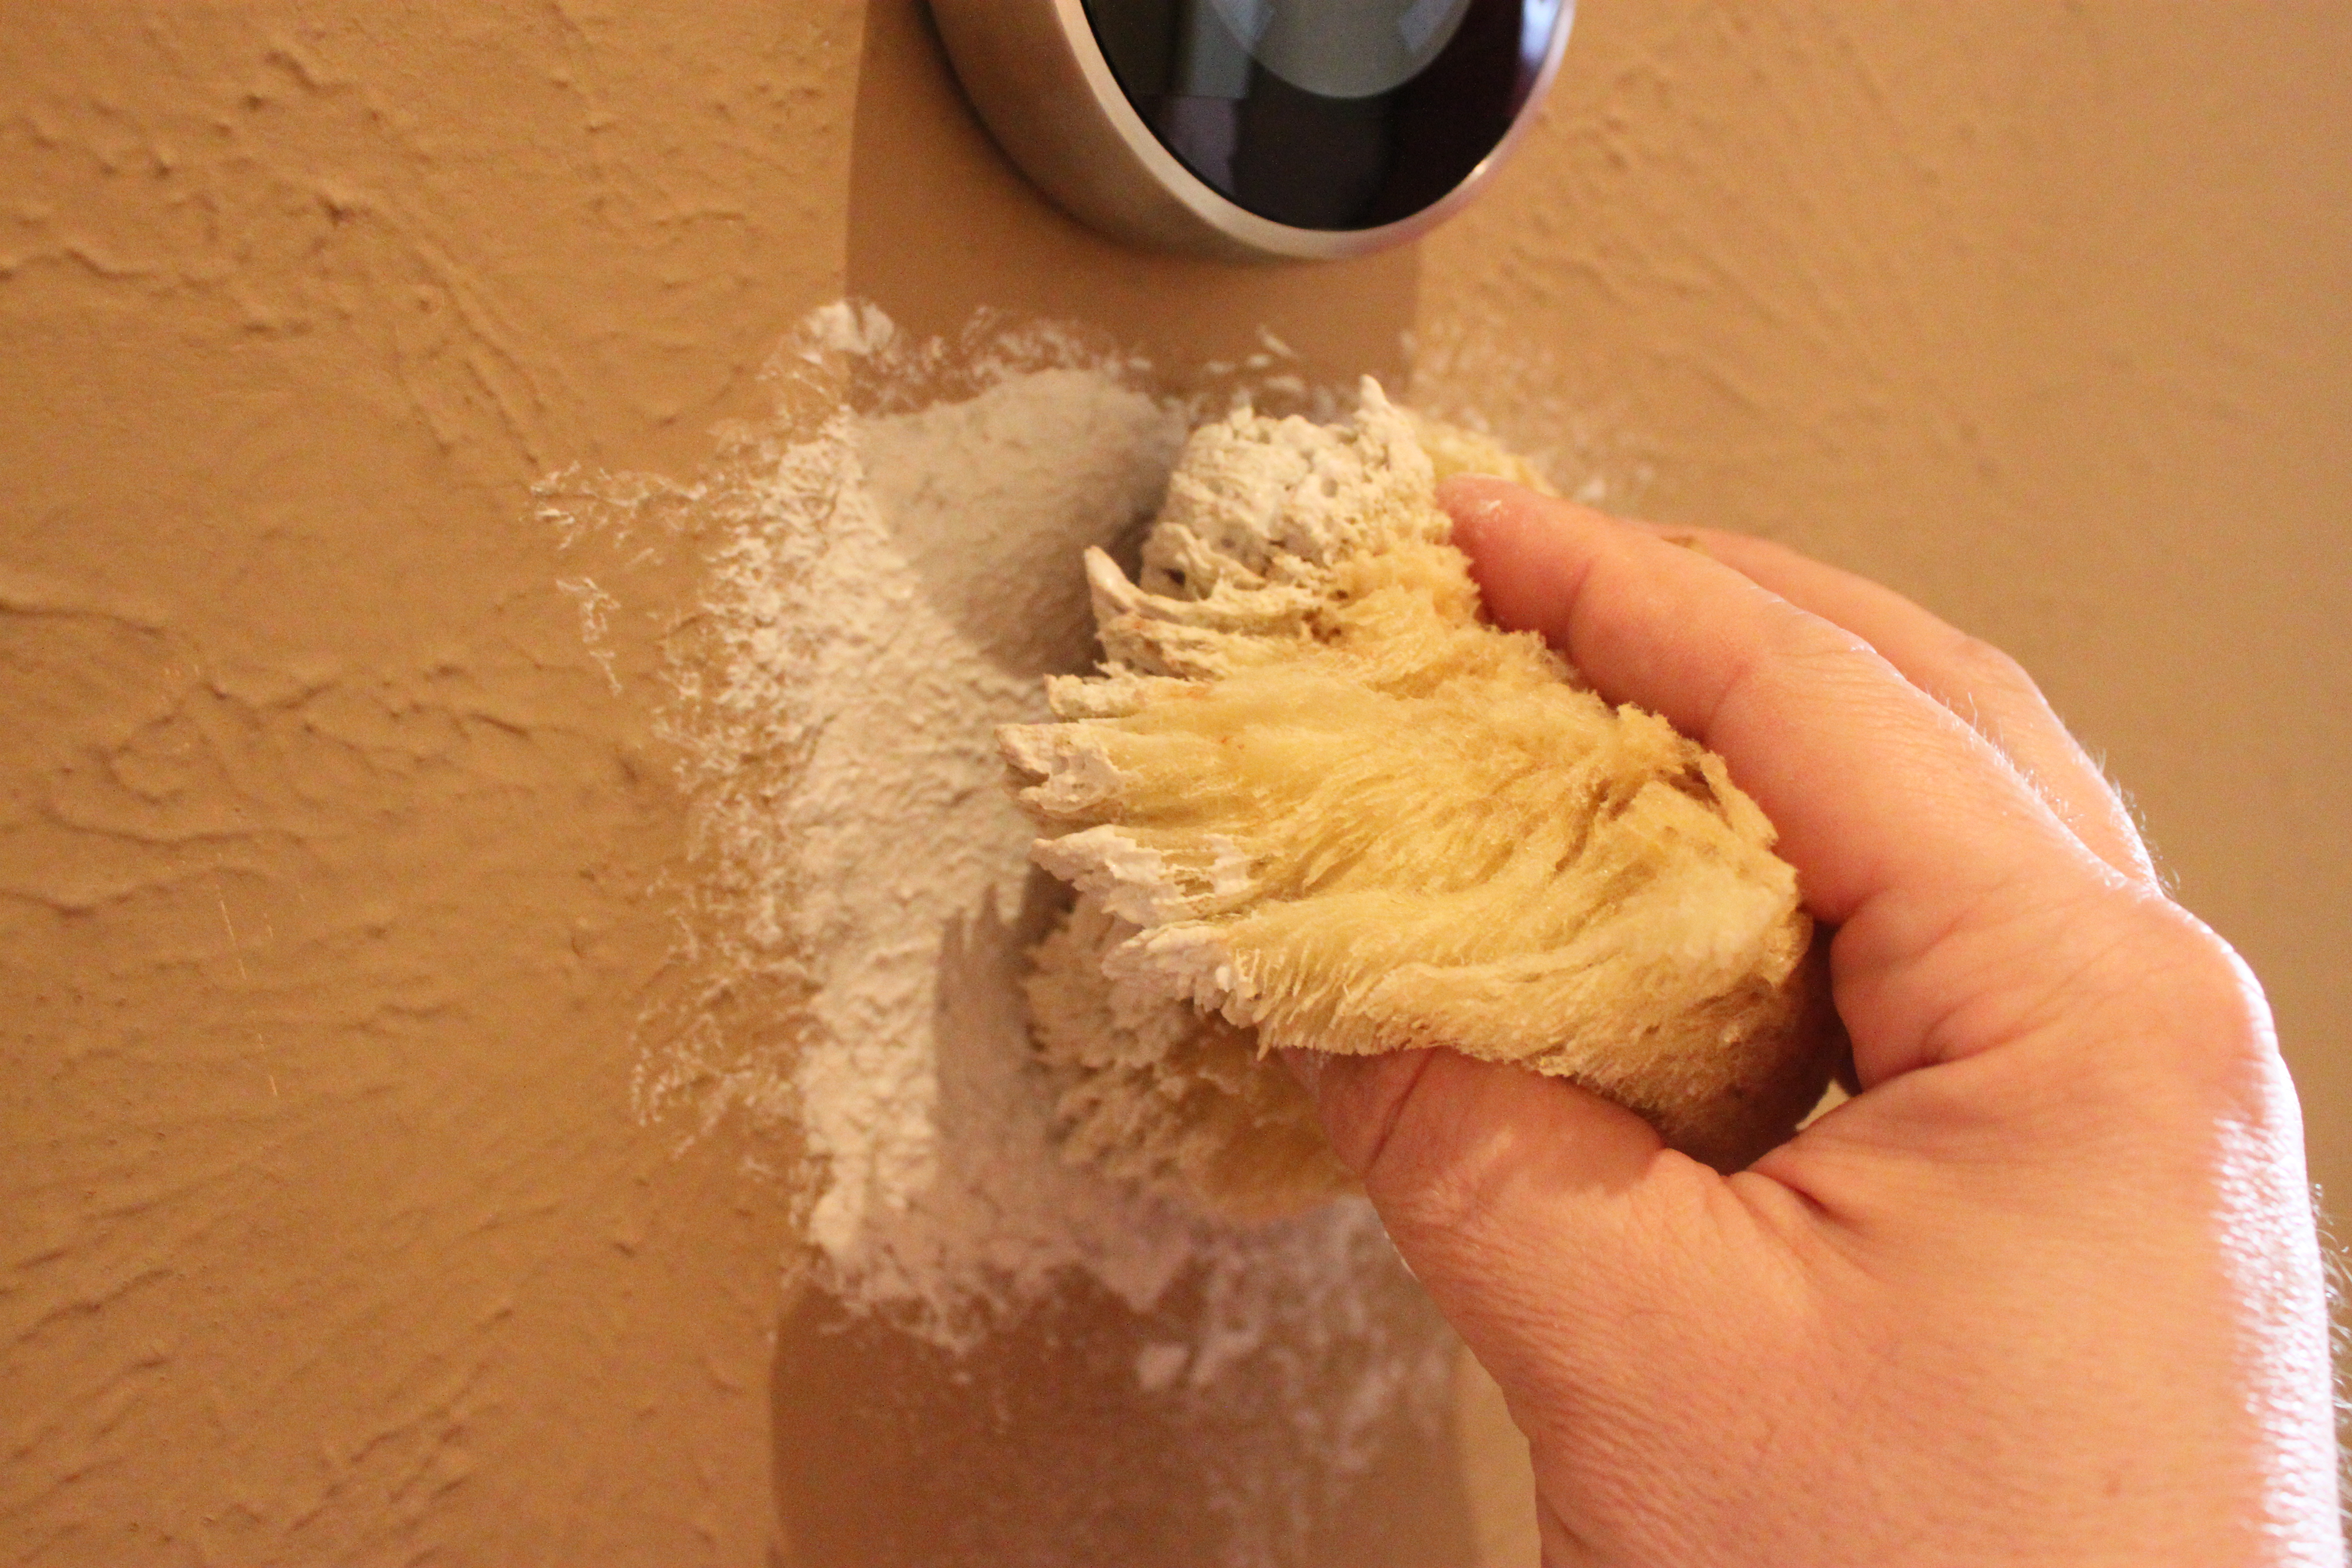
If it looks too heavy, just wipe it off and try again. Too thin, add more.
The sponge method works great for touching up small wall sections. For large patch jobs, you should probably use a crow’s foot brush. They sell those in the same section as drywall and joint compound at the home improvement store.
All better, now.

I think everyone knows where I stand on technology.
Without Jamie I would own a flip-phone that I would have to tap the 1 key 3 times just to text a “C” on and foil covered “rabbit-ear” antenna on top of my fat, heavy TV just so I can find Family Guy every Sunday.
Jamie introduced me to the iPad, Apple TV, the Mac, and the “life-sustaining” iPhone. He made me the Apple whore I am today.
Now, we have a new device to add to the list….
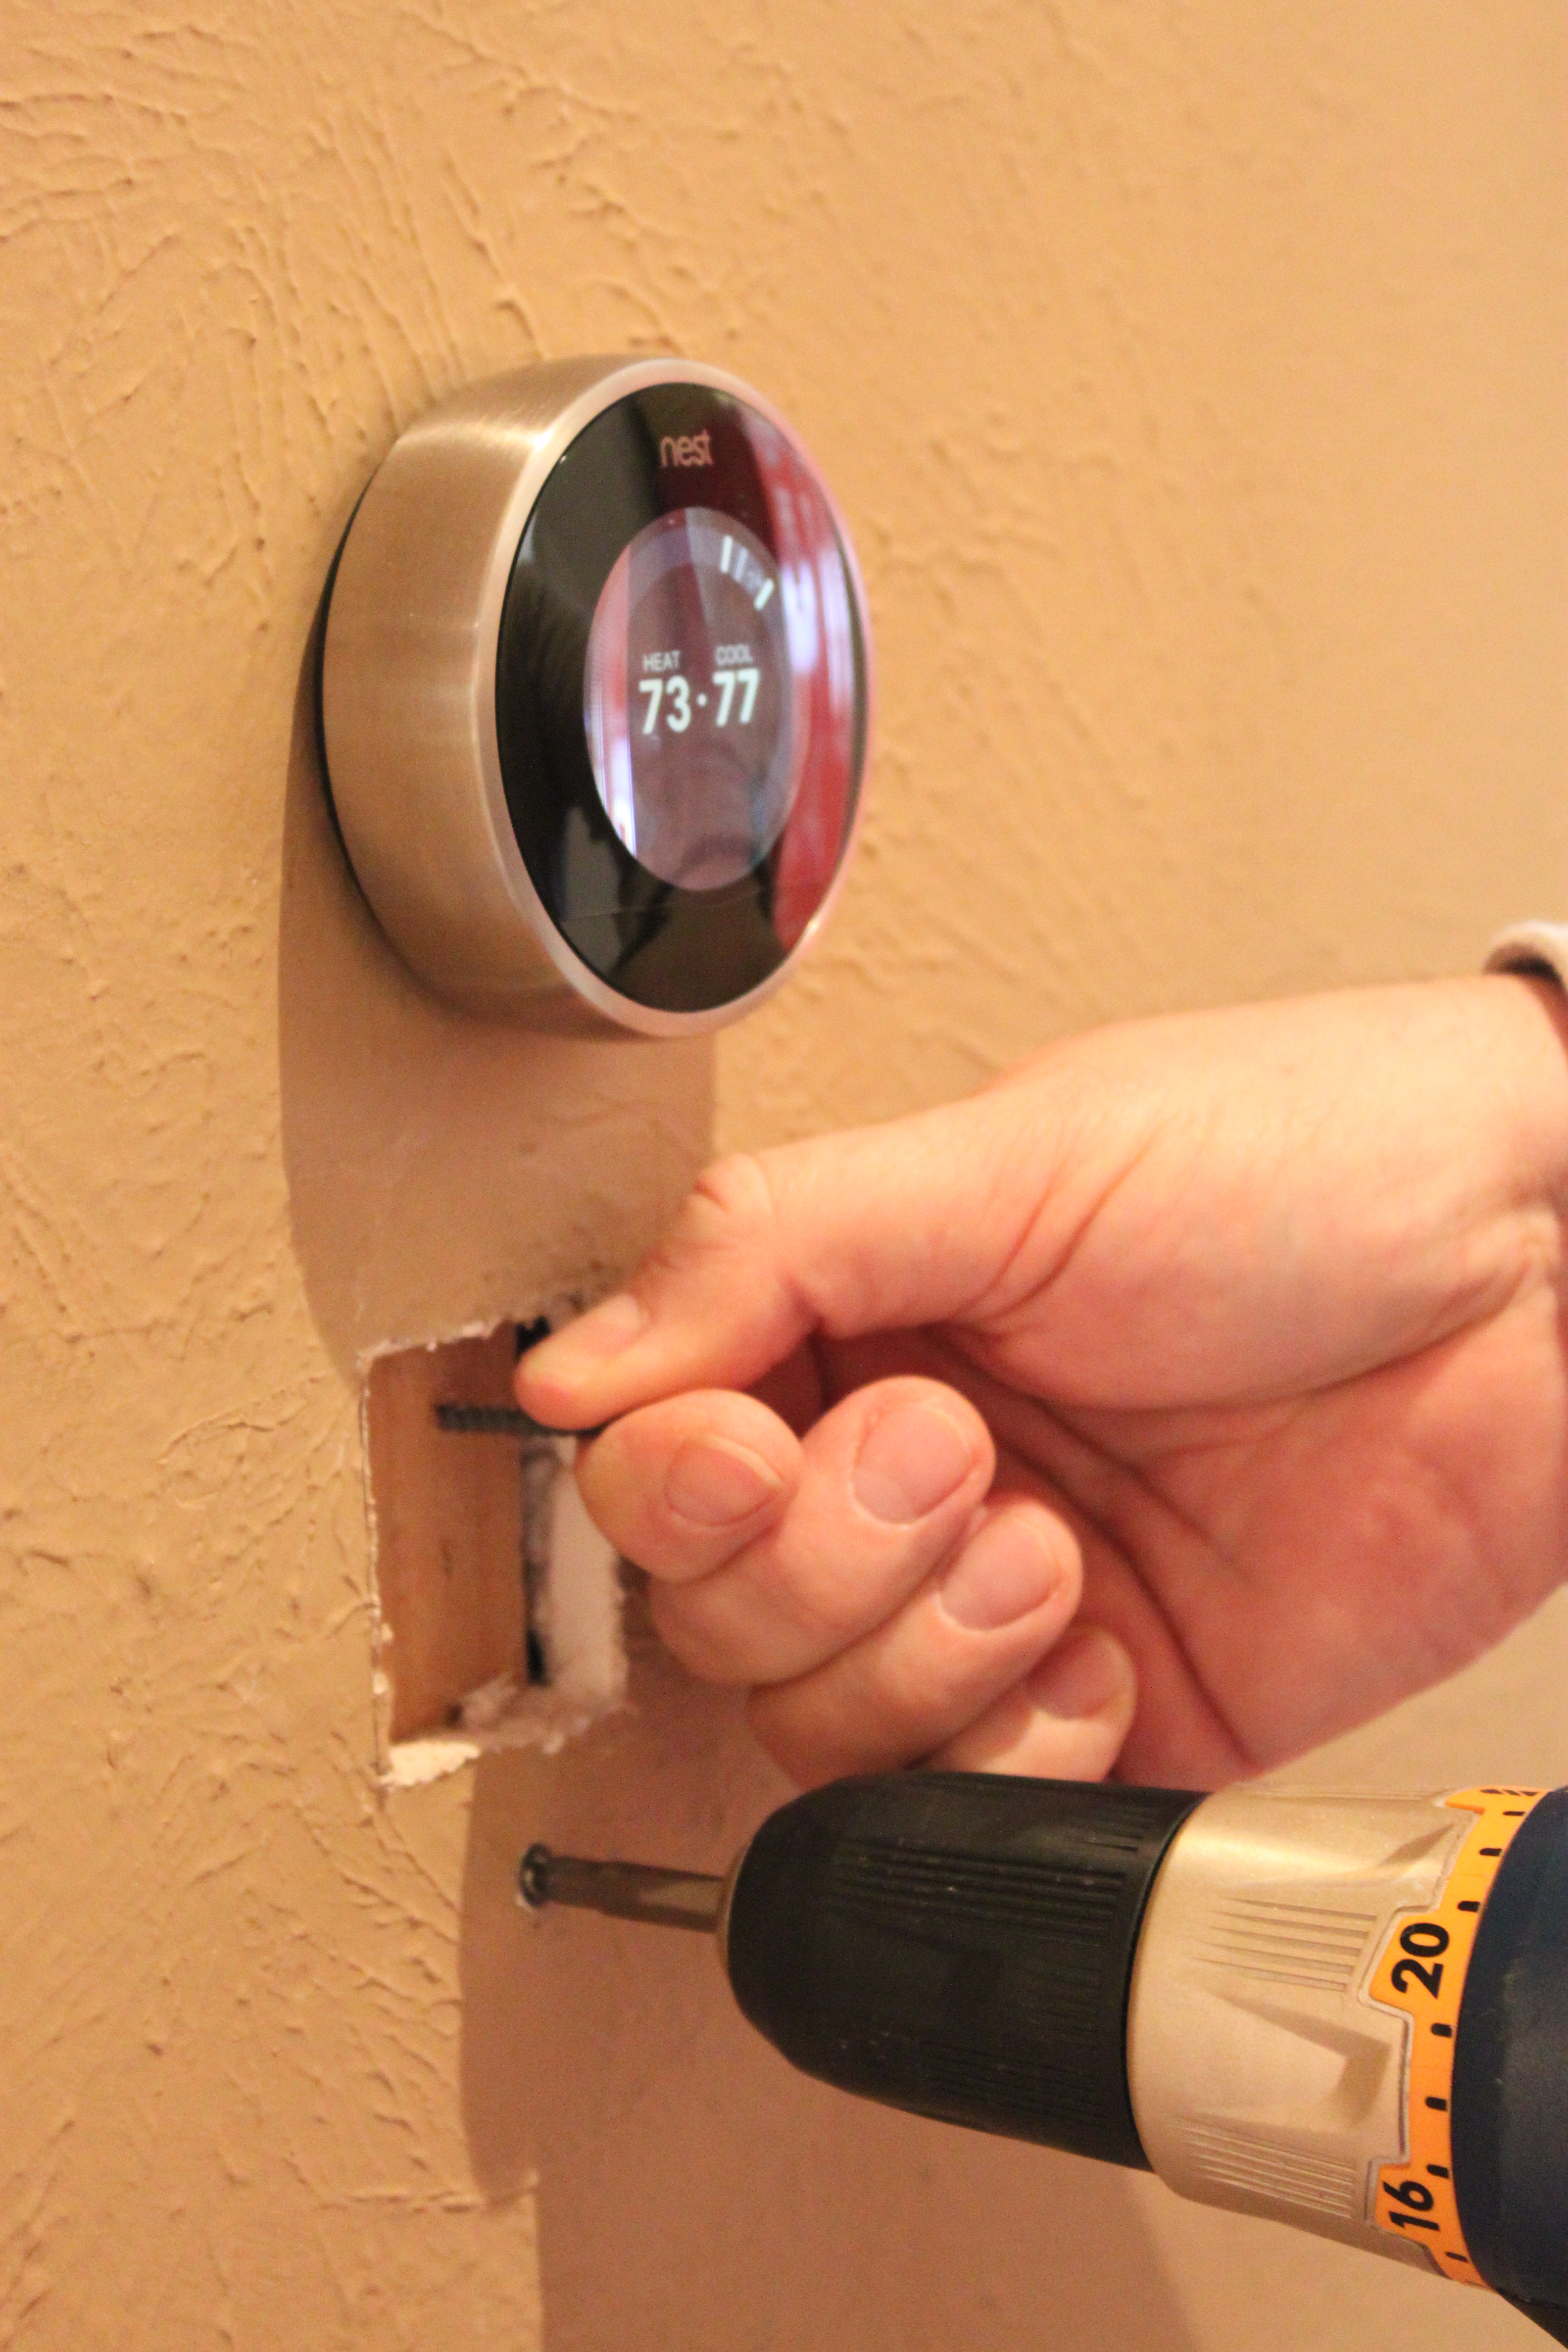
The Nest Thermostat.

It’s beautiful……Designed by the same genius who designed the iPod and iPhone.
The company better known for those iPhones and iPads is now selling this high-tech thermostat. Now don’t shake your head in disbelief, because the Nest is unlike any conventional thermostats.
The Nest can learn and remember your prefered temperatures to automatically keep your house cool or warm. It actually turns itself off when your house is empty to conserve energy. Most importantly it taps into the power of remote control, letting you change the temperature from anywhere via your PC, tablet, or iPhone.

Here’s the old one that Jamie installed shortly after we moved in.

Here’s the mess that was under that enormous bad boy.
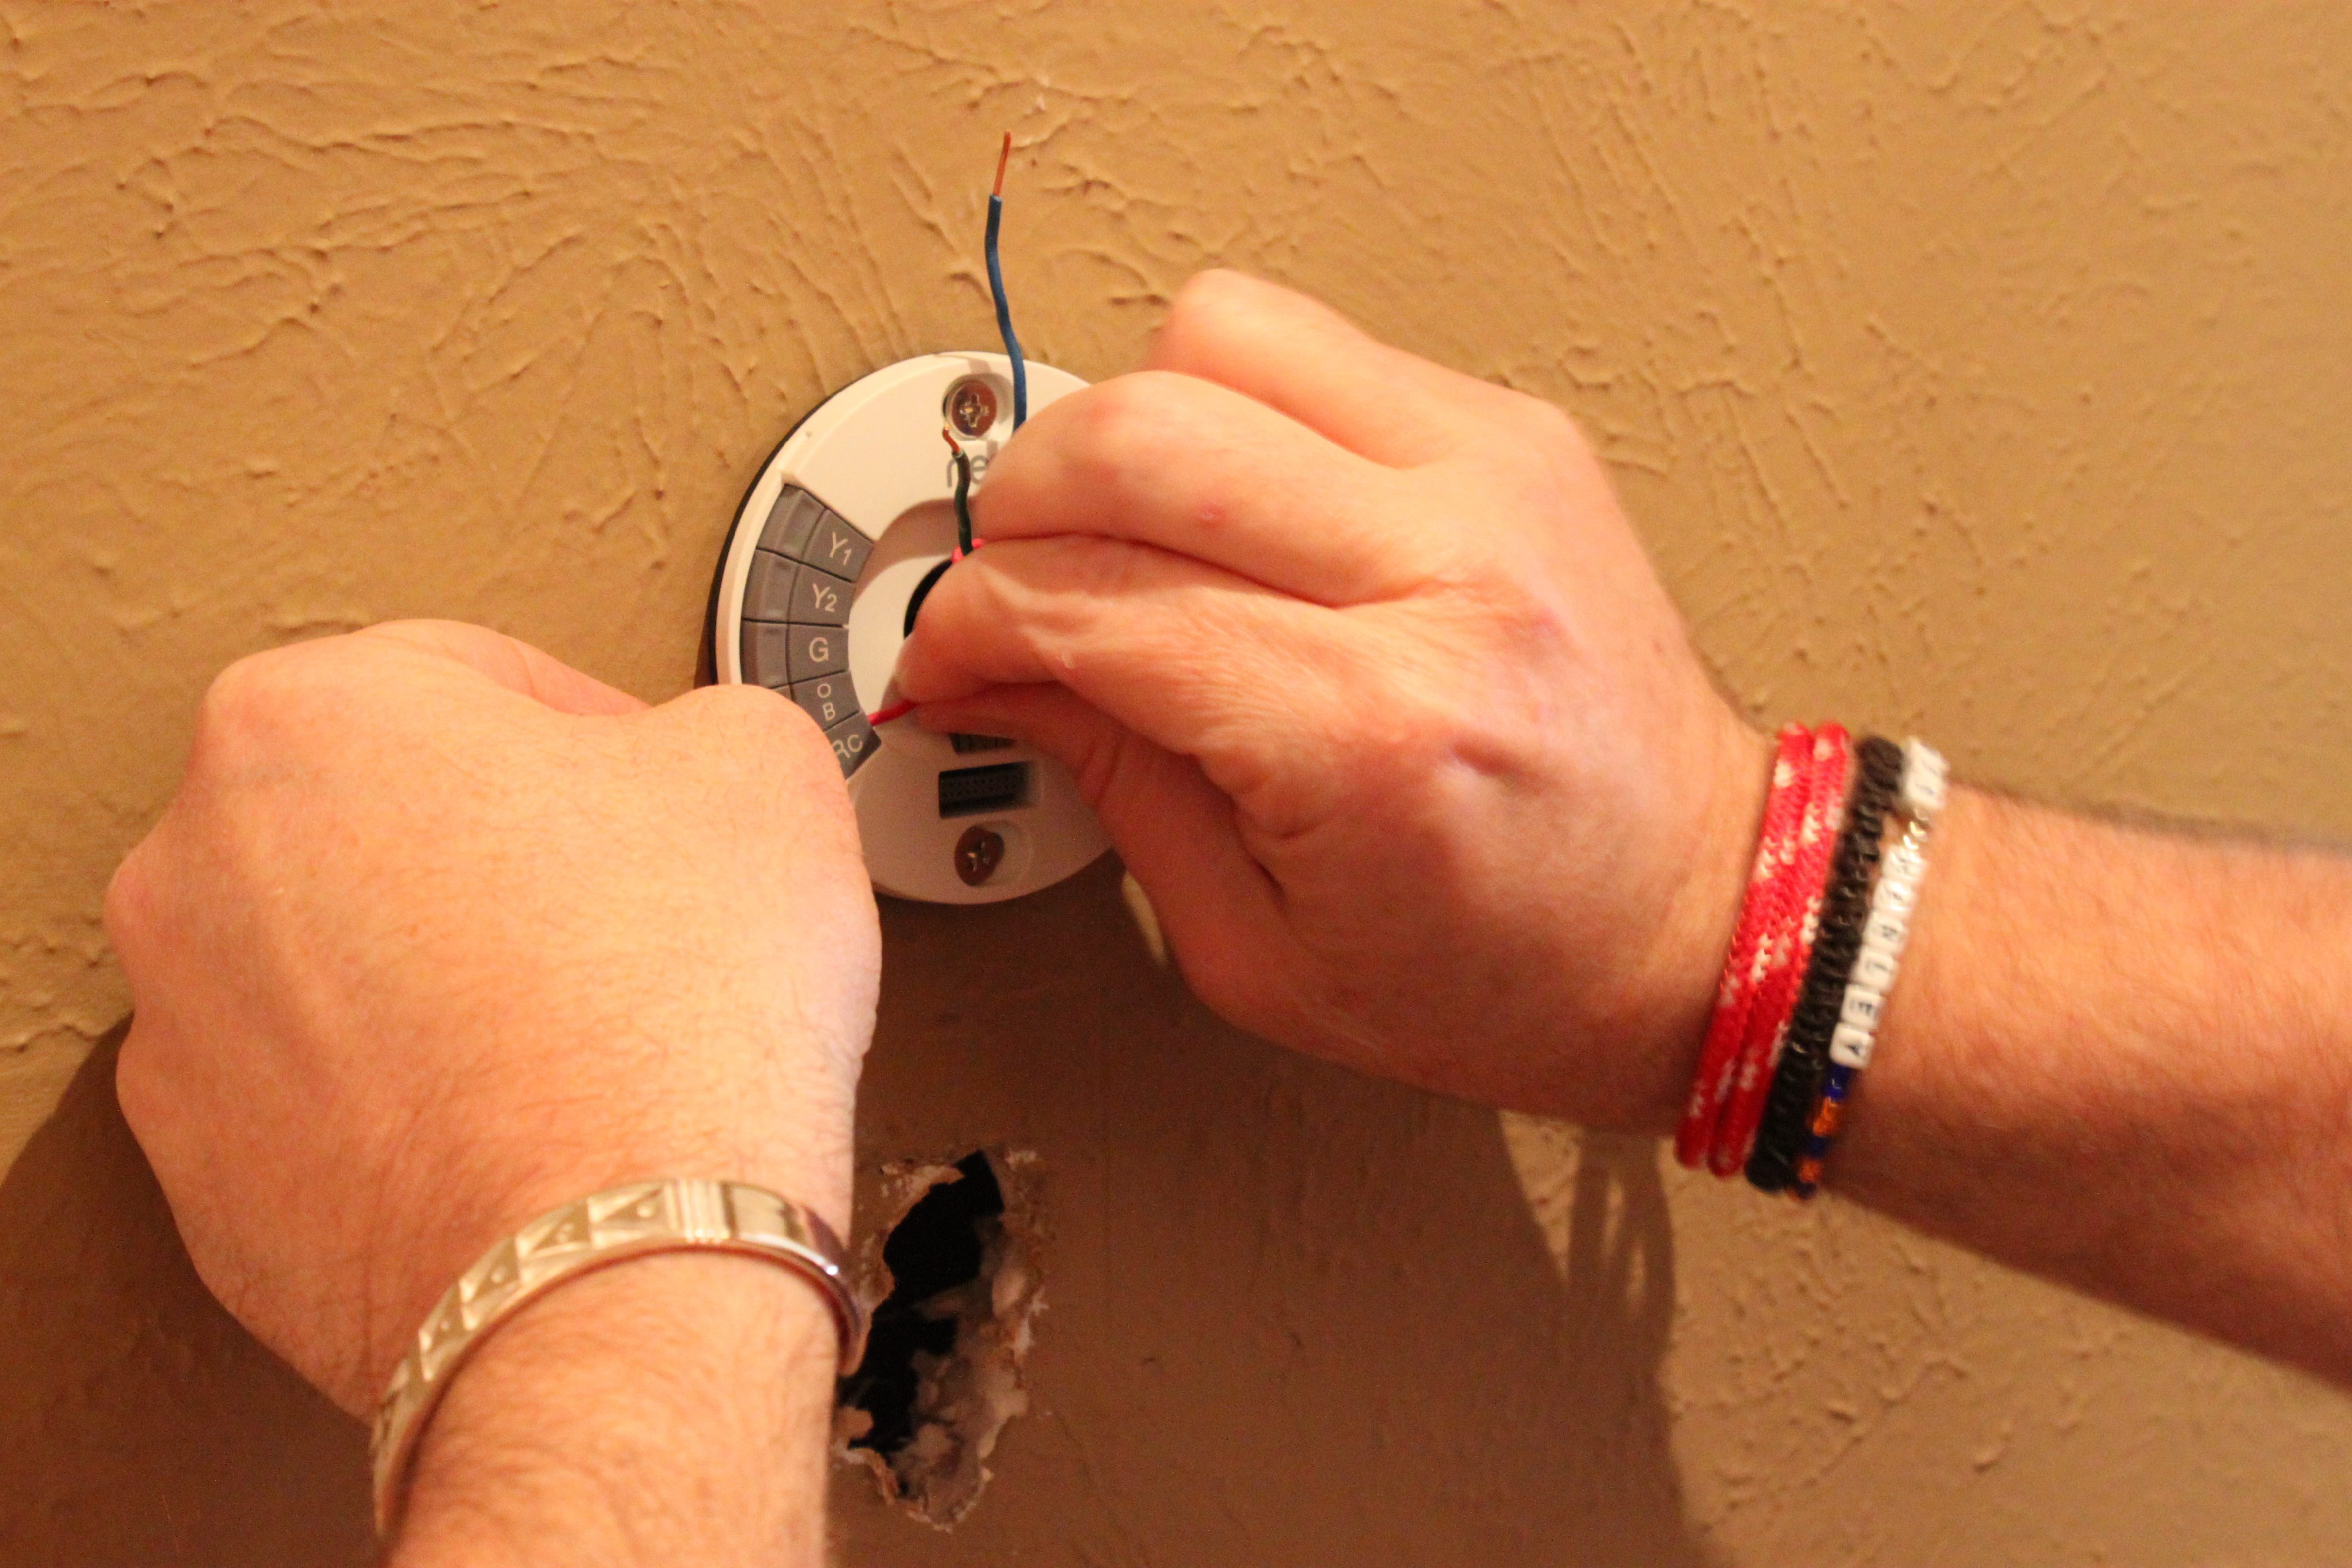
I moved the wires a few inches further up the wall, and attached plastic screw anchors to hold everything on the wall.

Jamie attached all the wires per the directions,( I wasn’t really paying attention at this point, think I was distracted by something shiny in the other room), but it seemed pretty simple – I didn’t hear much fowl language.
I have no rational reason for the wall changing color in every picture.
All finished with the install.
Stunning, and it actually …..learns us. It lights up every time I walk by…….it knows when we are at home.
“Wasn’t there a big gaping hole in the wall under this thing?” you ask.
Not anymore there isn’t…..
…..check back tomorrow to see where that hole went.
If we were playing the game “$10,000 Pyramid”, I would only have to say 4 words for y’all to know this guy…..
Black,
Folsom,
June,
Legend,


How about a little piece of Johnny Cash to hang in your abode?
We found this 1967 concert poster on AllPosters.com

One of our favorite websites for celebrity photos, Sonic Editions, has this somber picture for sale…..

Hatch Show Prints sell their distinct style of letter press art through the Country Music Hall of Fame. How about a Tripple Johnny?

or maybe frame a vinyl like this one from Amazon……

Yeah,
Legend,
Why not add a little “shooting gallery” style to your interiors?
image via Windsor Place Antiques

image via Design Hazards

image via School House Electric

image via The Remodelista

image via Philuko

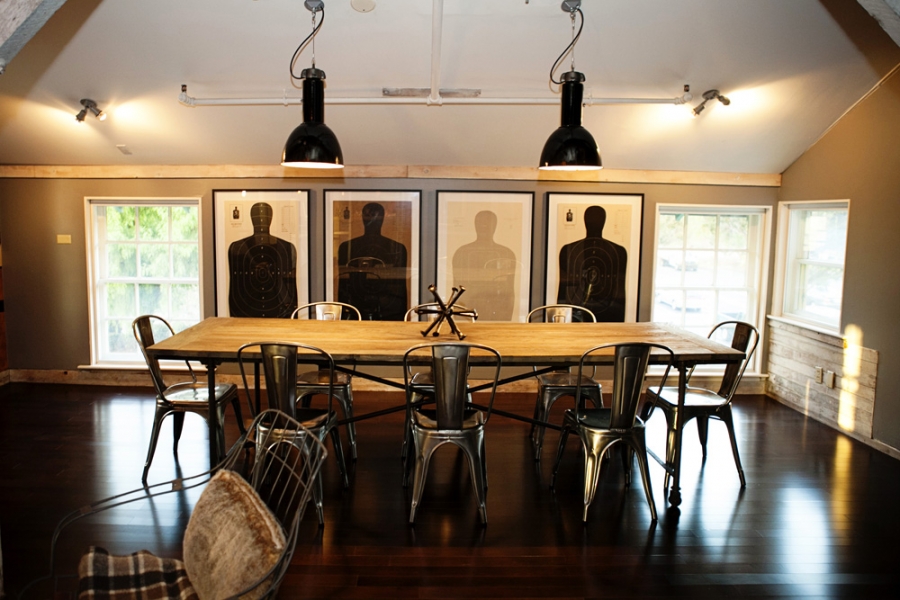
image via Graphics-Exchange
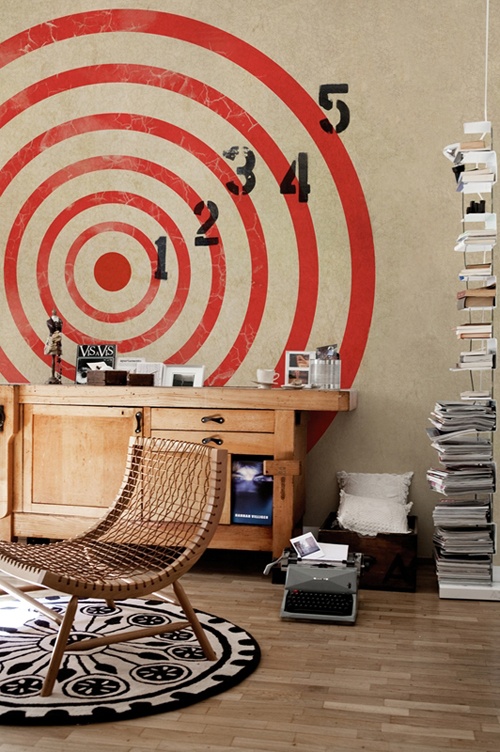


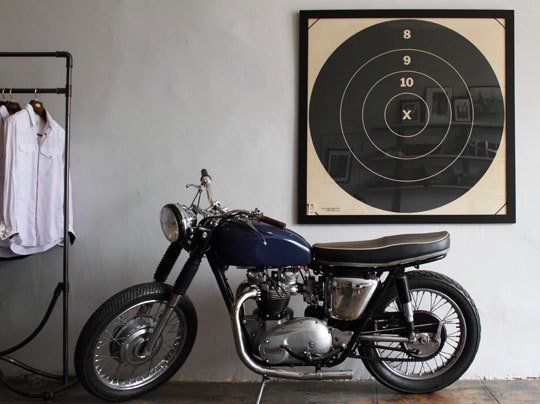

All uncredited images via Pinterest
We present to you, (sound of trumpets)

Magnificent, isn’t it?
West Elm has always caught our eye. Their designs/prices are usually somewhere between Ikea and Design Within Reach. But suddenly that “sterile mass-manufactured” look they have developed over the past 11 years has taken a sharp turn towards more “home-spun” looks.
Especially in this chair. (That red lamp ain’t half bad either)
It reminds me of those mixed denim quilts…..

Another of our projects currently on the back burner….but will happen one day.
Jamie made a trip to the store to see it in person….and snapped this pic.

Notice how the floor model is a completely different patchwork than the website image. Every one is unique……….. Love that.
The Everett chair is available in a bevy of covers…..(over 40 options)
and at almost $1,200, the patchwork version is twice as much as any of the others.
Even the leather options.
That’s the price you have to pay for one-of-a-kind from a big box store..

I collect a lot of things, but the bestest things to collect are cheap, underappreciated art forms,
Like, under a dollar, cheap.
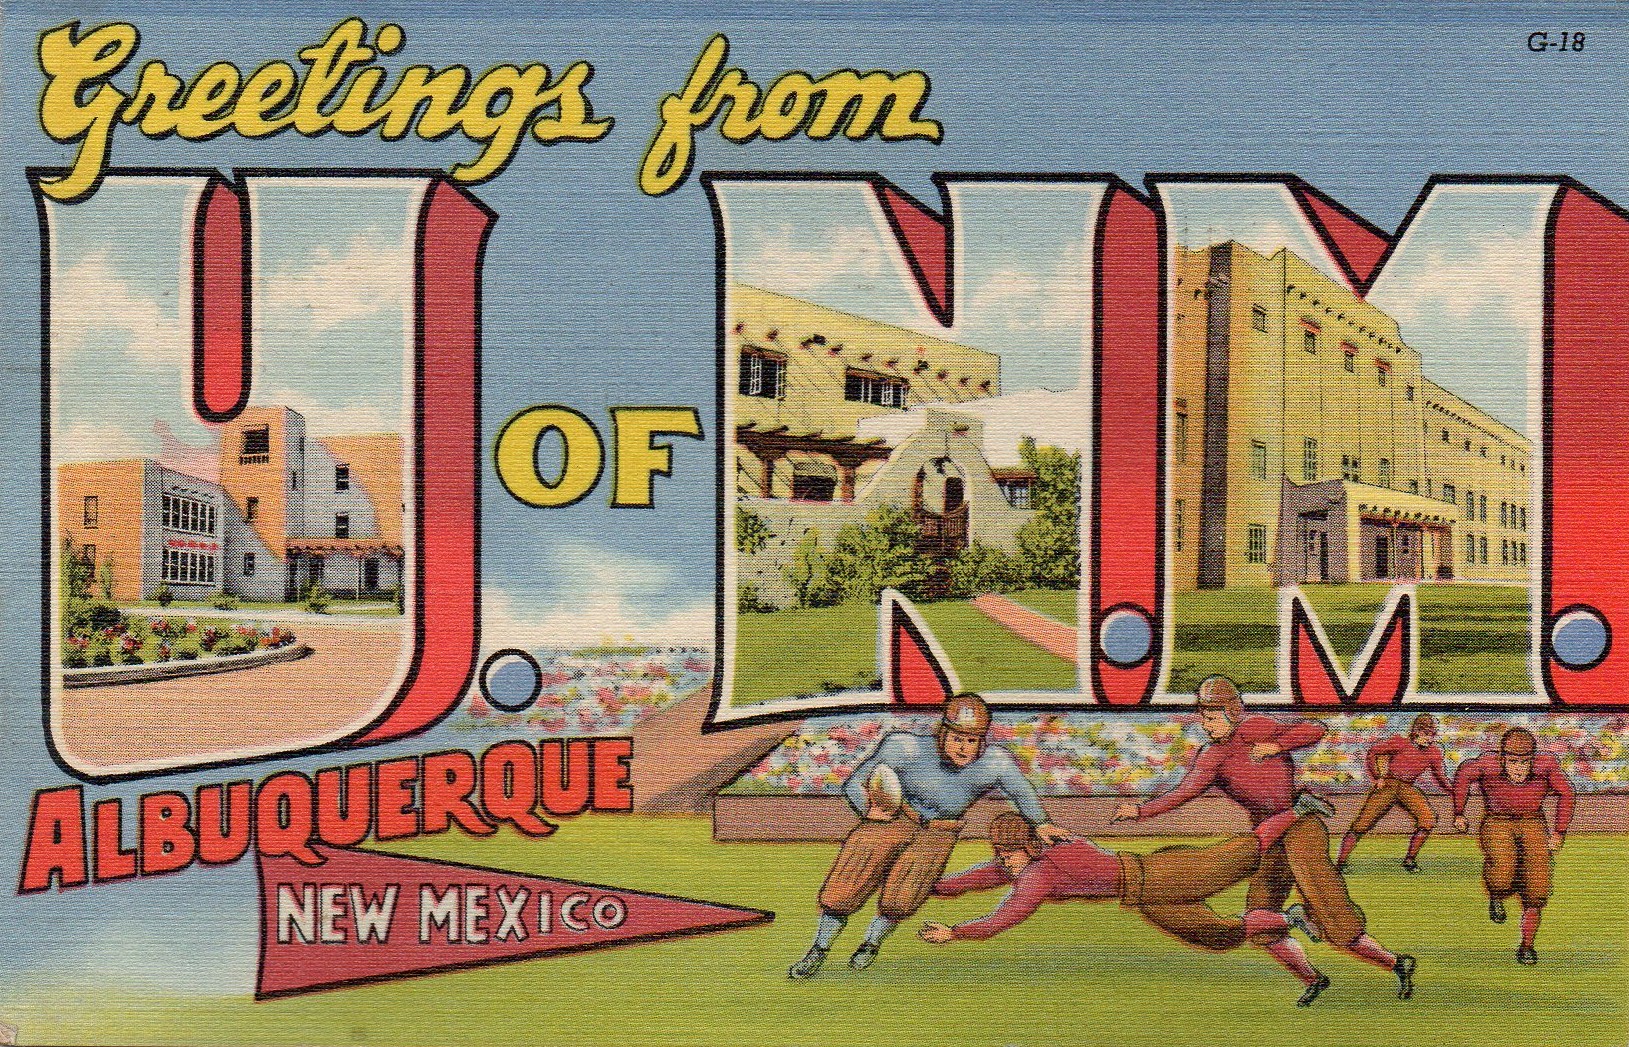
Maybe, something like vintage linen postcards…….
Long before email, postcards were the favored form of communication in the 19th century, but they didn’t have pictures until 20th century printing processes made them possible to produce economically.
The “Golden Era” of linen postcards is considered from the 1930’s through the early 60’s. Not actually made of linen, these postcards were printed on a cardstock with a high rag content making them more permeable to the bright saturated inks. It’s the rough linen-like texture that gave these cards their name.

A lot of collectors prefer the linen postcards of the Curt Teich company. They were known for the highest quality cards with the best colors and a striking creative flair. In the Curt Teich artist’s visions – buildings, monuments, and landscapes appeared even more beautiful and colorful than they were in real life. Daytime skies were always the brightest of blues and grass the greenest of green. Even desert scenes, normally greys and tans, were filled with intense oranges, browns and reds.
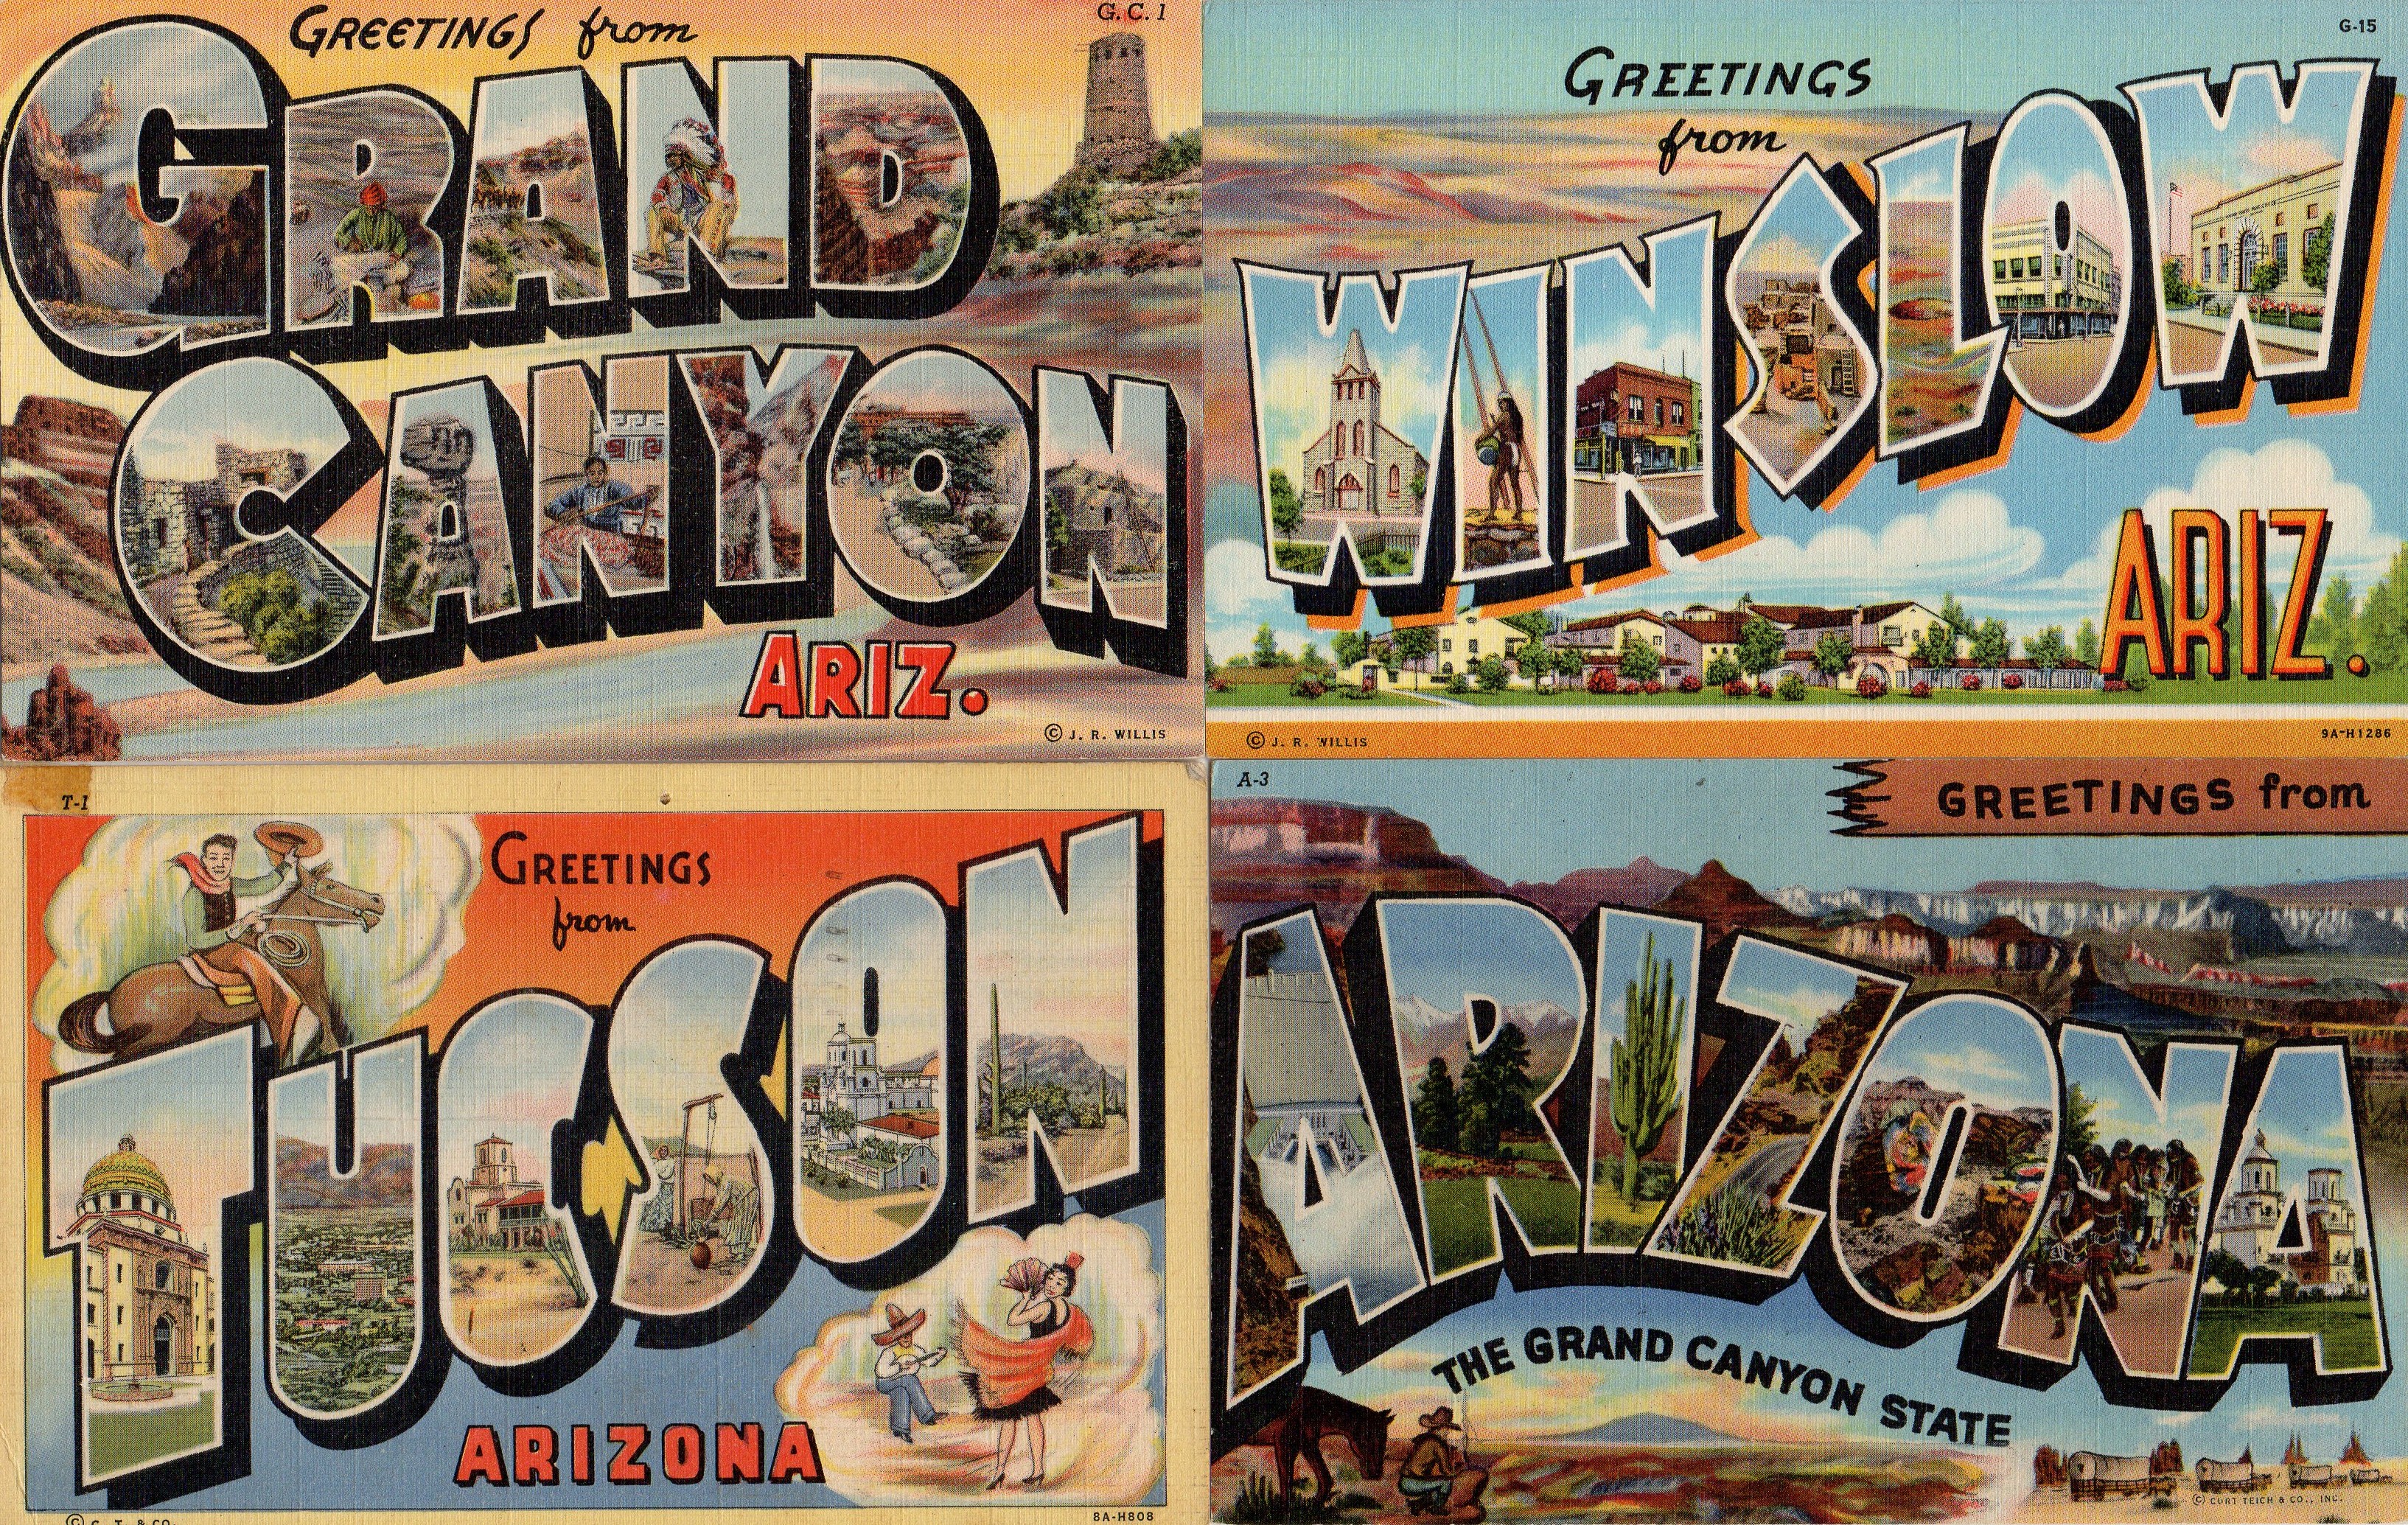
Somewhere along the production line, a Very wise artist had a vision to incorporate several monuments of a locale onto one postcard. Each sight of interest would be drawn inside a letter from the name of said location (following me so far?)…with a “Greetings From” heading hovering over the top. These are refered to by collectors (deltiologists, BTW) as “Large Letter” postcards.

I have a couple of hundred.
Like any good hoarder…..a single 100 is never enough.
I thought I would focus on postcards from my favorite locale…the American Southwest.
Starting with Texas…..of course,


New Mexico is another of my favorite states….


How cool is this University of New Mexico card with the vintage looking football players?
Here are just a few more favorites from my collection…


I think this one is my absolute favorite, and that’s a hard call to call.

I know, ……Tijuana?
Technically not part of the American Southwest, but I’m just crazy about that sombrero.
It almost makes Tijuana look like a place where you would actually want to spend a vacation.
That’s some talented art form.
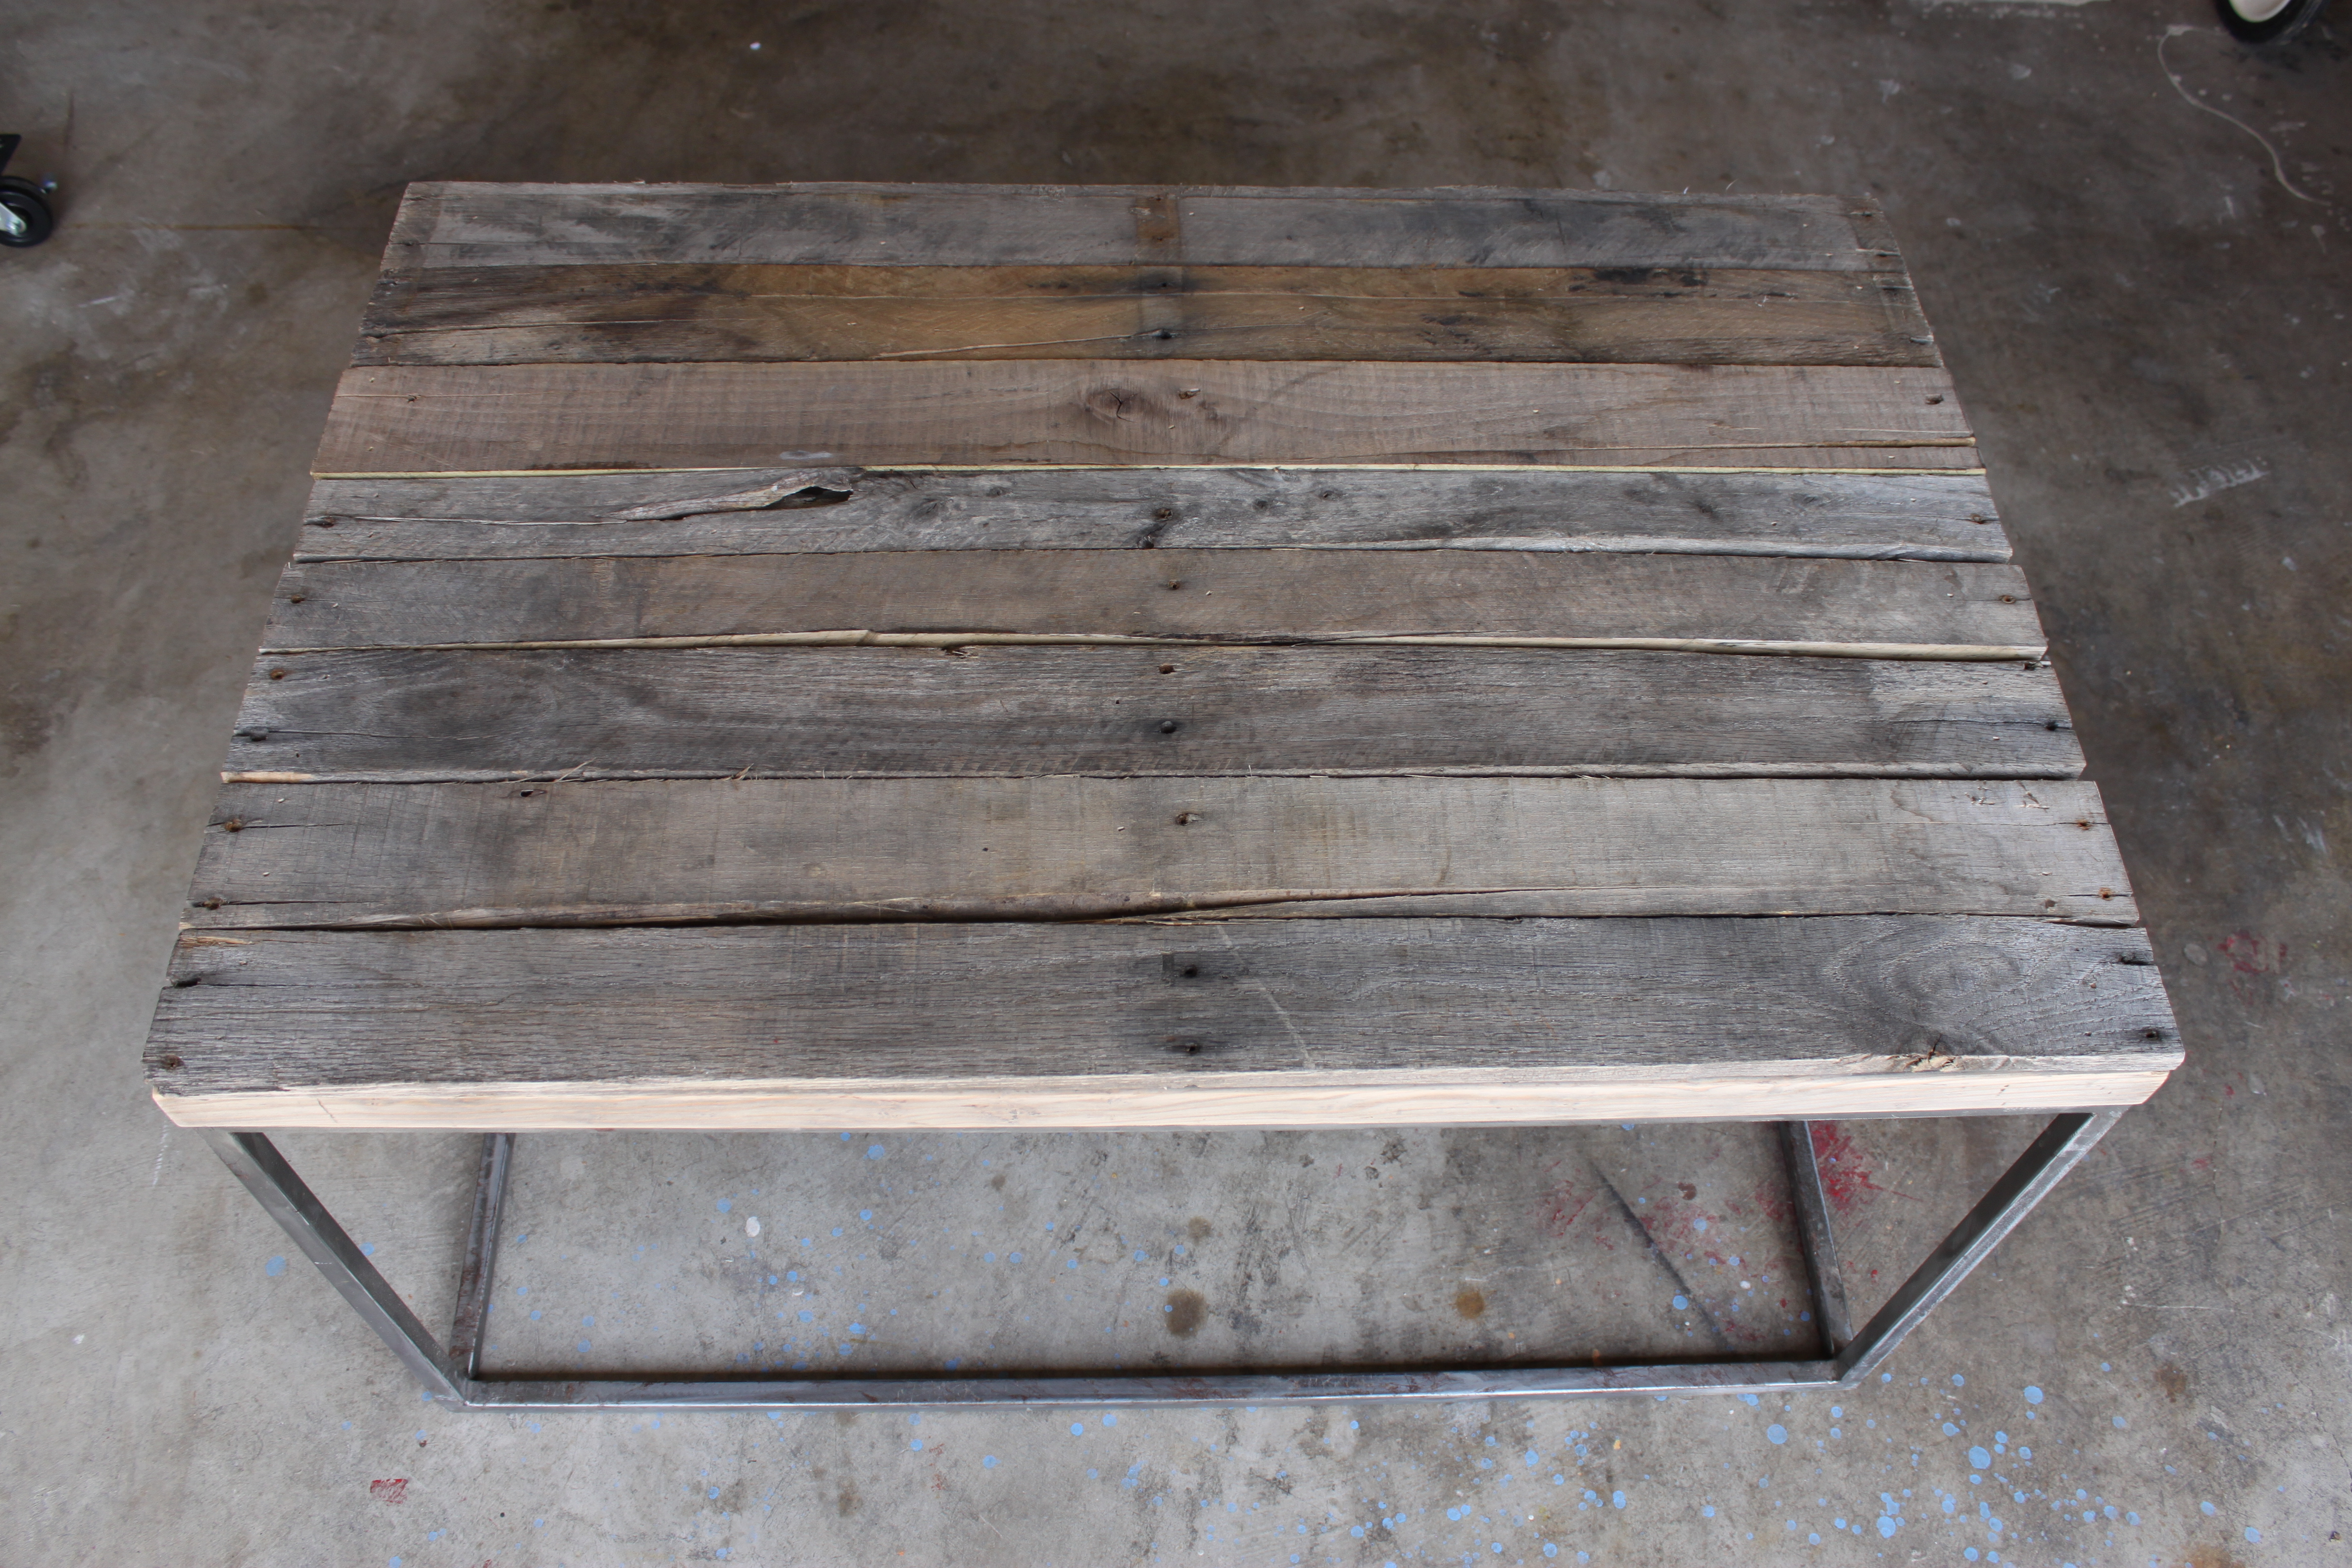
I present “Exhibit A”,
I’ve had this great “modern-ish” coffee table for well over a decade.
It has definitely seen better days.
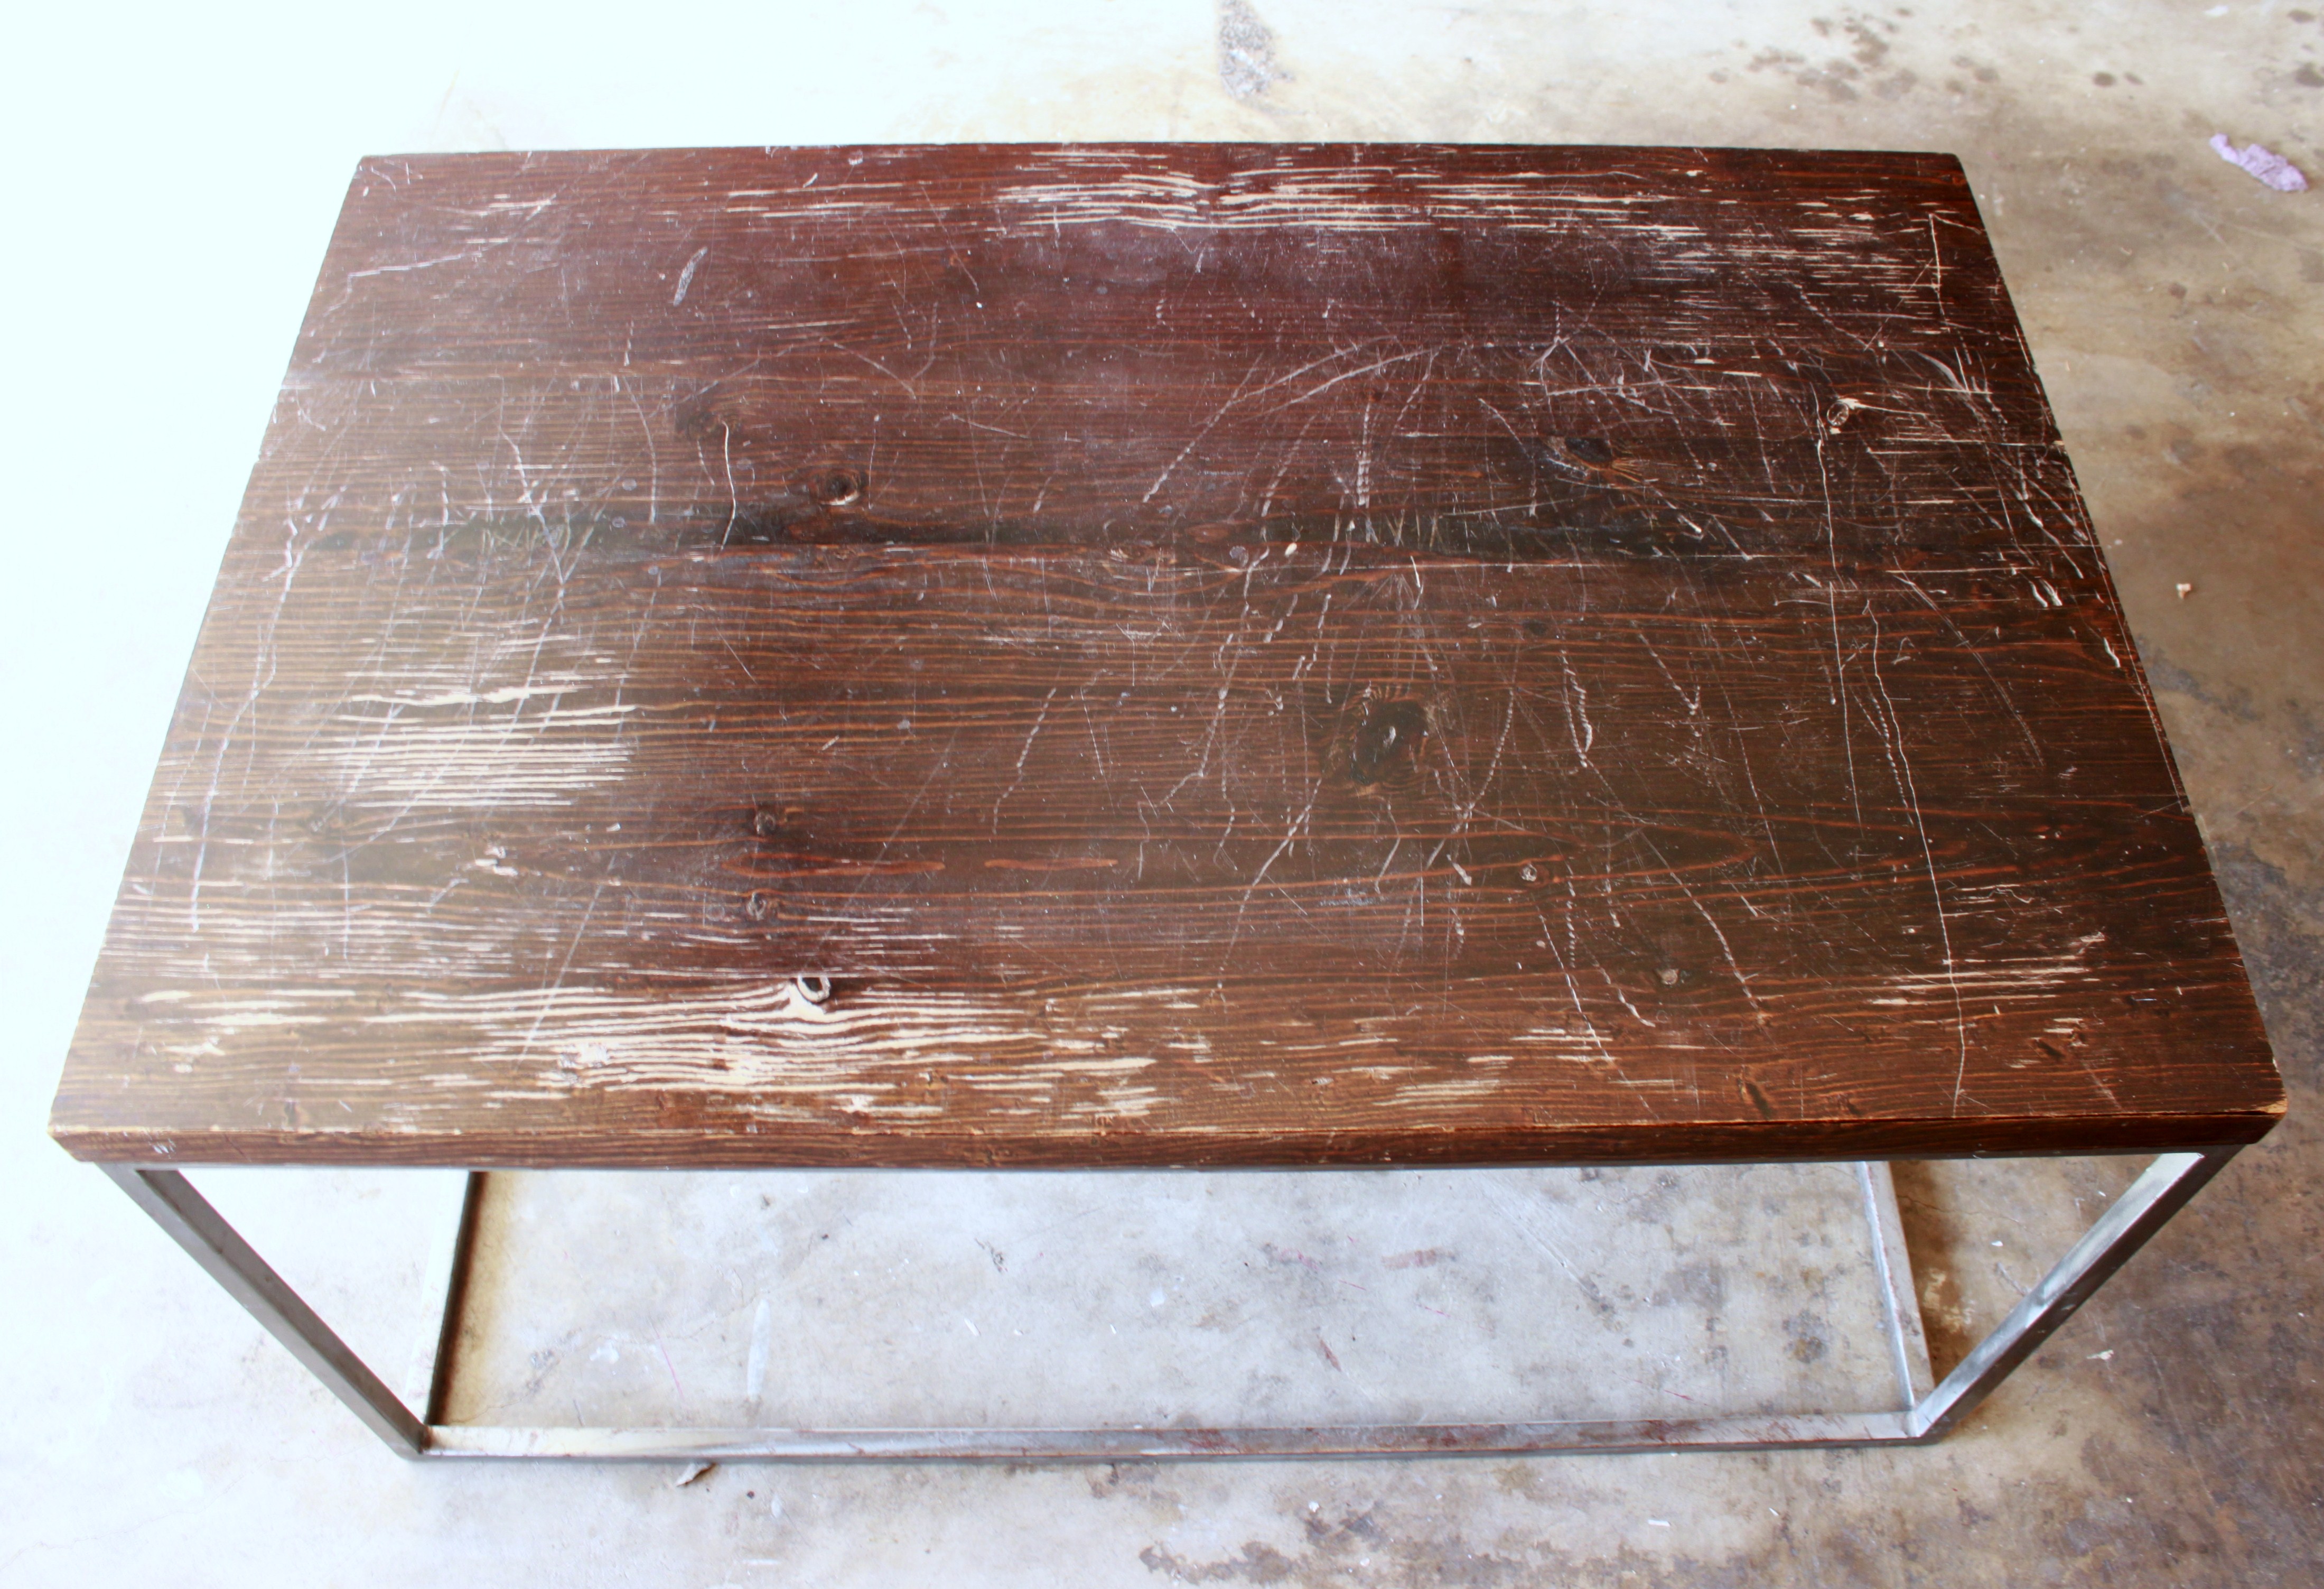
I love the square metal base. But that top.
I don’t know if any of y’all have a Doberman in your life. If you do, you will understand why the top looks this way. She has been using it to get a better view out of the front window…..and we pro’lly don’t trim her nails as often as we should.

Maybe there is some decent looking wood under all that brown stain?
I started with some VERY heavy grit sandpaper and scrubbed till my joints hurt.
After an hour of sanding off polyurethane and dark mahogany stain I was left with this….

Better, yes…..but still not exactly thrilled with it. Those Doberman talons dug deep.
And it looks so……flat. I wish it was a little bit more ….”rustic”.
Wait a minute. Remember that pallet wood we started collecting for the wood accent wall in the master bedroom a year ago?
Well, we never threw it away.
Shocker, I know.
I present “Exhibit B”
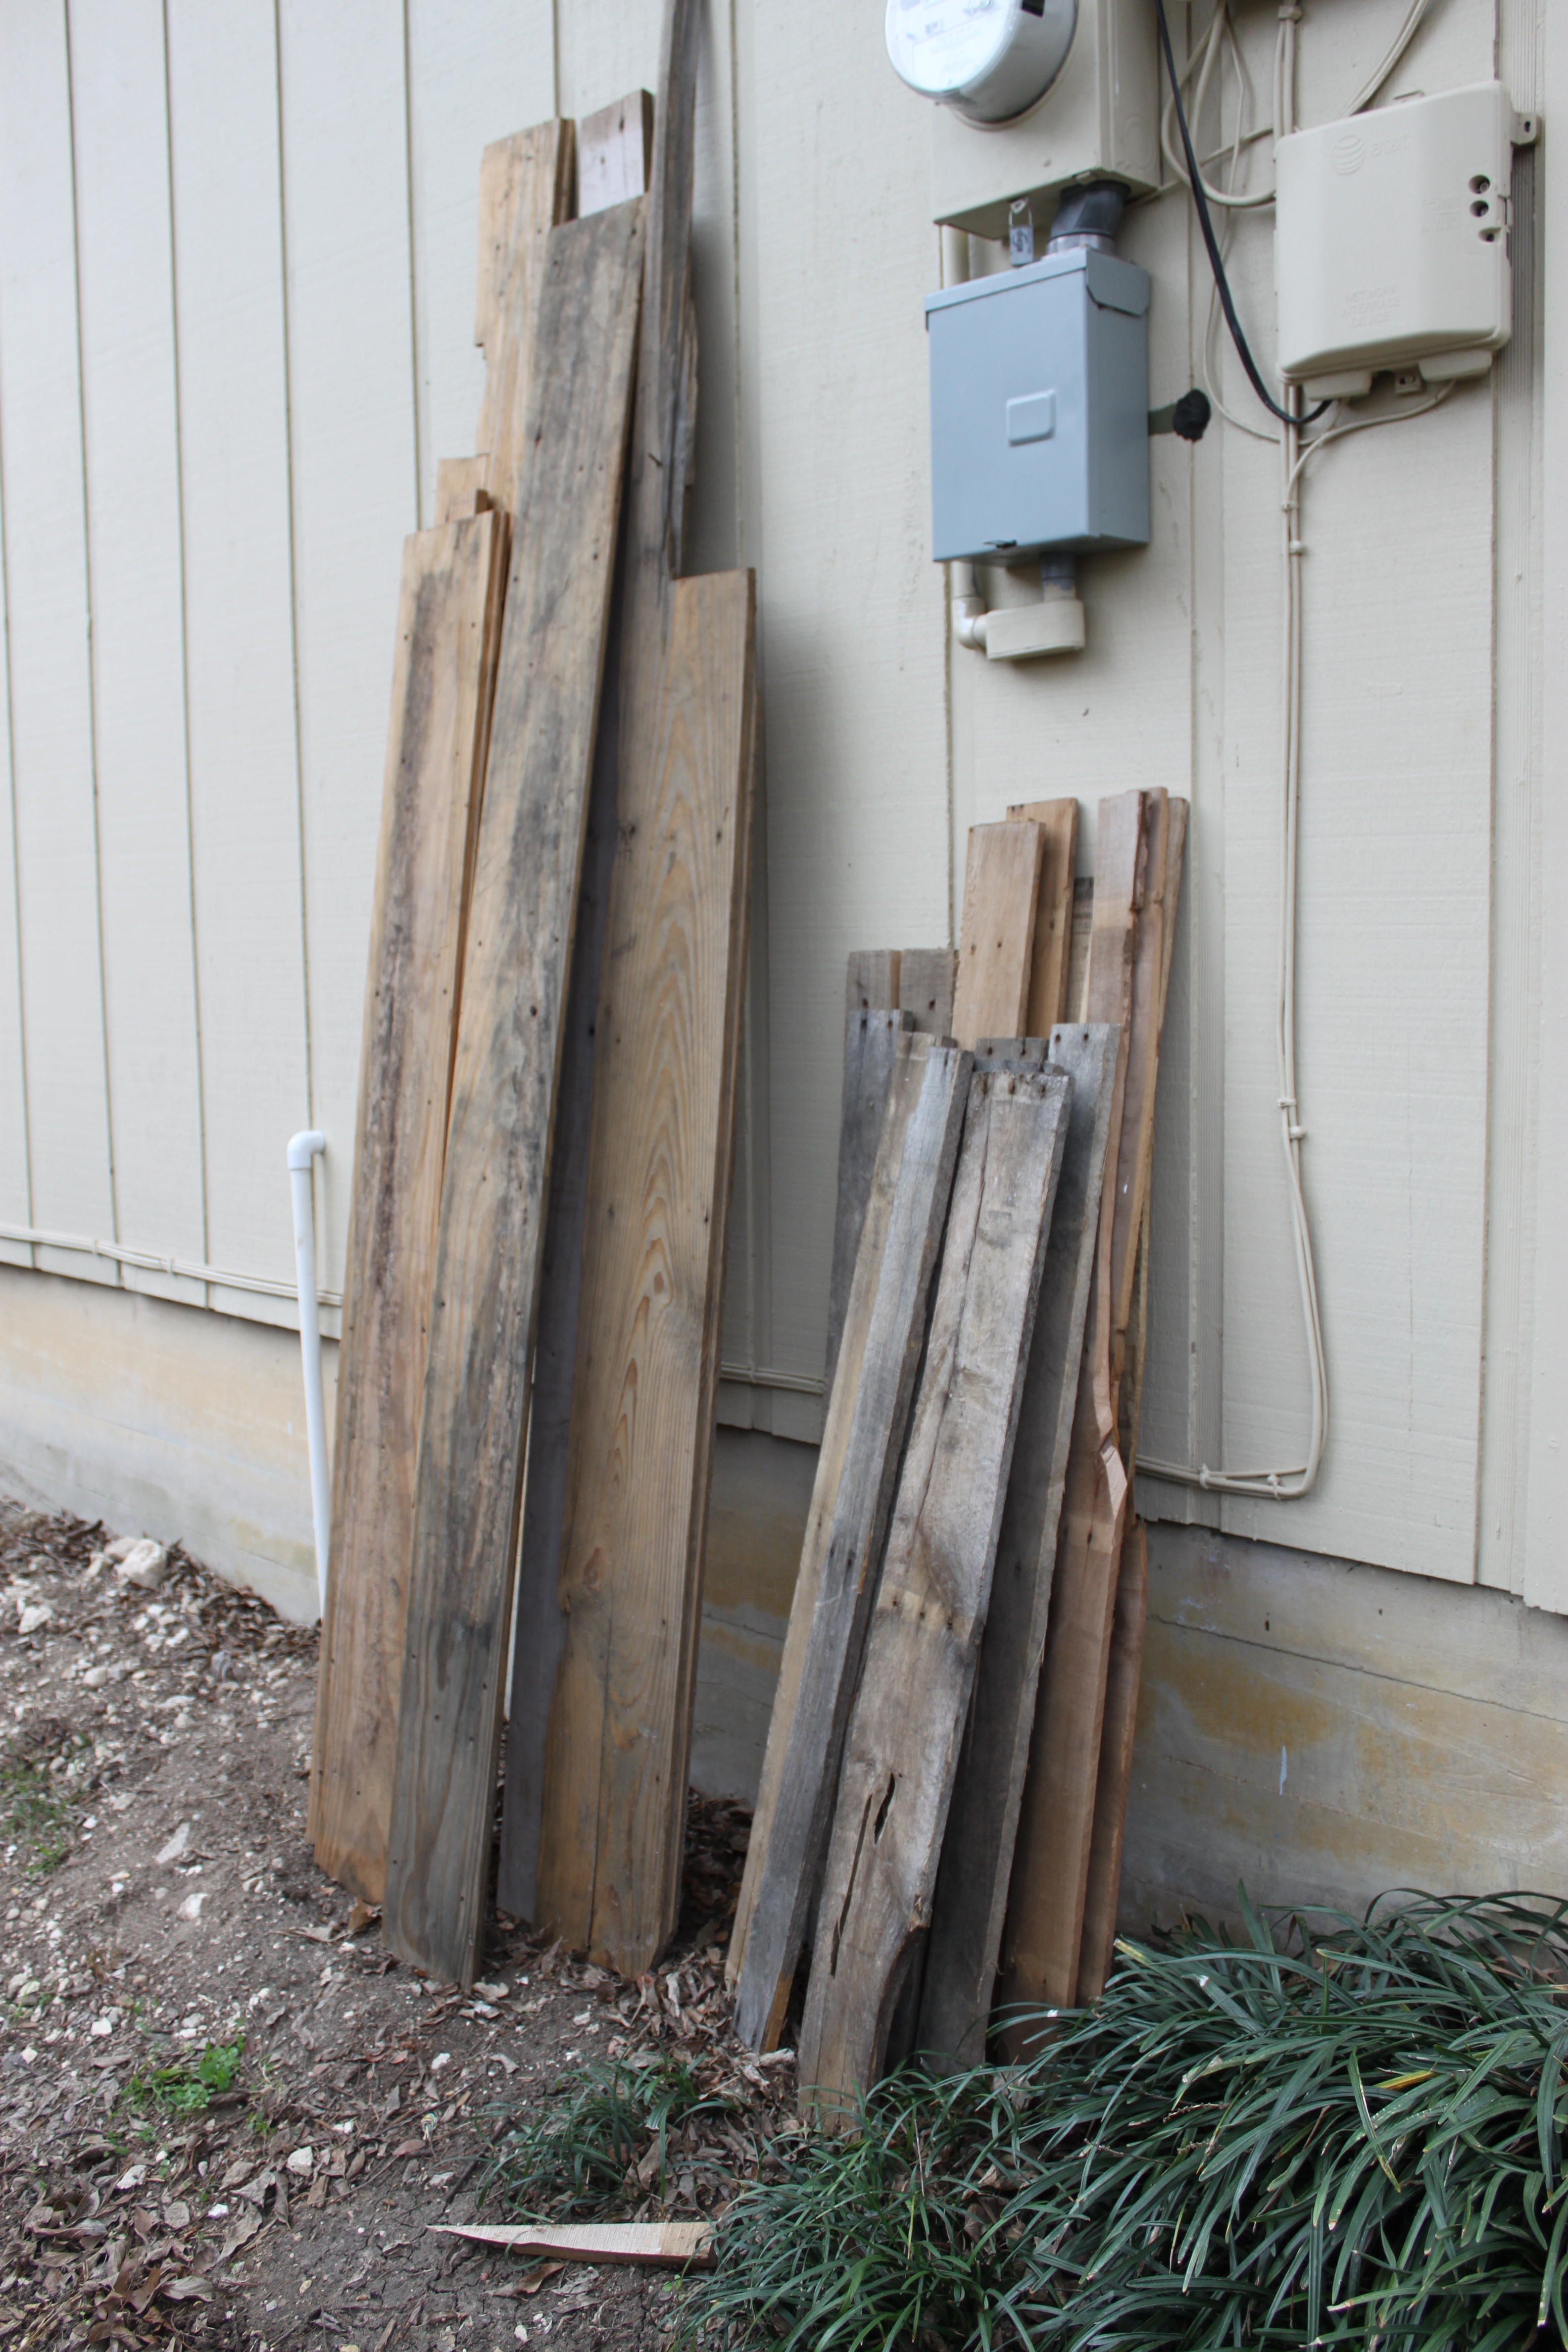
Y’all are never gunna believe this……but those short grey boards are EXACTLY the size of the wood coffee table top.
EXACTLY
AND…it’s almost the same color as the sanded wood. Can’t even tell where the boards stop and the table top begins…can you?

A and B together make a pretty decent “rustic/modern” coffee table.
All I had to do was nail everything together. (after a good cleaning, of course)
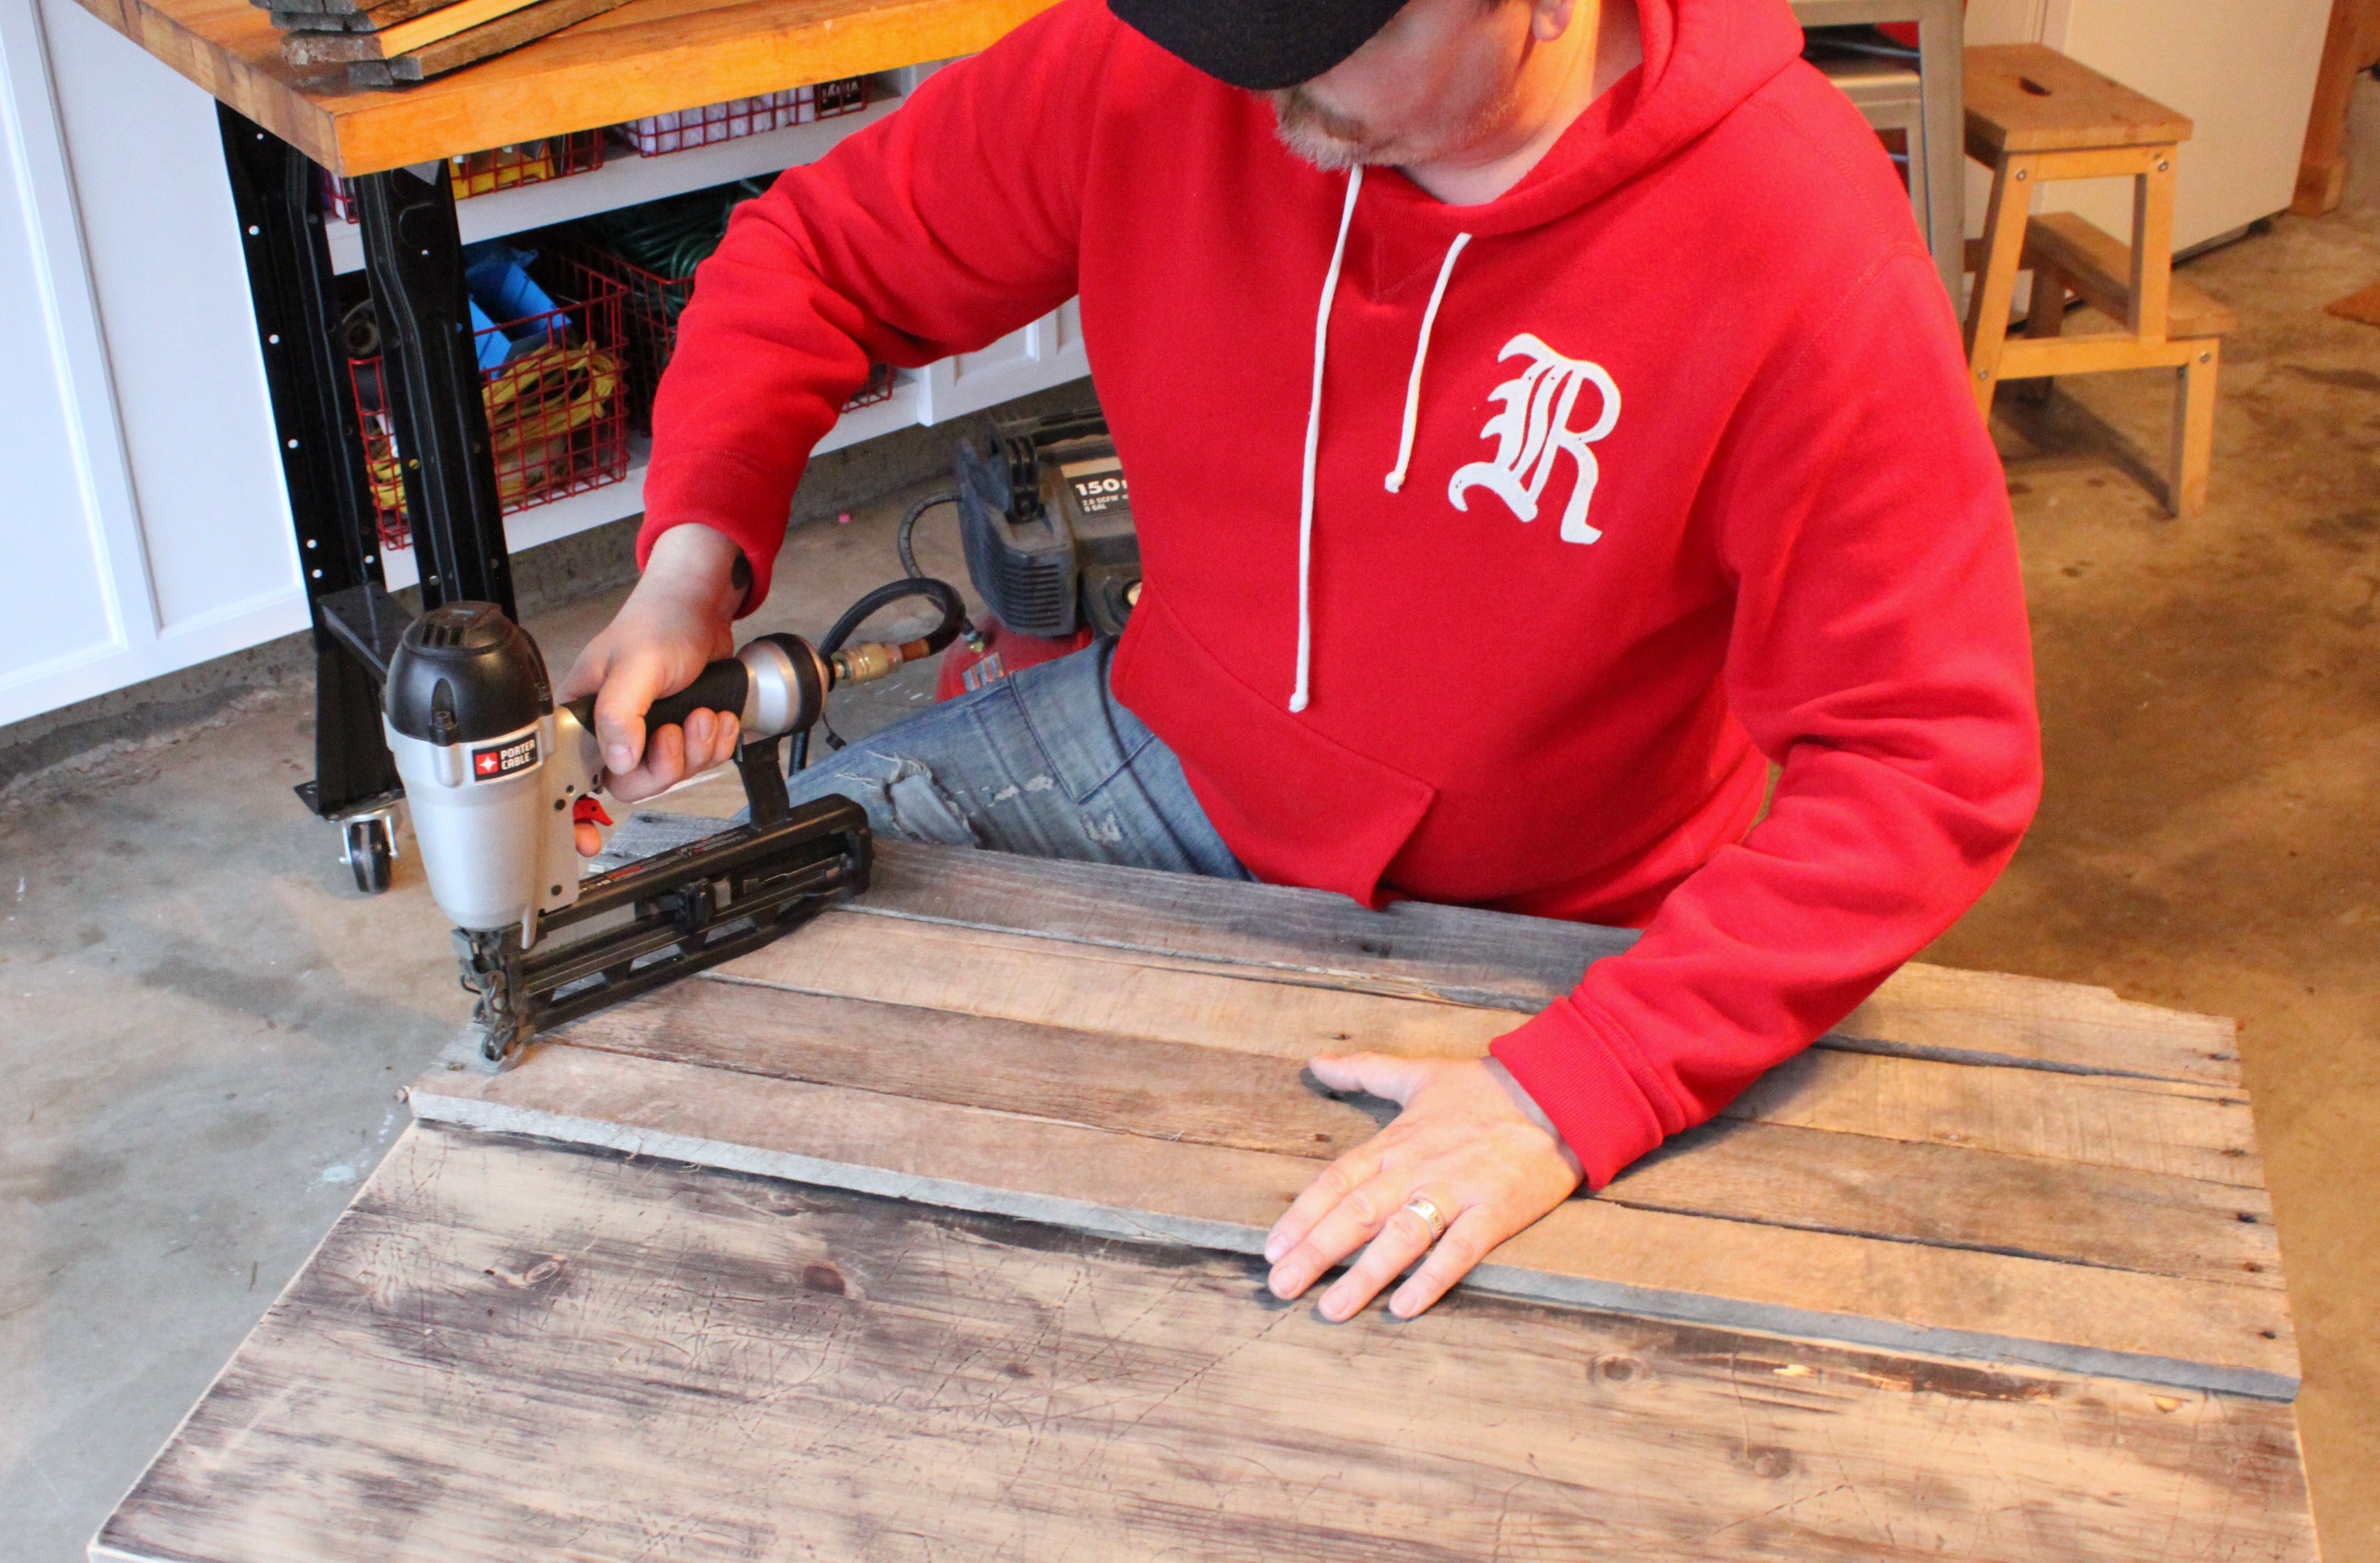
Pretty happy with this…..Love the way the nail holes line up down the sides and straight down the center. Like it was meant to be.
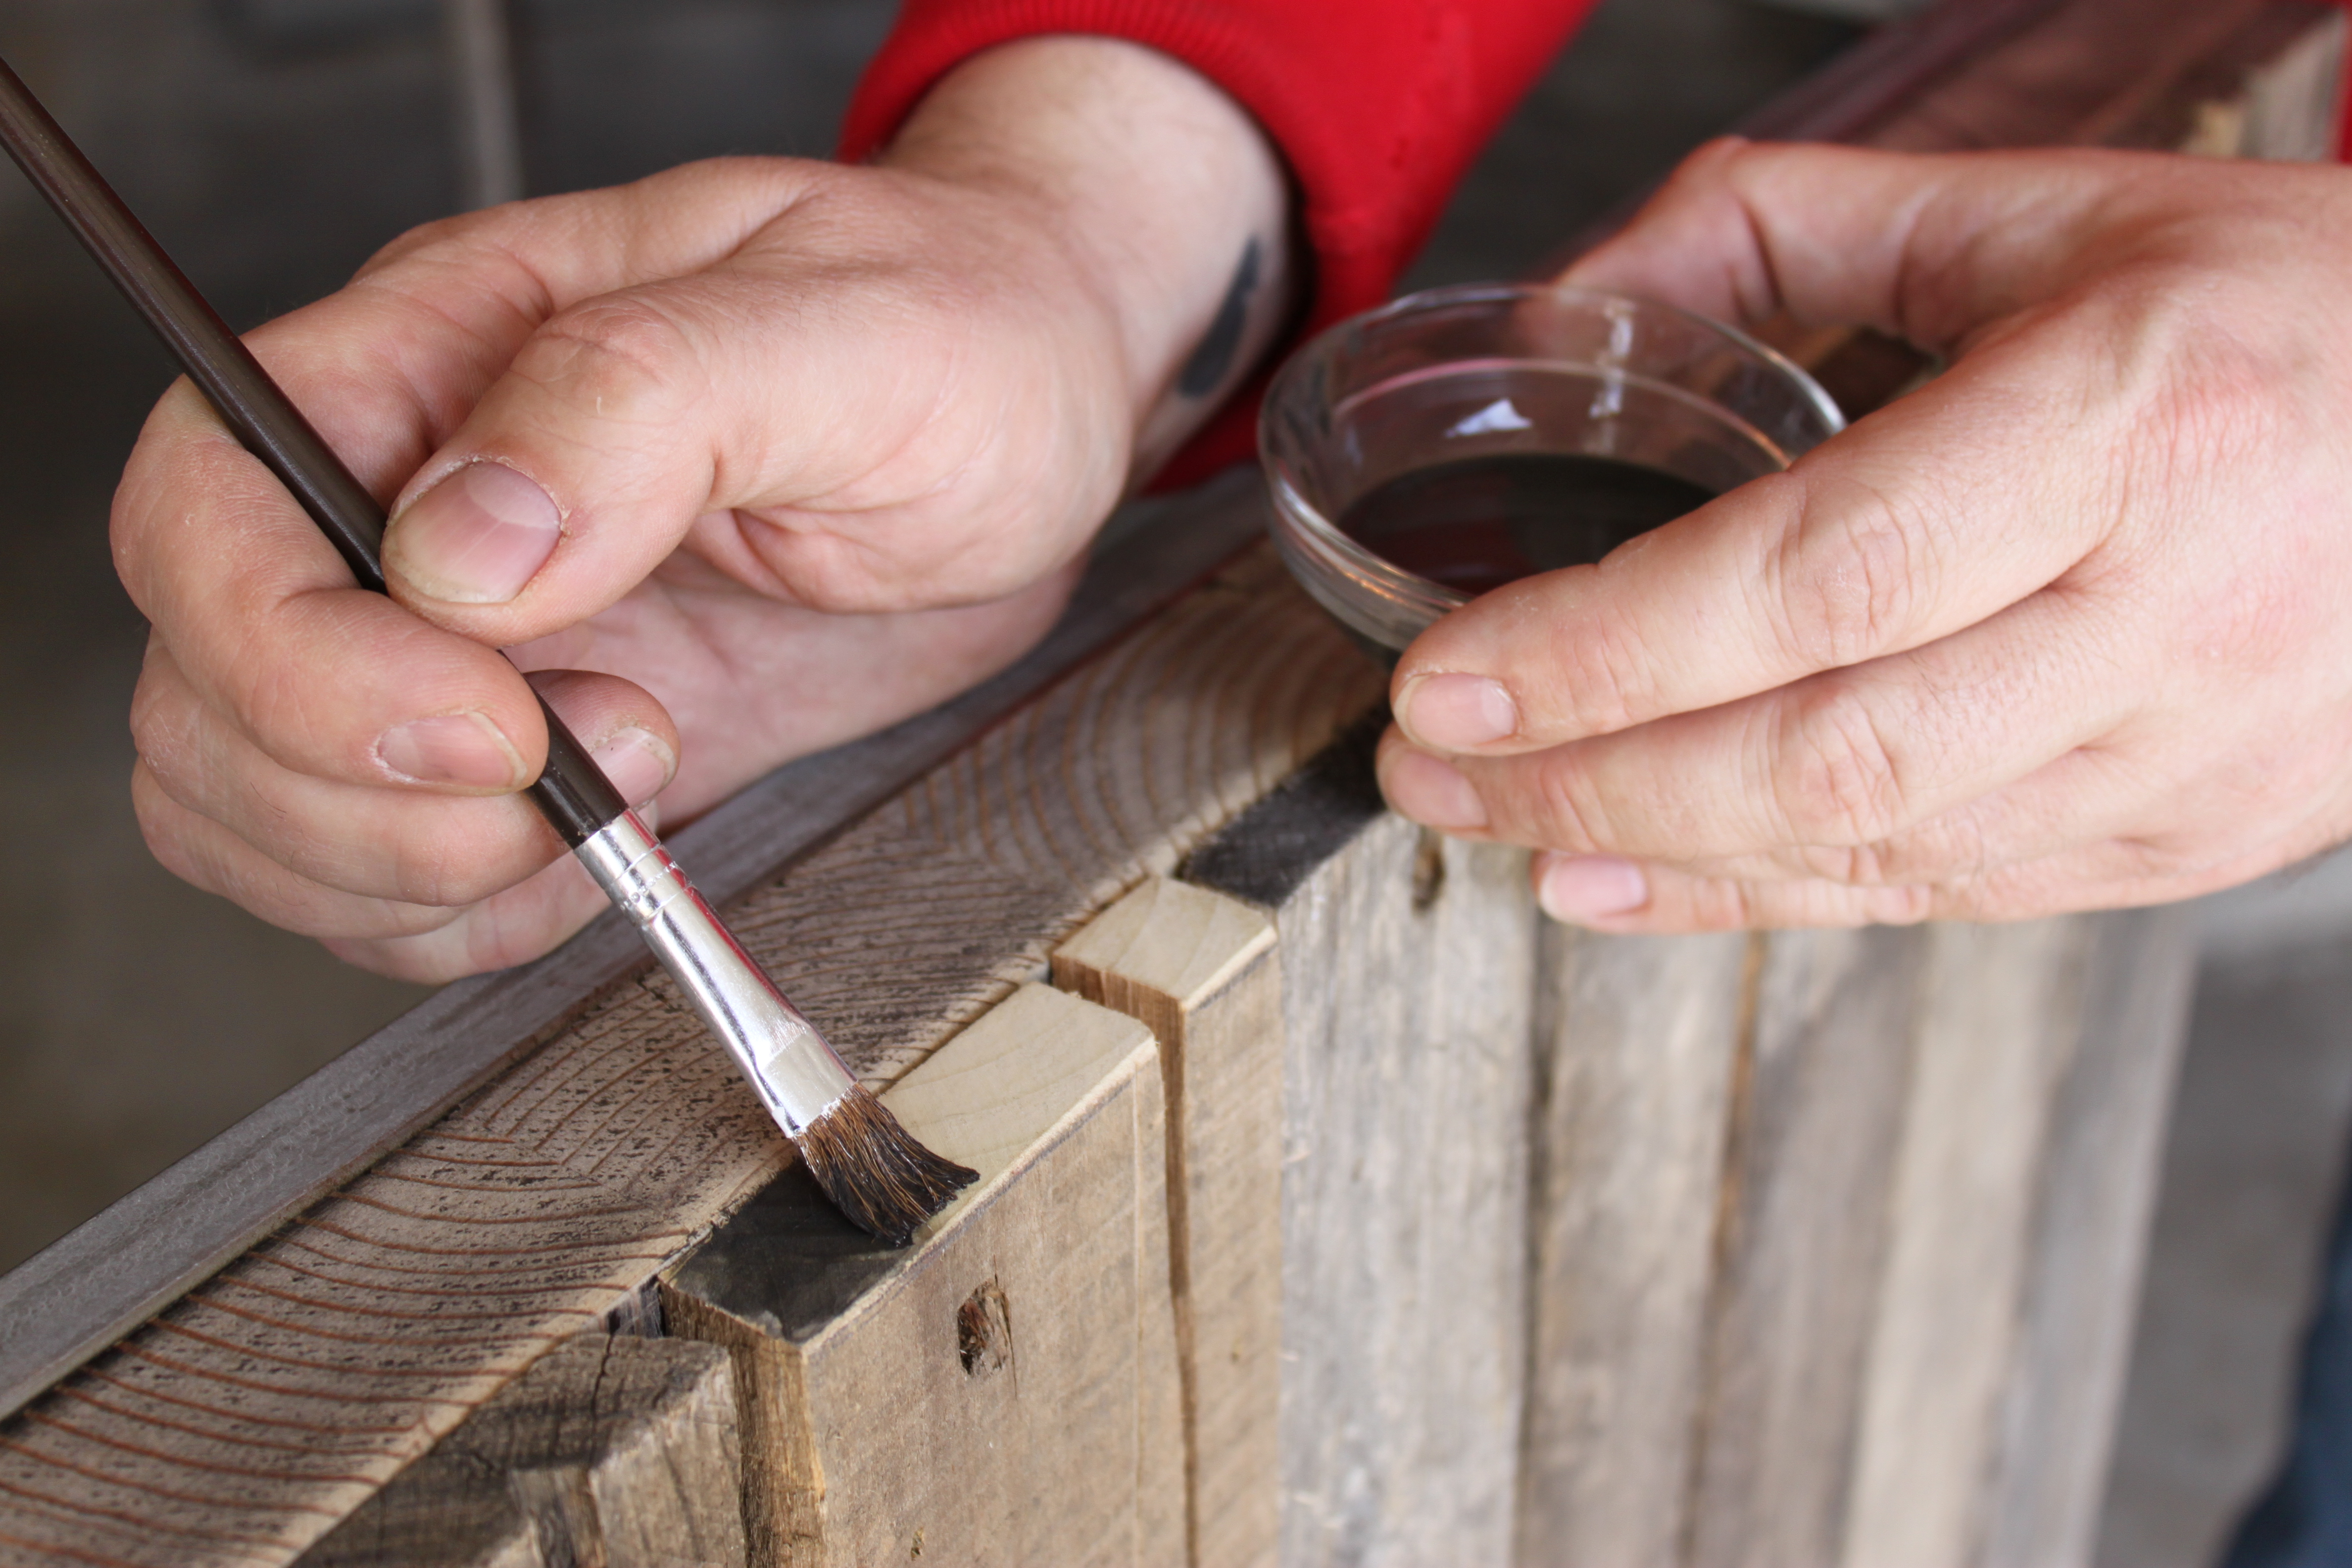
I had to trim a few pieces to make everything fit, and I didn’t like seeing those “freshly cut” edges.
I mixed some acrylic craft paints, black and brown, with water,
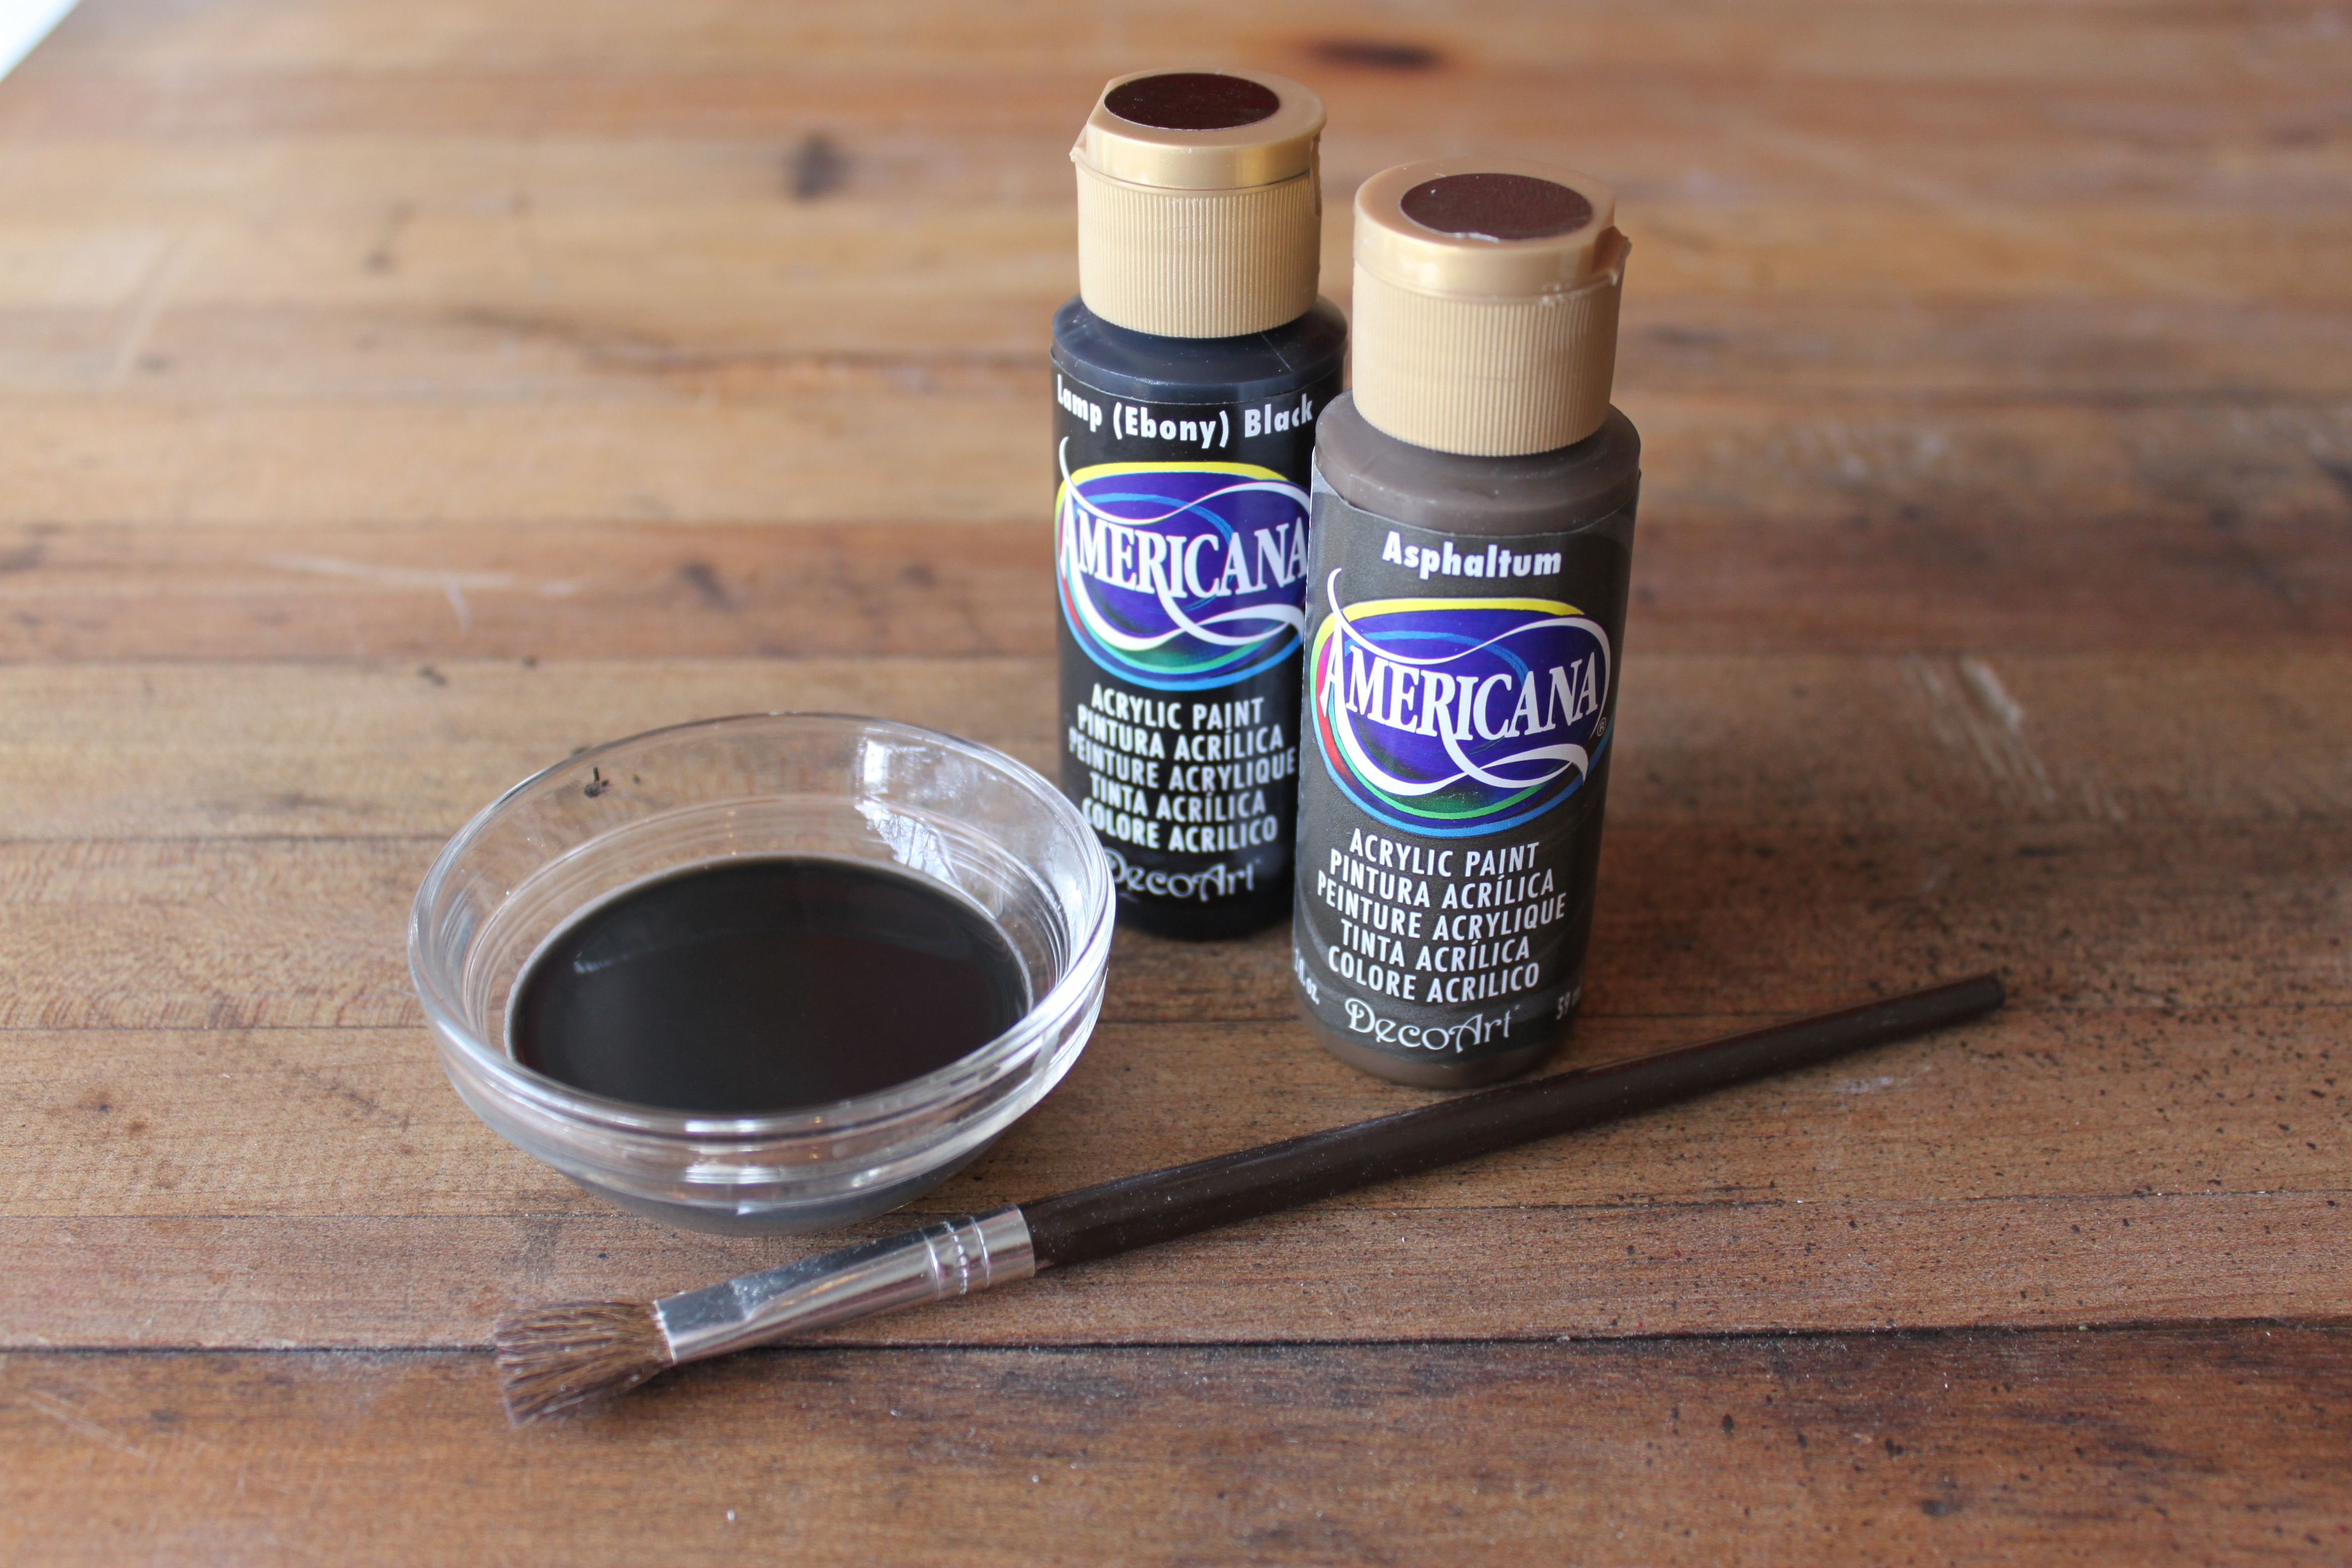
and brushed it on everything that looked new.
Here’s what she looks like now in the Living Room.


We think it’s Way, More, Much Better.
and…..it didn’t cost a thing.
UPDATE:
I found this pretty similar table at Restoration Hardware recently.

It is in the $1000 range

